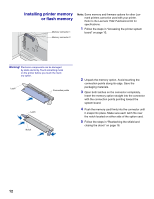
Lexmark T522 Setup Guide - Page 13
Use the tabs to slide the shield up until the top three
 |
UPC - 734646620642
View all Lexmark T522 manuals
Add to My Manuals
Save this manual to your list of manuals |
Page 13 highlights
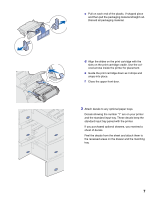
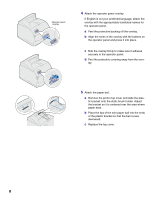
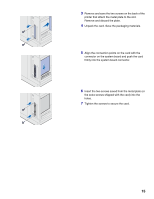
3 Press down on the side door latches and open the side door. Screws Keyhole Tab 4 Loosen, but do not remove, the six screws on the shield. You need a small Phillips screwdriver to loosen these screws. Note: Screws are used to give added protection against memory theft. 5 Use the tabs to slide the shield up until the top three screws fit into the three keyholes on the shield. 6 Hold the shield by the tabs and lift it off. Tab 11
-
 1
1 -
2
-
3
-
4
-
5
-
6
-
7
-
 8
8 -
 9
9 -
 10
10 -
 11
11 -
 12
12 -
 13
13 -
 14
14 -
 15
15 -
 16
16 -
 17
17 -
 18
18 -
19
-
20
-
21
-
22
-
23
-
24
-
25
-
26
-
27
-
28
-
29
-
30
-
31
-
32
 |
 |

11
3
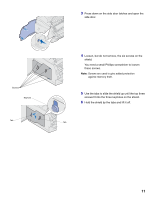
Press down on the side door latches and open the
side door.
4
Loosen, but do not remove, the six screws on the
shield.
You need a small Phillips screwdriver to loosen
these screws.
Note:
Screws are used to give added protection
against memory theft.
5
Use the tabs to slide the shield up until the top three
screws fit into the three keyholes on the shield.
6
Hold the shield by the tabs and lift it off.
Screws
Keyhole
Tab
Tab