Lexmark T522 Setup Guide - Page 17
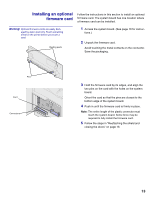
firmly into the system board connector.
 |
UPC - 734646620642
View all Lexmark T522 manuals
Add to My Manuals
Save this manual to your list of manuals |
Page 17 highlights
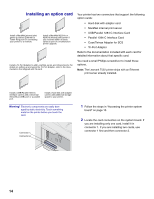
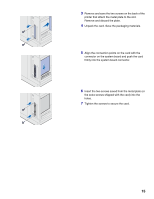
3 Remove and save the two screws on the back of the printer that attach the metal plate to the slot. Remove and discard the plate. 4 Unpack the card. Save the packaging materials. 5 Align the connection points on the card with the connector on the system board and push the card firmly into the system board connector. 6 Insert the two screws saved from the metal plate (or the extra screws shipped with the card) into the holes. 7 Tighten the screws to secure the card. 15
-
 1
1 -
2
-
3
-
4
-
5
-
6
-
7
-
8
-
9
-
10
-
11
-
 12
12 -
 13
13 -
 14
14 -
 15
15 -
 16
16 -
 17
17 -
 18
18 -
 19
19 -
 20
20 -
 21
21 -
 22
22 -
23
-
24
-
25
-
26
-
27
-
28
-
29
-
30
-
31
-
32
 |
 |

15
3
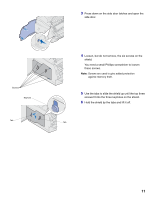
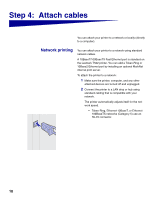
Remove and save the two screws on the back of the
printer that attach the metal plate to the slot.
Remove and discard the plate.
4
Unpack the card. Save the packaging materials.
5
Align the connection points on the card with the
connector on the system board and push the card
firmly into the system board connector.
6
Insert the two screws saved from the metal plate (or
the extra screws shipped with the card) into the
holes.
7
Tighten the screws to secure the card.