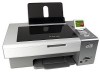
Lexmark X4850 User's Guide (Mac)
Lexmark X4850 - AIO INKJETPR P/C/S 27/30PPM WLS B/G/N Manual
 |
UPC - 734646046664
View all Lexmark X4850 manuals
Add to My Manuals
Save this manual to your list of manuals |
Lexmark X4850 manual content summary:
- Lexmark X4850 | User's Guide (Mac) - Page 1
Lexmark 4800 Series All-In-One User Guide June 2007 www.lexmark.com - Lexmark X4850 | User's Guide (Mac) - Page 2
- Lexmark X4850 | User's Guide (Mac) - Page 3
Contents Safety information...5 Networking the printer 6 General networking...6 Wireless networking...9 Advanced wireless setup...15 Printing...16 Getting started...16 Learning about the All-In-One software print options 20 Performing printing and related tasks 22 Managing print jobs...30 Copying - Lexmark X4850 | User's Guide (Mac) - Page 4
Customer Support...105 Troubleshooting...106 Setup troubleshooting...106 Wireless troubleshooting...112 Print troubleshooting...123 Copy troubleshooting...132 Scan troubleshooting...134 Jams and misfeeds troubleshooting 137 Memory card reader and PictBridge troubleshooting 140 Error messages - Lexmark X4850 | User's Guide (Mac) - Page 5
service or repairs, other than those described in the user documentation, to a professional service Lexmark is not responsible for the use of other replacement parts. CAUTION: Do not use the fax feature during a lightning storm. Do not set up this product or make any electrical or cabling connections - Lexmark X4850 | User's Guide (Mac) - Page 6
the following diagrams represent Lexmark printers with Lexmark internal print servers built in or installed in them so that they can communicate over a network. Lexmark internal print servers are devices made by Lexmark to enable Lexmark printers to be connected to wired or wireless networks. Wired - Lexmark X4850 | User's Guide (Mac) - Page 7
through a DSL or a cable modem. Internet Scenario 2: Computer, laptop, and printer connected wirelessly with Internet • A computer, a laptop, and a printer are connected wirelessly to a wireless router. • The network is connected to the Internet through a DSL or a cable modem. Internet Networking - Lexmark X4850 | User's Guide (Mac) - Page 8
has no connection to the Internet. Finding the MAC address Most network equipment has a unique hardware identification number to distinguish it from other devices on the network. This is called the Media Access Control (MAC) address. If your printer has a factory installed internal wireless print - Lexmark X4850 | User's Guide (Mac) - Page 9
. Related topics: • "Installing the printer on a network" on page 11 Types of wireless networks Networks can operate in one of two modes: infrastructure or ad hoc. Lexmark recommends setting up a network in infrastructure mode using the installation CD that came with the printer. Networking the - Lexmark X4850 | User's Guide (Mac) - Page 10
wireless access point (wireless Directly between devices router) More security options Determined by range and number printer network setup page indicates how strongly a transmitted signal is being received. Many factors can affect the signal strength. One factor is interference from other wireless - Lexmark X4850 | User's Guide (Mac) - Page 11
- Between 8 and 64 ASCII characters. ASCII characters are letters, numbers, and symbols found on a keyboard. Why do I need an installation cable? When you set up the printer on your wireless network, you will need to temporarily connect the printer to a computer using the installation cable. This - Lexmark X4850 | User's Guide (Mac) - Page 12
using a network printer connected to a local or remote subnet. 1 Open the application that you want to use. The Network Selection sheet can be accessed through two different paths: If you are using Lexmark Setup Assistant (during setup) Do this a Install the printer software. For more information - Lexmark X4850 | User's Guide (Mac) - Page 13
Insert the printer software CD. 2 From the Finder desktop, double-click the Lexmark 4800 Series Installer icon. 3 Double-click Install. 4 Click Continue. 5 Follow the instructions on the computer screen. If your printer is already installed but you have not set it up for use on your wireless network - Lexmark X4850 | User's Guide (Mac) - Page 14
last six digits of the printer's MAC address. 6 Run the Wireless Setup Assistant to configure the printer for use on your wireless network. For more information, see "Run the Wireless Setup Assistant" on page 122. Related topics: • "Changing wireless settings after installation" on page 121 Tips for - Lexmark X4850 | User's Guide (Mac) - Page 15
ad hoc network, and then click OK. 7 Insert the CD for Macintosh to run the wireless setup. 8 From the Finder desktop, double-click the Lexmark 4800 Series Installer icon. 9 Double-click the Install icon. 10 Click Continue. 11 Follow the instructions on the computer screen. Note: Store your network - Lexmark X4850 | User's Guide (Mac) - Page 16
paper support, and adjust the paper guides to rest against the edges of the paper. Note: To avoid paper jams, make sure the paper does not buckle when you adjust the paper guides. Related topics: • "Using the automatic paper type sensor" on page 16 Using the automatic paper type sensor The printer - Lexmark X4850 | User's Guide (Mac) - Page 17
paper support with the stamp location in the upper left corner. 2 Make sure: • The print side of the envelopes faces you. • The envelopes are designed for use with inkjet printers. • The paper guides in a paper jam. • The labels are loaded in the center of the paper support. • The paper guides rest - Lexmark X4850 | User's Guide (Mac) - Page 18
results loading them one at a time. 1 Load iron-on transfers with the print side of the transfer facing you. 2 Make sure: • You follow the loading instructions that came with the iron-on transfers. • The transfers are loaded in the center of the paper support. • The paper guides rest against the - Lexmark X4850 | User's Guide (Mac) - Page 19
the required stack of banner paper on the top cover. 4 Feed the leading edge of the banner paper into the printer first. WI F I PRINTING 5 Make sure: • The paper is loaded in the center of the paper support. • The paper guides rest against the edges of the paper. Related topics: • "Printing a banner - Lexmark X4850 | User's Guide (Mac) - Page 20
when used with genuine Lexmark evercolorTM 2 ink, providing photos that are fade- and water-resistant. • Lexmark Photo Paper-An outstanding "everyday" heavyweight inkjet photo paper designed for use with Lexmark printers, but compatible with all brands of inkjet printers. Although inexpensive, it - Lexmark X4850 | User's Guide (Mac) - Page 21
Collating copies using the computer The printer can sort multiple copy jobs. For Print. 2 In the Copies field, enter the number of copies you want to print. 3 Choose Collated double-click the Lexmark 4800 Series folder. 2 Double-click the Lexmark 4800 Series Center software" on page 72 Printing 21 - Lexmark X4850 | User's Guide (Mac) - Page 22
see the instructions that came with the paper.) Note: For best results, use Lexmark Photo Paper or Lexmark PerfectFinish Photo Paper. Do not use Lexmark Premium Photo Paper. Your print cartridges are not compatible with this type of paper. 2 Customize the settings as needed in the Page Setup dialog - Lexmark X4850 | User's Guide (Mac) - Page 23
software" on page 72 Printing borderless photos 1 Load photo or glossy paper with the glossy or printable side facing you. (If you are not sure which side is the printable side, see the instructions that came with the paper b From the Printer pop-up menu, choose 4800 Series. c For Mac OS X version - Lexmark X4850 | User's Guide (Mac) - Page 24
the settings as needed in the Print dialog. a From the software application, click File Œ Print. b From the Printer pop-up menu, choose 4800 Series. c Click Print. Notes: • To avoid paper jams, do not force the cards into the printer. • To prevent smudging, remove each card as it exits, and - Lexmark X4850 | User's Guide (Mac) - Page 25
ΠPage Setup. b From the "Format for" pop-up menu, choose 4800 Series. c From the Paper Size pop-up menu, choose a paper size. d Choose an orientation. e Click OK. 3 Customize the settings as needed in the Print dialog. a From the software application, click File ΠPrint. b From the Printer pop-up - Lexmark X4850 | User's Guide (Mac) - Page 26
on the top cover. 4 Load only the first page of banner paper into the paper support with the leading edge of the banner going into the printer. WI F I PRINTING 5 Adjust the left and right paper guides. 6 Customize the settings in the Page Setup dialog. a With your document open, choose File ΠPage - Lexmark X4850 | User's Guide (Mac) - Page 27
black and white This setting is available only if there is a black print cartridge installed. 1 Load paper. 2 Customize the settings in the Page Setup dialog as needed. 3 With a document open, click File ΠPrint. 4 From the Printer pop-up menu, choose 4800 Series. 5 From the third pop-up menu from - Lexmark X4850 | User's Guide (Mac) - Page 28
for letter- or A4-size plain paper. If you need to print duplex using paper other than letter- or A4-size plain paper, see "Printing on both sides of the paper (duplexing) manually" on page 29. Printing on both sides of the paper (duplexing) automatically The printer has a built-in duplex unit that - Lexmark X4850 | User's Guide (Mac) - Page 29
back into the paper support, with the blank side of the pages facing you. 6 Repeat steps 1 and 2. 7 From the Print menu, select Even numbered pages. 8 Click Print. Printing document files from a memory card or flash drive To use the Print Files function, your printer must be connected to a computer - Lexmark X4850 | User's Guide (Mac) - Page 30
plain paper. 2 From the Finder desktop, double-click the Lexmark 4800 Series folder. 3 Double-click the Lexmark 4800 Series Utility icon. 4 From the Maintenance tab, click Print Test Page. A page prints. If the test page did not print at all or has quality problems, attend to any error messages - Lexmark X4850 | User's Guide (Mac) - Page 31
: 1 Press . Printing stops and the print cartridge carrier returns to its home position. 2 Press to turn off the printer. To cancel a print job using the computer: 1 While the document is printing, click the printer icon on the dock. 2 From the queue window, select the job you want to cancel - Lexmark X4850 | User's Guide (Mac) - Page 32
allow it to dry to avoid ink smudging. 3 Load the paper vertically in the center of the paper support, and adjust the paper guides to rest against the edges of the paper. Note: To avoid paper jams, make sure the paper does not buckle when you adjust the paper guides. Related topics: • "Using the - Lexmark X4850 | User's Guide (Mac) - Page 33
image. Related topics: • "Understanding the parts of the printer" on page 76 • "Making a copy" on page 33 paper. 2 Load an original document facedown on the scanner glass. 3 From the control panel, press or repeatedly until Copy is highlighted. 4 Press or to select the number of copies. The number - Lexmark X4850 | User's Guide (Mac) - Page 34
repeatedly until Copy is highlighted. 4 Press or to select the number of copies. The number of copies is automatically set to 1. 5 Press . 6 you are not sure which side is the printable side, see the instructions that came with the paper.) 2 Place a photo facedown on the scanner glass. 3 From - Lexmark X4850 | User's Guide (Mac) - Page 35
• "Understanding the Copy Mode menu" on page 79 Adjusting copy quality 1 Load paper. 2 Load an original document facedown on the scanner glass. 3 From the control until Copy is highlighted. 4 Press or to select the number of copies. The number of copies is automatically set to 1. 5 Press . 6 - Lexmark X4850 | User's Guide (Mac) - Page 36
number of copies. The number of copies is automatically set to 1. 5 Press . 6 Press repeatedly until Collate is highlighted. 7 Press or to choose On. 8 Press to save the image of the page to the printer image on one page You can print the same image multiple times on one sheet of paper. This - Lexmark X4850 | User's Guide (Mac) - Page 37
repeatedly until Copy is highlighted. 4 Press or to select the number of copies. The number of copies is automatically set to 1. 5 Press . 6 the paper (duplexing) The printer has a built-in duplex unit that lets you print on both sides of the paper without having to flip the paper manually. This - Lexmark X4850 | User's Guide (Mac) - Page 38
1. 5 Press . 6 Press repeatedly until N-Up is highlighted. 7 Press or to choose the number of pages to copy on a single sheet of paper. You may choose to copy one page, two pages, or four pages on a sheet. 8 Press . The printer saves the image of the first page of the original document to the - Lexmark X4850 | User's Guide (Mac) - Page 39
all the pages you want to copy have been saved to the printer memory. The printer prints the copy automatically. Related topics: • "Loading original documents on original document is two-sided. Specify the size and type of the paper loaded. 5 Use the control panel buttons to navigate the menu items - Lexmark X4850 | User's Guide (Mac) - Page 40
, and other publications. You can also scan a document for faxing. 1 Make sure the printer is on. 2 Open the top cover. 3 Place the In-One Center scan options Choosing where to send scanned images 1 From the Finder desktop, double-click the Lexmark 4800 Series folder. 2 Double-click the Lexmark 4800 - Lexmark X4850 | User's Guide (Mac) - Page 41
Customize list is generated when you install the All-In-One software. You can expand this list manually adjust the color settings for optimum color output. 1 From the Finder desktop, double-click the Lexmark 4800 Series folder. 2 Double-click the Lexmark 4800 Series Center icon. 3 From the All-In-One - Lexmark X4850 | User's Guide (Mac) - Page 42
can adjust the scan settings and do creative scanning jobs on the Scan dialog. 1 From the Finder desktop, double-click the Lexmark 4800 Series folder. 2 Double-click the Lexmark 4800 Series Center icon. 3 Click Preview/Edit to open the Scan dialog. 4 Click to open the Scan Settings drawer and change - Lexmark X4850 | User's Guide (Mac) - Page 43
Select a preset scan setting according to the color and document type of your scan. Note: Select Custom Settings to customize the scan setting manually instead of using a preset scan setting. Reduce Background Noise Remove smudges and light background shading in color documents. Scanning 43 - Lexmark X4850 | User's Guide (Mac) - Page 44
the amount of ink on the page. software You can use the Auto-crop feature to highlight certain focal points or to show only a specific portion of an image. 1 From the Finder desktop, double-click the Lexmark 4800 Series folder. 2 Double-click the Lexmark 4800 Series Center icon. 3 From the All-in-One - Lexmark X4850 | User's Guide (Mac) - Page 45
an image 1 From the Finder desktop, double-click the Lexmark 4800 Series folder. 2 Double-click the Lexmark 4800 Series Center icon. 3 From the All-In-One Center, click Preview/Edit to open the Scan dialog. " on page 42 • "Enhancing photo print quality using the software" on page 72 Scanning 45 - Lexmark X4850 | User's Guide (Mac) - Page 46
Double-click the Lexmark 4800 Series Center icon. 3 Click Defaults. Related topics: • "Using the All-In-One Center" on page 90 • "Customizing scan settings from the Scan dialog" on page 42 Performing scanning and related tasks Scanning a document 1 Make sure the printer is connected to a computer - Lexmark X4850 | User's Guide (Mac) - Page 47
4 Press . 5 If your printer is connected to more than one computer: a Press or repeatedly until the computer to which you want to scan is highlighted. b Press . If you set a PIN during network setup and are being asked for it: 1 Enter the PIN using the and to select a digit location and the and to - Lexmark X4850 | User's Guide (Mac) - Page 48
From the Finder desktop, double-click the Lexmark 4800 Series folder. 3 Double-click the Lexmark 4800 Series Center icon. 4 Select Prompt numbered accordingly. • When a scan job is saved as a PDF, the Save dialog will only prompt once. All scanned pages are saved to only one file since PDF supports - Lexmark X4850 | User's Guide (Mac) - Page 49
document 1 Make sure the printer is connected to a computer, and both the printer and the computer are on. 2 Load an original document facedown on the scanner glass. 3 From the Finder desktop, double-click the Lexmark 4800 Series folder. 4 Double-click the Lexmark 4800 Series Center icon. 5 From - Lexmark X4850 | User's Guide (Mac) - Page 50
printer is connected to a computer, and both the printer and the computer are on. 2 Load an original image facedown on the scanner glass. 3 From the Finder desktop, double-click the Lexmark 4800 Series folder. 4 Double-click the Lexmark , see "Cropping photos using the software" on page 44. 11 Click - Lexmark X4850 | User's Guide (Mac) - Page 51
is connected to a computer, and both the printer and the computer are on. 2 Load an original document facedown on the scanner glass in the lower right corner. 3 From the Finder desktop, double-click the Lexmark 4800 Series folder. 4 Double-click the Lexmark 4800 Series Center icon. 5 From the - Lexmark X4850 | User's Guide (Mac) - Page 52
32 Saving a scanned image 1 Make sure the printer is connected to a computer, and both the printer and the computer are on. 2 Load an original the printer. To cancel a scan using the software: 1 From the Finder desktop, double-click the Lexmark 4800 Series folder. 2 Double-click the Lexmark 4800 - Lexmark X4850 | User's Guide (Mac) - Page 53
connected to more than one computer: a Press or repeatedly until the computer to which you want to scan is highlighted. b Press . If you set a PIN during network setup when you install the printer software for the first time. Choose this name when you scan an item on the network printer and want to - Lexmark X4850 | User's Guide (Mac) - Page 54
install the printer software for the first time. You can also change it as needed. 1 From the Finder desktop, double-click the Lexmark 4800 Series folder. 2 Double-click the Lexmark The printer is connected to a network through a print server or through the wireless network connection. • The printer, - Lexmark X4850 | User's Guide (Mac) - Page 55
. 6 Press . If you set a PIN during network setup and are being asked for it: a Enter the PIN using the and to select a digit location and the and to select a value for that digit. b Press . 7 Wait until the printer has finished downloading the scan applications list. 8 Make your selections using - Lexmark X4850 | User's Guide (Mac) - Page 56
Lexmark Photo Paper or Lexmark PerfectFinish Photo Paper. Do not use Lexmark Premium Photo Paper. Your print cartridges are not compatible with this type of paper on the card, make sure it points toward the printer. • If needed, make sure you connect the memory card to the adapter that came with it - Lexmark X4850 | User's Guide (Mac) - Page 57
printer does not read the memory card, remove and reinsert it. Notes: • The printer recognizes one memory card at a time. If you insert more than one printer to recognize that a flash drive is installed. When the flash drive is recognized, the message Storage Device Detected appears. If the printer - Lexmark X4850 | User's Guide (Mac) - Page 58
you insert more than one media device, a message appears on the display prompting you to designate the device you want the printer to recognize. Related If the printer is connected to the computer through a wireless network, and you are using the Network Card Reader to view and download photos from - Lexmark X4850 | User's Guide (Mac) - Page 59
you are not sure which side is the printable side, see the instructions that came with the paper.) 2 Insert a memory card or flash drive. 3 From the Press to save your changes. d Press . 8 Press or to select the number of copies to print. 9 You can select more photos for printing and editing - Lexmark X4850 | User's Guide (Mac) - Page 60
side is the printable side, see the instructions that came with the paper.) 2 Insert a memory card or flash drive . 3 From the control panel, press . 4 Press repeatedly until Print All Photos is highlighted. 5 Press . 6 Press or to select the number - Lexmark X4850 | User's Guide (Mac) - Page 61
8 Press again. One or more proof sheets print. 9 Follow the instructions on the proof sheet to select which photos to print, the number of copies per photo, red-eye reduction, page layout, print options, and paper size. Note: When making selections, make sure to fill in the circles completely. 10 - Lexmark X4850 | User's Guide (Mac) - Page 62
, the following message appears on the display: Camera Connected. Refer to Camera display or Camera owners manual for further information. After a few seconds, the following message appears: Use Camera to choose and print photos. Press to select printer default settings. 4 If you want to use the - Lexmark X4850 | User's Guide (Mac) - Page 63
If you are not sure which side is the printable side, see the instructions that came with the paper.) 2 Insert a memory card or flash drive. 3 From the control back to the photo. 12 Press or to select the number of copies to print. Note: The number of copies is automatically set to 1. 13 You can - Lexmark X4850 | User's Guide (Mac) - Page 64
best results, remove each printed sheet individually from the paper exit tray, and allow the prints to dry at number of photos on the memory card detected by the printer.) • Save Recent Date Photos • Save Date Range 9 Press . 10 Follow the instructions on the control panel display of the printer 64 - Lexmark X4850 | User's Guide (Mac) - Page 65
photos to your computer. b Follow the instructions on the computer screen. If the printer is connected to a wireless network, you will be asked to select the computer that you want to use. a Press or to select a computer. b Press . If you set a PIN during network setup and are being asked for it - Lexmark X4850 | User's Guide (Mac) - Page 66
see the instructions that came with the paper.) Note: For best results, use Lexmark Photo Paper or Lexmark PerfectFinish Photo Paper. Do not use Lexmark Premium Photo Paper. Your print cartridges are not compatible with this type of paper. 2 Customize the settings as needed in the Page Setup dialog - Lexmark X4850 | User's Guide (Mac) - Page 67
software application, click File Œ Print. b From the Printer pop-up menu, choose 4800 Series. c Click Print. Notes: • To avoid paper jams, do not force the cards into the printer side, see the instructions that came with the paper.) Notes: • Use only the following paper sizes to print borderless - Lexmark X4850 | User's Guide (Mac) - Page 68
using the software" on page 72 Printing color images in black and white This setting is available only if there is a black print cartridge installed. 1 Load paper. 2 Customize the settings in the Page Setup dialog as needed. 3 With a document open, click File ΠPrint. 4 From the Printer pop-up - Lexmark X4850 | User's Guide (Mac) - Page 69
send it through e-mail: 1 Load an original document facedown on the scanner glass. 2 From the Finder desktop, double-click the Lexmark 4800 Series folder. 3 Double-click the Lexmark 4800 Series Center icon. 4 From the "What is being scanned?" menu, select a document type other than Photo. 5 From the - Lexmark X4850 | User's Guide (Mac) - Page 70
. All scanned pages are saved to only one file since PDF supports multiple-page scanning. Related topics: • "Loading original documents on the scanner glass" on page 32 Saving a scanned image 1 Make sure the printer is connected to a computer, and both the printer and the computer are on. 2 Load an - Lexmark X4850 | User's Guide (Mac) - Page 71
, double-click the Lexmark 4800 Series folder. 2 Double-click the Lexmark 4800 Series Center icon. 3 From the All-In-One Center, click Preview/Edit Adjusting color settings when scanning" on page 41 Cropping photos using the software You can use the Auto-crop feature to highlight certain focal points - Lexmark X4850 | User's Guide (Mac) - Page 72
c Click to scan the image. Related topics: • "Using the All-In-One Center" on page 90 Enhancing photo print quality using the software 1 From the Finder desktop, double-click the Lexmark 4800 Series folder. 2 Double-click the Lexmark 4800 Series Center icon. 3 From the "What is being scanned?" menu - Lexmark X4850 | User's Guide (Mac) - Page 73
Finder desktop, double-click the Lexmark 4800 Series folder. 2 Double-click the Lexmark 4800 Series Center icon. 3 software" on page 72 Transferring photos from a memory device to the computer over a wireless network If the printer is connected to a computer through a wireless network connection - Lexmark X4850 | User's Guide (Mac) - Page 74
Wait for the Network Card Reader dialog to appear. 6 Select the images you want to save. 7 Click Save. 8 Choose the folder where you want the selected images to be saved. 9 Click Save. Related topics: • "Inserting a memory card" on page 56 • "Inserting a flash drive" on page 57 • "Transferring - Lexmark X4850 | User's Guide (Mac) - Page 75
the one shown. • Installation software for the printer • Windows Help • User's Guide in electronic format • Mac Help Printed booklet that serves as a guide. Note: Complete user information (User's Guide or Mac Help) can be found on the installation software CDs. Initial setup directions Connects the - Lexmark X4850 | User's Guide (Mac) - Page 76
Paper support Load paper. 2 Control panel display View menus. 3 Control panel Operate the printer. For more information, see "Using the control panel" on page 78. 4 Wi-Fi indicator Check wireless status: • Off-Indicates that no wireless option is installed. • Orange-Indicates that the printer - Lexmark X4850 | User's Guide (Mac) - Page 77
the To 1 Scanner unit Access the print cartridges. 2 Print cartridge carrier Install, replace, or remove a print cartridge. 3 Lexmark N2050 (internal wireless print Connect the printer to a wireless network. server) 4 USB port Connect the printer to a computer using a USB cable. Warning: Do - Lexmark X4850 | User's Guide (Mac) - Page 78
Icons • Ink cartridge levels Mode 1 2 3 4 5 6 7 8 9 10 11 A Main Menu Area Message • Scroll through submenus. • Increase the numbers of copies Clear current settings or error messages, and return to default settings. Display the Copy, Photo, Print files, Scan, Setup, and Maintenance menu, - Lexmark X4850 | User's Guide (Mac) - Page 79
Color Copies Resize Quality Lighter/Darker Paper Handling Collate You can Choose to copy in color and black and white. Specify the number of copies to print. Choose to Specify the size and type of the paper loaded. Copy multiple pages as a set. The last page copied is printed first. Understanding - Lexmark X4850 | User's Guide (Mac) - Page 80
or printing on both sides of the paper. Choose how many pages to print : If you connect a digital camera set to a supported mass storage format to the printer, you will be number of copies to print. Choose a network host computer. This selection is only displayed if the wireless adapter of the printer - Lexmark X4850 | User's Guide (Mac) - Page 81
flash drive. Choose default settings for photo size, layout, quality, and paper handling. Print Digital Print Order Format (DPOF) selections. This option appears The PictBridge Default Print Settings menu lets you select default printer settings that are used if no settings are selected from your - Lexmark X4850 | User's Guide (Mac) - Page 82
printer must be connected to a computer, and both the printer and computer must be on. 1 Insert a memory card or flash drive containing document files into the printer. The following file types are supported press . From here Paper Handling You can Choose the paper size and paper type. 3 Use the - Lexmark X4850 | User's Guide (Mac) - Page 83
the printer CD icon that automatically appears. 4 Double-click the Install icon. 5 Follow the instructions on the computer screen. Using the World Wide Web: 1 Go to the Lexmark Web site at www.lexmark.com. 2 From the home page, navigate through the menu selection, and then click Drivers & Downloads - Lexmark X4850 | User's Guide (Mac) - Page 84
the printer driver for your operating system. 4 Follow the instructions on the computer screen to download the driver and install the printer software. Related topics: • "Removing the printer software" on page 84 • "Removing and reinstalling the software" on page 148 Removing the printer software If - Lexmark X4850 | User's Guide (Mac) - Page 85
the printer. Paper Size Choose a paper size from the list. Orientation Choose an orientation. Scale Reduce or enlarge a photo to a percentage of its original size. Note: Recommended values are between 25% and 400% of the original size. These buttons are at the bottom of the Page Setup dialog - Lexmark X4850 | User's Guide (Mac) - Page 86
The Print dialog appears. • For Mac OS X version 10.3: • For Mac OS X version 10.4 or later: 2 From the Printer pop-up menu, choose 4800 Series. 3 Change the settings as needed. From here Copies & Pages Choose Copies Collated Pages To Specify the number of copies you want to print. Sort multiple - Lexmark X4850 | User's Guide (Mac) - Page 87
• Odd numbered pages • Even numbered pages Choose one of these options: • Use documents paper size • Scale to fit paper size Note: "Scale down only" is activated only when the "Scale to fit paper size" option is selected. Choose Standard. Choose a filtering option. Understanding the printer 87 - Lexmark X4850 | User's Guide (Mac) - Page 88
Billing Info Paper Type Print Quality Document Color Advanced Options Printer Services Preview Note: This option is available only if the file opened is a photo. Mirror Automatic Image Sharpening Lexmark 4800 Series Utility Troubleshooting Order Supplies Contact Lexmark Software Version Rotate - Lexmark X4850 | User's Guide (Mac) - Page 89
Page Setup dialog" on page 84 Using Printer Services Printer Services provides helpful Web links and information. From here you can: • Access the Utility. • Access Troubleshooting. • Order supplies. • Contact Customer Support. • Obtain software version information. To access Printer Services: 1 With - Lexmark X4850 | User's Guide (Mac) - Page 90
" on page 93 Using the All-In-One Center The All-In-One Center provides the basic functions for most scan jobs. You can customize the settings on the All-In-One Center dialog according to the type of project • Mixed Graphics and Text • Magazine or Newspaper • Black Text Understanding the printer 90 - Lexmark X4850 | User's Guide (Mac) - Page 91
desktop, double-click the Lexmark 4800 Series folder. Double-click the Lexmark Network Card Reader icon. • Go to the Mac OS X drive where the printer software was installed. Choose Library Œ Printers Œ Lexmark Œ 2007 Œ Lexmark 4800 Series folder. Double-click the Lexmark Network Card Reader icon - Lexmark X4850 | User's Guide (Mac) - Page 92
one computer connected to the network, you will be asked to select the computer that you want to use. a Press or to select a computer. b Press . If you set a PIN during network setup Reader: 1 Choose Lexmark Network Card Reader memory device is inserted into the printer. 4 Click Settings. 5 Assign - Lexmark X4850 | User's Guide (Mac) - Page 93
Install the print cartridges. • Print a test page. • Print an alignment page. • Clean the print cartridge nozzles. • Order ink or supplies. • Register your printer. • Contact Customer Support menu from the top, choose Printer Services. 3 Click Lexmark 4800 Series Utility. For Mac OS X version 10.4 or - Lexmark X4850 | User's Guide (Mac) - Page 94
The Utility has two tabs with different links under each tab: - Maintenance Tab - Web Links Tab Related topics: • "Using Printer Services" on page 89 Understanding the printer 94 - Lexmark X4850 | User's Guide (Mac) - Page 95
the printer Print cartridges Installing print cartridges 1 Remove the used print cartridge or cartridges. For more information, see "Removing a used print cartridge" on page 96. 2 If you are installing new print cartridges, remove the tape from the back and bottom of the black cartridge, and - Lexmark X4850 | User's Guide (Mac) - Page 96
load paper and press to print an alignment page. Note: The scanner unit must be closed to start a new scan, print, or copy job. Related topics: • "Aligning print cartridges" on page 97 Removing a used print cartridge 1 Make sure the printer is on. 2 Lift the scanner unit. The print cartridge carrier - Lexmark X4850 | User's Guide (Mac) - Page 97
"Installing print cartridges" on page 95 Refilling print cartridges The warranty does not cover repair of failures or damage caused by a refilled cartridge. Lexmark does not recommend use of a refilled cartridge. Refilling a cartridge can affect print quality and may cause damage to the printer. For - Lexmark X4850 | User's Guide (Mac) - Page 98
nozzles 1 Load plain paper. 2 From the Finder desktop, double-click the Lexmark 4800 Series folder. 3 Double-click the Lexmark 4800 Series Utility icon. 4 From the Maintenance tab, click Clean Print Nozzles. A page prints, forcing ink through the print cartridge nozzles to clean them. 5 To verify - Lexmark X4850 | User's Guide (Mac) - Page 99
print quality" on page 100 Preserving the print cartridges • Keep a new cartridge in its packaging until you are ready to install it. • Do not remove a cartridge from the printer except to replace, clean, or store it in an airtight container. The cartridges do not print correctly if left exposed for - Lexmark X4850 | User's Guide (Mac) - Page 100
. Try one or more of the following: Check paper • Use the appropriate paper for the document. If you are printing photos or other high-quality images, for best results use Lexmark Photo Paper or Lexmark PerfectFinish Photo Paper. Do not use Lexmark Premium Photo Paper. Your print cartridges are not - Lexmark X4850 | User's Guide (Mac) - Page 101
at least 24 hours before stacking, displaying, or storing. Item USB cable For more information, go to www.lexmark.com. Part Number 1021294 Paper Lexmark Photo Paper Note: Availability may vary by country or region. Paper size • Letter • A4 • 4 x 6 in. • 10 x 15 cm Maintaining the printer 101 - Lexmark X4850 | User's Guide (Mac) - Page 102
may cause damage to your printer. 5 Make sure the paper support and paper exit tray are dry before beginning a new print job. Finding information about the printer Quick Setup sheet Description The Quick Setup sheet gives you instructions for setting up hardware and software. Where to find You - Lexmark X4850 | User's Guide (Mac) - Page 103
by your printer) • Making copies (if supported by your printer) • Faxing (if supported by your printer) • Maintaining the printer • Connecting the printer to a network (if supported by your printer) • Troubleshooting problems with printing, copying, scanning, faxing, paper jams, and misfeeds - Lexmark X4850 | User's Guide (Mac) - Page 104
. materials and workmanship for a www.lexmark.com. period of 12 months after the 1 Click CUSTOMER SUPPORT. original date of purchase. 2 Click Warranty Information. 3 From the Statement of Limited Warranty section, click Inkjet & All-In-One Printers. 4 Scroll through the Web page to view - Lexmark X4850 | User's Guide (Mac) - Page 105
of the printer), and have it ready when you contact us so that we may serve you faster: • Machine Type number • Serial number • Date purchased • Store where purchased Related topics: • "Using the Utility" on page 93 • "Recycling Lexmark products" on page 150 • "Contacting Customer Support" on page - Lexmark X4850 | User's Guide (Mac) - Page 106
Try one or more of the following: Press power button Make sure the printer is on by pressing . Disconnect and reconnect the power cord 1 Disconnect the power cord from the wall outlet, and then from the printer. 2 Plug the cord all the way into the power supply on the printer. 2 1 Troubleshooting - Lexmark X4850 | User's Guide (Mac) - Page 107
is not on, press . Software does not install These are possible solutions. Try one or more of the following: Check your operating system The following operating systems are supported: • Windows Vista • Windows XP • Windows 2000 with Service Pack 3 or later • Mac OS X Check your system requirements - Lexmark X4850 | User's Guide (Mac) - Page 108
. Try one or more of the following: Check power If the light is not on, see "Power button is not lit" on page 106. Load paper correctly Remove the paper from the paper support, and then load the paper again. Check the ink levels Check the ink levels, and install new print cartridges if necessary - Lexmark X4850 | User's Guide (Mac) - Page 109
software" on page 148. 2 If the software still does not install correctly, visit our Web site at www.lexmark.com to check for the latest software. a In all countries or regions except the United States, select your country or region. b Click the links for drivers or downloads. c Select your printer - Lexmark X4850 | User's Guide (Mac) - Page 110
make sure it is properly installed in the right carrier. If you are using a black cartridge or photo cartridge, make sure it is properly installed in the left carrier. For more information, see the related topic below. Make sure the Lexmark printer driver is set as the default printer and is not on - Lexmark X4850 | User's Guide (Mac) - Page 111
the cartridges? Lift the access cover. Press down on the cartridge carrier levers to raise the cartridge carrier lids. Are the cartridges low on ink? 1 From the Finder desktop, double-click the Lexmark 4800 Series folder. 2 Double-click the Lexmark 4800 Series Utility icon. Troubleshooting 111 - Lexmark X4850 | User's Guide (Mac) - Page 112
. If an exclamation point (!) appears on a cartridge, the ink level is low. Install a new cartridge. For more information, see "Installing print cartridges" on page 95. For cartridge ordering information, see "Ordering print cartridges" on page 101. Wireless troubleshooting Check your security keys - Lexmark X4850 | User's Guide (Mac) - Page 113
printer driver is not installed, insert the printer software CD into your computer. 3 Follow the instructions on the screen. Note: You must install the printer driver on each computer that uses the network printer. Check if printer is connected to the wireless network 1 Print a network setup page - Lexmark X4850 | User's Guide (Mac) - Page 114
internal wireless print server. Make sure the printer is turned off and the power cord is unplugged from the wall outlet before you proceed. 2 While holding the printer firmly with one hand, hold the internal print server with your other hand and then pull it away from the printer. Troubleshooting - Lexmark X4850 | User's Guide (Mac) - Page 115
pop-up menu. d Write down the SSID. 2 Reconfigure the printer's settings. 3 Insert the CD for Macintosh. 4 From the Finder desktop, double-click the Lexmark 4800 Series Installer icon. 5 Double-click Install. 6 Click Continue. 7 Follow the instructions on the computer screen. Note: Store the SSID in - Lexmark X4850 | User's Guide (Mac) - Page 116
, see "Ping the printer" for Windows or Mac in the "Wireless troubleshooting" section. Run the wireless setup again If your wireless settings have changed, you will need to run the printer wireless setup again. Some reasons your settings may have changed include your having manually changed your WEP - Lexmark X4850 | User's Guide (Mac) - Page 117
before you can see them on the network. For more information, see "Run the Wireless Setup Utility" for Windows or "Run the Wireless Setup Assistant" for Mac. Printer cannot connect to the wireless network These are possible solutions. Try one or more of the following: Make sure your computer is - Lexmark X4850 | User's Guide (Mac) - Page 118
are possible solutions. Try one or more of the following: Check cable Make sure the installation cable is not connected to the printer. Configure the optional internal wireless print server Note: This solution does not apply to printers that have a pre-installed internal wireless print server. If - Lexmark X4850 | User's Guide (Mac) - Page 119
you need help finding the MAC address, see "Finding the MAC address" on page 8. Wi-Fi indicator light is blinking orange during installation When the Wi-Fi indicator light is blinking orange, it indicates that the printer has been set up for wireless networking but cannot connect to the network for - Lexmark X4850 | User's Guide (Mac) - Page 120
the Finder desktop, double-click the Lexmark 4800 Series folder. 2 Double-click Wireless Setup Assistant. 3 Follow the instructions on the computer screen. Wireless Setup Assistant cannot communicate with the printer during installation These are possible solutions. Try one or more of the following - Lexmark X4850 | User's Guide (Mac) - Page 121
on the back of the printer. 4 From the Finder desktop, double-click the Lexmark 4800 Series folder. 5 Double-click Wireless Setup Assistant. 6 Follow the instructions on the computer screen. Changing wireless settings after installation Use the Wireless Setup Assistant to change your password - Lexmark X4850 | User's Guide (Mac) - Page 122
to help resolve the problem. • You may need to change the wireless settings of your printer. Run the Wireless Setup Assistant 1 From the Finder desktop, double-click the Lexmark 4800 Series folder. 2 Double-click Wireless Setup Assistant. 3 Follow the instructions on the computer screen - Lexmark X4850 | User's Guide (Mac) - Page 123
. Try one or more of the following: Check paper • Use the appropriate paper for the document. If you are printing photos or other high-quality images, for best results use Lexmark Photo Paper or Lexmark PerfectFinish Photo Paper. Do not use Lexmark Premium Photo Paper. Your print cartridges are not - Lexmark X4850 | User's Guide (Mac) - Page 124
use Lexmark PerfectFinish Photo Paper or Lexmark Photo Paper. Do not use Lexmark Premium Photo Paper. Your print cartridges are not compatible with this type of paper. Check paper condition Use only new, unwrinkled paper. Removing and reinstalling the software Software may not be installed correctly - Lexmark X4850 | User's Guide (Mac) - Page 125
. 5 Click OK. Make sure paper size matches the printer setting 1 From the software application, click File ΠPage Setup. 2 From the "Format for" pop-up menu, choose 4800 Series. 3 From the Paper Size pop-up menu, check the paper size. Clean print cartridge nozzles For more information, see - Lexmark X4850 | User's Guide (Mac) - Page 126
paper size is set correctly The printer issues the Paper or Photo Size Error when your chosen photo size does not match the paper ink to dry on the surface of photo paper or transparencies than it does on most printouts. Are you using a transparency or photo paper designed for an inkjet printer - Lexmark X4850 | User's Guide (Mac) - Page 127
. 5 Click Print. Align the print cartridges 1 Load plain paper. 2 From the Finder desktop, double-click the Lexmark 4800 Series folder. 3 Double-click the Lexmark 4800 Series Utility icon. 4 From the Maintenance tab, click Print Alignment Page. 5 Follow the instructions on the computer screen. White - Lexmark X4850 | User's Guide (Mac) - Page 128
-click the Lexmark 4800 Series Utility icon. 3 From the Maintenance tab, check the ink levels of the cartridges. If an exclamation point (!) appears on a cartridge, the ink level is low. Install a new cartridge. Printer is plugged in but does not print These are possible solutions. Try one or more - Lexmark X4850 | User's Guide (Mac) - Page 129
Try one or error message will be displayed on the control panel of the printer. For more information, see the digital camera documentation. Make sure the camera is a PictBridge-enabled digital camera 1 Disconnect the camera. 2 Connect printer to avoid corruption or loss of data. Troubleshooting 129 - Lexmark X4850 | User's Guide (Mac) - Page 130
the paper is supported by the printer. If you are using automatic duplexing, use only letter- or A4-size plain paper. Check for paper jams Check for and clear any paper jams. For more information, see "Paper jam in the duplex unit" on page 137. Make sure the duplex unit is properly installed Remove - Lexmark X4850 | User's Guide (Mac) - Page 131
is the model series number of your printer and nnnnnnnnnnnn is the 12-digit MAC address of your printer. 5 If USB is selected instead: a Select XXXX Series, where XXXX is the model series number of your printer. b Click Make Default. c Close the window, and try printing again. Troubleshooting 131 - Lexmark X4850 | User's Guide (Mac) - Page 132
. Try one or more of the following: Check messages If an error message is displayed, see "Error messages" on page 143. Check ink Check the ink levels, and install a new print cartridge if necessary. Clean the scanner glass If the scanner glass is dirty, gently wipe it with a clean, lint-free cloth - Lexmark X4850 | User's Guide (Mac) - Page 133
corner. Partial document or photo copies These are possible solutions. Try one or more of the following: Check document placement Make sure the the scanner glass in the lower right corner. Check paper size Make sure the paper size being used matches the size you selected. Check Troubleshooting 133 - Lexmark X4850 | User's Guide (Mac) - Page 134
For more information, see "Removing and reinstalling the software" on page 148. Scan was not successful These are possible solutions. Try one or more of the following: Check USB cable connection If the printer is connected to the computer through a USB connection: 1 Check the USB cable for any - Lexmark X4850 | User's Guide (Mac) - Page 135
, gently wipe it with a clean, lint-free cloth dampened with water. Change the resolution to a higher value 1 From the Finder desktop, double-click the Lexmark 4800 Series folder. 2 Double-click the Lexmark 4800 Series Center icon. 3 Click Preview/Edit to open the Scan dialog. Troubleshooting 135 - Lexmark X4850 | User's Guide (Mac) - Page 136
photo scans These are possible solutions. Try one or more of the following: Check document placement the lower right corner. Check paper size Make sure the paper size being used matches the different application 1 From the error dialog, click Cancel. 2 From the All-In-One Center, choose a different - Lexmark X4850 | User's Guide (Mac) - Page 137
and misfeeds troubleshooting Paper jam in the printer Eject the paper automatically To remove the paper jam, eject the paper: 1 Press and hold . 2 Remove the paper from the paper exit tray. Remove the paper manually 1 Press to turn off the printer. 2 Firmly grasp the paper, and gently pull it out - Lexmark X4850 | User's Guide (Mac) - Page 138
: Check paper condition Use only new, unwrinkled paper. Check paper loading • Load a smaller amount of paper into the printer. • Load paper with the print side facing you. (If you are not sure which side is the printable side, see the instructions that came with the paper.) Troubleshooting 138 - Lexmark X4850 | User's Guide (Mac) - Page 139
, making sure it does not buckle. Printer does not feed paper, envelopes, or specialty media These are possible solutions. Try one or more of the following: Check for paper jams Check for and clear any paper jams. For more information, see "Jams and misfeeds troubleshooting" on page 137. Check media - Lexmark X4850 | User's Guide (Mac) - Page 140
possible causes and solutions. Try one or more of the following: Clear banner paper jams 1 Press to turn off the printer. 2 Remove the jammed banner paper from the printer. Adjust the paper type settings To keep a banner print job from jamming: • Use only the number of sheets needed for the banner - Lexmark X4850 | User's Guide (Mac) - Page 141
is PictBridge-enabled. Check USB cable Use only the USB cable that came with the camera. Remove memory cards Remove any memory cards from the printer. Check messages If an error message appears on the display, see "Error messages" on page 143. Troubleshooting 141 - Lexmark X4850 | User's Guide (Mac) - Page 142
supporting the formats listed above must be on the connected computer. Photos do not transfer from a memory card across a wireless network These are possible solutions. Try one or more of the following: Select the printer on your wireless network 1 From the Finder desktop, double-click the Lexmark - Lexmark X4850 | User's Guide (Mac) - Page 143
unmarked paper for aligning the cartridge. The printer will read any markings on used paper, which could cause the alignment error message to appear. Black Ink Low / Color Ink Low / Photo Ink Low 1 Check the indicated ink level or levels, and install a new print cartridge or cartridges if necessary - Lexmark X4850 | User's Guide (Mac) - Page 144
reinsert the color print cartridge, close the cartridge carrier lid, and close the scanner unit. 9 If the error reappears, replace the color print cartridge with a new one, close the cartridge carrier lid, and close the scanner unit. Clear Carrier Jam These are possible solutions. Try one or more of - Lexmark X4850 | User's Guide (Mac) - Page 145
. For more information, see "Installing print cartridges" on page 95. Cover Open Make sure that the scanner unit is closed. Paper Out 1 Load paper. 2 Press . Paper Jam For more information, see "Jams and misfeeds troubleshooting" on page 137. Printer Carrier Stall 1 Check the printer carrier for any - Lexmark X4850 | User's Guide (Mac) - Page 146
right carrier. Paper Size/Type error The paper loaded in the printer is not supported for duplex printing. Load plain letter- or A4-size paper. Paper Mismatch The size of the paper loaded in the printer is not supported by the current mode. 1 Load the correct paper. 2 Press . Troubleshooting 146 - Lexmark X4850 | User's Guide (Mac) - Page 147
6.0 Extensions YCbCr Images Only TIFF files created directly from digital cameras and not modified by computer software are supported. Paper or Photo Size error One or more photos selected for printing have a size that does not match the size of the paper loaded in the printer. Troubleshooting 147 - Lexmark X4850 | User's Guide (Mac) - Page 148
-click the Uninstaller icon. 4 Follow the instructions on the computer screen to remove the printer software. 5 Restart the computer before reinstalling the printer software. 6 Insert the CD, and then follow the instructions on the computer screen to reinstall the software. Troubleshooting 148 - Lexmark X4850 | User's Guide (Mac) - Page 149
Related topics: • "Installing print cartridges" on page 95 Troubleshooting 149 - Lexmark X4850 | User's Guide (Mac) - Page 150
include technical inaccuracies or typographical errors. Changes are periodically made services, except those expressly designated by the manufacturer, are the user's responsibility. For Lexmark technical support, visit support.lexmark.com. For information on supplies and downloads, visit www.lexmark - Lexmark X4850 | User's Guide (Mac) - Page 151
could damage your product hardware or software. CAUTION: A CAUTION identifies Product information Product name: Lexmark 4800 Series Machine type: installation. This equipment generates, uses, and can radiate radio frequency energy and, if not installed and used in accordance with the instructions - Lexmark X4850 | User's Guide (Mac) - Page 152
cable such as Lexmark part number 1021294 for USB Lexmark Technology & Services Lexmark International, Inc. 740 West New Circle Road Lexington, KY 40550 (859) 232-3000 Exposure to radio frequency radiation The following notice is applicable if your printer has a wireless network card installed - Lexmark X4850 | User's Guide (Mac) - Page 153
printer has a wireless network card installed service, this device is intended to be operated indoors and away from windows to provide maximum shielding. Equipment (or its transmit antenna) that is installed outdoors is subject to licensing. The installer /registration number only Support, Lexmark - Lexmark X4850 | User's Guide (Mac) - Page 154
products The following notices are applicable if your printer has a wireless network card installed This product is in conformity with the protection requirements is available from the Director of Manufacturing and Technical Support, Lexmark International, S. A., Boigny, France. The following - Lexmark X4850 | User's Guide (Mac) - Page 155
vara er í samræmi við grunnkröfur og aðrar kröfur, sem gerðar eru í tilskipun 1999/5/EC. Italiano Con la presente Lexmark International, Inc. dichiara che questo questo prodotto è conforme ai requisiti essenziali ed alle altre disposizioni pertinenti stabilite dalla direttiva 1999/5/CE. Latviski - Lexmark X4850 | User's Guide (Mac) - Page 156
Lexmark Web site at www.lexmark.com for your local sales office phone number. Product disposal Do not dispose of the printer or name Toxic and hazardous substances or elements Lead (Pb) Mercury (Hg) Cadmium (Cd) Hexavalent Polybrominated Chromium (Cr biphenyl (PBB) VI) Circuit boards X O O - Lexmark X4850 | User's Guide (Mac) - Page 157
-2006. X: Indicates that the content of the toxic and hazardous substance in at least one homogenous material of the part exceeds the concentration limit requirement as described in SJ/T11363-2006 than the average. Values are subject to change. See www.lexmark.com for current values. Notices 157 - Lexmark X4850 | User's Guide (Mac) - Page 158
or its suppliers, governs your use of any Software Program installed on or provided by Lexmark for use in connection with your Lexmark product. The term "Software Program" includes machine-readable instructions, audio/visual content (such as images and recordings), and associated media, printed - Lexmark X4850 | User's Guide (Mac) - Page 159
. You may Use one (1) copy of the Software Program. The term "Use" means storing, loading, installing, executing, or displaying the Software Program. If Lexmark has licensed the Software Program to you for concurrent use, you must limit the number of authorized users to the number specified in your - Lexmark X4850 | User's Guide (Mac) - Page 160
Software Program, except as and to the extent expressly permitted to do so by applicable law for the purposes of inter-operability, error correction, and security testing. If you have such statutory rights, you will notify Lexmark USE THE SOFTWARE PROGRAM, OR OTHERWISE IN CONNECTION WITH ANY - Lexmark X4850 | User's Guide (Mac) - Page 161
with the terms of this License Agreement, any other written agreement signed by you and Lexmark relating to your Use of the Software Program). To the extent any Lexmark policies or programs for support services conflict with the terms of this License Agreement, the terms of this License Agreement - Lexmark X4850 | User's Guide (Mac) - Page 162
print cartridges, programs, data, and removable storage media (unless directed otherwise by Lexmark). For further explanation of your warranty alternatives and the nearest Lexmark authorized servicer in your area, contact Lexmark at (800) 332-4120, or on the World Wide Web at http://support.lexmark - Lexmark X4850 | User's Guide (Mac) - Page 163
will not apply to claims by you for bodily injury or damage to real property or tangible personal property for which Lexmark is legally liable. IN NO EVENT WILL LEXMARK BE LIABLE FOR ANY LOST PROFITS, LOST SAVINGS, INCIDENTAL DAMAGE, OR OTHER ECONOMIC OR CONSEQUENTIAL DAMAGES. This is true even if - Lexmark X4850 | User's Guide (Mac) - Page 164
flash drives can be connected. A printer software option that lets you adjust the color correction curve of a scanned image. Gamma measures the contrast that affects the midtones of an image. Paper with one or two glossy sides designed for photos. The area on a print cartridge or a digital camera - Lexmark X4850 | User's Guide (Mac) - Page 165
on a wired network See "SSID (Service Set Identifier)" on page 165 A printer made available on a network, not connected directly to your computer. The area of the print cartridge through which ink flows through before it is applied to paper during printing. Treated paper designed for printing photos - Lexmark X4850 | User's Guide (Mac) - Page 166
connect different networks together UAA (Universally Administered Address) An address assigned to a network printer or print server by the manufacturer. To find the UAA, print a network setup unauthorized access to a wireless network. WPA is not supported on ad hoc wireless networks. Other possible
-
 1
1 -
 2
2 -
 3
3 -
 4
4 -
 5
5 -
 6
6 -
 7
7 -
8
-
9
-
10
-
11
-
12
-
13
-
14
-
15
-
16
-
17
-
18
-
19
-
20
-
21
-
22
-
23
-
24
-
25
-
26
-
27
-
28
-
29
-
30
-
31
-
32
-
33
-
34
-
35
-
36
-
37
-
38
-
39
-
40
-
41
-
42
-
43
-
44
-
45
-
46
-
47
-
48
-
49
-
50
-
51
-
52
-
53
-
54
-
55
-
56
-
57
-
58
-
59
-
60
-
61
-
62
-
63
-
64
-
65
-
66
-
67
-
68
-
69
-
70
-
71
-
72
-
73
-
74
-
75
-
76
-
77
-
78
-
79
-
80
-
81
-
82
-
83
-
84
-
85
-
86
-
87
-
88
-
89
-
90
-
91
-
92
-
93
-
94
-
95
-
96
-
97
-
98
-
99
-
100
-
101
-
102
-
103
-
104
-
105
-
106
-
107
-
108
-
109
-
110
-
111
-
112
-
113
-
114
-
115
-
116
-
117
-
118
-
119
-
120
-
121
-
122
-
123
-
124
-
125
-
126
-
127
-
128
-
129
-
130
-
131
-
132
-
133
-
134
-
135
-
136
-
137
-
138
-
139
-
140
-
141
-
142
-
143
-
144
-
145
-
146
-
147
-
148
-
149
-
150
-
151
-
152
-
153
-
154
-
155
-
156
-
157
-
158
-
159
-
160
-
161
-
162
-
163
-
164
-
165
-
166
 |
 |
Lexmark 4800 Series All-In-One
User Guide
June 2007
www.lexmark.com