Lexmark X4850 User's Guide (Mac) - Page 78
Using the control panel buttons and menus, Using the control panel - ink cartridges
 |
UPC - 734646046664
View all Lexmark X4850 manuals
Add to My Manuals
Save this manual to your list of manuals |
Page 78 highlights
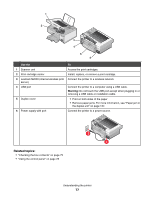
Using the control panel buttons and menus Using the control panel The display shows: • Mode indicators • Main menu art messages • Icons • Ink cartridge levels Mode 1 2 3 4 5 6 7 8 9 10 11 A Main Menu Area Message • Scroll through submenus. • Increase the numbers of copies to be printed. • Scroll through menus, submenus, or settings on the display. • Increase a number. • Cancel a print, copy, or scan job in progress. • Exit a menu or submenu, and return to the default copy, scan, or photo card screen. • Clear current settings or error messages, and return to default settings. Display the Copy, Photo, Print files, Scan, Setup, and Maintenance menu, depending on which mode is selected. Selects submenus (such as the Photo Menu when viewing photos). • Turn the printer on and off. • Stop the print, copy, or scan process. Select for duplex (two-sided) printing. Note: This button is not functional with a Macintosh operating system. You can print two-sided documents with a Macintosh operating system by using the settings in the Two-Sided menu of the Print dialog. Start a copy, scan, or photo print job, depending on which mode is selected. • Save temporary settings. • Return to the previous screen. • Scroll through submenus. • Decrease the number of copies to be printed. • Choose a menu or submenu item that appears on the display. • Save settings. • Feed or eject paper. • In Photo mode, select or deselect a photo. • Scroll through menus, submenus, or settings on the display. • Decrease a number. Understanding the printer 78
-
 1
1 -
2
-
3
-
4
-
5
-
6
-
7
-
8
-
9
-
10
-
11
-
12
-
13
-
14
-
15
-
16
-
17
-
18
-
19
-
20
-
21
-
22
-
23
-
24
-
25
-
26
-
27
-
28
-
29
-
30
-
31
-
32
-
33
-
34
-
35
-
36
-
37
-
38
-
39
-
40
-
41
-
42
-
43
-
44
-
45
-
46
-
47
-
48
-
49
-
50
-
51
-
52
-
53
-
54
-
55
-
56
-
57
-
58
-
59
-
60
-
61
-
62
-
63
-
64
-
65
-
66
-
67
-
68
-
69
-
70
-
71
-
72
-
 73
73 -
 74
74 -
 75
75 -
 76
76 -
 77
77 -
 78
78 -
 79
79 -
 80
80 -
 81
81 -
 82
82 -
 83
83 -
84
-
85
-
86
-
87
-
88
-
89
-
90
-
91
-
92
-
93
-
94
-
95
-
96
-
97
-
98
-
99
-
100
-
101
-
102
-
103
-
104
-
105
-
106
-
107
-
108
-
109
-
110
-
111
-
112
-
113
-
114
-
115
-
116
-
117
-
118
-
119
-
120
-
121
-
122
-
123
-
124
-
125
-
126
-
127
-
128
-
129
-
130
-
131
-
132
-
133
-
134
-
135
-
136
-
137
-
138
-
139
-
140
-
141
-
142
-
143
-
144
-
145
-
146
-
147
-
148
-
149
-
150
-
151
-
152
-
153
-
154
-
155
-
156
-
157
-
158
-
159
-
160
-
161
-
162
-
163
-
164
-
165
-
166
 |
 |
