Lexmark X4850 User's Guide (Mac) - Page 46
Selecting the All-In-One Center Preferences setting
 |
UPC - 734646046664
View all Lexmark X4850 manuals
Add to My Manuals
Save this manual to your list of manuals |
Page 46 highlights
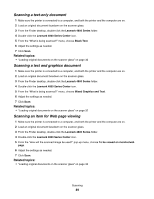
Selecting the All-In-One Center Preferences setting When scanning from the control panel, you have two options: • You can indicate that you want the Scan dialog to open on the computer screen when you press on the control panel. With this option, you can preview the scanned document, and then adjust the scan settings using the All-In-One Center. For more information, see "Using the All-In-One Center" on page 90. • You can indicate that you want to skip the Scan dialog, and send the scanned document straight to your selected application. To modify the Preferences setting: 1 From the Finder desktop, double-click the Lexmark 4800 Series folder. 2 Double-click the Lexmark 4800 Series Center icon. 3 From the menu bar, click Lexmark All-In-One Center. 4 Choose Preferences. 5 Select or unselect Show preview when Scan button pressed on the printer to indicate your preferred scanning option. • If you select Show preview when Scan button pressed on the printer, the Scan dialog opens on the computer screen when you press on the control panel. • If you unselect it, the scanned document is sent straight to your selected application when you press on the control panel. Note: By default, Show preview when Scan button pressed on the printer is selected. 6 Click OK to close the Preferences dialog with your scan settings applied and go back to the scan job, or you can click the Customize list icon to edit the Available Applications list. Click to go to the Help Center for more information. Related topics: • "Editing the Customize list" on page 41 • "Performing scanning and related tasks" on page 46 Resetting All-In-One software settings to defaults 1 From the Finder desktop, double-click the Lexmark 4800 Series folder. 2 Double-click the Lexmark 4800 Series Center icon. 3 Click Defaults. Related topics: • "Using the All-In-One Center" on page 90 • "Customizing scan settings from the Scan dialog" on page 42 Performing scanning and related tasks Scanning a document 1 Make sure the printer is connected to a computer, and both the printer and the computer are on. 2 Load an original document facedown on the scanner glass. 3 From the control panel, press or until Scan is highlighted. Scanning 46
-
 1
1 -
2
-
3
-
4
-
5
-
6
-
7
-
8
-
9
-
10
-
11
-
12
-
13
-
14
-
15
-
16
-
17
-
18
-
19
-
20
-
21
-
22
-
23
-
24
-
25
-
26
-
27
-
28
-
29
-
30
-
31
-
32
-
33
-
34
-
35
-
36
-
37
-
38
-
39
-
40
-
 41
41 -
 42
42 -
 43
43 -
 44
44 -
 45
45 -
 46
46 -
 47
47 -
 48
48 -
 49
49 -
 50
50 -
 51
51 -
52
-
53
-
54
-
55
-
56
-
57
-
58
-
59
-
60
-
61
-
62
-
63
-
64
-
65
-
66
-
67
-
68
-
69
-
70
-
71
-
72
-
73
-
74
-
75
-
76
-
77
-
78
-
79
-
80
-
81
-
82
-
83
-
84
-
85
-
86
-
87
-
88
-
89
-
90
-
91
-
92
-
93
-
94
-
95
-
96
-
97
-
98
-
99
-
100
-
101
-
102
-
103
-
104
-
105
-
106
-
107
-
108
-
109
-
110
-
111
-
112
-
113
-
114
-
115
-
116
-
117
-
118
-
119
-
120
-
121
-
122
-
123
-
124
-
125
-
126
-
127
-
128
-
129
-
130
-
131
-
132
-
133
-
134
-
135
-
136
-
137
-
138
-
139
-
140
-
141
-
142
-
143
-
144
-
145
-
146
-
147
-
148
-
149
-
150
-
151
-
152
-
153
-
154
-
155
-
156
-
157
-
158
-
159
-
160
-
161
-
162
-
163
-
164
-
165
-
166
 |
 |
