Lexmark X925 Common Criteria Installation Supplement and Administrator Guide - Page 26
Example, Settings, Security, Security Setup, Internal Accounts, Setup groups for use with internal
 |
View all Lexmark X925 manuals
Add to My Manuals
Save this manual to your list of manuals |
Page 26 highlights
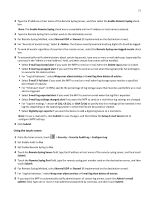
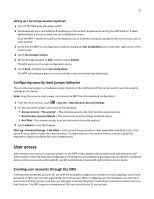
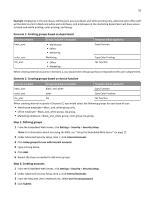
26 Example: Employees in the warehouse will be given access to black‑and‑white printing only, administrative office staff will be able to print in black and white and send faxes, and employees in the marketing department will have access to black‑and‑white printing, color printing, and faxing. Scenario 1: Creating groups based on department Security template Groups included in template Template will be applied to basic_user color_user fax_user • Warehouse • Office • Marketing Marketing • Office • Marketing Copy Function Copy Color Printing Fax Function When creating internal accounts in Scenario 1, you would select the group that corresponds to the user's department. Scenario 2: Creating groups based on device function Security template basic_user color_user fax_user Groups included in template black_and_white color fax Template will be applied to Copy Function Copy Color Function Fax Function When creating internal accounts in Scenario 2, you would select the following groups for each type of user: • Warehouse employee-Black_and_white group only. • Office employee-Black_and_white group, fax group. • Marketing employee-Black_and_white group, color group, fax group. Step 1: Defining groups 1 From the Embedded Web Server, click Settings > Security > Security Setup. Note: For information about accessing the EWS, see "Using the Embedded Web Server" on page 15. 2 Under Advanced Security Setup, Step 1, click Internal Accounts. 3 Click Setup groups for use with internal accounts. 4 Type a Group Name. 5 Click Add. 6 Repeat the steps as needed to add more groups. Step 2: Creating accounts 1 From the Embedded Web Server, click Settings > Security > Security Setup. 2 Under Advanced Security Setup, Step 1, click Internal Accounts. 3 From the Required User Credentials list, select User ID and password. 4 Click Submit.
-
 1
1 -
2
-
3
-
4
-
5
-
6
-
7
-
8
-
9
-
10
-
11
-
12
-
13
-
14
-
15
-
16
-
17
-
18
-
19
-
20
-
 21
21 -
 22
22 -
 23
23 -
 24
24 -
 25
25 -
 26
26 -
 27
27 -
 28
28 -
 29
29 -
 30
30 -
 31
31 -
32
-
33
-
34
-
35
-
36
-
37
-
38
-
39
-
40
-
41
-
42
-
43
-
44
-
45
-
46
-
47
-
48
-
49
-
50
-
51
-
52
-
53
-
54
-
55
-
56
 |
 |
