Lexmark X945e Setup Guide - Page 42
Step 5: Setting up the E-mail function, Getting ready to e-mail, Setting up the address book
 |
View all Lexmark X945e manuals
Add to My Manuals
Save this manual to your list of manuals |
Page 42 highlights
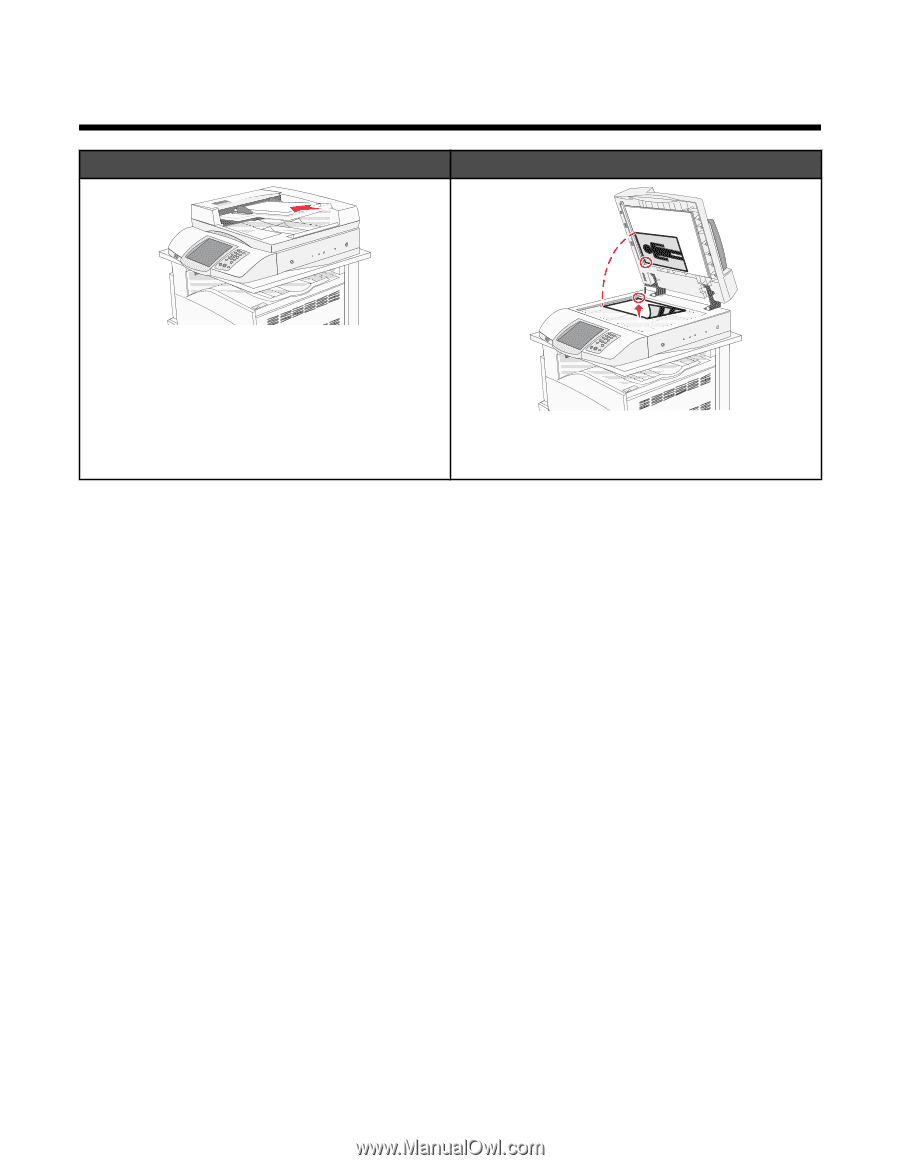
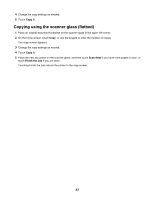
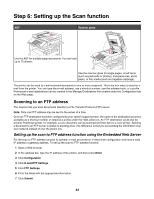
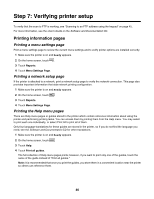
Step 5: Setting up the E-mail function ADF Scanner glass Use the ADF for multiple-page documents. You can load up to 75 sheets. Use the scanner glass for single pages, small items (such as postcards or photos), transparencies, photo paper, or thin media (such as magazine clippings). The printer can be used to e-mail scanned documents to one or more recipients. There are four ways to send an email from the printer. You can type the e-mail address, use a shortcut number, use the address book, or a profile. Permanent e-mail destinations can be created in the Manage Destinations link located under the Configuration tab on the Web page. Getting ready to e-mail Setting up the e-mail function For e-mail to operate, it must be turned on in the printer configuration and have a valid IP address or gateway address. To set up the e-mail function: 1 Open a Web browser. 2 In the address bar, type the IP address of the printer and, then press Enter. 3 Click Configuration. 4 Click E-mail/FTP Settings. 5 Click E-mail Server Setup. 6 Fill in the fields with the appropriate information. 7 Click Submit. Setting up the address book 1 Open a Web browser. 2 In the address bar, type the IP address of the printer, and then press Enter. 3 Click Configuration. 4 Click E-mail/FTP Settings. 42
-
 1
1 -
2
-
3
-
4
-
5
-
6
-
7
-
8
-
9
-
10
-
11
-
12
-
13
-
14
-
15
-
16
-
17
-
18
-
19
-
20
-
21
-
22
-
23
-
24
-
25
-
26
-
27
-
28
-
29
-
30
-
31
-
32
-
33
-
34
-
35
-
36
-
 37
37 -
 38
38 -
 39
39 -
 40
40 -
 41
41 -
 42
42 -
 43
43 -
 44
44 -
 45
45 -
 46
46 -
 47
47 -
48
-
49
-
50
-
51
-
52
-
53
-
54
-
55
-
56
-
57
-
58
-
59
-
60
-
61
-
62
-
63
 |
 |