Lexmark Z53 User's Guide for Macintosh (3 MB) - Page 39
Wiping print nozzles and contacts
 |
View all Lexmark Z53 manuals
Add to My Manuals
Save this manual to your list of manuals |
Page 39 highlights
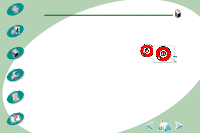
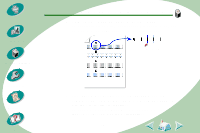
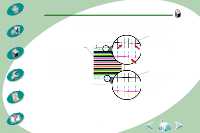
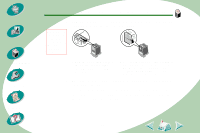
Steps to basic printing Beyond the basics Maintaining your printer Troubleshooting Appendix Index Maintaining your printer 4 Compare the diagonal lines above the printed bars to the diagonal lines below the printed bars. Look for a break in the diagonal lines. A broken line indicates clogged nozzles. If the bottom line still has breaks, run the test two more times. • If the print quality is satisfactory, the print nozzles are clean. You do not need to complete the remaining steps. • If the print quality of both sets of lines is not satisfactory, continue with the next step. 5 Remove and reinstall the print cartridge. 6 Repeat the nozzle test. 7 If the lines are still broken, see the next section, Wiping print nozzles and contacts. Wiping print nozzles and contacts If print quality does not improve after cleaning the print nozzles (see page 37), there may be dried ink on the print cartridge nozzles or contacts. 1 Remove the print cartridges from the printer. For help, see page 29. 39
-
 1
1 -
2
-
3
-
4
-
5
-
6
-
7
-
8
-
9
-
10
-
11
-
12
-
13
-
14
-
15
-
16
-
17
-
18
-
19
-
20
-
21
-
22
-
23
-
24
-
25
-
26
-
27
-
28
-
29
-
30
-
31
-
32
-
33
-
 34
34 -
 35
35 -
 36
36 -
 37
37 -
 38
38 -
 39
39 -
 40
40 -
 41
41 -
 42
42 -
 43
43 -
 44
44 -
45
-
46
-
47
-
48
-
49
-
50
-
51
-
52
-
53
-
54
-
55
-
56
-
57
-
58
-
59
-
60
-
61
-
62
-
63
 |
 |