Maytag MDB6709AWQ Installation Instructions - Page 16
the90°elbow, fittingstill, withoneadjustable, wrench, tighten, thenutwithsecond, adjustable, wrench
 |
UPC - 883049154343
View all Maytag MDB6709AWQ manuals
Add to My Manuals
Save this manual to your list of manuals |
Page 16 highlights
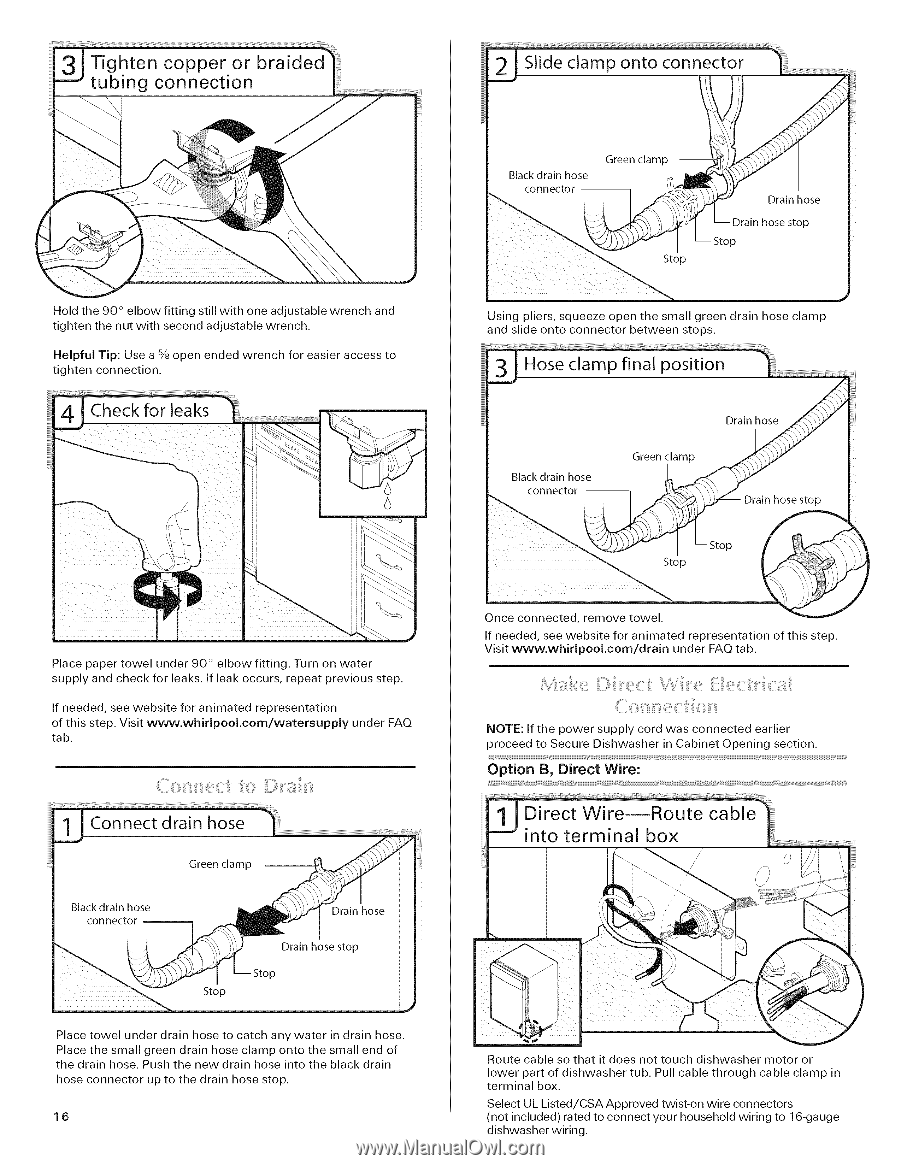
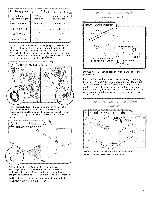
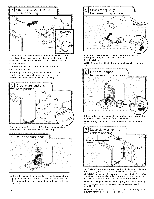
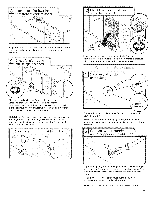
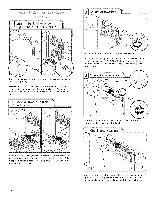
Holdthe90° elbowfittingstilwl ithoneadjustabwlreencahnd tightetnhenutwithseconaddjustabwlerench. Helpful Tip: Use a 5/8open ended wrench for easier access to tighten connection. Using pliers, squeeze open the small green drain hose clamp and slide onto connector between stops. Place paper towel under 90 ° elbow fitting. Turn on water supply and check for leaks. If leak occurs, repeat previous step. If needed, see website for animated representation of this step. Visit ww_v.whirlpool.com/watersupply tab. under FAQ Once connected, remove towel. If needed, see website for animated representation Visit www.whirlpool.com/drain under FAO tab. of this step. NOTE: If the power supply cord was connected earlier proceed to Secure Dishwasher in Cabinet Opening section. Option B, Direct Wire: # Place towel under drain hose to catch any water in drain hose. Place the small green drain hose clamp onto the small end of the drain hose. Push the new drain hose into the black drain hose connector up to the drain hose stop. 16 Route cable so that it does not touch dishwasher motor or lower part of dishwasher tub. Pull cable through cable clamp in terminal box. Select UL Listed/CSA Approved twist-on wire connectors (not included) rated to connect your household wiring to 16-gauge dishwasher wiring.
-
 1
1 -
2
-
3
-
4
-
5
-
6
-
7
-
8
-
9
-
10
-
 11
11 -
 12
12 -
 13
13 -
 14
14 -
 15
15 -
 16
16 -
 17
17 -
 18
18 -
 19
19 -
 20
20 -
 21
21 -
22
-
23
-
24
-
25
-
26
-
27
-
28
-
29
-
30
-
31
-
32
-
33
-
34
-
35
-
36
-
37
-
38
-
39
-
40
 |
 |