Maytag MGDE300VF Installation Instructions
Maytag MGDE300VF - Performance Series 27-in Gas Dryer Manual
 |
UPC - 883049135786
View all Maytag MGDE300VF manuals
Add to My Manuals
Save this manual to your list of manuals |
Maytag MGDE300VF manual content summary:
- Maytag MGDE300VF | Installation Instructions - Page 1
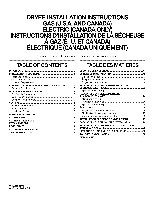
S_. AND CANADA) ELECTRIC (CANADA ONLY) INSTRUCTIONS D'INSTALLATION DE LA SI_CHEUSE .&.GAZ (l_.-U. ET CANADA) I_LECTRIQUE (CANADA UNIQUEMEN'r) Para una version de estas intrucciones en EspaSol, visite www.Whirlpool.com TABLE OF CONTENTS DRYER SAFETY 2 INSTALLATION REQUIREMENTS 4 Tools and Parts - Maytag MGDE300VF | Installation Instructions - Page 2
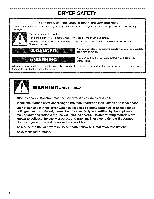
DRYER SAFETY Your safety and the safety of others are very important. We have provided many important safety messages in this manual and - install the clothes dryer according to the manufacturer's instructions and local codes. - Do not install a clothes dryer with flexible plastic venting materials - Maytag MGDE300VF | Installation Instructions - Page 3
it will be exposed to the weather. [] Do not repair or replace any part of the dryer or attempt any servicing unless specifically recommended in this Use and Care Guide or in published user-repair instructions that you understand and have the skills to carry out. [] Do not use fabric softeners - Maytag MGDE300VF | Installation Instructions - Page 4
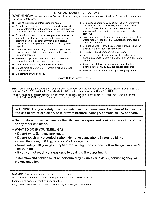
Parts Gather the required tools and parts before starting installation. Read and follow the instructions purchased your dryer. For further information, please refer to the "Assistance or Service" section in your Use and Care Guide. Remove parts package from dryer drum. Check that all parts are - Maytag MGDE300VF | Installation Instructions - Page 5
A sturdy floor to support the total dryer weight of 200 Ibs (90.7 kg). The combined weight of a companion appliance should also be considered. A level floor with a maximum slope of 1" (25 mm) under entire dryer. If slope is greater than 1" (25 mm), install Extended Dryer Feet Kit, Part Number 279810 - Maytag MGDE300VF | Installation Instructions - Page 6
servicing. • Additional clearances might be required for wall, door, and floor moldings. • Additional spacing should be considered on all sides of the dryer E* 1" (25 mm) 1" (25 mm) *Required spacing NOTE: Some models are not recommended for undercounter installation. 6 5;c; m2--)-4 -,4A*_ B -qC - Maytag MGDE300VF | Installation Instructions - Page 7
NOTE: Some models are not recommended for stacked recessed or closet installation. Mobile home - Additional installation requirements This dryer is suitable Safety, Title 24, HUD Part 280) or Standard CAN/CSA-Z240 MH. Mobile home installations require: All Dryers • Metal exhaust system hardware, - Maytag MGDE300VF | Installation Instructions - Page 8
178 Rexdale Blvd., Toronto, ON M9W 1R3 CANADA. To supply the required 4 wire, single phase dryer's final location. For further information, please reference the service numbers located in the "Assistance or Service" section. GROUNDING INSTRUCTIONS [] For a grounded, cord-connected dryer: This dryer - Maytag MGDE300VF | Installation Instructions - Page 9
your dealer or call the phone numbers referenced in the "Assistance or Service" section. LP gas conversion: Conversion must be made by a qualified Btu rating shown on the model/serial number plate is required for each 1,000 ft (305 m) increase in elevation. Gas supply pressure testing • The dryer - Maytag MGDE300VF | Installation Instructions - Page 10
electrician or service representative or personnel if you are in doubt as to whether the dryer is properly grounded. Do not modify the plug provided with the dryer: if it will not fit the outlet, have a proper outlet installed by a qualified electrician. SAVE THESE INSTRUCTIONS 1®TEFLON is - Maytag MGDE300VF | Installation Instructions - Page 11
instructions can result in death or fire. WARNING: To reduce the risk of fire, this dryer MUST BE EXHAUSTED OUTDOORS. IMPORTANT: Observe all governing codes and ordinances. The dryer metal vent. Review vent system Service. For more information, see the "Assistance or Service supported when the dryer - Maytag MGDE300VF | Installation Instructions - Page 12
local dealer. Failure to follow these instructions can result in death, fire, electrical Service" section to order. • Over-the-Top Installation: Part Number 4396028 • Periscope Installation (For use with dryer vent to wall vent mismatch): Part Number 4396037 - 0" (0 mm) to 18" (460 mm) mismatch Part - Maytag MGDE300VF | Installation Instructions - Page 13
no kinks in the flexible gas line. 4. Once the exhaust vent connection is made, remove the corner posts and cardboard. CONNECT INLET HOSE (STEAM MODELS) The dryer must be connected to the cold water faucet using the new inlet hoses. Do not use old hoses. 1. Turn cold water faucet off and remove - Maytag MGDE300VF | Installation Instructions - Page 14
performance. Excessive scale buildup may lead to the need for certain part replacement or repair. All Models: 15. Select a Timed Dry heated cycle, and start the dryer. Do not select the Air Only Temperature setting. If the dryer will not start, check the following: • Controls are set in a running - Maytag MGDE300VF | Installation Instructions - Page 15
go away. TROUBLESHOOTING First try the solutions suggested here and possibly avoid the cost of a service call... Dryer Operation Dryer will not run turn, but there may be a problem with your home power supply keeping the dryer's heater from turning on. The dryer will continue to run when this - Maytag MGDE300VF | Installation Instructions - Page 16
not use a plastic vent. Do not use a metal foil vent. Failure to follow these instructions can result in death or fire. Is the exhaust vent or outside exhaust hood clogged with lint, restricting air movement? Run the dryer for 5-10 minutes. Hold your hand under the outside exhaust hood to check air - Maytag MGDE300VF | Installation Instructions - Page 17
potentiel et vous disent comment r6duire le risque de blessure et ce qui peut se produire en cas de non-respect des instructions. AVERTISSEMENT - "Risque d'incendie" - L'installation de la s_cheuse & linge dolt _tre effectu_e par un installateur qualifi_. - installer la s_cheuse conform_rnent aux - Maytag MGDE300VF | Installation Instructions - Page 18
entretien doivent _tre effectues par un installateur qualifie, une agence de service ou le fournisseur de gaz. AVERTISSEMENT : L'odorat ne permet de gaz local. En cas de detection d'une fuite de gaz, executer les instructions "Que faire dans le cas d'une odeur de gaz". IMPORTANT : L'installation du - Maytag MGDE300VF | Installation Instructions - Page 19
service" de votre Guide d'utilisation et d'entretien. I quipement facultatif Consulter votre Guide respect de ces instructions peut causer un Un plancher robuste capable de supporter un poids total (secheuse et 460 mm)jusqu'au fond de la secheuse. Modeles &vapeur uniquement : Les robinets d'eau froide - Maytag MGDE300VF | Installation Instructions - Page 20
Ne pas faire fonctionner la secheuse & des temperatures inferieures & 45°F (7°C). _, des temperatures inferieures, la secheuse risque de ne plus s'arr_ter & la fin d'un programme automatique. Les temps de sechage risquent alors d'augmenter. La secheuse ne doit pas _tre installee ou remisee dans un - Maytag MGDE300VF | Installation Instructions - Page 21
mm) 5" (127 mm) *Espacement requis **Pour une evacuation par le c6te ou par le fond, un espacement de 0" (0 mm) est permis. REMARQUE : Certains modeles ne sont pas recommandes pour une installation dans un encastrement ou un placard. _76mm) D IF]fill I!ll I I 24 2* -qA*_ B -,4c-1_ i )2mC 551 - Maytag MGDE300VF | Installation Instructions - Page 22
25mm) Vapeur (_lectrique ou _ gaz) Sans vapeur (_lectrique ou _ gaz) A* 5 1/2"(140 mm) 5" (127 mm) *Espacement requis REMARQUE : Certains modeles ne sont pas recommandes pour une installation dans un encastrement ou dans un placard. Exigences suppl_mentaires concernant I'installation dans une - Maytag MGDE300VF | Installation Instructions - Page 23
service qui se trouvent & la section "Assistance ou service". Risque de choc _lectrique Brancher sur une prise a 4 aIv_oles reli6e _ la terre. Le non=respect de cette instruction Association, 178 Rexdale Blvd., Toronto, ON M9W 1R3 CANADA. L'appareil dolt _tre alimente uniquement par une alimentation - Maytag MGDE300VF | Installation Instructions - Page 24
. de gaz, et Le non-respect de ces instructions peut causer un d_c_s, un explosion ou un incendie indiques dans la section "Assistance ou service". Conversion au gaz de p_trole liqu_fi_ Dolt comporter un robinet d'arr_t du gaz : Au Canada : Un robinet d'arr_t manuel individuel doit _tre installe - Maytag MGDE300VF | Installation Instructions - Page 25
une reduction de 4 % du debit thermique (en BTU) indiqu6 sur la plaque signaletique est necessaire pour la canalisation d'arrivee de gaz, en fonction du modele de piedestal. Pour une installation dans un garage, prevoir Le non=respect de ces instructions peut causer un d6c_s, un incendie ou un - Maytag MGDE300VF | Installation Instructions - Page 26
est recommande de raccorder I'appareil sur un circuit distinct exclusif & cet appareil. iNSTRUCTiONS DE LiAiSON A LA TERRE [] Pour une s6cheuse reli6e & la terre et Pour plus de renseignements, consulter la section "Assistance ou service". Conduit m_tallique rigide • Pour un meilleur rendement de - Maytag MGDE300VF | Installation Instructions - Page 27
de nettoyage dans la maison et problemes de sant& Risque d'incendie Recouvrir tous les orifices d'_vacuation avec I'une des trousses suivantes : non utilis_s 279818 (blanche) W10186596 (gris de minuit) Contacter votre marchand local. Le non=respect de ces instructions peut causer un d_c_s, un - Maytag MGDE300VF | Installation Instructions - Page 28
installation. Deux installations & degagement reduit sont illustrees. Voir les instructions du fabricant. A. Installation au-dessus de la s#cheuse (#galement oQ le degagement est reduit. Voir la section "Assistance ou service" pour commander. • Installation au-dessus de la secheuse : Piece - Maytag MGDE300VF | Installation Instructions - Page 29
pour d_placer et installer la s_cheuse. Le non-respect de cette instruction peut causer une blessure au dos ou d'autre blessure. 1. emplacement final. Ne pas ecraser ni deformer le conduit d'evacuation. 3. (Sur les modeles a gaz) Verifier I'absence de deformation de la canalisation de gaz souple. 4. - Maytag MGDE300VF | Installation Instructions - Page 30
7= Fixer le tuyau d'alimentation en eau froide de la laveuse I'autre extremit6 du connecteur en Y. Visser le raccord & la main jusqu'& ce qu'il soit fixe au connecteur en Y. A RI GLAGE DE L'APLOMB DE LA SI CHEUSE Contr61er I'aplomb de la secheuse. Contr61er I'aplomb tout d'abord transversalement, - Maytag MGDE300VF | Installation Instructions - Page 31
ici, ce qui vous _vitera peut-6tre le co_t d'une visite de service... Fonctionnement de la s cheuse Le s6cheuse ne fonctionne pas Un fusible ou inexistante) : Le tambour tourne mais il y a peut-etre un probleme au niveau de I'alimentation electrique du domicile empechant I'element chauffant de la - Maytag MGDE300VF | Installation Instructions - Page 32
s_cheuse. Placer la s_cheuse au moins 460 ram (18 po) au=dessus du plancher pour une installation darts un garage. Le non=respect de ces instructions peut causer un d_c_s, une e×plosion ou un incendie. La s_cheuse est-elle install_e dans un placard? Les portes du placard doivent comporter des
-
 1
1 -
 2
2 -
 3
3 -
 4
4 -
 5
5 -
 6
6 -
 7
7 -
8
-
9
-
10
-
11
-
12
-
13
-
14
-
15
-
16
-
17
-
18
-
19
-
20
-
21
-
22
-
23
-
24
-
25
-
26
-
27
-
28
-
29
-
30
-
31
-
32
 |
 |
DRYER INSTALLATION INSTRUCTIONS
GAS (U.S_. AND CANADA)
ELECTRIC (CANADA ONLY)
INSTRUCTIONS
D'INSTALLATION DE LA SI_CHEUSE
.&.
GAZ (l_.-U. ET CANADA)
I_LECTRIQUE (CANADA UNIQUEMEN'r)
Para una version de estas
intrucciones
en EspaSol, visite www.Whirlpool.com
TABLE OF CONTENTS
DRYER SAFETY
..............................................................................
2
INSTALLATION
REQUIREMENTS
................................................
4
Tools and Parts
............................................................................
4
Optional
Equipment
.....................................................................
4
Location
Requirements
................................................................
5
ELECTRIC
DRYER POWER
HOOKUP-
CANADA
ONLY
..........
8
Electrical Requirements
...............................................................
8
GAS DRYER POWER
HOOKUP
....................................................
9
Gas Supply Requirements
...........................................................
9
Make Gas Connection
...............................................................
10
Electrical Requirements
.............................................................
10
VENTING
.......................................................................................
11
Venting Requirements
................................................................
11
Plan Vent System
.......................................................................
12
Install Vent System
.....................................................................
13
INSTALL
LEVELING
LEGS
...........................................................
13
CONNECT
VENT
...........................................................................
13
CONNECT
INLET HOSE
(STEAM MODELS)
........................................................................
13
LEVEL DRYER
..............................................................................
14
COMPLETE
INSTALLATION
.......................................................
14
TROUBLESHOOTING
..................................................................
15
TABLE DES MATII_RES
SECURITE
DE LA SECHEUSE
....................................................
17
EXIGENCES
D'INSTALLATION
...................................................
19
Outillage
et
pieces
......................................................................
19
I_quipement
facultatif
.................................................................
19
Exigences d'emplacement
.........................................................
19
RACCORDEMENT
DE L'ALIMENTATION
.A
LA
SECHEUSE
ELECTRIQUE
...........................................................
23
Specifications
electriques
..........................................................
23
RACCORDEMENT
DE L'ALIMENTATION
.A
LA SI_CHEUSE
.A
GAZ
..............................................................
24
Alimentation
en gaz
....................................................................
24
Raccordement
au gaz
................................................................
25
Specifications
electriques
..........................................................
25
E'VACUATION
................................................................................
26
Exigences
concernant
I'evacuation
...........................................
26
Planification
du systeme
d'evacuation
......................................
27
Installation
du systeme
d'evacuation
.........................................
28
INSTALLATION
DES PIEDS DE NIVELLEMENT
........................
29
RACCORDEMENT
DU CONDUIT
D'IeVACUATION
..................
29
RACCORDEMENT
DES TUYAUX
D'ALIMENTATION
(MODF:LES
.&
VAPEUR)
................................................................
29
REGLAGE DE L'APLOMB
DE LA SECHEUSE
...........................
30
ACHEVER
L'INSTALLATION
.......................................................
30
DI:!:PANNAG E
.................................................................................
31
W10255469B
W10259188B
- SP