Maytag MGDE300VF Installation Instructions - Page 4
Installation, Requirements - model
 |
UPC - 883049135786
View all Maytag MGDE300VF manuals
Add to My Manuals
Save this manual to your list of manuals |
Page 4 highlights
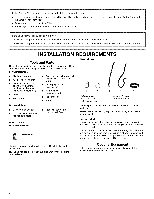
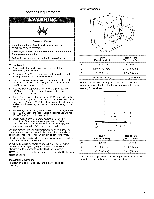
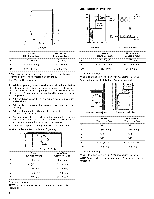
IntheStateof Massachusetthtsef,ollowinignstallatioinnstructionaspply: mInstallatioannsdrepairms usbt eperformebdya qualifieodrlicensecdontractoprl,umbeor,rgasfitteqrualifieodrlicensebdy theStateof Massachusetts. mIfusinga balvl alvei,tshalbl eaT-handlteype. mAflexiblgeasconnectowr,henusedm, ustnotexcee3dfeet. StateofCalifornPiaropositio6n5Warnings: WARNINGTh: isproducctontainaschemicaklnowtnotheStateofCaliforntiaocausecancer. WARNINGTh: isproducctontainaschemicaklnowtnotheStateofCaliforntiaocausebirthdefectosrothereproductihvaerm. INSTALLATION REQUIREMENTS Tools and Parts Gather the required tools and parts before starting installation. Read and follow the instructions provided with any tools listed here. For All Installations: Flat-blade screwdriver #2 Phillips screwdriver Adjustable wrench that opens to 1" (25 ram) or hex-head socket wrench (for adjusting dryer feet) • Level • Vent clamps • Caulking gun and compound (for installing new exhaust vent) • Tin snips (newvent installations) • 1_" nut driver (recommended) • Tape measure • Pliers Gas Installations: • 8" or 10" pipe wrench • Pipe-joint compound • 8" or 10" adjustable wrench resistant to LP gas (for gas connections) Parts supplied Non-Steam Models 4 Leveling legs Steam Models A B C D E A. Levelinglegs (4) g. "Y" connector C. Short inlet hose D. Long inlet hose E. Rubber washer Remove parts package from dryer drum. Check that all parts are included. NOTE: Do not use leveling legs supplied with dryer if installing on a pedestal. Parts needed Check local codes. Check existing electrical supply and venting. See "Electrical Requirements" and "Venting Requirements" before purchasing parts. Mobile home installations require metal exhaust system hardware available for purchase from the dealer from whom you purchased your dryer. For further information, please refer to the "Assistance or Service" section in your Use and Care Guide. Remove parts package from dryer drum. Check that all parts are included. NOTE: Do not use leveling legs supplied with dryer if installing on a pedestal. Optional Equipment Refer to your Use and Care guide for information about the accessories available for your dryer. 4
-
 1
1 -
 2
2 -
 3
3 -
 4
4 -
 5
5 -
 6
6 -
 7
7 -
 8
8 -
 9
9 -
 10
10 -
11
-
12
-
13
-
14
-
15
-
16
-
17
-
18
-
19
-
20
-
21
-
22
-
23
-
24
-
25
-
26
-
27
-
28
-
29
-
30
-
31
-
32
 |
 |
