Motorola MC3090G Integration Guide
Motorola MC3090G - Win CE 5.0 Core Manual
 |
View all Motorola MC3090G manuals
Add to My Manuals
Save this manual to your list of manuals |
Motorola MC3090G manual content summary:
- Motorola MC3090G | Integration Guide - Page 1
MC3000 Integrator Guide - Motorola MC3090G | Integration Guide - Page 2
- Motorola MC3090G | Integration Guide - Page 3
MC3000 Mobile Computer Integrator Guide 72E-68900-05 Revision A October 2008 - Motorola MC3090G | Integration Guide - Page 4
of Motorola. No right to copy a licensed program in whole or in part is granted, except as permitted under copyright law. The user shall not modify, merge, or incorporate any form or portion of a licensed program with other program material, create a derivative work from a licensed program, or use - Motorola MC3090G | Integration Guide - Page 5
to the original manual are listed below: Change -01 Rev A Date Dec. 2004 Initial Release Description -01 Rev B June 2005 Added Four Slot Ethernet cradle. Appendix A, added Accessory Specifications. -02 Rev A November 2005 Chapter 7, removed WZC, replaced with wireless application description - Motorola MC3090G | Integration Guide - Page 6
iv MC3000 Integrator Guide - Motorola MC3090G | Integration Guide - Page 7
the Mobile Computer ...1-1 Accessories ...1-2 Parts ...1-3 Mobile Computer Startup ...1-6 Install Main Battery ...1-6 Battery Charging ...1-8 Spare Battery Charging ...1-9 Stylus ...1-9 Starting the Mobile Computer ...1-10 Calibration Screen ...1-10 Resetting the Mobile Computer ...1-11 Windows CE - Motorola MC3090G | Integration Guide - Page 8
vi MC3000 Integrator Guide Flash Storage ...1-17 Launching Applications ...1-18 Chapter 2: Accessories Introduction ...2-1 Cradles ...2-1 Spare Battery Chargers ...2-1 Cables ...2-1 SD Card ...2-1 Single Slot Serial/USB Cradle ...2-2 Setup ...2-3 Battery Charging ...2-3 LED Charge Indications ...2-4 - Motorola MC3090G | Integration Guide - Page 9
Up a Connection on the Mobile Computer (Windows Mobile 6.1 2-30 USB Connection Setup ...2-34 Cradle/Cable Setup ...2-36 USB Host Communication Setup ...2-37 Chapter 3: ActiveSync Introduction ...3-1 Installing ActiveSync ...3-1 Mobile Computer Setup ...3-2 Setting Up an ActiveSync Connection on - Motorola MC3090G | Integration Guide - Page 10
Folder ...5-9 Symbol Configuration Manager ...5-9 File Types ...5-9 User Interface ...5-9 File Deployment ...5-11 Enterprise Mobility Developer Kits ...5-12 Chapter 6: Wireless Applications Introduction ...6-1 Signal Strength Icon ...6-2 Turning Off the Radio ...6-3 On Device with Windows CE - Motorola MC3090G | Integration Guide - Page 11
Introduction ...8-1 Maintaining the Mobile Computer ...8-1 Battery Safety Guidelines ...8-1 Troubleshooting ...8-2 Mobile Computer ...8-2 Single Slot Serial/USB Cradle ...8-4 Four Slot Charge Only Cradle ...8-5 Four Slot Ethernet Cradle ...8-6 Four Slot Spare Battery Charger 8-6 UBC Adapter - Motorola MC3090G | Integration Guide - Page 12
x MC3000 Integrator Guide Appendix A: Technical Specifications Mobile Computer and Accessory Technical Specifications A-1 Mobile Computer Pin-Outs ...A-4 Laser Decode Ranges ...A-6 Imager Decode Ranges ...A-8 Appendix B: Internet Explorer Kiosk Mode Introduction ...B-1 Glossary Index - Motorola MC3090G | Integration Guide - Page 13
Guide for Motorola Enterprise Mobility Devices - describes how to use Motorola developed applications. • MC3000 User Guide - describes how to use the MC3000 mobile computer. • MC3000 Integrator Guide - describes how to set up the MC3000 mobile computer and the accessories. • EMDK Help File - Motorola MC3090G | Integration Guide - Page 14
1D laser scanner in rotating turret Windows CE 5.0 Core or Professional or Windows Mobile 6.1 Classic 28, 38, 48 key or 20 key Mechanical Software Versions This guide covers various software configurations and references are made to operating system or software versions for: • Adaptation Kit - Motorola MC3090G | Integration Guide - Page 15
Mobile 6.1 Devices To determine the OEM software version on a Windows Mobile 6.1 device: Tap Start > Settings > System tab > System Information icon > System tab. OEM Software on Windows CE 5.0 Devices To determine the OEM software version on a Windows CE 5.0 device: Tap Start > Settings > Control - Motorola MC3090G | Integration Guide - Page 16
xiv MC3000 Integrator Guide BTExplorer Software To determine the BTExplorer software version on a Windows Mobile 6.1 or Windows CE 5.0 device: Tap BTExplorer icon > Show BTExplorer> File > About. Fusion Software To determine the Fusion software version on a Windows Mobile 6.1 or Windows CE 5.0 - Motorola MC3090G | Integration Guide - Page 17
the Strap/Door Assembly and how to start the mobile computer for the first time. • Chapter 2, Accessories, describes the accessories available including cradles, cables and spare battery chargers. Accessory set up and use is also provided. • Chapter 3, ActiveSync, provides instructions on installing - Motorola MC3090G | Integration Guide - Page 18
xx • Microsoft® Applications for Mobile 6 User Guide, p/n 72E-108299-xx • Enterprise Mobility Developer Kit (EMDK) Help File, p/n 72E-38880-03 • Windows CE Platform SDK for MC3000c50, available at: http://www.motorola.com/enterprisemobility/support • Enterprise Mobility Developer Kit for C (SMDK for - Motorola MC3090G | Integration Guide - Page 19
About This Guide xvii shipment if the approved shipping container is not used. Shipping the units improperly can possibly void the warranty. If you purchased your Enterprise Mobility business product from a Motorola business partner, contact that business partner for support. - Motorola MC3090G | Integration Guide - Page 20
xviii MC3000 Integrator Guide - Motorola MC3090G | Integration Guide - Page 21
shipping container may include: • Standard Battery (lithium-polymer) • Extended Life Battery (lithium-ion) • Cable(s) • Power Supply • Cradles. Inspect the equipment for damage. If any equipment is missing or damaged, contact Motorola Enterprise Mobility Support immediately. See page xvi for contact - Motorola MC3090G | Integration Guide - Page 22
four mobile computers. Four Slot Ethernet Cradle Charges up to four mobile computers and provides Ethernet communications. Four Slot Spare Battery Charger Charges up to four mobile computer spare batteries. Power Supply Country specific and accessory specific, power supply. USB Client Charge - Motorola MC3090G | Integration Guide - Page 23
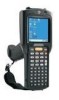
Parts There are three versions of the MC3000 mobile computers, the MC3000 1D/2D Imager (MC3000S or MC3090S), the MC3000 Laser with Rotating Scan Turret (MC3000R Microphone (optional) Power MC3000R MC3000S Figure 1-1 MC3000 Imager (MC3000S) and MC3000 Laser (MC3000R) Mobile Computers (front view - Motorola MC3090G | Integration Guide - Page 24
Window Headset Jack (optional) Headset Jack (optional) Scan Window Strap/Door Assembly Screws Strap/Door Assembly Stylus Stylus Holder Latches MC3000S MC3000R Figure 1-2 MC3000 Imager (MC3000S) and MC3000 Laser (MC3000R) Mobile Computers (back view) Rotating Scan Turret The MC3000R mobile - Motorola MC3090G | Integration Guide - Page 25
Beeper Display Scan LED Indicator (red/green) Trigger Getting Started 1 - 5 Scan LED Indicators (red/green) Charge LED Indicator (amber) Indicator LED Bar Scan Button Keypad Power Figure 1-4 MC3090G Mobile Computer - Motorola MC3090G | Integration Guide - Page 26
1 - 6 MC3000 Integrator Guide Mobile Computer Startup To start using the mobile computer: • Install the main battery. • Charge the main battery and the backup battery. • Start the mobile computer. Install Main Battery If the main battery is charged, the mobile computer can be used immediately. If - Motorola MC3090G | Integration Guide - Page 27
Latches Strap/Door Assembly Hand Strap Getting Started 1 - 7 Battery Clip Battery Battery Slot Figure 1-5 Main Battery Installation Latches 1 Hand Strap 2 0.5 in. (12.7 mm) Battery Strap/Door Assembly 5 Figure 1-6 Main Battery Installation (MC3090G) 3 Strap/Door Assembly - Motorola MC3090G | Integration Guide - Page 28
Spare Battery Chargers (and a power supply): • Single Slot Serial/USB Cradle • Four Slot Spare Battery Charger • Universal Battery Charger (UBC) Adapter. To charge the mobile computer using the cradles: 1. Insert the mobile computer into a cradle. See Chapter 2, Accessories for accessory information - Motorola MC3090G | Integration Guide - Page 29
in the mobile computer, the amber LED flashes once if the battery power is low or the battery is not fully inserted. Spare Battery Charging There are three accessories that can be used to charge a spare battery: • Single Slot Serial/USB Cradle • Four Slot Spare Battery Charger • UBC Adapter - Motorola MC3090G | Integration Guide - Page 30
settings launch the Demo window. Application specific shells may provide application specific windows instead of the Demo window. These screens also appear when a cold boot is performed. If the mobile computer does not power on, see Resetting the Mobile Computer on page 1-11. Calibration Screen Use - Motorola MC3090G | Integration Guide - Page 31
on a warm or cold boot) the Demo window appears. These sample/demo applications are intended to be used by application developers as application development examples. These applications were not developed to support end users. Refer to the Application Guide for Motorola Enterprise Mobility Devices - Motorola MC3090G | Integration Guide - Page 32
1 - 12 MC3000 Integrator Guide Performing a Cold Boot A cold boot restarts the mobile computer and erases all user stored records and entries from RAM. Never perform a cold boot unless a warm boot does not solve the problem. CAUTION Cold boot resets the mobile computer, to the default settings. All - Motorola MC3090G | Integration Guide - Page 33
by Control Panel time-out settings. These settings are configurable and the factory default settings are shown in Table 1-3. Table 1-3 Wakeup Default Settings Condition for Wakeup Power Button Automatic Time-out AC power is applied. No Yes Mobile computer is inserted into a cradle. No - Motorola MC3090G | Integration Guide - Page 34
14 MC3000 Integrator Guide Latches Strap/Door Assembly Hand Strap Battery Battery Clip Figure 1-10 Main Battery Removal (MC3000S/R) Latches 1 Strap/Door Assembly 2 3 0.5 in. (12.7 mm) Battery Pull Tab 4 4 Battery with Pull Tab Battery without Pull Tab Figure 1-11 Main Battery Removal - Motorola MC3090G | Integration Guide - Page 35
versions of this assembly, one for the Standard Battery and one for the Extended Life Battery. Before removing the Strap/Door Assembly, press the red Power button to turn off the screen and set the mobile computer to suspend mode. To remove the Strap/Door Assembly: 1. Rotate the latches to the open - Motorola MC3090G | Integration Guide - Page 36
1 - 16 MC3000 Integrator Guide Strap/Door Assembly Removal and Replacement (MC3090G) The Strap/Door Assembly consists of a hand strap and the battery door. Before removing the Strap/Door Assembly, press the red Power button to turn off the screen and set the mobile computer to suspend mode. To - Motorola MC3090G | Integration Guide - Page 37
file folders. The pre-installed folders are in flash file system memory and optional removable storage devices (SD storage cards). Figure 1-14 Mobile Computer Directory Structure • Application and Platform folders are located in flash file system memory. • The Windows, Program Files, profiles, and - Motorola MC3090G | Integration Guide - Page 38
1 - 18 MC3000 Integrator Guide Launching Applications The Application/Startup folder is used to launch programs automatically when the mobile computer is powered on or after a warm or cold boot. NOTE The Windows/Startup folder is not supported. There are two ways to launch programs automatically: 1. - Motorola MC3090G | Integration Guide - Page 39
The MC3000 accessories provide a variety of product support capabilities. Accessories include cradles, cables, spare battery chargers and SD cards. Cradles • Single Slot Serial/USB cradle charges the mobile computer main battery and/or a spare battery. It also synchronizes the mobile computer with - Motorola MC3090G | Integration Guide - Page 40
set up and use the Single Slot Serial/USB cradle. For cradle setup, see Figure 2-2. For communications setup procedures, see USB Connection Setup on page 2-34 and/or Serial Communication Setup on page 2-30. The Single Slot Serial/USB cradle: • Provides 5.4VDC power for operating the mobile computer - Motorola MC3090G | Integration Guide - Page 41
2-1 Single Slot Serial/USB Cradle Setup Power Supply Battery Charging The Single Slot Serial/USB cradle can charge the mobile computer main battery and a spare battery simultaneously. To charge the mobile computer: 1. Connect the Single Slot Serial/USB cradle to a Motorola approved power source - Motorola MC3090G | Integration Guide - Page 42
2 - 4 MC3000 Integrator Guide Scan/Charge Indicator LED Bar USB Port Serial Port Charge LED Indicator (amber) Mobile Computer Slot Spare Battery Charging LED Spare Battery Spare Battery Charging Slot Battery Clip Power Port Figure 2-2 Single Slot Serial/USB Cradle 3. When charging is complete, - Motorola MC3090G | Integration Guide - Page 43
To connect the Single Slot Serial/USB cradle to a serial or USB device: 1. Connect Single Slot Serial/USB cradle cable to the communications port. 2. Slide the mobile computer into the mobile computer slot. The amber Charge LED Indicator indicates the mobile computer battery charging status and - Motorola MC3090G | Integration Guide - Page 44
the battery. • Simultaneously charges up to four mobile computers. CAUTION Use only a Motorola approved power supply output rated 12 VDC and minimum 9 A. Use of an alternative power supply will void the product warranty and may cause product damage. See the MC3000 User Guide for the power supply - Motorola MC3090G | Integration Guide - Page 45
Accessories 2 - 7 Charge LED Indicator (amber) Scan/Charge Indicator LED Bar Mobile Computer Slot Power LED Figure 2-4 Four Slot Charge Only Cradle 3. The mobile computer amber Charge LED Indicator indicates the mobile computer battery charging status. The Standard Battery usually charges in less - Motorola MC3090G | Integration Guide - Page 46
a host computer, use the SIngle Slot Serial/USB cradle. CAUTION Use only a Motorola approved power supply output rated 12 VDC and minimum 9 A. Use of an alternative power supply will void the product warranty and may cause product damage. See the MC3000 User Guide for the power supply regulatory - Motorola MC3090G | Integration Guide - Page 47
Accessories 2 - 9 Double-tap the LAN icon to open the LANNDS1 window. This window display the TCP/IP information for the mobile computer. LAN Icon Figure 2-6 LANNDS1 Window Ethernet Cradle Drivers (Windows Mobile 6.1) The MC3000 includes Ethernet cradle drivers that initiate automatically when you - Motorola MC3090G | Integration Guide - Page 48
2 - 10 MC3000 Integrator Guide • Use server-assigned IP address or • Use specific IP address. Enter the IP mobile computer into a slot to begin charging and initiate communication. Charge LED Indicator (amber) Scan/Charge Indicator LED Bar Mobile Computer Slot Figure 2-10 Four Slot Ethernet Cradle - Motorola MC3090G | Integration Guide - Page 49
Accessories 2 - 11 LED Charge Indications The charge LED shows the status of the battery charging in the mobile computer. The Standard Battery usually charges in less than four hours and the Extended Life Battery usually charges in less than six hours. See Table 2-1 on page 2-5 for charging status - Motorola MC3090G | Integration Guide - Page 50
2 - 12 MC3000 Integrator Guide Table 2-2 shows allocated bandwidth (based on 100 Mbps) for the number of daisychained cradles, with each mobile computer attempting transmission at the maximum data rate. Table 2-2 Daisychaining Bandwidth Daisychained Ethernet Cradles Bandwidth Allocation For Each - Motorola MC3090G | Integration Guide - Page 51
Accessories 2 - 13 Wall Mount Bracket Use the optional Wall Mount Bracket to mount a four slot cradle directly to a wall. To attach the Wall Mount Bracket: 1. Use the Wall Mount Bracket as a template and mark the locations of the four mounting screws. NOTE Use fasteners appropriate for the type of - Motorola MC3090G | Integration Guide - Page 52
with the mounting slots in the back of the four slot cradle. Slip the two mounting tabs into mounting slots. 3. Swing the four slot cradle down onto the mounting bracket and align the mounting screws so that they fit into the screw slots. Wall Mount Bracket Screw Slots Power Supply Well Figure 2-14 - Motorola MC3090G | Integration Guide - Page 53
Accessories 2 - 15 Figure 2-15 Mounting Screws 5. Connect the power (see Figure 2-3 on page 2-6). The power supply should be located in the power supply well. - Motorola MC3090G | Integration Guide - Page 54
. See the MC3000 User Guide for the power supply regulatory compliance statement. Setup Connect the Four Slot Spare Battery Charger to a Motorola approved power source. Power Port DC Cable AC Cord Figure 2-16 Four Slot Spare Battery Charger Setup Power Supply Spare Battery Charging To charge - Motorola MC3090G | Integration Guide - Page 55
Accessories 2 - 17 Power Supply Spare Battery Charging Slot Spare Battery Charging LEDs (4) 2 1 Battery Clip Spare Batteries Figure 2-17 Four Slot Spare Battery Charger 3. Gently press down on the battery to ensure proper contact. The Standard Battery usually charges in less than four hours and - Motorola MC3090G | Integration Guide - Page 56
cable. Figure 2-18 Cables (MC3000 Connector) The MC3000 Communication/Charge cables: • Provide the mobile computer with operating and charging power when used with the Motorola approved power supply. • Synchronize information between the mobile computer and a host computer. With customized or third - Motorola MC3090G | Integration Guide - Page 57
can charge the mobile computer battery and supply operating power. To charge the mobile computer battery: 1. Connect the MC3000 Communication/Charge cable power input connector to the Motorola approved power source. 2. Attach the bottom of the mobile computer to the MC3000 connector and gently - Motorola MC3090G | Integration Guide - Page 58
, p/n 70-33188-xx. CAUTION Use only a Motorola approved power supply output rated 15 VDC and minimum 1.5 A. Use of an alternative power supply will void the product warranty and may cause product damage. See the MC3000 User Guide for the power supply regulatory compliance statement. Setup Connect - Motorola MC3090G | Integration Guide - Page 59
Battery Clip 2 1 Battery Accessories 2 - 21 UBC Adapter Spare Battery Charging Slot Figure 2-21 UBC Adapter Battery Insertion 3. Gently press down on the battery to ensure proper contact. The Standard Battery usually charges in less than four hours and the Extended Life Battery usually charges - Motorola MC3090G | Integration Guide - Page 60
Flashing-Yellow The battery was deeply discharged and is being trickle charged to bring the voltage up to the operating level. After operating level voltage is achieved, the battery charges normally. FAULT Yellow Charging error, check placement of mobile computer/spare battery. CHARGING Yellow - Motorola MC3090G | Integration Guide - Page 61
operator is properly grounded. Do not use the SD card slot for any other accessories. NOTE Select SD cards with environmental and/or the write cycle performance specifications that meet or exceed the application requirements. 2GB SD Memory Cards are supported on MC3000 with OEM Version 05.26.0000 - Motorola MC3090G | Integration Guide - Page 62
SD card can be used to store files or programs used by the mobile computer. Files may be copied using an available file browser, or using ActiveSync. InkWiz is a provided tool that is being used as an example of how to access data on the SD card. 1. From the Series 3000 Demo window, double-tap the - Motorola MC3090G | Integration Guide - Page 63
Card partition now shows that the MSIMGSIZ.DAT file is not in the Storage Card partition. Figure 2-27 InkWiz, Delete File Format an SD Card Use the Storage Manager to format the SD card. 1. Tap Start > Settings > Control Panel to access the Windows Control Panel. - Motorola MC3090G | Integration Guide - Page 64
28 Windows Control Panel 2. Double tap the Storage Manager icon to access the Storage Properties Window. CAUTION Do not select any other partitions for formatting. The DSK3: SD/MMC Card selection is the only entry that can be formatted. Formatting the other partitions may render the mobile computer - Motorola MC3090G | Integration Guide - Page 65
that the partition is dismounted. 9. Tap Properties, the Partition Properties window appears. Figure 2-32 Partition Properties 10. Tap Format, the Format window appears. Figure 2-33 Format Windows 11. The default settings for the Format window are to perform a Quick Format. To perform a full format - Motorola MC3090G | Integration Guide - Page 66
2 - 28 MC3000 Integrator Guide Figure 2-34 Format Confirmation Window 13. Tap Yes, the Format in progress window appears. Figure 2-35 Format In Progress Window 14. The Format in progress window completion bar indicates the status of the format. When the format is complete the Format complete window - Motorola MC3090G | Integration Guide - Page 67
Figure 2-38 Storage Properties Window 17. Tap OK, to exit the Storage Manager. Accessories 2 - 29 - Motorola MC3090G | Integration Guide - Page 68
appropriate accessory and software, the mobile computer can establish a serial connection or a USB connection. For a serial or USB connection, use one of the following: • Single Slot Serial/USB cradle • MC3000 Communication/Charge cables. Installing Serial/USB Communication Software To successfully - Motorola MC3090G | Integration Guide - Page 69
from the drop-down list. The default connection for synchronization is USB. 5. Tap ok to exit the Connections window. 6. Ensure that ActiveSync is installed on the host computer and a partnership was created. 7. Select Start > Programs > Microsoft ActiveSync on the host computer, if it is not - Motorola MC3090G | Integration Guide - Page 70
port. It cannot share a port with any other device. Refer to the host computer user manual supplied to locate the USB ports. 12. Connect the mobile computer to the accessory being used for communication. 13. Power on the mobile computer. 14. If a partnership was already created between the host - Motorola MC3090G | Integration Guide - Page 71
from the drop-down list. Figure 2-44 Change Connection Window 4. Tap OK to exit the Change Connection window and tap OK to exit the PC Connection Properties window. 5. Ensure that ActiveSync was installed on the host computer and a partnership was created. See Setting Up an ActiveSync Connection - Motorola MC3090G | Integration Guide - Page 72
USB communication setup is used to set up to communicate between the host and the mobile computer using either a Single Slot Serial/USB cradle or using one of the serial MC3000 Communication/Charge cables. NOTE For serial communication using the Single Slot Serial/USB cradle, connect only the USB - Motorola MC3090G | Integration Guide - Page 73
drop-down list. Accessories 2 - 35 Figure 2-48 Change Connection Window 4. Tap OK to exit the Change Connection window and tap OK to exit the PC Connection Properties window. 5. Ensure that ActiveSync was installed on the host computer and a partnership was created. See Setting Up an ActiveSync - Motorola MC3090G | Integration Guide - Page 74
. Refer to the computer user manual supplied to locate the USB(s). 12. Upon connection, synchronization occurs automatically. Cradle/Cable Setup To use ActiveSync with a cradle or a MC3000 Communication/Charge cable, see Setting Up a Serial Connection on the Mobile Computer (Windows CE 5.0) on page - Motorola MC3090G | Integration Guide - Page 75
Accessories 2 - 37 USB Host Communication Setup NOTE USB Host mode is only available on Windows Mobile 6.1 devices. The mobile computer can be configured as a USB host device for use with USB client devices. To configure the mobile computer as a USB host: 1. Tap Start > Settings > System > USBConfig - Motorola MC3090G | Integration Guide - Page 76
2 - 38 MC3000 Integrator Guide - Motorola MC3090G | Integration Guide - Page 77
set to synchronize continually while the mobile computer is connected to the host computer, or set to only synchronize on command. • Selects the types of information to synchronize and control how much data is synchronized. Installing ActiveSync To install ActiveSync on the host computer, download - Motorola MC3090G | Integration Guide - Page 78
3 - 2 MC3000 Integrator Guide Mobile Computer Setup NOTE Microsoft recommends installing ActiveSync on the host computer before connecting the mobile computer. The mobile computer can be set up to communicate either with a serial connection or a USB connection. Chapter 2, Accessories provides the - Motorola MC3090G | Integration Guide - Page 79
-down list. 4. Tap OK to exit the Connections window and tap OK to exit the ActiveSync window. 5. Proceed with installing ActiveSync on the host computer and setting up a partnership. Setting Up an ActiveSync Connection on the Host Computer To start ActiveSync: 1. Select Start > Programs > Microsoft - Motorola MC3090G | Integration Guide - Page 80
- 4 MC3000 Integrator Guide Setting up a Partnership with a Windows CE 5.0 Device To set up a partnership with a Windows CE 5.0 device: 1. If the Get Connected window does not appear on the host computer, select Start > All Programs > Microsoft ActiveSync. Figure 3-5 New Partnership Window 2. Select - Motorola MC3090G | Integration Guide - Page 81
. To retain partnerships after a cold boot, capture partnership registry information in a .reg file and save it in the Flash File System, detailed information is provided in the EMDK Windows CE Help File for Motorola Mobile Computers. For more information about using ActiveSync, start ActiveSync on - Motorola MC3090G | Integration Guide - Page 82
3 - 6 MC3000 Integrator Guide Synchronization with a Windows Mobile 6.1 Device NOTE When a mobile computer with Windows Mobile 6.1 is connected to a host computer and an ActiveSync connection is made, the WLAN and WWAN radios (if applicable) are disabled. This is a Microsoft security feature to - Motorola MC3090G | Integration Guide - Page 83
ActiveSync 3 - 7 Figure 3-11 Synchronization Option Window 5. Select the appropriate settings and click Next. Figure 3-12 Wizard Complete Window 6. Click Finish. - Motorola MC3090G | Integration Guide - Page 84
disconnect from the host computer. NOTE The first ActiveSync operation must be performed with a local, direct connection. Windows Mobile retains partnerships information after a cold boot. For more information about using ActiveSync, start ActiveSync on the host computer, then see ActiveSync Help. - Motorola MC3090G | Integration Guide - Page 85
Deployment for Windows CE 5.0 Software Installation on Development PC To develop applications to run on the mobile computer, use one or both of the following: • Enterprise Mobility Developer Kit (EMDK) for C • Platform Software Developer Kit (Platform SDK) for MC3000 • Device Configuration - Motorola MC3090G | Integration Guide - Page 86
for the mobile computer. \Program Files\Symbol\TCM2 Tools (Keyboard Used in developing applications for \Program Files\Symbol Device Configurations remap, if any) the mobile computer. package\MC3000\v1.0\Tools\kbtool Note: Directory locations may vary depending upon software versions. - Motorola MC3090G | Integration Guide - Page 87
www.motorola.com/enterprisemobility/support. a. Select Mobile Computers. The Mobile Computer Products page displays. b. Select MC3000. The MC3000 Product page displays. c. On the MC3000 Product page, select the appropriate Enterprise Mobility Developer Kit for C from the Software Downloads section - Motorola MC3090G | Integration Guide - Page 88
v4.0 are installed on the development computer, ensure Microsoft Visual C++ v4.0 launches. Table 4-2 lists the EMDK for C components. Table 4-2 EMDK for C Components and Locations Components Directory Location EMDK (API) Help file and Readme file \Program Files\Symbol Mobility Developer Kit vx - Motorola MC3090G | Integration Guide - Page 89
ActiveSync is installed on the host computer and that a partnership was created. For more information see, Chapter 3, ActiveSync. 2. Connect the mobile computer to the host computer using a Single Slot Serial/USB cradle or an appropriate cable. See, Chapter 2, Accessories for connection information - Motorola MC3090G | Integration Guide - Page 90
4 - 6 MC3000 Integrator Guide Figure 4-1 ActiveSync Connected Window 4. Select Explore. Figure 4-2 ActiveSync Explorer 5. Double-click the folder to expand the folder contents. Figure 4-3 Application Folder Contents - Motorola MC3090G | Integration Guide - Page 91
to ActiveSync Help. 6. When installation is complete, tap Start > Programs on the mobile computer, then tap the program icon. Adding a Program from the Internet 1. Download the program to the mobile computer from the Internet using Internet Explorer. 2. Read any installation instructions, Read Me - Motorola MC3090G | Integration Guide - Page 92
added and deleted from the script window. The DCP includes scripts used by Motorola to build the standard factory installed Platform and Application partitions provided on the mobile computer. The standard Platform partition contains drivers while the Application partition contains demo applications - Motorola MC3090G | Integration Guide - Page 93
Deployment for WinCE 5.0 4 - 9 Figure 4-4 TCM Script 1 Window Table 4-3 lists the TCM window components. Table 4-3 TCM Components Icon Component Script Window Function Displays the files to be used in the creation of the partition(s). File Explorer Window Used to select the files to be added - Motorola MC3090G | Integration Guide - Page 94
hex files. Check button Check the script for errors (files not found). Send button Download the hex image to the mobile computer. Tile button Arrange the sub-windows in a tiled orientation. Build and Send button Build the current script into a set of hex images and send the hex images to the - Motorola MC3090G | Integration Guide - Page 95
Deployment for WinCE 5.0 4 - 11 Figure 4-5 Script Properties Window - Partition Data Tab 3. In the Terminal drop-down list, the MC3000C42a v1.0 or MC3000C42b v1.0 entry is already selected. 4. Use the default Flash Type. 5. In the Disks drop-down list, select the number of disk partitions to create - Motorola MC3090G | Integration Guide - Page 96
12 MC3000 Integrator Guide Creating the Script for the Hex Image On start-up, TCM displays the TCM window with the Script1 window and File Explorer window pointing to the following directory: \Program Files\Symbol Device Configuration Packages\MC3000C42a\v0.1\TCMScripts\ \Program Files\Symbol Device - Motorola MC3090G | Integration Guide - Page 97
must be established and external power must be provided, before resetting the mobile computer into IPL. To build an image: 1. Click Build on the TCM toolbar. The Configure Build window appears. Figure 4-8 Configure Build Window 2. Select the items (partitions) to build using the check box(es) to - Motorola MC3090G | Integration Guide - Page 98
Guide 1. For downloads using either a serial or a USB connection, connect the mobile computer to the development computer using the Single Slot Serial/USB cradle or MC3000 Communication/Charge cables. NOTE The cradle or Communication/Charge cable must be connected with the appropriate power - Motorola MC3090G | Integration Guide - Page 99
Select Transport menu, USB or Lighthouse 0 serial selection. System Reset Selecting this item provides a simple method to exit IPL and to cold boot the operating system. Auto Select Selecting this item allows one or more files to be downloaded without having to manually select the destination - Motorola MC3090G | Integration Guide - Page 100
4 - 16 MC3000 Integrator Guide Select Transport USB Lighthouse 0 - Serial Previous Top Figure 4-10 Select Transport Menu 3. Use the up and down scroll keys to select either the Lighthouse 0 - Serial transport method or the USB transport method, then press ENT. 4. If the Lighthouse 0 - Serial - Motorola MC3090G | Integration Guide - Page 101
3. Select the Serial or USB: Symbol Device from the Comm Port drop-down list. 4. For serial connections, select the Baud Rate from the from the Baud Rate drop-down list. 5. Click Download to begin the operation. 6. During download, the Downloading screen on mobile computer displays the Device Status - Motorola MC3090G | Integration Guide - Page 102
4 - 18 MC3000 Integrator Guide Downloading: "Partition Name" via "Device Parameters" Result was: Success! Press any key to continue Figure 4-14 Downloading Complete Screen 1. On completion, press ENT to return to the IPL menu to select the next partition to download. 2. To exit IPL, select the - Motorola MC3090G | Integration Guide - Page 103
sector in In Script Properties window, one of the disks is too small (one sector in size size). This may cause problem while building images, especially downloading images, TCM failed to connect to the mobile computer. Check if the correct flow control protocol is selected and the mobile computer - Motorola MC3090G | Integration Guide - Page 104
; the mobile computer requires servicing. -2 The user cancelled the download. -7 An error occurred opening the source device (either radio card or serial port). Check source device connectivity and retry. -8 An error occurred opening the destination device (either flash ROM or Power Micro - Motorola MC3090G | Integration Guide - Page 105
is invalid. Only Symbol HEX files are supported by IPL. Creating a Splash Screen The source bitmap files used to create the default splash screens for the mobile computer are supplied with the DCP for MC3000 These files can be modified using any of the standard windows image editors, allowing - Motorola MC3090G | Integration Guide - Page 106
in the Windows CE file system and are as follows: • Platform: The Platform FFS partition contains Motorola-supplied programs and Dynamic Link Libraries (DLLs). This FFS is configured to include DLLs that control system operation. Since these drivers are required for basic mobile computer operation - Motorola MC3090G | Integration Guide - Page 107
during software development. Since these early loading drivers read these keys before RegMerge gets a chance to change them, the mobile computer must be cold booted. The warm boot does not re-initialize the registry and the early loading driver reads the new registry values. Do not use Regmerge - Motorola MC3090G | Integration Guide - Page 108
CE: The complete Windows CE operating system is stored on Flash devices. If necessary, the entire OS image may be downloaded to the mobile computer using files provided by Motorola. The current OS partition on the mobile computer is included as part of the TCM installation package. Any upgrades - Motorola MC3090G | Integration Guide - Page 109
Application Deployment for WinCE 5.0 4 - 25 • A connection from the host computer and the mobile computer (either serial or wireless) • TCM (on development computer) to download the files. Once these requirements are satisfied, the mobile computer can be upgraded by invoking IPL and navigating the - Motorola MC3090G | Integration Guide - Page 110
4 - 26 MC3000 Integrator Guide - Motorola MC3090G | Integration Guide - Page 111
. Application Design Considerations To ensure application compatibility of a 320 x 320 display in Windows Mobile, some applications will need to be recompiled with the Microsoft WM6 SDK. Security The MC3000 implement a set of security policies that determine whether an application is allowed to run - Motorola MC3090G | Integration Guide - Page 112
private key • Provide the corresponding public certificate to end-users so that it can be installed into SPC Certificate Store. Locking Down a Mobile Computer Like most configuration options in Windows Mobile 6.1, security settings are set via XML provisioning. For example, to enforce the "trusted - Motorola MC3090G | Integration Guide - Page 113
parameter in the xml example above. Device Management Security You can control access to certain device settings and security levels, such as installing applications and changing security settings. Refer to the Windows Mobile Version 6 Help file for information on device management security. Remote - Motorola MC3090G | Integration Guide - Page 114
(for updating the operating system). Refer to the Microsoft Windows Mobile 6 Help file for information on CAB files. Installation Using ActiveSync To install an application package: • Connect the MC3000 to a host computer using ActiveSync. See Chapter 3, ActiveSync for more information. • Locate the - Motorola MC3090G | Integration Guide - Page 115
Central web site, http://www.motorola.com/enterprisemobility/support. 2. Download the appropriate update package. 3. Copy the update package to the \temp directory on the MC3000. 4. Connect the MC3000 to AC power. See Chapter 2, Accessories. 5. Simultaneously press the Power button and the 1 and - Motorola MC3090G | Integration Guide - Page 116
with Pocket PC. 3. Optionally, use the Authenticode tools to sign the .cpf file. 4. Tap the filename to install. 5. Certain applications and settings require a cold boot to take affect. In these cases, cold boot the MC3000. Refer to the Windows Mobile Version 6 Help file for more information. - Motorola MC3090G | Integration Guide - Page 117
Windows Mobile 6.1, Motorola used two drivers (RegMerge and CopyFiles) to update the registry and to copy files during a cold boot. With Mobile 6.1, Motorola recommends using XML provisioning instead. RegMerge and CopyFiles are supported for backward compatibility but Motorola may eliminate support - Motorola MC3090G | Integration Guide - Page 118
Memory Executing programs use RAM to store data. Data stored in RAM is lost upon a warm boot. RAM also included a volatile file storage area called Cache Disk. Volatile File Storage (Cache Disk) Windows Mobile 6.1 memory architecture uses persistent storage for all files, registry settings, and - Motorola MC3090G | Integration Guide - Page 119
a cold boot. The Application folder is approximately 20 MB (formatted). Symbol Configuration Manager Symbol Configuration Manager (SCM) is a utility that runs on the development computer and is used to create configuration files. These files, when deployed to an MC3000, set configuration parameters - Motorola MC3090G | Integration Guide - Page 120
5 - 10 MC3000 Integrator Guide Figure 5-1 Main SCM Window Menu Functions Use the main menu to access the program functionality described in Table 5-1. Table 5-1 SCM Menu Functions Menu Item Description File Menu Open Config File Open a saved configuration file (.SCD). Save Config Changes - Motorola MC3090G | Integration Guide - Page 121
, use the Authenticode tools to sign the .cpf file. 2. Make the .cpf file read-only, then copy it to the MC3000. 3. Tap the filename to install. 4. Certain applications and settings require a cold boot to take affect. In these cases, cold boot the MC3000. Refer to the Windows Mobile Version 6 Help - Motorola MC3090G | Integration Guide - Page 122
Mobility Developer Kits The Motorola Enterprise Mobility Developer Kit (EMDK) family of products allows you to write applications that take advantage of the capture, move and manage capabilities of the MC3000. Go to the Support Central (http://www.motorola.com/enterprisemobility/support) to download - Motorola MC3090G | Integration Guide - Page 123
Go to http://www.motorola.com/enterprisemobility/manuals for the latest user guide. Wireless LANs allow mobile computers to communicate wirelessly and to send captured data to a host device in real time. Before a mobile computer can be used on a Spectrum24 WLAN, the facility must be set up with the - Motorola MC3090G | Integration Guide - Page 124
6 - 2 MC3000 Integrator Guide Signal Strength Icon Figure 6-1 Wireless Applications Menu Signal Strength Icon The Signal Strength icon in the task tray indicates the mobile computer's wireless signal strength as follows: Table 6-1 Wireless Applications Icons, Signal Strength Descriptions Icon - Motorola MC3090G | Integration Guide - Page 125
: displays. 3. Select WLP1:. WLP1: displays in the text box at the top of the window. 4. In the drop-down list box, select D4. 5. Tap Set. To turn on the radio: 1. Tap Start > Settings > Control Panel > Power icon > PwrDevices tab. 2. In the text box, scroll down until WLP1: displays. 3. Select WLP1 - Motorola MC3090G | Integration Guide - Page 126
6 - 4 MC3000 Integrator Guide On Device with Windows Mobile 6.1 Windows Mobile 6.1 devices include Wireless Manager, which provides a simple method of enabling, disabling the WLAN radio. To open Wireless Manager, tap the Connectivity icon. Figure 6-4 Opening Wireless Manager Select Wireless Manager. - Motorola MC3090G | Integration Guide - Page 127
Wireless Applications 6 - 5 Find WLANs Application Use the Find WLANs application to discover available networks in the vicinity of the user and mobile computer. To open the Find WLANs application, tap the Signal Strength icon > Find WLANs. The Find WLANs window displays. Figure 6-6 Find WLAN - Motorola MC3090G | Integration Guide - Page 128
, a notification box appears asking the user to confirm the quit. Tap No to return to the wizard or tap Yes to quit and return to the Manage Profiles window. Profile ID The Profile ID dialog box is the first dialog box in the Profile Editor Wizard. Use the Profile ID dialog box to - Motorola MC3090G | Integration Guide - Page 129
) identifier of the network connection. Use the Name: field to enter a user friendly name of the mobile computer profile used to connect to either an AP or another networked computer. Example: The Public LAN. ESSID The ESSID is the 802.11 extended service set identifier. The ESSID is 32-character - Motorola MC3090G | Integration Guide - Page 130
802.11d option is selected, the Options > Regulatory > Country setting is not used. For a single profile that can be used in multiple countries, with infrastructure that supports 802.11d (including Symbol infrastructure), set the Profile Country to Allow Any Country. Under Options > Regulatory - Motorola MC3090G | Integration Guide - Page 131
Wireless Applications 6 - 9 Ad-Hoc Use the Ad-Hoc dialog box to select the necessary information to control Ad-Hoc mode. This dialog box does not display if Infrastructure mode is selected. To select Ad-Hoc mode: 1. Select a channel number from the Channel drop-down list. Table 6-6 Ad-Hoc - Motorola MC3090G | Integration Guide - Page 132
to enable PEAP authentication. This method uses a digital certificate to verify and authenticate a user's identity. LEAP Select this option to enable LEAP authentication. LEAP is founded on mutual authentication. The AP and the mobile computer attempting to connect to it require authentication - Motorola MC3090G | Integration Guide - Page 133
network (VPN) connections. With Windows XP SP1, Windows XP SP2, Windows Server 2003, and Windows 2000 SP4, MS CHAP v2 is also an EAP type. TLS EAP TLS is used during the phase 2 of the authentication process. This method uses a user certificate to authenticate. Table 6-9 lists the TTLS tunneled - Motorola MC3090G | Integration Guide - Page 134
as CHAP, since it works only to establish the initial link. PAP is also more vulnerable to attack because it sends authentication packets throughout the network. Nevertheless, PAP is more commonly used than CHAP to log in to a remote host like an Internet service provider. MD5 Message Digest - Motorola MC3090G | Integration Guide - Page 135
. 4. Tap ok to exit. After the installation is compete, the Installed User Certs dialog box displays and the certificate is available in the drop-down list for selection. NOTE In order to successfully install a user certificate, the mobile computer must already be connected to a network from - Motorola MC3090G | Integration Guide - Page 136
. The network credentials prompts can be set to appear; at connection, on each resume, or at a specified time. An administrator can enter the credentials directly into the profile which permanently caches the credentials. In this case, user login to the mobile computer is not required. If a profile - Motorola MC3090G | Integration Guide - Page 137
Wireless Applications 6 - 15 Figure 6-17 Prompt for Login at Dialog Box If mobile computer does not have the credentials, the user is prompted to enter a username and password. If the mobile computer has the credentials (previous entered via a login dialog box), it uses these credentials unless the - Motorola MC3090G | Integration Guide - Page 138
6 - 16 MC3000 Integrator Guide Figure 6-18 Time Cache Options Dialog Box 1. Tap the Interval radio button to check credentials at a set time interval. 2. Enter the value in minutes, in the Min box. 3. Tap Next to continue. 4. Tap the At (hh:mm) radio button to check credentials at a set time. 5. Tap - Motorola MC3090G | Integration Guide - Page 139
on page 6-18 for setting the encryption information. Advanced Identity Use the Advanced ID dialog supplied to the authenticator. In TTLS and PEAP, it is recommended that this field not contain a true identity, but instead the identity anonymous, plus any desired realm (e.g. anonymous@myrealm). A user - Motorola MC3090G | Integration Guide - Page 140
6 - 18 MC3000 Integrator Guide Figure 6-22 Advanced Identity Dialog Box Tap Next, the Encryption dialog box displays. Encryption Use the Encryption dialog box to select an encryption type. The Encryption dialog box only allows encryption types that can be used with the currently selected - Motorola MC3090G | Integration Guide - Page 141
list to configure the four WEP keys. The adapter uses the selected key. Note: The default Hex digit keys are visible any time they are used. As a security precaution after setting the key values for the network, the digits are replaced to use Wireless Protected Access (WPA) via TKIP. Manually enter - Motorola MC3090G | Integration Guide - Page 142
6 - 20 MC3000 Integrator Guide Key Entry Page If either 40-Bit WEP or 128-Bit WEP is selected the wizard proceeds to the key entry dialog box unless the Use Passkey check box was selected in the Encryption Dialog Box (see Figure 6-23 on page 6-18). The Key Entry dialog box will be shown - Motorola MC3090G | Integration Guide - Page 143
to manually assign the IP, subnet mask, default gateway, DNS and WINS addresses used by the mobile computer profile. Select either DHCP or Static from the drop-down list and then tap Next. If Static IP is selected, the IP Address Entry dialog box displays. If DHCP is selected, the Transmit Power - Motorola MC3090G | Integration Guide - Page 144
6 - 22 MC3000 Integrator Guide Figure 6-28 Static IP Address Entry Dialog Box Table 6-14 Static IP Address Entry Fields Field Description IP Address The Internet is a collection of networks with users that communicate with each other. Each communication carries the address of the source and - Motorola MC3090G | Integration Guide - Page 145
types. The Transmit Power drop-down list contains different options for each mode. Automatic (i.e. use the current AP settings) and Power Plus (use higher than the current AP settings) are available for Infrastructure mode. Adjusting the Radio Transmission Power level enables the user to expand or - Motorola MC3090G | Integration Guide - Page 146
no radio interference from other devices is anticipated. Tap Next to implement power consumption changes for the mobile computer profile. the Battery Usage dialog box displays. Battery Usage Use the Battery Usage dialog box to select power consumption of the wireless LAN. There are three settings - Motorola MC3090G | Integration Guide - Page 147
network performance. In networks with minimal latency. Max Power Save will perform just as well as Fast Power Save, but with increased battery savings. Manage Profiles Application The Manage Profiles window provides a list of user configured wireless profiles. Up to 32 profiles can be defined at - Motorola MC3090G | Integration Guide - Page 148
parameters available for use in various network environments. When the WLAN Profiles window initially displays, existing profiles appear in the list. Select a profile from the list. Select Connect from the pop-up menu to set that profile as the active profile. Once selected, the mobile computer uses - Motorola MC3090G | Integration Guide - Page 149
Move Up or Move Down from the pop-up to order the profile. If the current profile association is lost, the mobile computer attempts to associate with the first profile in the list and then the next until a new association is achieved. NOTE Profile Roaming must be enabled. Export a Profile To export - Motorola MC3090G | Integration Guide - Page 150
to the mobile computer • Wireless Log - displays a log of important recent activity, such as authentication, association, DHCP renewal completion, in time order • Versions - displays software, firmware and hardware version numbers • Quit - Exits the Wireless Status window. Option windows contain - Motorola MC3090G | Integration Guide - Page 151
, tap the back button to go back to the Wireless Status window. Table 6-20 Signal Strength Status Field Description Signal Quality Displays the Relative Signal Strength Indicator (RSSI) of the signal transmitted between the AP and mobile computer. As long as the Signal Quality icon is green - Motorola MC3090G | Integration Guide - Page 152
, tap Current Profile in the Wireless Status window. The Current Profile window displays. Figure 6-37 Current Profile Window Table 6-21 Current Profile Fields Field Description Profile Name Displays the current profile name that the mobile computer is using to communicate with the AP. ESSID - Motorola MC3090G | Integration Guide - Page 153
setting. Transmit Power Displays the radio transmission power level. IPv4 Status Window The IPv4 Status window displays the current IP address, subnet and other IP related information assigned to the mobile computer. It also allows the address to be renewed if it the profile is currently using - Motorola MC3090G | Integration Guide - Page 154
at the physical layer. Host Name Displays the name of the mobile computer. Wireless Log Window The Wireless Log window displays a log of important recent activity, such as authentication, association, DHCP renewal completion, in time order. Users can choose to save the log to a file or to clear - Motorola MC3090G | Integration Guide - Page 155
of the software components on the list are defined in registry, so that the application can retrieve version information from the executable. "File not found" is displayed if the executable cannot be found at the specified path. To open the Versions window, tap Versions in the Wireless Status window - Motorola MC3090G | Integration Guide - Page 156
in range using the same ESSID as the mobile computer. • Quit - Exits the Wireless Diagnostics window. Option windows contain a back button to return to the main Wireless Diagnostics window. ICMP Ping Window The ICMP Ping window allows a user to test a connection at the network layer (part of the - Motorola MC3090G | Integration Guide - Page 157
a connection at the network layer (part of the IP protocol), between the mobile computer and any place on the network. To open the Trace Route window, tap Trace Route in the Wireless Diagnostics window. The Trace Route window displays. Figure 6-43 Trace Route Window A user can enter an IP address or - Motorola MC3090G | Integration Guide - Page 158
to a new profile • The mobile computer is suspended • The mobile computer resets (warm or cold). Selecting Set Roaming allows the mobile computer to roam to any AP with a better signal. These settings are temporary and never saved to the registry. Tap Refresh to update the list of the APs with the - Motorola MC3090G | Integration Guide - Page 159
disabled, refresh the Available WLAN Networks window to display the Ad Hoc networks available to the mobile computer. Tap Save to save the settings or tap X to discard any changes. Regulatory Options Use the Regulatory settings to configure the country the mobile computer is in. Due to regulatory - Motorola MC3090G | Integration Guide - Page 160
6 - 38 MC3000 Integrator Guide Figure 6-46 Regulatory Options Dialog Box Table 6-24 Regulatory Options Field Description Settings Select the country of use from the drop-down list. In order to connect to a profile, the profile country must match this setting, or the AP country setting if the - Motorola MC3090G | Integration Guide - Page 161
supported with Symbol infrastructure. Enabled by default. Change Password Dialog Box Use the Change Password dialog box to require a password before any profile can be edited. This allows system administrators to pre-configure profiles and not allow a user to change the network settings. The user - Motorola MC3090G | Integration Guide - Page 162
6 - 40 MC3000 Integrator Guide Export Use the Export dialog box to export all profiles to a registry file, and to export the options to a registry file. Each of these export functions prompts the user for a filename that is used as the registry file. The "save" dialog box defaults to the application - Motorola MC3090G | Integration Guide - Page 163
a warm boot or cold boot. Cold Boot Persistence Exporting options and profiles can be used to provide cold boot persistence. If the exported registry files are saved in the Application folder, they are automatically utilized on a cold boot, restoring previous profile and option settings. Currently - Motorola MC3090G | Integration Guide - Page 164
6 - 42 MC3000 Integrator Guide Registry Settings Some of the parameters can be modified through a registry key. The registry path is: HKLM\SOFTWARE\Symbol Technologies, Inc.\Configuration Editor Table 6-27 Registry Parameter Settings Key Type Default Description CertificateDirectory REG_SZ - Motorola MC3090G | Integration Guide - Page 165
Username and Network Password fields are used as credentials for the profile selected in the Wireless Profile field. Currently these fields Off dialog box and the Login dialog box displays. When the user is logged off, the mobile computer only roams to profiles that do not require credentials or to - Motorola MC3090G | Integration Guide - Page 166
6 - 44 MC3000 Integrator Guide - Motorola MC3090G | Integration Guide - Page 167
3.X RD Client version 4.43. For Windows Mobile 6.1 devices: OEM version 01.06.0000 uses MSP 3.X RD Client version 4.66. RD Client Version 1.9.0 The Rapid Deployment (RD) Client version 1.9.0 facilitates software downloads to a mobile computer from a Mobility Services Platform (MSP) Console's FTP - Motorola MC3090G | Integration Guide - Page 168
successfully scanned a bar code. (The Indicator LED bar on the mobile computer turns green and a beep sounds). If there are no bar codes left to scan, the Rapid Deployment Configuring window displays. Bar codes left to scan... Displays a list of any remaining bar codes to scan (1-D bar codes only - Motorola MC3090G | Integration Guide - Page 169
a single or multiple RD bar codes, the data encoded in the bar code can: • Reset the mobile computer's connection profile. A connection profile is a set of Wireless Application parameters that the mobile computer uses to access the wireless network. • Initiate downloads of one or more software - Motorola MC3090G | Integration Guide - Page 170
refer to the Mobility Services Platform 3.X User's Guide. An MSP Administrator uses the MSP Console for the creation of an RD profile that contains all the wireless network and security information (for example, ESSID, WEP Keys, etc.) required to get a mobile computer onto the wireless network. The - Motorola MC3090G | Integration Guide - Page 171
next. NOTE Multi-part linear bar codes (1-D bar codes) can require scanning several bar codes. Bar codes can be scanned in any order. The display indicate the bar code to scan. Figure 7-7 Rapid Deployment Window 4. After all the bar codes are scanned successfully, the mobile computer connects to the - Motorola MC3090G | Integration Guide - Page 172
types of IP connection modes are currently supported for Electronic Staging: ActiveSync Connection Mode This mode uses the IP connection that is established when the mobile computer is directly connected (via a USB cable, serial cable or cradle) to a host computer running ActiveSync. The most common - Motorola MC3090G | Integration Guide - Page 173
on a host computer that is on the same subnet that is accessible from the connection. Well-known WLAN Connection Mode This mode works only on supported Motorola WLAN adapters. The RD Client attempts to configure and establish WLAN IP connections using pre-defined Motorola WLAN settings. If the RD - Motorola MC3090G | Integration Guide - Page 174
7 - 8 MC3000 Integrator Guide 3. Select Search Network. The SEARCHING NETWORKS window appears. On RD Clients version 44.3 and above, select Search Connected Networks or Search Unconnected Networks. The SEARCHING NETWORKS window appears. Figure 7-12 RD Client Searching for On-Demand Profile Server 4. - Motorola MC3090G | Integration Guide - Page 175
Scanning on page 7-4 for detailed information. • View Client Info • Log Menu • Package List • Exit - Closes the RD Client application. Figure 7-14 RD Client Main Menu Client Info Use the Client Info window to view the following information: • RD Client version • Product name • Operating system type - Motorola MC3090G | Integration Guide - Page 176
7 - 10 MC3000 Integrator Guide Tap OK to return to the Main Menu. Log Menu The Log Menu contains the following options: • View Log • View Job Log • Set Log Level • Set Job Log Level. Select Log Menu option. Figure 7-16 Log Menu Window Tap OK to return to the Main Menu. View Log Use the View Log - Motorola MC3090G | Integration Guide - Page 177
Staging and Provisioning 7 - 11 View Job Log Use the View Job Log option to display a list of jobs that have be processed. Select View Job Log option. Figure 7-18 View Job Log Window Tap OK to return to the Log Menu. Set Log Level Use the Set Log Level option to set the level of the information that - Motorola MC3090G | Integration Guide - Page 178
7 - 12 MC3000 Integrator Guide Figure 7-20 Set Job Log Level Window Select a level option. Package List Use the Package List option to display the packages that have been installed on the mobile computer. Select the Package List option. Figure 7-21 Package List Window Tap OK to return to the Main - Motorola MC3090G | Integration Guide - Page 179
Client as a 100% backward compatible replacement for previous versions of AirBEAM Client, when used in Level 2 Agent and Level 3 Agent modes with existing MSP 2.X Appliances. For more detailed information on MSP Agent (Provisioning Client), refer to the MSP 3.X User's Guide (p/n 72E-100158-xx). MSP - Motorola MC3090G | Integration Guide - Page 180
7 - 14 MC3000 Integrator Guide Figure 7-22 MSP Agent Main Menu Monitor Processing Use the Monitor Processing option to view the status of packages being processed. Select the Monitor Processing option. Figure 7-23 Monitor Processing Window Tap OK to return to the Main Menu. Force Check-In Use the - Motorola MC3090G | Integration Guide - Page 181
Provisioning 7 - 15 Figure 7-24 Force Check-in Window Tap OK to return to the Main Menu. Package List Use the Package List option to display the packages that have been installed on the mobile computer. Select the Package List option. Figure 7-25 Package List Window Tap OK to return to the Main Menu - Motorola MC3090G | Integration Guide - Page 182
The Log Menu contains the following options: • View Log • View Job Log • Set Log Level • Set Job Log Level. Select Log Menu option. Figure 7-27 Log Menu Window Tap OK to return to the Main Menu. View Log Use the View Log option to display a list of events that have occurred. Select View Log option. - Motorola MC3090G | Integration Guide - Page 183
Menu. View Job Log Use the View Job Log option to display a list of jobs that have be processed. Select View Job Log option. Figure 7-29 View Job Log Window Press the left function key to return to the Log Menu. Set Log Level Use the Set Log Level option to set the level of the information - Motorola MC3090G | Integration Guide - Page 184
7 - 18 MC3000 Integrator Guide Figure 7-30 Set Log Level Window Select a level option. Set Job Log Level Use the Set Job Log Level option to set the level of the information that appears in the Job log. Figure 7-31 Set Job Log Level Window Select a level option. Hide UI Use the Hide UI option to - Motorola MC3090G | Integration Guide - Page 185
Staging and Provisioning 7 - 19 Figure 7-32 UnHide UI Selection - Motorola MC3090G | Integration Guide - Page 186
Package Builder Product Reference Guide, p/n 72-55769-xx. AirBEAM Smart Client The AirBEAM Smart Client is installed on the mobile computer. It is configured with the server access information, the names of the packages to be downloaded and other controlling parameters. When the AirBEAM Smart - Motorola MC3090G | Integration Guide - Page 187
to the mobile computer using Remote Desktop. See 3. Select Start > Programs > AirBEAM Smart Client. The AirBEAM Smart CE window appears. 4. Select File > Configure. The AirBEAM configuration window appears. Figure 7-33 AirBEAM Configuration Window The configuration window is used to view and - Motorola MC3090G | Integration Guide - Page 188
7 - 22 MC3000 Integrator Guide Packages(2) Tab Use this tab to specify the package name of the last four the Packages(2) tab. Information entered in these fields are case and space sensitive. Server Tab Use this tab to specify the configurations of the server to which the client connects during the - Motorola MC3090G | Integration Guide - Page 189
7-5 Misc(1) Tab Descriptions Field Description Auto-load This drop-down list is used to specify how the AirBEAM Smart Client is to be invoked during the boot sequence. The package synchronization process is started automatically. The Synchronization Dialog box is displayed, but the user is not - Motorola MC3090G | Integration Guide - Page 190
- 24 MC3000 Integrator Guide Table 7-5 . When enabled, the parameter also disables the appending of .apd to the package. This feature is useful for AS/400 systems, the TFTP protocol is to be used to download files. By default, the AirBEAM Smart Client uses the FTP protocol. WNMS This check - Motorola MC3090G | Integration Guide - Page 191
synchronization process fails (-813) if any download files are in-use. Wait Welcome This check box specifies whether the AirBEAM Smart Client waits for the WELCOME windows to be completed before automatically launching the synchronization process after a reset. Close Apps This check box specifies - Motorola MC3090G | Integration Guide - Page 192
the radio network registry initialization files (essid_xxxx_yy.reg). Use DHCP bootfile This check box control specifies whether the AirBEAM Smart Client uses the DHCP response option 67 to specify the Package and Package 1 parameters. If enabled, special RF network registry settings are required - Motorola MC3090G | Integration Guide - Page 193
prompted to warm boot the device to initiate the package downloads. Launch - Updated packages are not automatically downloaded. The user is prompted to start the package download. The user can defer the package download by responding no to the prompt. The MAXNOPRESS registry setting can be used to - Motorola MC3090G | Integration Guide - Page 194
7 - 28 MC3000 Integrator Guide • The Status List displays status messages that setting automatic synchronization, use the Auto-load drop-down list to specify how the AirBEAM Smart Client should be invoked automatically when the client device is rebooted. See Misc(1) Tab on page 7-23 for instructions - Motorola MC3090G | Integration Guide - Page 195
chapter includes instructions on cleaning and storing the mobile computer, and provides troubleshooting solutions for potential problems during mobile computer operation. Maintaining the Mobile Computer For trouble-free service, observe the following tips when using the mobile computer: • Do not - Motorola MC3090G | Integration Guide - Page 196
equipment or battery, contact Motorola Enterprise Mobility support to arrange for inspection. See Service Information on page xvi for contact information. Troubleshooting Mobile Computer Table 8-1 Troubleshooting the Mobile Computer Problem Cause Solution Mobile computer does Main battery not - Motorola MC3090G | Integration Guide - Page 197
or unplugged from host computer during communication. Replace the mobile computer in the cradle, or reattach the cable and re-transmit. Incorrect cable configuration. See Chapter 2, Accessories for cable configurations. Communication software was incorrectly installed or configured. Perform - Motorola MC3090G | Integration Guide - Page 198
set to generate a beep on good decode. Battery is low. Check the battery level. When the battery is low, the mobile computer automatically goes into suspend mode. Single Slot Serial/USB Cradle Table 8-2 Troubleshooting the Single Slot Serial/USB Cradle Problem Cause Solution Mobile computer - Motorola MC3090G | Integration Guide - Page 199
software is not installed or configured properly. Replace mobile computer in cradle and retransmit. See Chapter 2, Accessories for cable configurations. Perform communication setup as described in Communication Setup on page 2-30. Four Slot Charge Only Cradle Table 8-3 Troubleshooting - Motorola MC3090G | Integration Guide - Page 200
Replace mobile computer in cradle and retransmit. cradle during communication. Incorrect cradle setup. See Chapter 2, Accessories for cradle setup. Ethernet connection error. Link LED is not lit (see Link LED on page 2-11). Troubleshoot the Ethernet connection. Four Slot Spare Battery Charger - Motorola MC3090G | Integration Guide - Page 201
Maintenance & Troubleshooting 8 - 7 Table 8-5 Troubleshooting the Four Slot Spare Battery Charger (Continued) Problem Cause Solution Battery not charging. Charger is not receiving Ensure the power cable is connected securely to both the charger power. and to AC power. Battery is not - Motorola MC3090G | Integration Guide - Page 202
8 MC3000 Integrator Guide Cables Table 8-7 Troubleshooting the Cables Problem Cause Solution Mobile computer amber Charge LED Indicator does not light when mobile computer attached. Cable is not receiving power. Mobile computer is not seated correctly in the cable. Ensure the power cable is - Motorola MC3090G | Integration Guide - Page 203
Specifications Mobile Computer and Accessory Technical Specifications Table A-1 summarizes the mobile computer technical specifications and intended operating environments. Table A-2 summarizes the accessory technical specifications and the intended operating environments. Table A-1 Mobile - Motorola MC3090G | Integration Guide - Page 204
A - 2 MC3000 Integrator Guide Table A-1 Mobile Computer Technical Specifications (Continued) Item Description Dimensions MC3000S: 7.43 in L x 3.18 in W x 1.76 in D (188.7 mm L x 80.8 mm W x 44.6 mm D) MC3000R: 8.33 in L x 3.18 in W x 1.57 in D (211.6 mm L x 80.8 mm W x 39.9 mm D) Weights - Motorola MC3090G | Integration Guide - Page 205
Technical Specifications A - 3 Table A-1 Mobile Computer Technical Specifications (Continued) Item Description Accessory Technical Specifications Single Slot Serial/USB Cradle Cables Four Slot Charge Only and Four Slot Ethernet Cradles Four Slot Spare Battery Charger Universal Battery Charger - Motorola MC3090G | Integration Guide - Page 206
A - 4 MC3000 Integrator Guide Table A-2 Accessory Technical Specifications (Continued) Single Slot Serial/USB Cradle Cables Four Slot Charge Only and Four Slot Ethernet Cradles Four Slot Spare Battery Charger Universal Battery Charger (UBC) Adapter Power 12 V, 3.3 A 5.4 V, 3 A 12 V, 9 A 12 - Motorola MC3090G | Integration Guide - Page 207
Technical Specifications A - 5 Table A-3 MC3000 Pin-Outs (Continued) PIN Number Signal Name Function 14 U1_DSR_RS232 RS232 DSR (into mobile computer) 15 VCC5_CAM 5V power to RS232 accessories 16 POWER_JACK_ACC Power into mobile computer. - Motorola MC3090G | Integration Guide - Page 208
provide the decode ranges for barcodes of specified densities. Figure A-2 shows the laser decode ranges and Table A-4 on page A-7 lists the scan ranges for the selected bar code densities. The minimum element width (or "symbol density") is the width in mils of the narrowest element (bar or space - Motorola MC3090G | Integration Guide - Page 209
Specifications A - 7 Table A-4 MC3000R Laser Decode Ranges Symbol Density/ Bar Code Type/W-N Ratio Bar Code Content/ Contrast (Note 1) Ranges Near Far Symbol of the bar code and the scan angle. 3. Working range specifications: Photographic quality symbols, pitch = 10°, skew = 0°, roll = 0°, - Motorola MC3090G | Integration Guide - Page 210
A - 8 MC3000 Integrator Guide Imager Decode Ranges The decode ranges provide the decode distances for barcodes of specified densities. Figure A-3 shows the imager decode ranges and Table A-5 on page A-9 lists the scan ranges for the selected bar code densities. The minimum element width (or "symbol - Motorola MC3090G | Integration Guide - Page 211
Technical Specifications A - 9 Table A-5 MC3000S Imager Decode Ranges Symbol Density/ Bar Code Type/W-N Ratio Bar Code Content upon the width of the bar code and the scan angle. 3. Working range specifications: Photographic quality symbols, pitch = 10°, skew = 0°, roll = 0°, ambient light < - Motorola MC3090G | Integration Guide - Page 212
A - 10 MC3000 Integrator Guide - Motorola MC3090G | Integration Guide - Page 213
Bar Animation Icon Status Bar Task Bar Figure B-1 Internet Explorer Window Configuration is done through the registry settings: HKEY_CURRENT_USER > Software > Microsoft > Internet Explorer > Main. The following registry keys are used to configure Kiosk mode: • URL - hides/displays the Address - Motorola MC3090G | Integration Guide - Page 214
B - 2 MC3000 Integrator Guide • Command Bar - hides/displays the Address, Menu and Button bars. • Status Bar - the application to take the modified registry values. By default, all items listed above are visible. Setting the appropriate registry keys (dword: 1) disable the appropriate feature. The - Motorola MC3090G | Integration Guide - Page 215
Using the Interfaces B - 3 Figure B-3 Internet Explorer with Menu Bar Visible To make only the Address bar visible, set the following: • Command Bar = 1 • Button Bar = 0 • URL = 1 • Menu Bar = 0. Figure B-4 Internet Explorer with Address Bar Visible To make only the Button bar visible, set the - Motorola MC3090G | Integration Guide - Page 216
B - 4 MC3000 Integrator Guide Figure B-5 Internet Explorer with Button Bar Visible The bottom part of the Internet Explorer window contains the Status bar. To hide the Status bar, set the following: • Status = 0. Figure B-6 Internet Explorer with Status Bar Hidden The Taskbar at the bottom of the - Motorola MC3090G | Integration Guide - Page 217
Using the Interfaces B - 5 Internet Explorer Figure B-7 Internet Explorer with Task Bar Hidden To hide both the Status bar and the Taskbar, set the following: • Status Bar = 0. • Task Bar = 0. Figure B-8 Internet Explorer with Status and Task Bar Hidden To hide all, set the following: • Command Bar - Motorola MC3090G | Integration Guide - Page 218
B - 6 MC3000 Integrator Guide Figure B-9 Internet Explorer with All Hidden The Animation icon display in the upper right corner of the window to indicate that Internet Explorer is accessing a web page. To hide the icon, set the following: • Animation = 1 - Motorola MC3090G | Integration Guide - Page 219
Client. AirBEAM® Smart Client is part of Motorola's AirBEAM® suite, which also includes AirBEAM® Safe and AirBEAM® Manager. The AirBEAM® Smart Client system uses the network accessible host server to store software files that are to be downloaded to the mobile computers. The AirBEAM® Smart Client - Motorola MC3090G | Integration Guide - Page 220
. During boot-up, the computer can run self-diagnostic tests and configure hardware and software. C CDRH. Center for Devices and Radiological Health. A federal agency responsible for regulating laser product safety. This agency specifies various laser operation classes based on power output during - Motorola MC3090G | Integration Guide - Page 221
those characters. Cold Boot. A cold boot restarts the mobile computer and erases all user stored records and entries. COM port. Communication port; ports are identified by number, e.g., COM1, COM2. Continuous Code. A bar code or symbol in which all spaces within the symbol are parts of characters - Motorola MC3090G | Integration Guide - Page 222
a wired interface to a radio network. F Flash Memory. Flash memory is nonvolatile, semi-permanent storage that can be electronically erased in the circuit and reprogrammed. Some mobile computers use Flash memory to store the operating system (ROM-DOS), the terminal emulators, and the Citrix ICA - Motorola MC3090G | Integration Guide - Page 223
Glossary - 5 H Hard Reset. See Cold Boot. Hz. Hertz; A unit of frequency equal to one cycle per second. Host Computer. A computer that serves other terminals in a network, providing such services as computation, database access, supervisory programs and network control. I IDE. Intelligent drive - Motorola MC3090G | Integration Guide - Page 224
controller does not agree with the data encoded within a bar code symbol. Mobile Computer. In this text, mobile computer refers to the Motorola wireless handheld computer. It can be set up to run as a stand-alone device, or it can be set up to communicate with a network, using wireless radio - Motorola MC3090G | Integration Guide - Page 225
) standard that defines the connector, connector pins, and signals used to transfer data serially from one device to another. S Scan Area. Area intended to contain a symbol. Scanner. An electronic device used to scan bar code symbols and produce a digitized pattern that corresponds to the bars and - Motorola MC3090G | Integration Guide - Page 226
scanner is energized, programmed and ready to read a bar code. Scanning Sequence. A method of programming or configuring parameters for a bar code reading system by scanning bar code menus. SDK. Software Development Kit Self-Checking Code. A symbology that uses service. Soft Reset. See Warm Boot. - Motorola MC3090G | Integration Guide - Page 227
which produces visible laser light. W WAN. Wide-Area Network. A radio network that supports data communication beyond a local area. That is, information can be sent across a city, state, or even nationwide. Warm Boot. A warm boot restarts the mobile computer by closing all running programs. All data - Motorola MC3090G | Integration Guide - Page 228
Glossary - 10 MC3000 Integrator Guide - Motorola MC3090G | Integration Guide - Page 229
adapter 2-1 battery charging 2-20 LED indicators 2-21 setup 2-20 troubleshooting 8-7 ActiveSync xvi, 3-1, 4-5 deploying CAB files 5-4 downloading files 4-5 installing 3-1 setting up a connection 3-3 using serial/USB cradle 2-30 adding programs from Internet 4-7 using IPL 4-7 using SD - Motorola MC3090G | Integration Guide - Page 230
setup ActiveSync on mobile computer 2-30 MC3000 communication/charge cables 2-19 serial communication 2-31 single slot serial/USB cradle 2-5 USB communication setup 2-31 communication/charge cables communication setup 2-19 setup 2-19 troubleshooting 8-8 configuration xii connector - Motorola MC3090G | Integration Guide - Page 231
setup 2-6 troubleshooting 8-5, 8-6 four slot Ethernet cradle 1-2, 2-1, 2-8 charging 2-10 charging indicators 2-11 drivers 2-8, 2-9 setup 2-8 four slot spare battery charger 1-2 battery charging 2-16 LED indicators 2-17 setup 2-16 troubleshooting 8-6 G gateway 6-23 H hard reset 1-11 - Motorola MC3090G | Integration Guide - Page 232
2-19 troubleshooting 8-8 MC3000 connector A-4 MC3000-K parts 1-3, 1-4 MC3000-R parts 1-3, 1-4 memory xii Menu bar B-1 mobile computer cold boot 1-12 hard reset 1-11, 1-12 reset 1-11 soft reset 1-11 starting 1-10 warm boot 1-11, 1-12 Mobility Services Platform MSP 4-5 Mobility Services - Motorola MC3090G | Integration Guide - Page 233
strength 6-29 single slot serial/USB cradle 1-2, 2-1, 2-2 battery charging 2-3 communication setup 2-5 LED indicators 2-4 RS232 cable 1-2 setup 2-3 troubleshooting 8-4 USB cable 1-2 SMDK 1-2, 4-1, 4-3 components 4-4 system requirements 4-1 soft reset 1-11, 1-12 software installation - Motorola MC3090G | Integration Guide - Page 234
specifications A-1 temperature battery charging A-1, A-3 operating A-1 storage A-1 Terminal Configuration Manager, see TCM TKIP (WPA 6-19 troubleshooting 8-2 cables 8-8 four slot charge only cradle 8-5, 8-6 four slot spare battery charger 8-6 mobile computer 8-2 single slot serial/USB - Motorola MC3090G | Integration Guide - Page 235
- Motorola MC3090G | Integration Guide - Page 236
Plaza Holtsville, New York 11742, USA 1-800-927-9626 http://www.motorola.com/enterprisemobility MOTOROLA and the Stylized M Logo and Symbol and the Symbol logo are registered in the U.S. Patent and Trademark Office. All other product or service names are the property of their registered owners
-
 1
1 -
 2
2 -
 3
3 -
 4
4 -
 5
5 -
 6
6 -
 7
7 -
8
-
9
-
10
-
11
-
12
-
13
-
14
-
15
-
16
-
17
-
18
-
19
-
20
-
21
-
22
-
23
-
24
-
25
-
26
-
27
-
28
-
29
-
30
-
31
-
32
-
33
-
34
-
35
-
36
-
37
-
38
-
39
-
40
-
41
-
42
-
43
-
44
-
45
-
46
-
47
-
48
-
49
-
50
-
51
-
52
-
53
-
54
-
55
-
56
-
57
-
58
-
59
-
60
-
61
-
62
-
63
-
64
-
65
-
66
-
67
-
68
-
69
-
70
-
71
-
72
-
73
-
74
-
75
-
76
-
77
-
78
-
79
-
80
-
81
-
82
-
83
-
84
-
85
-
86
-
87
-
88
-
89
-
90
-
91
-
92
-
93
-
94
-
95
-
96
-
97
-
98
-
99
-
100
-
101
-
102
-
103
-
104
-
105
-
106
-
107
-
108
-
109
-
110
-
111
-
112
-
113
-
114
-
115
-
116
-
117
-
118
-
119
-
120
-
121
-
122
-
123
-
124
-
125
-
126
-
127
-
128
-
129
-
130
-
131
-
132
-
133
-
134
-
135
-
136
-
137
-
138
-
139
-
140
-
141
-
142
-
143
-
144
-
145
-
146
-
147
-
148
-
149
-
150
-
151
-
152
-
153
-
154
-
155
-
156
-
157
-
158
-
159
-
160
-
161
-
162
-
163
-
164
-
165
-
166
-
167
-
168
-
169
-
170
-
171
-
172
-
173
-
174
-
175
-
176
-
177
-
178
-
179
-
180
-
181
-
182
-
183
-
184
-
185
-
186
-
187
-
188
-
189
-
190
-
191
-
192
-
193
-
194
-
195
-
196
-
197
-
198
-
199
-
200
-
201
-
202
-
203
-
204
-
205
-
206
-
207
-
208
-
209
-
210
-
211
-
212
-
213
-
214
-
215
-
216
-
217
-
218
-
219
-
220
-
221
-
222
-
223
-
224
-
225
-
226
-
227
-
228
-
229
-
230
-
231
-
232
-
233
-
234
-
235
-
236
 |
 |
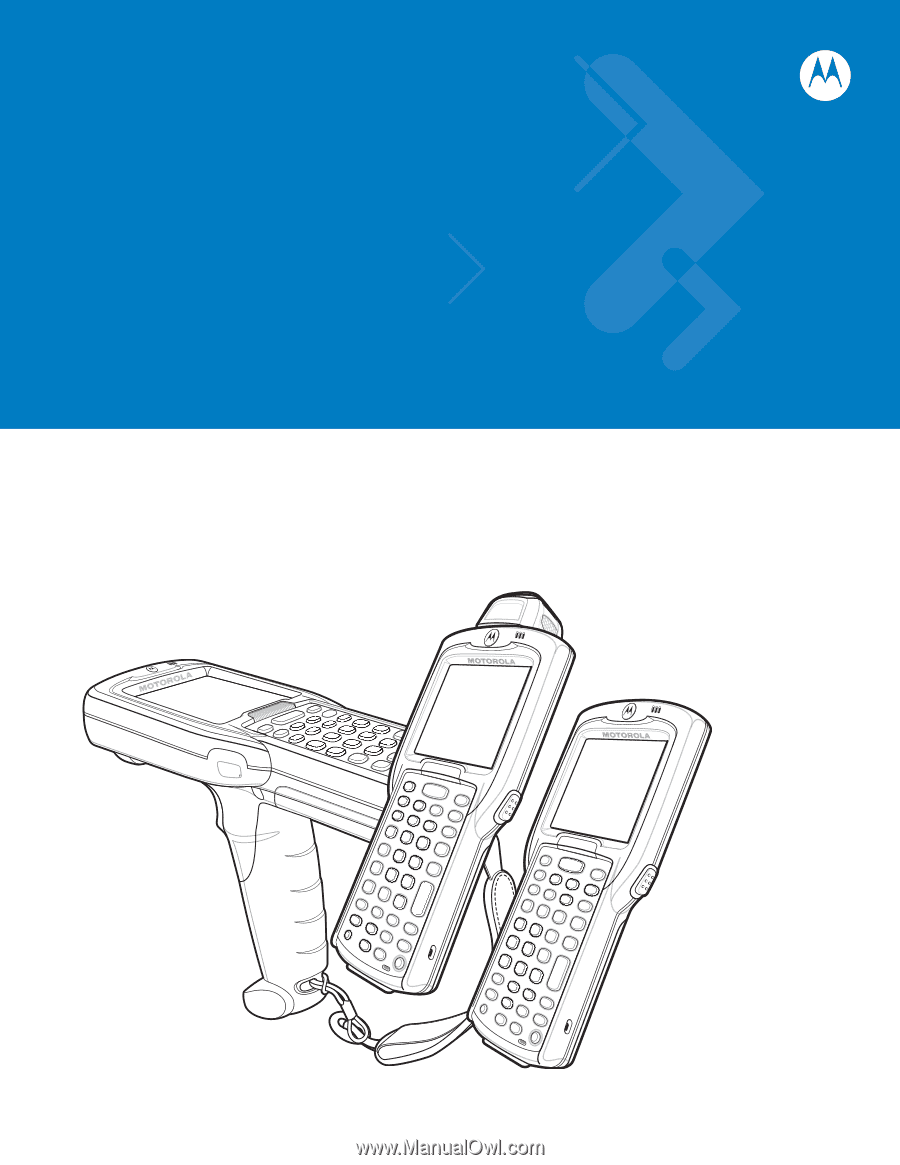
MC3000
Integrator Guide