Motorola MC3090G Integration Guide - Page 57
Setup, Battery Charging, LED Charge Indications, Communication Setup
 |
View all Motorola MC3090G manuals
Add to My Manuals
Save this manual to your list of manuals |
Page 57 highlights
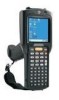
Accessories 2 - 19 Setup The MC3000 Communication/Charge cables can connect with a serial/USB device, such as a printer or host computer, through its serial or USB port. MC3000 Connector Power Input Connector Serial (RS232) Cable Top View USB Host Cable Mini-B Connector Power Input Barrel Connector USB Client Cable Standard-A Connector Figure 2-19 MC3000 Communication/Charge Cables Battery Charging The MC3000 Communication/Charge cables can charge the mobile computer battery and supply operating power. To charge the mobile computer battery: 1. Connect the MC3000 Communication/Charge cable power input connector to the Motorola approved power source. 2. Attach the bottom of the mobile computer to the MC3000 connector and gently press in until the snaps latch on the mobile computer. 3. The mobile computer amber Charge LED Indicator indicates the mobile computer battery charging status. The Standard Battery usually charges in less than four hours and the Extended Life Battery usually charges in less than six hours. See Table 2-1 on page 2-5 for charging status indications. 4. When charging is complete, remove the cable by gently pulling the mobile computer and the cable apart until the snaps release the mobile computer. LED Charge Indications The MC3000 Communication/Charge cables use the amber Charge LED Indicator to indicate the MC3000 battery charging status. See Table 2-1 on page 2-5 for charging status indications. Communication Setup To connect the MC3000 Communication/Charge cables to a serial or USB device: 1. Connect serial/USB end of the MC3000 Communication/Charge cable into the communications port. 2. Connect the MC3000 connector end to the MC3000 Communication/Charge cable to the mobile computer. For more information on communications setup procedures, see USB Connection Setup on page 2-34 and/or Serial Communication Setup on page 2-30.
-
 1
1 -
2
-
3
-
4
-
5
-
6
-
7
-
8
-
9
-
10
-
11
-
12
-
13
-
14
-
15
-
16
-
17
-
18
-
19
-
20
-
21
-
22
-
23
-
24
-
25
-
26
-
27
-
28
-
29
-
30
-
31
-
32
-
33
-
34
-
35
-
36
-
37
-
38
-
39
-
40
-
41
-
42
-
43
-
44
-
45
-
46
-
47
-
48
-
49
-
50
-
51
-
 52
52 -
 53
53 -
 54
54 -
 55
55 -
 56
56 -
 57
57 -
 58
58 -
 59
59 -
 60
60 -
 61
61 -
 62
62 -
63
-
64
-
65
-
66
-
67
-
68
-
69
-
70
-
71
-
72
-
73
-
74
-
75
-
76
-
77
-
78
-
79
-
80
-
81
-
82
-
83
-
84
-
85
-
86
-
87
-
88
-
89
-
90
-
91
-
92
-
93
-
94
-
95
-
96
-
97
-
98
-
99
-
100
-
101
-
102
-
103
-
104
-
105
-
106
-
107
-
108
-
109
-
110
-
111
-
112
-
113
-
114
-
115
-
116
-
117
-
118
-
119
-
120
-
121
-
122
-
123
-
124
-
125
-
126
-
127
-
128
-
129
-
130
-
131
-
132
-
133
-
134
-
135
-
136
-
137
-
138
-
139
-
140
-
141
-
142
-
143
-
144
-
145
-
146
-
147
-
148
-
149
-
150
-
151
-
152
-
153
-
154
-
155
-
156
-
157
-
158
-
159
-
160
-
161
-
162
-
163
-
164
-
165
-
166
-
167
-
168
-
169
-
170
-
171
-
172
-
173
-
174
-
175
-
176
-
177
-
178
-
179
-
180
-
181
-
182
-
183
-
184
-
185
-
186
-
187
-
188
-
189
-
190
-
191
-
192
-
193
-
194
-
195
-
196
-
197
-
198
-
199
-
200
-
201
-
202
-
203
-
204
-
205
-
206
-
207
-
208
-
209
-
210
-
211
-
212
-
213
-
214
-
215
-
216
-
217
-
218
-
219
-
220
-
221
-
222
-
223
-
224
-
225
-
226
-
227
-
228
-
229
-
230
-
231
-
232
-
233
-
234
-
235
-
236
 |
 |
