Nikon 1768 Instruction Manual
Nikon 1768 - N 90s SLR Camera Manual
 |
View all Nikon 1768 manuals
Add to My Manuals
Save this manual to your list of manuals |
Nikon 1768 manual content summary:
- Nikon 1768 | Instruction Manual - Page 1
Nikon INSTRUCTION MANUAL - Nikon 1768 | Instruction Manual - Page 2
84-85 SPECIAL FUNCTIONS 86- 102 EXPOSURE COMPENSATION 87-93 AE-L (AUTO EXPOSURE LOCK) LEVER 88-89 TO OBTAIN METER READING FOR A PARTICULAR SUBJECT IN MANUAL EXPOSURE MODE 90-91 EXPOSURE COMPENSATION BUTION 92-93 SELF-TIMER OPERATION 94-96 ONE-SHOT SELF-TIMER 95 TWO-SHOT SELF-TIMER 96 TO - Nikon 1768 | Instruction Manual - Page 3
LONG TIME EXPOSURE-Using bul b setting 98-99 TO USE NON-DX-CODED FILM 100 INTERCHANGING FOCUSING SCREENS 101-1 02 LENSES 103-1 06 LENS COMPATIBILITY CHART 104-1 06 FLASH PHOTOGRAPHY 107-126 NIKON SPEEDLIGHT COMPATIBILITY 108-1 09 FLASH MODES AVAILABLE WITH NIKON SPEEDLlGHT 108 WHAT YOU CAN - Nikon 1768 | Instruction Manual - Page 4
a host of new features, many of which you may not be familiar with, before actually taking pictures you should thoroughly read the instruction manuals provided, including the "PHOTOGRAPHIC SYSTEM" leaflet. These will help you understand the technical terminology used and how the various new features - Nikon 1768 | Instruction Manual - Page 5
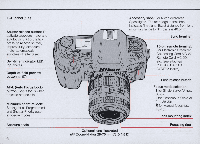
NOMENCLATURE Once you know the names of the parts of your new Nikon N90, as well as their functions and the camera's other controls, you will be surprised how simple and logical the N90 system's operation can be. 5 - Nikon 1768 | Instruction Manual - Page 6
attached PHOTOGRAPHIC SYSTEM leaflet). Lens release button Focus mode selector: S for Single Servo AF (pp. 36-37). Cfor Continuous Servo AF (pp. 38-39). M for Manual focus (pp. Optional lens illustrated (AF Zoom-Nikkor 28-70mm f/3 .5-4.5 D) index Focusing ring - Nikon 1768 | Instruction Manual - Page 7
Eyepiece shutter lever: Used to prevent stray light from entering viewfinder. Viewfinder/LCD panel illumination button: Press to illuminate viewfinder and LCD panel, useful in dim light. Illumination automatically switches off 8 sec. after you remove your finger from button. Camera strap eyelet - Nikon 1768 | Instruction Manual - Page 8
Reset button: Press and hold this button and exposure compensation/ reset button together for instant reset of basic camera settings (p. 20) Exposure mode (MODE) button' : See page 54. Vari-Program (ps) button' : See pages 70-71 . Flash sync mode (~) button': See pages 121,123 and 125. Film advance - Nikon 1768 | Instruction Manual - Page 9
4. Film speed setting mode 5. Exposure compensation 6. Shutter speed 7. Autofocus 8. Aperture 9. Release/Focus priority 10. Flash sync mode/Red-Eye Reduction 11. Manual focus 15 16 17 18 19 12. Electronic Organizer* 13. Custom* 14. Battery 15. Film advance mode 16. Frame counterNari-Program/ISO - Nikon 1768 | Instruction Manual - Page 10
Viewfinder indication 23 4 1. Wide-Area focus brackets 2. 12mm-dia. reference circle for Center- Weighted Metering 3. 3mm dia. reference circle for Spot Metering/ Spot-Area focus 4. Clear matte field 5. Focus area 6. Focus indicators: • indicates a stationary subject is in focus; .... indicates a - Nikon 1768 | Instruction Manual - Page 11
BASIC OPERATION This section shows you how to prepare the camera for shootinge.g., how to mount lens, load film , etc.-as well as how to actually take pictures. Whether you ' re a beginner or a seasoned photographer, you should master this section before proceeding further. 11 - Nikon 1768 | Instruction Manual - Page 12
MOUNTING THE LENS 2 Position the lens in the camera's bayonet mount so that the mounting indexes on lens and camera body are aligned. Taking care not to press the lens release button, twist lens counterclockwise until it locks into place. To remove Push and hold lens release button and turn lens - Nikon 1768 | Instruction Manual - Page 13
INSTALLING BATTERIES • Make sure the power switch is set at OFF position . • NiCd batteries that have "+" terminals exceeding 6mm in diameter cannot be used. • Manganese batteries are not recommended for use at low temperatures . • See page 133 for "NOTES ON BATTER IES." 1 Loosen battery holder - Nikon 1768 | Instruction Manual - Page 14
viewfinder LCD show aperture/shutter speed indications, and autofocus operation starts (unless camera is set for manual focusing). The exposure indications and battery mark stay on for approx. 8 sec. after you sec., 16 sec., 30 sec., 60 sec. For details, see Nikon AC-1 E card instruction manual. 14 - Nikon 1768 | Instruction Manual - Page 15
alert. The beeper also comes on when the camera's computer memory is full in the Memo Holder function. For details, refer to Nikon AC-1 E card instruction manual. 15 - Nikon 1768 | Instruction Manual - Page 16
-coded film is shown on the LCD panel. Data Link System users You can set the camera to OX-priority. For details, see AC-1 E card instruction manual. If not, press and hold ISO button in, then rotate command dial until [jJJ appears. 16 - Nikon 1768 | Instruction Manual - Page 17
2 Slide camera back lock releases together to open camera back. 3 Insert film cartridge. Do not touch the shutter curtains with your finger or with film leader. 4 Pull film leader out to red index mark. 5 Check to ensure film is properly positioned with no slack (see illustration) . 17 - Nikon 1768 | Instruction Manual - Page 18
is loaded, the ISO and IDJ marks in the LCD panel blink, the beeper sounds (if set), and the shutter is locked. Set ISO speed manually (see p. 100). 8 Confirm frame counter shows I and - Nikon 1768 | Instruction Manual - Page 19
you are using other non-AF Nikkor lenses, use Center-Weighted or Spot Metering {see p. 32j, manual focus, and AperturePriority Auto or Manual Exposure mode {see pp. 60-62 or 63-66}. To confirm usable mode by lens, see chart of AF Nikkor lens at its minimum setting (see lens instruction manual). 19 - Nikon 1768 | Instruction Manual - Page 20
of AF and AE" with the MF-26, use the MF-26's(IlTImrT J button and the camera 's command dial. (For details, see the MF-26's instruction manual.) 20 - Nikon 1768 | Instruction Manual - Page 21
MF-26 users Pressing the reset buttons also cancels the MF-26's following functions: Auto Exposure Bracketing Multiple Exposure Operation Auto Sequence Shooting Long Time Exposure Interval Timer Flash Exposure Bracketing Flash output level compensation Focus Priority 4 Hold camera, look through - Nikon 1768 | Instruction Manual - Page 22
5 Lightly press shutter release button to start autofocus operation and switch exposure meter on . Confirm that the in-focus indicator . for a stationary subject or ~.~ for a moving subject appears on the viewfinder's LCD readout. Confirm , too, that the shutter speed and aperture indications are - Nikon 1768 | Instruction Manual - Page 23
If shutter speed indicated is 1/(lens focal length) sec. or slower, the picture may come out blurred. To avoid this, hold camera firmly or use a tripod. If H I appears in the shutter speed position-Overexposure alert: Use Nikon ND or similar filter. If l 0 appears in the shutter speed - Nikon 1768 | Instruction Manual - Page 24
6 To take picture, fully depress shutter release button. Camera automatically advances film by one frame, and LCD frame counter increases by one. Shutter speed/aperture indications in LCD panel and inside viewfinder tum off approx. 2 sec. after you release shutter and take your finger off shutter - Nikon 1768 | Instruction Manual - Page 25
REWINDING FILM eJ ~ Or!lF ~ 1 Film advance stops automatically at end of rol l with End and Gl_ symbol in LCD panel blinking. (Audible beeper sounds if set.) At the end of fi lm roll, each time you press shutter release button, End and Gl_ blink and audible beeper sounds (if set), reminding you to - Nikon 1768 | Instruction Manual - Page 26
3 e After rewind automatically stops, confirm frame counter shows E, and film installation symbol blinks for a few seconds. 4 Open camera back and remove film cartridge. To conserve battery power, turn off the power switch when you are not using the camera. Always remove batteries before storing a - Nikon 1768 | Instruction Manual - Page 27
GENERAL FUNCTIONS This chapter explains the various modes of the N90 camera 's operation. Please review it thoroughly. 27 - Nikon 1768 | Instruction Manual - Page 28
FILM ADVANCE MODE SINGLE-FRAME SHOOTING :e 5 fS.6 EJ~DWF [ :J (!) _ - Nikon 1768 | Instruction Manual - Page 29
fps in the ~L mode-with fresh alkaline AAtype batteries at normal temperature and at shutter speeds higher than 1/250 sec. in the Manual exposure and Manual focus modes. With shutter speeds slower than 1/250 sec., the framing rate becomes progressively slower in proportion to the shutter speed in - Nikon 1768 | Instruction Manual - Page 30
EXPOSURE METERING SYSTEM The Nikon N90 has three type of exposure metering systems- Matrix Metering, Center-Weighted Metering and Spot Metering . MATRIX METERING This system is ideal for quick operation in any exposure mode (pp. 49-66). With D-type AF Nikkor lenses including AF-I Nikkor, 3D Matrix - Nikon 1768 | Instruction Manual - Page 31
CENTER-WEIGHTED METERING SPOT METERING With 75% of the meter's sensitivity concentrated on the 12mmdia. circle in the viewfinder and 25% outside this circle, this meter becomes useful in situations where you want to base exposure on a specific area in the scene. In the auto exposure mode, to - Nikon 1768 | Instruction Manual - Page 32
SETIING METERING SYSTEM mI!II =:J( (:l _II _ Matrix Metering fS.6 Center-Weighted Metering "iBP P: fS ;WF .6 mI!II:::::::J( (:l _II _ Spot Metering While pressing the metering system (:':)button, rotate command dial until the desired symbol----G for Matrix Metering, ~ for Center-Weighted - Nikon 1768 | Instruction Manual - Page 33
FOCUS FOCUS AREA IcS FS.6 eJ ~f mIilJ =J(El _II __ 1 I 0 P :25 F5.o Wide-Area Autofoeus The N90's autofocus system offers a choice of two focus areas: Wide and Spot. While pressing focus area button, rotate command dial until the desired symbol--E:2J for Wide Area or 0 for Spot Area- appears in - Nikon 1768 | Instruction Manual - Page 34
43. .. To give correct exposure on your subject, see "AE-L LEVER" on pages 88 to 89 or 'TO OBTAIN METER READING FOR A PARTICULAR SUBJECT IN MANUAL EXPOSURE MODE" on pages 90 to 91. 34 - Nikon 1768 | Instruction Manual - Page 35
driving for the next shot after the first shot is taken so that the subject focus remains locked. For details, see the Nikon AC-1 E card's instruction manual. Caution Do not attempt to tum the lens focusing ring or impede its rotation when the focus mode selector is set to S or C. In addition - Nikon 1768 | Instruction Manual - Page 36
:25 fS.6 eJ~ tt€9 (j}J ( IJ ~~_cffBI Single Servo AF with Focus-Priority For Single Servo AF with Focus-Priority, set the focus mode to S. You lightly press the shutter release button, the lens starts adjusting for focus. Because the p'riority is on correct focus, the shutter cannot be released - Nikon 1768 | Instruction Manual - Page 37
Moving subject is expected to be in focus W ith a moving subject: Lightly press the shutter release button. Focus Tracking is automatically activated with ~ • indication in the viewfinder. As soon as the subject is expected to be in focus appears, indicating that you can release shutter. If subject - Nikon 1768 | Instruction Manual - Page 38
125 F5.6 eJ~ tt@ m:I ( 11 m=::J - Nikon 1768 | Instruction Manual - Page 39
Moving suject is expected to be in focus With a moving subject: Lightly press the shutter release button and Focus Tracking is automatically activated with . .. indication . As soon as the subject is expected to be in focus , viewfinder shows Focus Tracking remains on as long as you keep lightly - Nikon 1768 | Instruction Manual - Page 40
AUTOFOCUS WITH MAIN SUBJECT OFF CENTER In Single Servo AF mode As previously noted, in Single Servo autofocus, focus is locked as long as the shutter release button is kept lightly pressed. Use this feature for off-center subjects. In the following procedure, Spot-Area AF demonstration photos are - Nikon 1768 | Instruction Manual - Page 41
2. Confirm in-focus indicator . appears (and In-Focus Signal beeps if set) in viewfinder. 3. Keeping the shutter release button lightly pressed, recompose, then fully depress shutter release button to take picture. 41 - Nikon 1768 | Instruction Manual - Page 42
-26 or Data Link System users The MF-26 enables you to set simultaneous lock of autofocus and auto exposure. For details, see MF-26's instruction manual. 42 - Nikon 1768 | Instruction Manual - Page 43
2. Keeping shutter release button lightly pressed, confirm infocus indicator . appears in viewfinder. Then press and hold AF-L button to lock focus. Keep holding AF-L button until next step is completed. 3. While holding AF-L button in, recompose , then fully depress shutter release button to take - Nikon 1768 | Instruction Manual - Page 44
then use focus lock (pp. 38-43). Or, use a Nikon autofocus Speedlight to perform autofocus with Speedlight's AF illuminator. B. Low contrast subject Focus manually with clear matte field, or for autofocus, focus on another subject at same distance but with more contrast, then use focus lock (pp. 38 - Nikon 1768 | Instruction Manual - Page 45
at different distances. (For example, when shooting a person over a fence or when shooting animals inside a cage) Use Spot Area for autofocus (page 34) or focus manually with clear matte field. • With an extremely bright object near your subject Use Spot Area for autofocus (page 34) or focus - Nikon 1768 | Instruction Manual - Page 46
it to M. If you are using an AF-I Nikkor lens, set the focus mode ring to M or MI A.) There are two ways of assuring precise manual focus: with the Electronic Rangefinder or with the viewfinder's clear matte field. 1. Look through viewfinder and position focus brackets on main subject. Then lightly - Nikon 1768 | Instruction Manual - Page 47
2. Keeping shutter release button lightly pressed, rotate lens focusing ring in direction indicated by focus-to-Ieft arrow ( ~ or focus-to-right arrow ( ~), until arrow disappears and infocus indicator . appears. If focus-to-Ieft arrow ( ~ does not disappear when you turn focus ring counterclockwise - Nikon 1768 | Instruction Manual - Page 48
Manual focus using clear matte field Look through viewfinder and rotate lens focusing ring until image on clear matte field appears sharp. 48 - Nikon 1768 | Instruction Manual - Page 49
EXPOSURE MODE Light reaching the film is controlled by shutter speed and lens aperture. The proper combination results in a correct exposure. Shutter speed and lens aperture settings are based on the ISO speed set for the film in use and the operation of the camera's exposure control system. The - Nikon 1768 | Instruction Manual - Page 50
EXPOSURE MODE Selecting the exposure control mode means deciding if you want the shutter speed and/or lens aperture to be set automatically or manually. The Nikon N90 camera offers two types of programmed auto exposure modes, Auto Multi-Program (p) and Vari-Program (P,), as well as Shutter-Priority - Nikon 1768 | Instruction Manual - Page 51
Program chart of Auto Multi-Program To check shutter speed and aperture values, follow either the black or red line to where it intersects the diagonal line. Auto Multi-Program chart (ISO 100) > , ~ ~ ~ ~ ~ til / V / / / / // / V / / / / // / V / / /// / / V VV V 1.4 / / / V - Nikon 1768 | Instruction Manual - Page 52
-Priority Auto exposure mode operates only with Nikon lenses that have a built-in CPU (AF Nikkor and AI-P Nikkor lenses). Manual exposure mode Manual exposure control allows you to make both aperture and shutter speed settings. For a technically correct exposure, follow the recommendation of the - Nikon 1768 | Instruction Manual - Page 53
Pictures taken at different shutter speeds Pictures taken at different apertures High shutter speed Wide aperture Slow shutter speed Narrow aperture 53 - Nikon 1768 | Instruction Manual - Page 54
it from the Electronic Organizer to the camera, P with [ P will appear in the LCD between Mand P . For details, see the AC-1 E card instruction manual. 10.• p :(,5 F-- For users of lenses that have no CPU, or accessories such as bellows attachment or extension rings Use Aperture-Priority Auto or - Nikon 1768 | Instruction Manual - Page 55
FLEXIBLE PROGRAM If you want to change the shutter speed/aperture combination of Auto Multi-Program. use the Flexible Program function. Flexible Program enables you to temporarily change an automatically set shutter speed/aperture combination in 1 EV steps. while maintaining the correct exposure. - Nikon 1768 | Instruction Manual - Page 56
to its minimum aperture setting (highest f-number). With AF Nikkor and AI-P Nikkor lenses, lock lens aperture at minimum setting (refer to lens instruction manual). FS.S I 2. While pressing MODE button, rotate command dial until "5 " appears on LCD panel and viewfinder. If "bulb" is set on the - Nikon 1768 | Instruction Manual - Page 57
I:J 3. Remove finger from MODE button, and rotate command dial to select desired shutter speed . Shutter speed indication changes one step at a time in the c following sequence: 3~'' IS" B" 'i" COO I" 'i B IS 3D 60 IcS cSO SOD 1000 cOOO 'iOOO BODO 4. Look inside viewfinder, compose and lightly - Nikon 1768 | Instruction Manual - Page 58
60 (M 11 SJ~ O!ill)-' m[jJJ =:J( El _:J _ If H : appears in the aperture position with electronic analog display*-Overexposure alert**: Select higher shutter speed or use Nikon NO fi lter. - FE E SJit1l Oili~ i • m[jJJ =:J(El _:J _ If FE E blinks in the aperture position-Lens setting error a:lert - Nikon 1768 | Instruction Manual - Page 59
5. To take the picture, fully depress shutter release button. 59 - Nikon 1768 | Instruction Manual - Page 60
OPERATION IN APERTURE-PRIORITY AUTO EXPOSURE MODE 1. While pressing MODE button, rotate command dial until A appears on LCD panel and viewfinder. • If using an AF Nikkor or AI-P lens, make sure it is not locked to smallest aperture before next step. F ,:-0.,(-, 2. Remove finger from MODE button - Nikon 1768 | Instruction Manual - Page 61
aperture, such as ReflexNikkor lenses: Aperture cannot be changed. With lenses having no auto diaphragm such as PCNikkor lenses: Switch to Manual exposure mode (pp. 6366) . 3. Look inside viewfinder, compose and lightly press shutter release button . Confirm automatically set shutter speed. 61 - Nikon 1768 | Instruction Manual - Page 62
If the selected shutter speed is 1/(focallength) sec. or slower, picture blur may occur". To avoid this, hold camera very steadily or use a tripod. mliD :=l( - Nikon 1768 | Instruction Manual - Page 63
it is not locked to smallest aperture before proceeding to next step. 2. Remove finger from MODE button, set shutter speed by rotating command dial. • In Manual exposure mode, you can set shutter speed to bul b for long time exposure by rotating command dial. For details about bul b setting, see pp - Nikon 1768 | Instruction Manual - Page 64
If meter has automatically turned off and LCD readout is off, turn meter on again by lightly pressing shutter release button. Set aperture by rotating the lens aperture ring. VB) I t: :j" J 64 - Nikon 1768 | Instruction Manual - Page 65
3. Look into the viewfinder, compose and lightly press shutter release button . Adjust aperture and/ or shutter speed until electronic analog display shows "0" or desired amount. " _ +1 •• 0 . . 1 - / _ ~IIII "+1 ••0.. 1-/ IIII~ /II " / I I I" Electronic analog display blinks when the - Nikon 1768 | Instruction Manual - Page 66
changing shutter speed , With lenses having no auto diaphragm such as pcNikkor lenses: Lens is stopped down when a smaller aperture (larger f-number) is selected , Focus manually with the lens set at maximum aperture, 4. To take the picture, fully depress shutter release button, 66 - Nikon 1768 | Instruction Manual - Page 67
VARI-PROGRAM Here's how you can benefit from the N90's Vari -Program options for specific picture-taking situations. 67 - Nikon 1768 | Instruction Manual - Page 68
the selection of shutter speed and aperture for average situations. It guides the exposure control system into using reasonably high shutter speeds to control methods such as Shutter, Priority Auto , Aperture-Priority Auto and Manual. But with Vari-Program control, you allow the camera's computer to - Nikon 1768 | Instruction Manual - Page 69
Portrait Program (P 0) This enables you to take a portrait, with your subject standing out against a blurred background. Portrait Program with Red- Eye Reduction (,. E) Notice how, when taking pictures of people in dim light with flash, sometimes their eyes appear red. This program reduces the - Nikon 1768 | Instruction Manual - Page 70
SELECTING VARI-PROGRAM Use Nikkor lenses with CPU such as AF Nikkor or AI-P- Nikkor lenses and be sure to set lens aperture to the minimum setting. 1. Set Vari-Program. Press and hold Ps button and confirm exposure mode indication (P, S, R or M) starts blinking. 2. While keeping the Ps button - Nikon 1768 | Instruction Manual - Page 71
To confirm selected Vari-Program in the LCD panel Press the Ps button. The selected Vari-Program (P0 , ,. f , HF , L R, 5 L, 5 P or [ tI) is temporarily indicated in place of the frame counter in the LCD panel. If you want to change the VariProgram option, without removing your finger from the Ps - Nikon 1768 | Instruction Manual - Page 72
SHOOTING WITH VARI-PROGRAM PORTRAIT PROGRAM 125 f5.6 BJoo Pc This program selects the widest aperture possible, thus minimizing depth of field and producing a sharply focused main subject against a blurred background and foreground. It makes the focused subject seem sharper and minimizes distracting - Nikon 1768 | Instruction Manual - Page 73
Recommended lenses AF Nikkor lenses. To obtain pronounced blurred background effect, use 85mm to 200mm telephoto lenses with a maximum aperture of fl2.8 or wider. Recommended camera settings Metering system ~ for Matrix' Focus area 0 for Wide' or G for Spot Focus mode S for Single Servo AF - Nikon 1768 | Instruction Manual - Page 74
PORTRAIT PROGRAM WITH RED-EYE REDUCTION (with 88-25 exclusively) Ie'S FS.6 _11111111!""""'1 8]00 rE Using the same exposure control as the Portrait Program, this program adds the benefit of Red-Eye Reduction in portraits taken with flash. Use this program for both indoor and outdoor portraits, - Nikon 1768 | Instruction Manual - Page 75
LCD panel, with 0 appearing in the viewfinder display. '''Automatically selected and cannot be cancelled. Procedure For flash shooting procedure, see S8-25's instruction manual. However, with Red-Eye Reduction function, note that it is only at the fourth flash that the shutter is released. So hold - Nikon 1768 | Instruction Manual - Page 76
HYPERFOCALPROGRAM Ie'S fS.6 BJDD HF Although this program does not actually set the hyperfocal distance, it emulates the effects achieved by using very small lens apertures and short focal length lenses. The result will be a very large depth of field which yields a wide range of acceptable sharpness - Nikon 1768 | Instruction Manual - Page 77
Recommended lenses 50mm or wider angle AF Nikkor lenses, or AF Zoom-Nikkor lenses with 50mm or shorter zooming position. Recommended camera settings Metering system ~ for Matrix' Focus area 0 for Wide' or 0 for Spot Focus mode S for Single Servo AF or C for Continuous Servo AF Film advance - Nikon 1768 | Instruction Manual - Page 78
LANDSCAPE PROGRAM Ie'S FS.6 OBJoo LR Similar in concept to the Hyperiocal Program with respect to depth of field and overall sharpness. 78 - Nikon 1768 | Instruction Manual - Page 79
Recommended lenses Select lens according to the desired effect. If you want an expansive view, use a wideangle AF Nikkor lens. If you prefer to emphasize your subject by magnifying it, use a telephoto AF Nikkor lens. Recommended camera settings Metering system ~ for Matrix' Focus area [D) for - Nikon 1768 | Instruction Manual - Page 80
SILHOUETIE PROGRAM Ie'S fS.6 OBJoo SL A silhouette photograph intentionally underexposes the backlit foreground subject so that it appears nearly black against the brighter background. This program works effectively only when the subject is at least 2 EV values lower (i.e., darker) than the - Nikon 1768 | Instruction Manual - Page 81
Recommended lenses Choose your lens according to the desired effect. If you want to picture a dynamic sunset. for example, use a telephoto AF Nikkor to magnify the sun. To make your main subject beautifully silhouetted • There must be a difference (at least 2 EV) in brightness between subject and - Nikon 1768 | Instruction Manual - Page 82
SPORT PROGRAM IcS fS.6 8JDD SP This program is designed to use select shutter speed and aperture combinations that correspond to those of the long lenses typically used for sports photography. It is biased towards higher shutter speeds to freeze action but make the subject 's arms or legs, for - Nikon 1768 | Instruction Manual - Page 83
Recommended lenses AF Nikkor lenses. For a more pronounced blurred background effect, use SOmm to 300mm telephoto lenses with a maximum aperture of fl2.S or brighter. Recommended camera settings Metering system ~ for Matrix' Focus area 0 for Wide' or [£] for Spot Focus mode Cfor Continuous - Nikon 1768 | Instruction Manual - Page 84
CLOSE-UP PROGRAM 125 F5.6 BJDD r .. LU In close-up photography, various effects can be achieved with different f/stops. A very small aperture increases depth of field and enhances overall apparent sharpness. A wider aperture decreases depth of field and makes the focused subject stand out from the - Nikon 1768 | Instruction Manual - Page 85
function. Recommended camera settings Metering system ~ for Matrix' Focus area 0 for Spot Focus mode S for Single Servo AF or M for manual focus Film advance mode • Automatically selected. I]] for single-frame shooting , or ~H or ~l for continuous shooting Procedure You can follow steps - Nikon 1768 | Instruction Manual - Page 86
SPECIAL FUNCTIONS This chapter explains advanced photographic techniques and applications including exposure compensation methods. It also shows you how to use the self-timer, how to perform long time exposure, how to check depth of field and what to do when using non-DX-coded films. 86 - Nikon 1768 | Instruction Manual - Page 87
mode (pp. 90-91) • Using exposure compensation button (pp. 92-93) • All Mode Exposure Bracketing (MF-26 users only) (see MF-26 instruction manual) Results will vary, depending on conditions, so you will want to experiment with each method . About reflectance When using the Center-Weighted or Spot - Nikon 1768 | Instruction Manual - Page 88
AE-L (AUTO EXPOSURE LOCK) LEVER In the auto exposure mode, when you want to control exposure based on the brightness of a specific area within the scene, switch the metering system to Center-Weighted or Spot and use the AE-L lever as follows: 2. Lightly press shutter release button , and confirm - Nikon 1768 | Instruction Manual - Page 89
3. Keep shutter release button lightly pressed, slide AE-L lever and hold it in. • While AE-L lever is held in, beeper does not sound for picture-blur alert even if a slow shutter speed is selected. Neither does the green ~ mark for dark scene/subject appear. 4. Recompose the picture and shoot. In - Nikon 1768 | Instruction Manual - Page 90
TO OBTAIN METER READING FOR A PARTICULAR SUBJECT IN MANUAL EXPOSURE MODE In Manual exposure mode, if you want to set exposure as desired on a particular subject, switch metering system to Center-Weighted or Spot and use the following - Nikon 1768 | Instruction Manual - Page 91
S Eo.:, F +,.. ..,- ) 3. Adjust shutter speed and aperture until electronic analog display shows desired exposure . 4. Recompose the picture and shoot. In Single Servo AF mode, if recomposing the picture could change sUbject-to-camera distance, refocus by briefly removing your finger from the - Nikon 1768 | Instruction Manual - Page 92
EXPOSURE COMPENSATION BUTTON To modify exposure control (i.e., from the ISO standard) use the exposure compensation button. Compensation from -5EV to +5EV in 1/3 steps is possible. After taking your photographs, be sure to reset the control to "0" to resume normal operation. (Center-Weighted - Nikon 1768 | Instruction Manual - Page 93
1° _ ~.!J ,!=- ,"C, C, F3. .t.: 2. Once set, exposure compensation remains fixed until reset. Although the ili symbol stays on to indicate that exposure compensation is on, the compensation value disappears from the readout when you remove your finger from ili button, To confirm compensation value, - Nikon 1768 | Instruction Manual - Page 94
SELF-TIMER OPERATION You have a choice of one-shot or two-shot self-timer operation. In one-shot self-timer mode, duration is variable from 2 sec. to 30 sec. When using any auto exposure mode, use eyepiece shutter before setting self-timer to prevent stray light from entering viewfnder and - Nikon 1768 | Instruction Manual - Page 95
ONE-SHOT SELF-TIMER :25 F5.6 EJ~(D)WF IDJ ( , ~J, ~ e~... 1. While pressing ~ button, rotate command dial until desired timer duration with ~ symbol appears in LCD panel. Timer duration can be varied from 2 to 30 seconds in onesecond increments. • Next to 30 (for 30-sec. duration), 10 with ~~ mark - Nikon 1768 | Instruction Manual - Page 96
TWO-SHOT SELF-TIMER 125 F5.6 :eJ[~)(DJWF JL IilJ [ m::=J ~. . 1. While pressing ~ button, rotate command dial counterclockwise until :0 with 00 symbol (next to 30) appears in LCD panel. 2. Compose picture, lightly press shutter release button, and confirm focus and exposure. 3. While pressing ~ - Nikon 1768 | Instruction Manual - Page 97
lens at maximum aperture). This enables you to view the depth of field before you take the picture, with the N90's AperturePriority auto or Manual exposure mode. Depress the depth-of-field preview button to stop the lens down to the aperture set. The image viewed becomes progressively darker as - Nikon 1768 | Instruction Manual - Page 98
Set ML-3, etc. is also recommended to avoid camera shake. II;f (', " ),-.I III 1. Press MODE button and rotate command dial to select Mfor Manual exposure mode. 2. Without pressing MODE button, rotate command dial clockwise until but b appears in LCD panel and viewfinder. 3. Fully depress the - Nikon 1768 | Instruction Manual - Page 99
batteries inside the N90. Data Link System users You can use "Time" instead of "Bulb" for long time exposure. For details, see AC-1 E card instruction manual. MC-20 users You can perform long time exposures of preset duration up to 9 hours 59 minutes 59 seconds. Note that exposure duration depends - Nikon 1768 | Instruction Manual - Page 100
unacceptable OX code is loaded, the Err , ISO and ffiJ marks blink in LCD panel , beeper sounds, and shutter is locked. You set ISO manually. • You can manually set film speed for a OX-coded film, and the camera will automatically recognize the ISO number set, whether it is the higher, lower or - Nikon 1768 | Instruction Manual - Page 101
INTERCHANGING FOCUSING SCREENS In addition to the advanced B-type BriteView screen supplied with the N90 camera, the E-type clear Matt/ Fresnel screen with focusing brackets and grid is available as an option. Type E screen is suitable for copying and architectural photography. 1. Remove the lens. - Nikon 1768 | Instruction Manual - Page 102
3. Remove the screen by grasping the small tab with the tweezers. 5. Using the tweezers, push the front edge of the holder upward until it clicks into place. An improperly placed focusing screen results in unreliable focus information, so always make sure the screen is in its proper place. 4. - Nikon 1768 | Instruction Manual - Page 103
LENSES Your Nikon N90 uses Nikon's respected, long-established tripleclaw F-mount for rugged and reliable performance. Crafted from stainless steel , the camera's mount works perfectly with the chromed brass bayonet of each Nikkor lens. For full performance, always use Nikon lenses. 103 - Nikon 1768 | Instruction Manual - Page 104
A, 12, 13 and PN-11 f 13 o Compatible X Incompatible Autofocus 0 0'2 0'2 X X X X 0'10 X X X X Manual with electronic rangefinder Manual with matte field 0 0 0'3 0 0 '3 0 0 '3 0 0 0 X 0 X 0 X X 0'11 0 0'11 0 0' 11 0 0'11 0 Programmed Auto 0 0 X X X X X X X X X X Exposure - Nikon 1768 | Instruction Manual - Page 105
'1 3D Matrix Metering is selected with D-type AF Nikkor lenses and Advanced Matrix Metering is selected with non-D-type lenses. '2 With maximum effective aperture of f15.6 or faster when using the TC-16A Autofocus Converter. (See page 35). '3 With maximum aperture of f15.6 or faster. '4 Set shutter - Nikon 1768 | Instruction Manual - Page 106
2000mm f/ 11 (No. 200111 to 200310)* • Can be modified, at nominal charge, for use with the N90. Contact an authorized Nikon dealer or service facility. eThe following teleconverters and lenses cannot be used w ith the N90 (correct exposure is unobtainable): • AF Teleconverter TC-16 • AF Nikkor 80mm - Nikon 1768 | Instruction Manual - Page 107
FLASH PHOTOGRAPHY You can enjoy the exc itement of the Nikon N90 camera's advanced flash technology by using Nikon's advanced SB-25 AF Speedlight. With the N90 System you 'll discover the benefits of flash for more picture-taking situations than ever. Make fill-flash a standard part of your - Nikon 1768 | Instruction Manual - Page 108
performs Automatic 8iJlanced Fill-Flash or Standard TTL Flash. For details, see pp. 110-115. '2 Set the N90's exposure mode to Aperture-Priority Auto or Manual. '3 The difference between S8-21A and 58-218, or between S8-16A and 58-168, is the type of controller attached. (For detaifs, see specific - Nikon 1768 | Instruction Manual - Page 109
below. Speedlight S8-25 S8-24 Autofocus using AF assist iIIuminator"1 Yes SlowSync"2 Yes"S Yes Yes"S Rear-Curtain Sync"3 Yes Yes Repeating Flash'4 Yes Manual flash output level compensation 'S FP High-Speed Sync'6 Yes Yes Red-Eye Reduction '? Yes Yes Yes No No S8-23, S8-22 and S8 - Nikon 1768 | Instruction Manual - Page 110
TTL AUTO FLASH-AUTOMATIC BALANCED FILL-FLASH AND STANDARD TTL FLASH TYPE OF TIL AUTO FLASH TIL auto is recommended for most common flash shooting situations. With the Nikon Speedlight set for TIL auto flash (see chart on page 108 for compatibility), Automatic Balanced FillFlash or Standard TIL - Nikon 1768 | Instruction Manual - Page 111
Exposure mode Programmed and Aperture-Priority Shutter-Priority Auto Auto and Manual AF Nikkor lens (except for AF Nikkor for F3 AF , the SB-25's LCD panel shows without rel~. For details, see the SB-25 manual. When using Vari-Program • Vari-Program can be used only with AF Nikkor including Ootype - Nikon 1768 | Instruction Manual - Page 112
to perform standard TIL flash operation. For standard TIL flash, the S8-24's LCD panel shows iIll and blinking ~. For details, see the S8-24 manual. When using Vari-Program • Vari-Program can be used only with AF Nikkor including Ootype AF Nikkor lenses and AI-P-Nikkor lenses. With other lenses - Nikon 1768 | Instruction Manual - Page 113
, SB-15, SB-14*2, SB- 11 *2 or SB-140*2 Exposure mode lens Metering system Programmed and Aperture-Priority Shutter-Priority Auto Auto and Manual Manual O-Iype AF Nikkor lens, non-O-Iype AF Nikkor lens (except lor AF Nikkor for F3AF) and AI-P-Nikkor lens Matrix, CenterWeighted and Spot Multi - Nikon 1768 | Instruction Manual - Page 114
AUTOMATIC BALANCED FILL-FLASH WITH TIL MULTI SENSOR-3D MULTI - SENSOR BALANCED FILL-FLASH AND MULTISENSOR BALANCED FILL-FLASH 3D Multi-Sensor Balanced Fill-Flash is possible only with the combination of the N90, aD-type AF Nikkor lens and the Nikon SB-25 AF Speedlight. In this flash mode, just after - Nikon 1768 | Instruction Manual - Page 115
. This means that, although the main subject is correctly exposed, the background may not be. With SB-25 or SB-24, Standard TIL allows you manual selection of flash output level compensation instead of having the computer do it automatically. So, with SB-25 or SB-24, you can intentionally cancel - Nikon 1768 | Instruction Manual - Page 116
or shorter: 1/250 sec. to 1I(focallength) sec:1 If focal elngth in use is longer than 60mm: 1/250 sec. to 1/60 sec:1 Manually set as desired Manual (M) Manually set as desired from 1/250 sec. to 30 sec:3 '1 With Slow Sync or Rear-Curtain Sync, automatically controlled shutler speed range is - Nikon 1768 | Instruction Manual - Page 117
Reference: Available maximum aperture for each film speed ISO film speed 25 50 100 200 400 BOO 1000 112.B 113.3 1/4 1/4.B 1/5.6 1/6.7 1/7.1 As film speed increases by one step, available maximum aperture is stopped down by 112 flstop. If you are using a lens with a maximum aperture smaller - Nikon 1768 | Instruction Manual - Page 118
bars of 8B-25 or 8B-24, or flash shooting distance range table of 8B-23, 8B-22 or 8B-20, For details, see 8peedlight's manual. 6. Confirm that ready-light is on, then fully depress shutter release button to take a picture, If ready-light blinks for a few seconds after shooting: Flash - Nikon 1768 | Instruction Manual - Page 119
Slow Sync or Rear-Curtain Sync mode, l 0 may appear in the LCD readout to signal that the background may come out underexposed. In Manual exposure mode If electronic analog display indicates "+ (plus) " or "- (minus) " values, backgound may be over- or underexposued. To give the backgound a correct - Nikon 1768 | Instruction Manual - Page 120
TO MAKE NIGHT BACKGROUND MORE VISIBLE-SLOW SYNC OPERATION When fiash pictures are taken at high shutter speeds in dim light, the background may come out dark. To improve background exposure, use Slow Sync to extend the automatically controlled shutter speed range down to 30 sec. Without Slow Sync, - Nikon 1768 | Instruction Manual - Page 121
1. Set camera's exposure mode to P for Auto Multi-Program or A for Aperture-Priority Auto. 2. While pressing the camera's ~ button, rotate command dial until r,l appears in camera's LCD panel. Then follow steps 2-6 of TIL AUTO FLASH OPERATION, on p. 118. Use a tripod to prevent camera shake. 121 - Nikon 1768 | Instruction Manual - Page 122
set in the Auto-Multi Program or AperturePriority Auto exposure mode. However, to set a desired shutter speed, set the N90 to Shutter-Priority Auto or Manual exposure mode. • When the SB-25 or SB-24 is used, note that the Rear-Curtain Sync setting on the camera body is ignored. So - Nikon 1768 | Instruction Manual - Page 123
in the camera's LCD panel. For S8-25 or S8-24 users: Set the Speedlight's sync mode selector to REAR position. (See your Speedlight's instruction manual) . Rear-Sync setting on camera is ignored. Then follow steps 2-6 of TTL AUTO FLASH OPERATION, on p. 118. When using a low shutter speed, mount the - Nikon 1768 | Instruction Manual - Page 124
RED-EYE REDUCTION (for use with 58-25 only) When shooting people or animals in dim light using a flash, the subject's eye may sometimes appear red in color pictures or white in B&W pictures. The Red-Eye Reduction function reduces the possibility of "red-eye". With this function, before the shutter - Nikon 1768 | Instruction Manual - Page 125
rn While pressing the camera's button, rotate the command dial until ~~ appears in camera's LCD readout. Then follow steps 2-6 of TIL Auto Flash Operation, on p118. However, with the Red-Eye Reduction function, remember that it is only at the fourth flash that the shutter is released. So hold the - Nikon 1768 | Instruction Manual - Page 126
NOTES ON FLASH PHOTOGRAPHY • Use only Nikon 8peedlights. Other units may damage the camera's electrical circuits due to incompatible voltage requirements', electric contact alignment or switch phase. • Not compatible with 250Vor higher. • When using a special 8peedlight such as a studio strobe - Nikon 1768 | Instruction Manual - Page 127
EV CHARTS FOR FLASH PHOTOGRAPHY For your reference, the following charts show shutter speed/aperture combination at each EV in fiash photography: (a) Auto Multi-Program (b) Shutter-Priority Auto (e) Aperture-Priority Auto (b) > , ~ ~ ~ ~ ~ 1 1.4 V V VVVVVVVVV / V/ V/ V/ VV/ /V/ V / - Nikon 1768 | Instruction Manual - Page 128
MISCELLANEOUS The Nikon N90 is a high-performance, precision instrument, designed to give you superior pictures. You 'll want to take good care of your camera to ensure the best performance. Take time to review this section thoroughly, and you will add to the pleasure of taking pictures. We've also - Nikon 1768 | Instruction Manual - Page 129
is fully compatible with the Nikon system. Using a linear polarizer, however, will not damage the Nikon system, and it may be used for fully manual focusing and exposure settings made without using the built-in meter or Electronic Rangefinder. • Special filters, such as soft focus filters, cannot be - Nikon 1768 | Instruction Manual - Page 130
CAMERA CARE TIPS 1. Do not touch the camera's reflex mirror or focusing screen. Remove dust with a blower brush. 2. Do not touch the shutter curtains. 3. Do not touch the OX contacts. Keep them clean with a blower brush. 4. Clean the viewfinder eyepiece with a soft, clean cloth. Do not use - Nikon 1768 | Instruction Manual - Page 131
an cool, dry place away from storing leather cases in vinyl authorized Nikon dealer or naphthalene or camphor bags may cause the leather service center. (moth repellent). In a to deteriorate. humid environment, store the camera inside a vinyl bag with a desiccant to keep out dust, moisture - Nikon 1768 | Instruction Manual - Page 132
any malfunction resulting from the use of the camera other than as specified in this manual. Compared with regular batteries, NiCd batteries provide greater efficiency at low temperatures. Before charging NiCd batteries, thoroughly read the instructions for batteries and the battery charger. 132 - Nikon 1768 | Instruction Manual - Page 133
1. Keep batteries out of children 's reach. If someone accidentally swallows batteries, call a doctor immediately. 2. Do not disassemble, short circuit or heat batteries. Do not charge dry cells. 3. If you do not intend to use the camera for a long time, remove the batteries. 4. Battery power - Nikon 1768 | Instruction Manual - Page 134
Metering range (at ISO 100 with fl1.4 lens) Exposure meter Exposure modes Programmed auto exposure control Shutter-priority auto exposure control Available in Manual focus mode with AF Nikkor and other AI-type Nikkor lenses with a maximum aperture of f/5. 6 or faster Three built-in exposure meters - Nikon 1768 | Instruction Manual - Page 135
shown in LCD readout; also shows flash recommended/ ready light LED Shutter speed, aperture, exposure mode, metering system, focus area, manual focus mark, autofocus mark with focus-/release-priority indication, flash sync, film speed, OX mark, exposure compensation mark, frame counterNariProgram - Nikon 1768 | Instruction Manual - Page 136
-timer operation; two-shot self-timer possible; cancellable Provides visual verification of depth of field; can be previewed in Aperture-Priority Auto or Manual exposure mode Automatic, instant-return type Hinged back; interchangeable with Nikon Multi-Control Back MF-26 or World Time Data Back MF-25 - Nikon 1768 | Instruction Manual - Page 137
operates from 1/250 to 1/60 sec: or to 1/(focal length)** in normal sync, or 1/250 to 30 sec. in slow sync; in ShutterPriority Auto or Manual exposure mode, shutter fires at speed set, and when set from 1/250 to 1/8000 sec., shutter is automatically set to 1/250 sec . • With lens focal - Nikon 1768 | Instruction Manual - Page 138
Power source Battery power confirmation Dimensions (WxHxD) Weight (without batteries) Four AA-type batteries ~ for sufficient power; C7iJ indicates batteries are nearing exhaustion; blinking C7iJ indicates batteries are just about exhausted; no indication/ mark appears when batteries are completely - Nikon 1768 | Instruction Manual - Page 139
GLOSSARY Balanced fill-flash operation A technique in flash photography in which flash illumination is controlled to balance it with the ambient light on the scene. The N90 uses an Automatic Balanced Fill-Flash System with TIL Multi-Senosr for this automatic operation with a compatible Nikon TIL - Nikon 1768 | Instruction Manual - Page 140
sets matching lens aperture for correct exposure. Aperture-Priority auto: User selects aperture and camera sets matching shutter speed for correct exposure. Manual: User selects both shutter speed and aperture, following or ignoring the meter's recommendations (by LCD readout) to achieve the desired - Nikon 1768 | Instruction Manual - Page 141
Liquid Crystal Display. The N90 has two: the panel on top of the camera body and inside the viewfinder. Manual flash Flash output is controlled manually in the manual flash mode, while flash output power varies automatically according to the selected aperture in the auto flash mode, Some Speedlights - Nikon 1768 | Instruction Manual - Page 142
TTL auto flash The camera's light sensor measures flash illumination, as reflected by the subject on the film and shuts off the flash when measurement indicates correct exposure. Because the sensor that controls the flash receives light through the lens, TIL auto flash can be used for bounce flash - Nikon 1768 | Instruction Manual - Page 143
batteries. Err - EJBETImF ~- \eE_J _ Err . ISO and IDJ marks blink· Locked Non-DX-coded film or film with unacceptable DX code is loaded. Set manually to correct setting. IcS fS.6 EJ~ lI!JmF .III~e' E_) :" .. - Nikon 1768 | Instruction Manual - Page 144
at S or can be released at C and M. Autofocus is impossible with the subject. Set focus mode selector to M and focus manually using clear matte field. d(5 (F - ~~ n!. (fQlIJ m=J - Nikon 1768 | Instruction Manual - Page 145
LCD panelNiewfinder P. blinks and F- - appears< Shutter Cause and remedy Locked Vari-Program is set even though lens attached has no CPU. mI!IJ =:J[ - Nikon 1768 | Instruction Manual - Page 146
b blinks • Alert signal sounds if electronic beeper is set. 146 Locked buL b is set in the Shutter-Priority Auto exposure mode. Set exposure mode to Manual or set another shutter speed . - Nikon 1768 | Instruction Manual - Page 147
deteriorate and display information may start to fade. You can have the LCD replaced at a nominal charge by contacting an authorized Nikon dealer or service facility. • At high temperatures of 60°C 1140°F or above, the display turns black, making it impossible to read. It returns to normal when the - Nikon 1768 | Instruction Manual - Page 148
No reproduction in any form of this manual, in whole or in part (except for brief quotation in critical articles or reviews), may be made without written authorization from NIKON CORPORATION. Nikon NIKON
-
 1
1 -
 2
2 -
 3
3 -
 4
4 -
 5
5 -
 6
6 -
 7
7 -
8
-
9
-
10
-
11
-
12
-
13
-
14
-
15
-
16
-
17
-
18
-
19
-
20
-
21
-
22
-
23
-
24
-
25
-
26
-
27
-
28
-
29
-
30
-
31
-
32
-
33
-
34
-
35
-
36
-
37
-
38
-
39
-
40
-
41
-
42
-
43
-
44
-
45
-
46
-
47
-
48
-
49
-
50
-
51
-
52
-
53
-
54
-
55
-
56
-
57
-
58
-
59
-
60
-
61
-
62
-
63
-
64
-
65
-
66
-
67
-
68
-
69
-
70
-
71
-
72
-
73
-
74
-
75
-
76
-
77
-
78
-
79
-
80
-
81
-
82
-
83
-
84
-
85
-
86
-
87
-
88
-
89
-
90
-
91
-
92
-
93
-
94
-
95
-
96
-
97
-
98
-
99
-
100
-
101
-
102
-
103
-
104
-
105
-
106
-
107
-
108
-
109
-
110
-
111
-
112
-
113
-
114
-
115
-
116
-
117
-
118
-
119
-
120
-
121
-
122
-
123
-
124
-
125
-
126
-
127
-
128
-
129
-
130
-
131
-
132
-
133
-
134
-
135
-
136
-
137
-
138
-
139
-
140
-
141
-
142
-
143
-
144
-
145
-
146
-
147
-
148
 |
 |
Nikon
INSTRUCTION
MANUAL