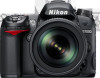
Nikon D7000 D7000 User's Manual
Nikon D7000 Manual
 |
UPC - 018208254743
View all Nikon D7000 manuals
Add to My Manuals
Save this manual to your list of manuals |
Nikon D7000 manual content summary:
- Nikon D7000 | D7000 User's Manual - Page 1
DIGITAL CAMERA User's Manual En - Nikon D7000 | D7000 User's Manual - Page 2
using the camera for the first time, read the safety instructions in "For Your Safety" (0 xii-xvii). Help Use the camera's on-board help feature for help on menu items and other topics. See page 18 for details. Digitutor "Digitutor", a series of "watch and learn" manuals in movie form, is available - Nikon D7000 | D7000 User's Manual - Page 3
Recording and Viewing Movies # P, S, A, and M Modes $ User Settings: U1 and U2 Modes k Release Mode d Image Recording Options N Focus S ISO Sensitivity Z Exposure/Bracketing r White Balance J Image Enhancement l Flash Photography t Other Shooting Options I More on Playback Q Connections U Menu Guide - Nikon D7000 | D7000 User's Manual - Page 4
Can I shoot movies? i Release Modes Can I take photos one at a time or in quick succession? How do I take pictures with the self-timer or a remote control? Can I reduce shutter noise in quiet surroundings? i Focus Can I choose how the camera focuses? Can I choose the focus point? i Image Quality and - Nikon D7000 | D7000 User's Manual - Page 5
? Can I print the date of recording on my photos? Maintenance and Optional Accessories What memory cards can I use? What lenses can I use? What optional flash units (Speedlights) can I use? What other accessories are available for my camera? What software is available for my camera? What do I do - Nikon D7000 | D7000 User's Manual - Page 6
18 Using Camera Menus ...19 First Steps ...21 Charge the Battery ...21 Insert the Battery ...24 Attach a Lens...25 Basic Setup...27 Insert a Memory Card...29 Format the Memory Card ...32 Adjust Viewfinder Focus ...34 Basic Photography and Playback 35 "Point-and-Shoot" Photography (i and j Modes - Nikon D7000 | D7000 User's Manual - Page 7
49 Recording and Viewing Movies 57 Recording Movies ...57 Viewing Movies ...62 Editing Movies ...63 Trimming Movies ...63 Saving Selected Frames...66 P, S, A, and M Modes 67 Mode P (Programmed Auto 68 Mode S (Shutter-Priority Auto 69 Mode A (Aperture-Priority Auto 70 Mode M (Manual)...71 - Nikon D7000 | D7000 User's Manual - Page 8
Image Size ...88 Using Two Memory Cards ...89 Focus 91 Autofocus ...91 Autofocus Mode ...91 AF-Area Mode...94 Focus Point Selection...96 Focus Lock...97 Manual Focus ...99 ISO Sensitivity 101 Auto ISO Sensitivity Control 103 Exposure/Bracketing 105 Metering ...105 Autoexposure Lock...106 - Nikon D7000 | D7000 User's Manual - Page 9
143 Using the Built-in Flash...143 Flash Mode ...144 Flash Compensation...148 FV Lock...149 Other Shooting Options 151 Restoring Default Settings 151 Multiple Exposure...152 Interval Timer Photography 155 Non-CPU Lenses...159 The GP-1 GPS Unit ...162 More on Playback 163 Full-Frame Playback - Nikon D7000 | D7000 User's Manual - Page 10
Control 205 Long Exp. NR (Long Exposure Noise Reduction 205 High ISO NR...205 A Custom Settings: Fine-Tuning Camera Settings 206 A: Reset Custom Settings 207 a: Autofocus...208 a1: AF-C Priority Selection 208 a2: AF-S Priority Selection 208 a3: Focus Tracking with Lock-On 209 a4: AF Point - Nikon D7000 | D7000 User's Manual - Page 11
211 b2: EV Steps for Exposure Cntrl 211 b3: Easy Exposure Compensation 212 b4: Center-Weighted Area 213 b5: Fine Tune Optimal Exposure 213 c: Timers/AE Lock ...213 c1: Shutter-Release Button AE-L 213 c2: Auto Meter-off Delay 214 c3: Self-Timer...214 c4: Monitor off Delay...215 c5: Remote on - Nikon D7000 | D7000 User's Manual - Page 12
Mode...237 Flicker Reduction...237 Time Zone and Date ...237 Language ...238 Image Comment ...238 Auto Image Rotation ...239 Image Dust Off Ref Photo 240 Battery Info...242 Copyright Information 243 Save/Load Settings...244 Virtual Horizon ...245 AF Fine Tune ...246 Eye-Fi Upload ...247 Firmware - Nikon D7000 | D7000 User's Manual - Page 13
Now" ...284 "Clean at Startup/Shutdown 285 "Manual Cleaning" ...286 Caring for the Camera and Battery: Cautions 289 Available Settings ...292 Defaults ...295 Exposure Program (Mode P 298 Troubleshooting ...299 Display ...299 Shooting (All Modes) ...300 Shooting (P, S, A, M)...302 Playback ...303 - Nikon D7000 | D7000 User's Manual - Page 14
. In the event of focused into the camera when the sun is in malfunction, the product should be or close to the frame could cause a fire. removing the battery, take the equipment to a Nikon-authorized service center for inspection. A Observe caution when using the flash • Using the camera with - Nikon D7000 | D7000 User's Manual - Page 15
equipment. result in overheating and damage to the • Do not short or disassemble the battery. charger. • Be sure the product is off before • Dust on or near the metal parts of the replacing the battery. If you are using an plug should be removed with a dry cloth. AC adapter, be sure it is - Nikon D7000 | D7000 User's Manual - Page 16
. accurate and complete, we would • Nikon reserves the right to change the appreciate it were you to bring any errors or specifications of the hardware and software omissions to the attention of the Nikon described in these manuals at any time and representative in your area (address without - Nikon D7000 | D7000 User's Manual - Page 17
AC 125 V (U.S.A. only): The power cable must be rated for the voltage in use, be at least AWG no. 18 gauge, and have SVG insulation or better with used in accordance with the instructions, that are not expressly approved by Nikon may cause harmful interference to radio Corporation may void the user - Nikon D7000 | D7000 User's Manual - Page 18
to another person, erase all data using commercial deletion software, or format the device and then completely refill it with images containing no private information (for example, pictures of empty sky). Be sure to also replace any pictures selected for preset manual (0 123). Care should be taken - Nikon D7000 | D7000 User's Manual - Page 19
/ Visit these sites to keep up-to-date with the latest product information, tips, answers to frequently-asked questions (FAQs), and general advice on digital imaging and photography. Additional information may be available from the Nikon representative in your area. See the following URL for contact - Nikon D7000 | D7000 User's Manual - Page 20
xviii - Nikon D7000 | D7000 User's Manual - Page 21
particularly recommended if the camera is used professionally. Any accessories regularly used with the camera, such as lenses or optional flash units, should be included when the camera is inspected or serviced. A Camera Settings The explanations in this manual assume that default settings are used - Nikon D7000 | D7000 User's Manual - Page 22
rest of the manual. X The Camera Body 1 Release mode dial 7, 77 2 Mode dial 6 3 Eyelet for camera strap 4 Release mode dial lock release 7, 77 5 Accessory shoe (for optional flash unit).......... 275 6 Accessory shoe cover 275 7 Power switch 2 8 Shutter-release button 38, 39 9 E (exposure - Nikon D7000 | D7000 User's Manual - Page 23
(front 81 5 Mounting mark 25 6 Built-in microphone 58, 60 7 Lens release button 26 8 Connector cover 180, 182, 191, 193 9 Cover for accessory terminal and external microphone connectors 57 10 AF-mode button 50, 92, 95 11 Focus-mode selector 91, 99 12 Meter coupling lever 310 13 Mirror 83 - Nikon D7000 | D7000 User's Manual - Page 24
The Camera Body (Continued) X 1 AF-assist illuminator 210 Self-timer lamp 81 Red-eye reduction lamp 145 2 Sub-command dial 13, 233 3 Fn button 149, 230 4 Depth-of-field preview button 72, 232 5 Battery-chamber cover 24 6 Battery-chamber cover latch 24 7 Contact cover for optional MB-D11 - Nikon D7000 | D7000 User's Manual - Page 25
175 Q (format) button 32 4 K (playback) button 46, 163 5 Monitor Viewing settings 10 Live view 49, 57 Viewing pictures 46 Full-frame playback 163 6 G (menu) button 18, 195 7 L (help/protect) button 18, 174 WB (white balance) button 117 8 W (thumbnail/playback zoom out) button 171, 172 ISO - Nikon D7000 | D7000 User's Manual - Page 26
modes: Mode dial X P, S, A, and M Modes Select these modes for full control over camera settings. • P-Programmed auto (0 68) • S-Shutter-priority auto (0 69) • A-Aperture-priority auto (0 70) • M-Manual (0 71) Auto Modes Select these modes for simple, point-and-shoot photography. • i Auto - Nikon D7000 | D7000 User's Manual - Page 27
photographs at up to 6 frames CH Continuous high speed per second while the shutter-release button is pressed. J Quiet shutter-release As for single-frame, except that camera noise is reduced. E Self-timer Take pictures with the self-timer. 4 Remote control Take pictures with an optional ML-L3 - Nikon D7000 | D7000 User's Manual - Page 28
, 112 Number of shots per interval 156 2 Shutter speed 69, 71 Maximum aperture (non-CPU lenses 159 Exposure compensation value 107 PC mode indicator 181 Flash compensation value 148 White balance fine-tuning 120 Color temperature 122 White balance preset number 123, 128 Number of shots - Nikon D7000 | D7000 User's Manual - Page 29
Setting d2 216 2 Focus points 38, 96 AF-area mode 94 3 AF area brackets 37, 165 4 Battery indicator 35, 216 5 Black-and-white indicator 216 6 "No memory card" indicator 30, 216 7 Focus indicator 38, 97, 100 8 Autoexposure (AE) lock 106 9 Shutter speed 69, 71 AF mode 222 18 Aperture Auto - Nikon D7000 | D7000 User's Manual - Page 30
exposures remaining 36 Manual lens number 161 13 Fn button assignment 230 14 AE-L/AF-L button assignment 232 15 Picture Control indicator 132 16 Long exposure noise reduction indicator ....... 205 17 Auto distortion control 205 18 White balance 117 White balance fine-tuning indicator 120 19 - Nikon D7000 | D7000 User's Manual - Page 31
33 Active D-Lighting indicator 139 34 High ISO noise reduction indicator 205 35 Movie quality 60 36 Autofocus mode 91 37 Copyright information 243 38 "Clock not set" indicator 28, 237 39 Image comment indicator 238 40 Release mode 7, 77 Continuous shooting speed 78, 217 41 Eye-Fi connection - Nikon D7000 | D7000 User's Manual - Page 32
230 7 AE-L/AF-L button assignment 232 8 Picture Control 132 9 Long exposure noise reduction 205 10 Auto distortion control 205 A Tool Tips A tool tip giving the name of the selected item appears in the information display. Tool tips can be turned off using Custom Setting d5 (Screen Tips; 0 216 - Nikon D7000 | D7000 User's Manual - Page 33
to adjust a variety of settings. M/Y button Flash mode Flash compensation X D button Bracketing AF-mode button Autofocus mode AF-area mode Mode dial Sub-command dial E button Exposure compensation WB/L button White balance ISO/W button ISO sensitivity QUAL/X button Image quality/size Main - Nikon D7000 | D7000 User's Manual - Page 34
an autofocus mode (0 92). QUAL button Sub-command dial Control panel + Choose an AF-area mode (0 95). AF-mode button Main command dial Control panel + ❚❚ ISO Sensitivity Set ISO sensitivity (0 101). AF-mode button Sub-command dial Control panel + ISO button Main command dial Control panel 14 - Nikon D7000 | D7000 User's Manual - Page 35
a shutter speed (mode S or M; 0 69, 71). Choose an aperture (mode A or M; 0 70, 71). Mode S or M Main command dial Control panel Choose a metering option (mode P, S, A, or M; 0 105). Mode A or M Sub-command dial Control panel + Set exposure compensation (mode P, S, A, or M; 0 107). Z button - Nikon D7000 | D7000 User's Manual - Page 36
dial + Control panel Fine-tune white balance (0 120), set color temperature (0 122), or choose a white balance preset (0 128) in mode P, S, A, or M. ❚❚ Flash Settings Choose a flash mode (0 144). WB button Main command dial + WB button Sub-command dial + Control panel Control panel Set flash - Nikon D7000 | D7000 User's Manual - Page 37
Monitor Cover A clear plastic cover is provided with the camera to keep the monitor clean and protect it when the camera is not in use. To attach the cover, insert the projection on the top of the cover into the matching indentation above the camera monitor (q) and press the bottom of the cover - Nikon D7000 | D7000 User's Manual - Page 38
from the camera menus. To view the menus, press the G button. G button X Tabs Choose from the following menus: • D: Playback (0 195) • C: Shooting (0 202) • A: Custom Settings (0 206) • B: Setup (0 236) • N: Retouch (0 248) • O/m: My Menu or Recent settings (defaults to My Menu; 0 265) Slider - Nikon D7000 | D7000 User's Manual - Page 39
Using Camera Menus The multi selector and J button are used to navigate the camera menus. Move cursor up J button: select highlighted item Cancel and return to Select highlighted item or previous menu display sub-menu X Move cursor down Follow the steps below to navigate the menus. 1 Display - Nikon D7000 | D7000 User's Manual - Page 40
: • Menu items that are displayed in gray are not currently available. • While pressing 2 generally has the same effect as pressing J, there are some cases in which selection can only be made by pressing J. • To exit the menus and return to shooting mode, press the shutter-release button halfway - Nikon D7000 | D7000 User's Manual - Page 41
is powered by an EN-EL15 rechargeable Li-ion battery (supplied). To maximize shooting time, charge the battery in the supplied MH-25 battery charger before use. About 2 hours and 35 minutes are required to fully recharge the battery when no charge remains. X 1 Connect the AC power cable or - Nikon D7000 | D7000 User's Manual - Page 42
3 Insert the battery. Place the battery in the battery bay as shown in the illustration on the charger. X 4 Plug the charger in. The CHARGE lamp will blink while the battery charges. Battery Charging charging complete D Charging the Battery Charge the battery indoors at ambient temperatures - Nikon D7000 | D7000 User's Manual - Page 43
the temperature is in the correct range and then unplug the charger and remove and reinsert the battery. If the problem persists, cease use immediately and take battery and charger to your retailer or a Nikon-authorized service representative. The supplied power cable and AC wall adapter are for - Nikon D7000 | D7000 User's Manual - Page 44
place when the battery is fully inserted (w). 4 Close the battery-chamber cover. Battery latch A Removing the Battery Turn the camera off and open the battery-chamber cover. Press the battery latch in the direction shown by the arrow to release the battery and then remove the battery by hand. 24 - Nikon D7000 | D7000 User's Manual - Page 45
the camera when the lens is removed. The lens generally used in this manual for illustrative purposes is an AF-S DX NIKKOR 18-105mm f/3.5-5.6G ED VR. mark on the camera body, position the lens in the camera's bayonet mount (q). Being careful not to press the lensrelease button, rotate the lens - Nikon D7000 | D7000 User's Manual - Page 46
AF-S DX NIKKOR 18-105mm f/3.5-5.6G ED VR lenses support vibration reduction (VR), which reduces blur caused by camera shake even when the camera is panned, allowing shutter speeds to be slowed by approximately 3 EV (Nikon measurements; effects vary with the user and shooting conditions). X To use - Nikon D7000 | D7000 User's Manual - Page 47
Setup A language-selection dialog will be displayed the first time the camera is turned on. Choose a language and set the time and date. Photographs can not be taken until you have set the time and date. 1 Turn the camera press J. 4 Choose a date format. Press 1 or 3 6 Set the date and time. The dialog - Nikon D7000 | D7000 User's Manual - Page 48
Clock Language and date/time settings can be changed at any time using the Language (0 238) and Time zone and date (0 237) options in the setup menu. The camera clock can also be synchronized with GPS devices (0 162). A The Clock Battery The camera clock is powered by an independent, rechargeable - Nikon D7000 | D7000 User's Manual - Page 49
Insert a Memory Card The camera stores pictures on Secure Digital (SD) memory cards (available separately; 0 319). The camera has two memory card slots (Slot 1 and Slot 2); if you will be using only one memory card, insert it in Slot 1 (0 30). 1 Turn the camera off. X A Inserting and Removing - Nikon D7000 | D7000 User's Manual - Page 50
2 plays a backup or secondary role. If the default setting of Overflow is selected for Role played by card in Slot 2 (0 89) when two memory cards are inserted, the card in slot 2 will only be used when the card in slot 1 is full. 4GB Slot 1 The control panel shows the slot or slots that currently - Nikon D7000 | D7000 User's Manual - Page 51
• Memory cards may be hot after use. Observe due caution when removing memory cards from the camera. • Do not remove memory cards from the camera, turn the camera off, or remove or disconnect the power source during formatting or while data are being recorded, deleted, or copied to a computer - Nikon D7000 | D7000 User's Manual - Page 52
the camera on. 2 Press the Q buttons. Hold the Q (O and Z) buttons down simultaneously until a blinking C appears in the shutter-speed displays in the control panel and is complete, the control panel and viewfinder will show the number of photographs that can be recorded at current settings. 32 - Nikon D7000 | D7000 User's Manual - Page 53
will be displayed in the monitor if you attempt to release the shutter). To unlock the memory card, slide the switch to the "write" position. 4GB Write-protect switch X A See Also See page 236 for information on formatting memory cards using the Format memory card option in the setup menu. 33 - Nikon D7000 | D7000 User's Manual - Page 54
single-servo autofocus (AF-S; 0 91), single-point AF (0 94), and the center focus point (0 96), and then frame a high-contrast subject in the center focus point and press the shutter-release button halfway to focus the camera. With the camera in focus, use the diopter adjustment control to bring the - Nikon D7000 | D7000 User's Manual - Page 55
sBasic Photography and Playback "Point-and-Shoot" Photography (i and j Modes) s This section describes how to take photographs in i (auto) mode, an automatic "point-and-shoot" mode in which the majority of settings are controlled by the camera in response to shooting conditions, and in which the - Nikon D7000 | D7000 User's Manual - Page 56
number will flash, n or j will blink in the shutter-speed displays, and the icon for the affected card will blink. Insert another memory card (0 29) or delete some photos (0 47, 175). A Camera Off Display If the camera is turned off with a battery and memory card inserted, the memory card icon - Nikon D7000 | D7000 User's Manual - Page 57
the camera as shown at right when framing photographs in portrait (tall) orientation. In j mode, shutter speeds slow when lighting is poor; use of a tripod is recommended. 2 Frame the photograph. Frame a photograph in the viewfinder with the main subject in the AF area brackets. A Using a Zoom - Nikon D7000 | D7000 User's Manual - Page 58
. Focus point In-focus indicator Description I Subject in focus. 2 4 Focus point is between camera and subject. 2 4 Focus point is behind subject. 2 4 Camera unable to focus using autofocus. (blinks) See page 93. In-focus indicator Buffer capacity While the shutter-release button is - Nikon D7000 | D7000 User's Manual - Page 59
A Auto-Meter Off Focus: press halfway Shoot: press all the way down s The viewfinder and the control panel shutter speed and aperture displays will turn off if no operations are performed for about 6 seconds (auto meter off ), reducing the drain on the battery. Press the shutter-release button - Nikon D7000 | D7000 User's Manual - Page 60
Creative Photography (Scene Modes) The camera offers a choice of "scene" modes. Choosing a scene mode automatically optimizes settings to suit the selected scene, making creative photography as simple as selecting a mode, framing a picture, and shooting as described on pages 35-39. ❚❚ h Mode To - Nikon D7000 | D7000 User's Manual - Page 61
turn off; use of a tripod is recommended to prevent blur when lighting is poor. Fast shutter speeds freeze motion for dynamic sports shots in which the main subject stands out clearly. The built-in flash and AF-assist illuminator turn off. To take a sequence of shots, select continuous release mode - Nikon D7000 | D7000 User's Manual - Page 62
close-up shots of flowers, insects, and other small objects (a macro lens can be used to focus at very close ranges). Use of a tripod is recommended to prevent blur. Reduce noise and unnatural colors when photographing night landscapes, including street lighting and neon signs. The built-in flash - Nikon D7000 | D7000 User's Manual - Page 63
off. Preserves the colors seen in the weak natural light before dawn or after sunset. The built-in flash and AF-assist illuminator turn off; use of a tripod is recommended to prevent blur when lighting is poor. u Sunset w Pet Portrait Preserves the deep hues seen in sunsets and sunrises. The - Nikon D7000 | D7000 User's Manual - Page 64
is poor. Captures the brilliant reds and yellows in autumn leaves. The built-in flash turns off; use of a tripod is recommended to prevent blur when lighting is poor. y Blossom 0 Food Use for fields of flowers, orchards in bloom, and other landscapes featuring expanses of blossoms. The built-in - Nikon D7000 | D7000 User's Manual - Page 65
shooting dark scenes to create dark, somber images that bring out highlights. The built-in flash turns off; use of a tripod is recommended to prevent blur when lighting is poor. 2 High Key Use when shooting bright scenes to create bright images that seem filled with light. The built-in flash turns - Nikon D7000 | D7000 User's Manual - Page 66
I KON D7000 To end playback and return to shooting mode, press the shutter-release button halfway. 1/ 125 F5. 6 100 35mm AUTO1 0, 0 20100D7000 DSC_0001. JPG 15/ 04/ 2010 10 : 02 : 27 NORMAL 4928×3264 A Image Review When On is selected for Image review in the playback menu (0 200), photographs - Nikon D7000 | D7000 User's Manual - Page 67
press the O button again to delete the image and return to playback (to exit without deleting the picture, press K). A Delete To delete selected images (0 176), all images taken on a selected date (0 177), or all images in a chosen location on a selected memory card (0 176), use the Delete option - Nikon D7000 | D7000 User's Manual - Page 68
s 48 - Nikon D7000 | D7000 User's Manual - Page 69
current autofocus mode. 50 y AF-area mode The current AF-area mode. 50 u Focus point The current focus point. The display varies with the option selected for AF-area mode (0 50). 51 i Time remaining (movie mode) The recording time remaining in movie mode. 58 o Movie quality The frame size - Nikon D7000 | D7000 User's Manual - Page 70
. Camera x AF-F focuses continuously until shutter-release button is pressed. Focus locks when shutter-release button is pressed halfway. Monitor To use manual focus, rotate the focus-mode selector to M and proceed to Step 6 after focusing as described on page 55. 3 Choose an AF-area mode - Nikon D7000 | D7000 User's Manual - Page 71
through the frame. Focus point Focus point D Using Autofocus in Live View Use an AF-S lens. The desired results may not be achieved with other lenses or teleconverters. Note that in live view, autofocus is slower and the monitor may brighten or darken while the camera focuses. The focus point may - Nikon D7000 | D7000 User's Manual - Page 72
), borders will no longer be displayed. x $/% (wide- and normal-area AF): The camera focuses on the subject in the selected focus point while the shutter- release button is pressed halfway. & (subject-tracking AF): The camera focuses on the current subject. To end tracking, press J. D Subject - Nikon D7000 | D7000 User's Manual - Page 73
indicators * Hide all indicators * x Virtual horizon * Framing grid * * A crop showing the area recorded is displayed during movie recording when frame sizes other than 640 × 424 are selected for Movie settings > Movie quality in the shooting menu (0 60; when movie indicators are displayed - Nikon D7000 | D7000 User's Manual - Page 74
A HDMI When the camera is attached to an HDMI video device, the camera monitor will turn off and the video device will display the view through the lens as shown at right. If the device supports HDMI-CEC, select Off for the HDMI > Device control option in the setup menu (0 194) before shooting in - Nikon D7000 | D7000 User's Manual - Page 75
in, a navigation window will appear in a gray frame at the bottom right corner of the display. Use the multi selector to scroll to areas of the frame not visible in the monitor (available only if wide- or normal-area AF is selected X button for AF-area mode), or press W to zoom out. x Navigation - Nikon D7000 | D7000 User's Manual - Page 76
x 56 - Nikon D7000 | D7000 User's Manual - Page 77
-in microphone may record lens noise during autofocus or vibration reduction. This can be prevented by using a commercially-available external microphone with a stereo mini-pin jack (3.5 mm diameter). External microphones can also be used to record in stereo. 3 Choose an AF-area mode. See Step 3 on - Nikon D7000 | D7000 User's Manual - Page 78
is not available when On is selected for Manual movie settings in mode M as described on page 60. In autofocus mode, focus can be locked by pressing the shutter-release button Time remaining halfway. A See Also The behavior of the AE-L/AF-L button can be adjusted using Custom Setting f5 (Assign - Nikon D7000 | D7000 User's Manual - Page 79
you attempt to start live view or movie recording, wait for the internal circuits to cool and then try again. Shutter speed and ISO sensitivity are adjusted automatically unless On is selected for Manual movie settings (0 60) and the camera is in mode M. D The Count-Down Display A count down will be - Nikon D7000 | D7000 User's Manual - Page 80
to the card in Slot 2. The menu shows the time available on each card; recording ends automatically when no time remains. • Manual movie settings: Choose On to allow manual adjustments to shutter speed and ISO sensitivity when the camera is in mode M. Shutter speed can be chosen from values - Nikon D7000 | D7000 User's Manual - Page 81
1 Select Movie settings. Press the G button to display the menus. Highlight Movie settings in the shooting menu and press 2. G button 2 Choose movie options. Highlight the desired item and press 2, then highlight an option and press J. y 61 - Nikon D7000 | D7000 User's Manual - Page 82
-frame playback. Exit to shooting mode Press shutter-release button halfway. Monitor will turn off; photographs can be taken immediately. Display menus G See page 195 for more information. A The 2 Icon 2 is displayed in full-frame and movie playback if the movie was recorded without sound. 62 - Nikon D7000 | D7000 User's Manual - Page 83
of movies: 1 Display a movie full frame. K button y Press the K button to display pictures full frame in the monitor and press 4 and 2 to scroll through pictures until the movie you wish to edit is displayed. 2 Choose a starting or end point. Play the movie back as described on page 62 - Nikon D7000 | D7000 User's Manual - Page 84
to display the retouch menu. L button 4 Choose an option. To create a copy that includes the current frame and all following frames, highlight Choose start point in the edit movie menu y and press J. Select Choose end point to create a copy that includes the current frame and all preceding - Nikon D7000 | D7000 User's Manual - Page 85
copy will be created. The copy will not be saved if there is insufficient space available on the memory card. To prevent the camera from turning off unexpectedly, use a fully-charged battery when editing movies. A The Retouch Menu Movies can also be edited using the Edit movie option in the retouch - Nikon D7000 | D7000 User's Manual - Page 86
View the movie and choose a frame. Play the movie back as described on page 62. Pause the movie at the frame you intend to copy. 2 Display the retouch menu. Press L to display the retouch menu. y L button 3 Choose Save selected frame. Highlight Save selected frame and press J. 4 Create a still copy - Nikon D7000 | D7000 User's Manual - Page 87
or blur motion. Aperture-priority auto (0 70): User chooses aperture; camera selects A shutter speed for best results. Use to blur background or bring both foreground and background into focus. # M Manual (0 71): User controls both shutter speed and aperture. Set shutter speed to "bulb" or "time - Nikon D7000 | D7000 User's Manual - Page 88
in most situations. This mode is recommended for snapshots and other situations in which you want to leave the camera in charge of shutter speed and aperture. To take photographs in programmed auto: 1 Rotate the mode dial to P. Mode dial 2 # Frame a photograph, focus, and shoot. A Flexible - Nikon D7000 | D7000 User's Manual - Page 89
Mode S (Shutter-Priority Auto) In shutter-priority auto, you choose the shutter speed while the camera automatically selects the aperture that will produce the optimal exposure. Use slow shutter speeds to suggest motion by blurring moving subjects, fast shutter speeds to "freeze" motion. Fast - Nikon D7000 | D7000 User's Manual - Page 90
and maximum for the lens. Sub-command dial 3 Frame a photograph, focus, and shoot. A Non-CPU Lenses (0 270) Use the lens aperture ring to adjust aperture. If the maximum aperture of the lens has been specified using the Non-CPU lens data item in setup menu (0 159) when a non-CPU lens is attached - Nikon D7000 | D7000 User's Manual - Page 91
or the shutter can be held open indefinitely for a long time-exposure (A, 0 73). Aperture can be set to values between the minimum and maximum for the lens. Use the exposure indicators to check exposure. Shutter speed Aperture Main command dial Sub-command dial 3 Frame a photograph, focus, and - Nikon D7000 | D7000 User's Manual - Page 92
pressed. See page 228 for more information. A AF Micro NIKKOR Lenses Provided that an external exposure meter is used, the exposure ratio need only be taken into # account when the lens aperture ring is used to set aperture. A The Exposure Indicator If a shutter speed other than "bulb" or "time" is - Nikon D7000 | D7000 User's Manual - Page 93
battery or an optional EH-5a AC adapter and EP-5B power connector. Note that noise # (randomly-spaced bright pixels or fog) may occur in long exposures; before shooting, choose On for Long exp. NR in the shooting menu (0 205). 2 Rotate the mode dial to M. Mode dial 3 Choose a shutter speed - Nikon D7000 | D7000 User's Manual - Page 94
shutter. Bulb: After focusing, press the shutter-release button on the camera or optional MC-DC2 remote cord all the way down. Keep the shutter-release button pressed until the exposure is complete. Time: Press the ML-L3 shutter-release button all the way down to start shooting. 5 Close the shutter - Nikon D7000 | D7000 User's Manual - Page 95
(mode P), shutter speed (modes S and M), aperture (modes A and M), exposure and flash compensation, flash mode, focus point, metering, AF and AF-area modes (viewfinder photography only), bracketing, and settings in the shooting (0 202) and Custom Settings (0 206) menus (note that the camera - Nikon D7000 | D7000 User's Manual - Page 96
, or to U2 to recall the settings assigned to U2. Mode dial $ Resetting User Settings To reset settings for U1 or U2 to default values: 1 Select Reset user settings. Press the G button to display the menus. Highlight Reset user settings in the setup menu and press 2. G button 2 Select U1 or U2 - Nikon D7000 | D7000 User's Manual - Page 97
mode to minimize camera shake in telephoto or close-up MUP photography or in other situations in which the slightest camera movement can result in blurred photographs (0 83). 1 Average frame rate with an EN-EL15 battery, continuous-servo AF, manual or shutter-priority auto exposure, a shutter speed - Nikon D7000 | D7000 User's Manual - Page 98
focus, and shoot. While the shutter-release button is pressed all the way down, pictures will be taken at about 6 fps in continuous high speed mode, or at the frame rate selected for Custom Setting d6 (CL mode shooting speed, 0 217) in continuous low speed mode. Frame rates may slow when the battery - Nikon D7000 | D7000 User's Manual - Page 99
The approximate number of images that can be stored in the memory buffer at current settings is shown in the exposure- count displays in the viewfinder and control panel while the shutter-release button is pressed. The illustration at right shows the display when space remains in the buffer - Nikon D7000 | D7000 User's Manual - Page 100
camera on a stable, level surface. 2 Select a release mode. Press the release mode dial lock release and rotate the release-mode dial to E (self-timer) or 4 (remote) mode. Release mode dial In remote mode, the timing of the shutter G button release can be selected using the Remote control mode - Nikon D7000 | D7000 User's Manual - Page 101
DK-5 eyepiece cap 4 Take the photograph. Self-timer mode: Press the shutter-release button halfway to focus, and then press the button the rest of the way down to start the self-timer (note that the timer will not start if the camera is unable to focus or in other situations in which the - Nikon D7000 | D7000 User's Manual - Page 102
the camera is unable to focus in viewfinder photography, it will return to stand-by without releasing the shutter. A Remote Mirror-up Mode Metering is not performed in remote mirror-up mode. Photos can not be framed in the viewfinder while the mirror is raised. AA In self-timer mode, a shutter speed - Nikon D7000 | D7000 User's Manual - Page 103
by camera movement when the mirror is raised. Use of a tripod is recommended. 1 Select mirror up mode. Press the release mode dial lock release and rotate the release mode dial to MUP. Release mode dial 2 Raise the mirror. Frame the picture, focus, and then press the shutter-release button the - Nikon D7000 | D7000 User's Manual - Page 104
k 84 - Nikon D7000 | D7000 User's Manual - Page 105
to the memory card. NEF (RAW) NEF Settings such as white balance and contrast can be adjusted on a computer after shooting. JPEG fine JPEG normal JPEG Record JPEG images at a compression ratio of roughly 1:4 (fine quality). * Record JPEG images at a compression ratio of roughly 1:8 (normal - Nikon D7000 | D7000 User's Manual - Page 106
is set by pressing the QUAL button and rotating the main command dial until the desired setting is displayed in the control panel. A The Shooting Menu Image quality can also be adjusted using the Image quality option in the shooting menu (0 202). QUAL button Main command dial Control panel - Nikon D7000 | D7000 User's Manual - Page 107
options can be accessed from the shooting menu. Press the G button to display the menus, highlight the desired color data recorded. A NEF (RAW) Images NEF (RAW) images can be viewed on the camera or using software such as Capture NX 2 (available separately; 0 281) or ViewNX 2 (available on - Nikon D7000 | D7000 User's Manual - Page 108
size is set by pressing the QUAL button and rotating the sub-command dial until the desired setting is displayed in the control panel. A The Shooting Menu Image size can also be adjusted using the Image size option in the shooting menu (0 202). QUAL button Sub-command dial d Control panel 88 - Nikon D7000 | D7000 User's Manual - Page 109
on the card with the least amount of memory. Shutter release will be disabled when either card is full. A Recording Movies When two memory cards are inserted in the camera, the slot used to record movies can be selected using the Movie settings > Destination option in the shooting menu (0 60). d 89 - Nikon D7000 | D7000 User's Manual - Page 110
d 90 - Nikon D7000 | D7000 User's Manual - Page 111
: Mode Description N AF-A Auto-servo AF: Camera automatically selects single-servo autofocus if subject is stationary, continuous-servo autofocus if subject is moving. Single-servo AF: For stationary subjects. Focus locks when shutter-release button is pressed AF-S halfway. At default settings - Nikon D7000 | D7000 User's Manual - Page 112
To select the autofocus mode, press the AF-mode button and rotate the main command dial until the desired setting is displayed in the viewfinder or control panel. AF-mode button Main command dial Control panel Viewfinder N 92 - Nikon D7000 | D7000 User's Manual - Page 113
Predictive Focus Tracking In AF-C mode or when continuous-servo autofocus is selected in AF-A mode, the camera will initiate predictive focus tracking if the subject moves toward or away from the camera while the shutter-release button is pressed halfway. This allows the camera to track focus while - Nikon D7000 | D7000 User's Manual - Page 114
When the shutter-release button is pressed halfway, the colors in the area surrounding the focus point are stored in the camera. Consequently 3D-tracking may not produce the desired results with subjects that are the same color as the background or that occupy a very small area of the frame. 94 - Nikon D7000 | D7000 User's Manual - Page 115
after the camera focuses; in AF-C mode or when continuous-servo autofocus is selected in AF-A mode, the main focus point remains highlighted after the other focus points have turned off. To select the AF-area mode, press the AFmode button and rotate the sub-command dial until the desired setting is - Nikon D7000 | D7000 User's Manual - Page 116
A Auto-area AF The focus point for auto-area AF is selected automatically; manual focus-point selection is not available. A See Also For information on choosing when the focus point is illuminated, see Custom Setting a4 (AF point illumination, 0 209). For information on setting focus-point selection - Nikon D7000 | D7000 User's Manual - Page 117
for AF-area mode (0 94). 1 Focus. Position the subject in the selected focus point and press the shutter-release button halfway to initiate focus. Check that the in-focus indicator (I) appears in the viewfinder. 2 Lock focus. AF-A and AF-C focus modes: With the shutter-release button pressed - Nikon D7000 | D7000 User's Manual - Page 118
the camera and the subject while focus lock is in effect. If the subject moves, focus again at the new distance. A See Also See Custom setting c1 (Shutter-release button AE-L, 0 213) for information on using the shutter-release button to lock exposure, Custom Setting f5 (Assign AE-L/AF-L button - Nikon D7000 | D7000 User's Manual - Page 119
Manual focus is available for lenses that do not support autofocus (non-AF NIKKOR lenses) or when the autofocus does not produce the desired results (0 93). • AF-S lenses: Set the lens focus mode switch to M. A AF-S Lenses Users of AF-S lenses (including the AF-S DX NIKKOR 18-105mm f/3.5-5.6G ED VR - Nikon D7000 | D7000 User's Manual - Page 120
faster, the viewfinder focus indicator can be used to confirm whether the subject in the selected focus point is in focus (the focus point can be selected from any of the 39 focus points). After positioning the subject in the selected focus point, press the shutter-release button halfway and rotate - Nikon D7000 | D7000 User's Manual - Page 121
to ISO 25600). Auto and scene modes also offer an AUTO option, which allows the camera to set ISO sensitivity automatically in response to lighting conditions. The higher the ISO sensitivity, the less light needed to make an exposure, allowing higher shutter speeds or smaller apertures. ISO - Nikon D7000 | D7000 User's Manual - Page 122
dial is rotated to P, S, A, or M after AUTO is selected for ISO sensitivity in another mode, the ISO sensitivity last selected in P, S, A, or M mode will be restored. A Hi 0.3-Hi 2 Pictures taken at these settings are more likely to be subject to noise (randomly-spaced bright pixels, fog, or lines - Nikon D7000 | D7000 User's Manual - Page 123
value selected by the user (ISO sensitivity is adjusted appropriately when the flash is used). 1 Select Auto ISO sensitivity control. Press the G button and select ISO sensitivity settings in the shooting menu. Highlight Auto ISO sensitivity control and press 2. G button 2 Select On. Highlight On - Nikon D7000 | D7000 User's Manual - Page 124
display. A Auto ISO Sensitivity Control Noise is more likely at higher sensitivities. Use the High ISO NR option in the shooting menu to reduce noise (see page 205). When a flash is used, the value selected for Minimum shutter speed is ignored in favor of the option selected for Custom Setting e1 - Nikon D7000 | D7000 User's Manual - Page 125
3.5 mm (0.14 in.) in diameter (approximately 2.5% of frame). Circle is centered on current focus point, making it possible to meter off-center subjects b (if non-CPU lens is used or if auto-area AF is in effect, camera will meter center focus point). Ensures that subject will be correctly exposed - Nikon D7000 | D7000 User's Manual - Page 126
(0 105). Choose Z to assign the greatest weight to the center of frame, or b to set exposure for a 3.5-mm circle centered on the active focus point. a will not produce the desired results. 2 Lock exposure. Position the subject in the selected focus point and press the shutter-release button halfway - Nikon D7000 | D7000 User's Manual - Page 127
control panel and viewfinder after you release the E button. The current value for exposure compensation can be confirmed in the exposure indicator by pressing the E button. Normal exposure can be restored by setting exposure compensation to ±0. Exposure compensation is not reset when the camera - Nikon D7000 | D7000 User's Manual - Page 128
mode M, exposure compensation affects only the exposure indicator; shutter speed and aperture do not change. A Using a Flash When a flash is used, exposure compensation affects both background exposure and flash level. A See Also For information on choosing the size of the increments available for - Nikon D7000 | D7000 User's Manual - Page 129
and/or flash level over a series of photographs: 1 Select exposure or flash bracketing. G button To display the menus, press the G button. Select Custom Setting e5 (Auto bracketing set) in the Custom Settings menu, highlight an option, and press J. Choose AE & flash to vary both exposure and flash - Nikon D7000 | D7000 User's Manual - Page 130
Bracketing increment D button Sub-command dial Control panel A See Also For information on choosing the size of the increment, see Custom Setting b2 (EV steps performed, see Custom Setting e6 (Bracketing order, 0 229). 4 Frame a photograph, focus, and shoot. The camera will vary exposure and - Nikon D7000 | D7000 User's Manual - Page 131
mode P), aperture (mode S), or shutter speed (modes A and M). If auto ISO sensitivity control is enabled in modes P, S, and A, the camera will automatically vary ISO sensitivity for optimum exposure when the limits of the camera exposure system are exceeded; in mode M, the camera will first use auto - Nikon D7000 | D7000 User's Manual - Page 132
The camera creates multiple copies of each photograph, each with a different white balance. For more information on white balance, see page 117. 1 Select white balance bracketing. Choose WB bracketing for Custom Setting e5 Auto bracketing set. 2 Choose the number of shots. Pressing the D button - Nikon D7000 | D7000 User's Manual - Page 133
in the white balance fine-tuning display, 0 119). No adjustments are made on the green-magenta axis. In self-timer mode (0 80), the number of copies specified in the white-balance program will be created each time the shutter is released, regardless of the option selected for Custom Z Setting c3 - Nikon D7000 | D7000 User's Manual - Page 134
shooting menu (if Active D-Lighting is off, the second shot will be taken with Active D-Lighting set to Auto). Choose three shots to take a series of photographs with Active D-Lighting set to Off, Normal, and High. Number of shots Bracketing progress indicator D button Main command dial Control - Nikon D7000 | D7000 User's Manual - Page 135
will resume the next time the shutter-release button is pressed. In self-timer mode, the camera will take the number of shots selected in Step 2 on page 114 each time the shutter-release button is pressed, regardless of the option selected for Custom Setting c3 (Self-timer) > Number of shots - Nikon D7000 | D7000 User's Manual - Page 136
Z 116 - Nikon D7000 | D7000 User's Manual - Page 137
photograph as reference for white balance (0 123). * All values are approximate. Fine-tuning set to 0. White balance is set by pressing the WB button and rotating the main command dial until the desired setting is displayed in the control panel. WB button Main command dial Control panel 117 - Nikon D7000 | D7000 User's Manual - Page 138
): 5,000 K • M (shade): 8,000 K r A See Also When WB bracketing is selected for Custom Setting e5 (Auto bracketing set, 0 229), the camera will create several images each time the shutter is released. White balance will be varied with each image, "bracketing" the value currently selected for - Nikon D7000 | D7000 User's Manual - Page 139
into an image. White balance is fine tuned using the White balance option in the shooting menu or by pressing the WB button and rotating the sub-command dial. ❚❚ The White Balance Menu 1 Select a white balance option. G button To display the menus, press the G button. Select White balance in the - Nikon D7000 | D7000 User's Manual - Page 140
color temp.) and L (Preset manual), the WB button can be used to fine-tune white balance on the amber (A)-blue (B) axis (0 119; to fine-tune white balance when K or L is selected, use the shooting menu as described on page 119). Six settings in both directions are available; each increment is - Nikon D7000 | D7000 User's Manual - Page 141
absolute. For example, moving the cursor to B (blue) when a "warm" setting such as J (incandescent) is selected for white balance will make photographs slightly "colder" but will not actually make them blue. A Color Temperature Fine-Tuning When Choose color temp. is selected, you can view the color - Nikon D7000 | D7000 User's Manual - Page 142
, take a test shot to determine if the selected value is appropriate. A The White Balance Menu Color temperature can also be selected in the white balance menu. Note that the color temperature with the WB button and the sub-command dial replaces the value selected in the white balance menu. r 122 - Nikon D7000 | D7000 User's Manual - Page 143
Preset Manual Preset manual is used to record and recall custom white balance settings for shooting under mixed lighting or to compensate for light sources with a strong color cast. Two methods are available for setting preset white balance: Method Description Measure Neutral gray or white - Nikon D7000 | D7000 User's Manual - Page 144
reference object so that it fills the viewfinder and press the shutter-release button all the way down. The camera will measure a value for white balance and store it in preset d-0. No photograph will be recorded; white balance can be measured accurately even when the camera is not in focus. 124 - Nikon D7000 | D7000 User's Manual - Page 145
or too bright, the camera may be unable to measure white balance. A flashing b a will appear in the control panel and viewfinder for about six seconds. Press the shutter-release button halfway to return to Step 4 and measure white balance again. Viewfinder Control panel Viewfinder 6 Select preset - Nikon D7000 | D7000 User's Manual - Page 146
from d-0 to any of the other presets (d-1-d-4). 1 Select L (Preset manual). Press the G button and select White balance in the shooting menu. Highlight Preset manual and press 2. G button 2 Select a destination. W button Highlight the destination preset (d-1 to d-4) and press W. 3 Copy d-0 to - Nikon D7000 | D7000 User's Manual - Page 147
Highlight the source image. To view the highlighted image full frame, press and hold the X button. X button To view images in other locations, hold D and for the selected preset. A Choosing a White Balance Preset Press 1 to highlight the current white balance preset (d-0- d-4) and press 2 to - Nikon D7000 | D7000 User's Manual - Page 148
display fine tuning menu (0 119) without completing the next step, press J instead. 3 Select Set. Highlight Set and press 2. Fine tuning menu for the selected white balance preset is displayed (0 119). A Selecting a White Balance Preset: the WB Button At a setting of L (Preset manual), presets - Nikon D7000 | D7000 User's Manual - Page 149
enter a descriptive comment of up to thirty-six characters for a selected white balance preset. 1 Select L (Preset manual). Highlight Preset manual in the white balance menu and press 2. 2 Select a preset. W button Highlight the desired preset and press W. 3 Select Edit comment. Highlight Edit - Nikon D7000 | D7000 User's Manual - Page 150
r 130 - Nikon D7000 | D7000 User's Manual - Page 151
Produces vibrant landscapes and cityscapes. 1 Display Picture Controls. G button To display the menus, press the G button. Highlight Set Picture Control in the J shooting menu and press 2 to display a list of Picture Controls. 2 Choose a Picture Control. Highlight an option and press J. 131 - Nikon D7000 | D7000 User's Manual - Page 152
other cameras of the same model and compatible software (0 138). A Optional Picture Controls Additional optional Picture Controls may be available for download from Nikon websites. A The Picture Control Indicator The current Picture Control is shown in the information display when the R button is - Nikon D7000 | D7000 User's Manual - Page 153
modified to suit the scene or the user's creative intent. Choose a balanced combination of settings using Quick adjust, or make manual adjustments to individual settings. 1 Select a Picture Control. Highlight the desired Picture Control in the Set Picture Control menu (0 131) and press 2. 2 Adjust - Nikon D7000 | D7000 User's Manual - Page 154
adjustments Manual adjustments (non-monochrome only) (monochrome only) D "A" (Auto) J Results for auto sharpening, contrast, and saturation vary with exposure and the position of the subject in the frame. Use a type G or D lens for best results. A Custom Picture Controls The options available with - Nikon D7000 | D7000 User's Manual - Page 155
Monochrome is selected). Release the W button to return to the Picture Control menu. The icons for Picture Controls that use auto contrast and saturation are displayed in green in the Picture Control grid, and lines appear parallel to the axes of the grid. A Previous Settings The line under the - Nikon D7000 | D7000 User's Manual - Page 156
Creating Custom Picture Controls The Picture Controls supplied with the camera can be modified and saved as custom Picture Controls. 1 Select Manage Picture Control. To display the menus, press the G button. Highlight Manage Picture Control in the shooting menu and press 2. G button 2 Select Save - Nikon D7000 | D7000 User's Manual - Page 157
position, use the multi selector to highlight the desired character in the keyboard area and press J. To delete the character at the current cursor position, press the O button. To return to the shooting menu without saving the Picture Control, press the G button. Custom Picture Control names - Nikon D7000 | D7000 User's Manual - Page 158
Sharing Custom Picture Controls Custom Picture Controls created using the Picture Control Utility available with ViewNX 2 or optional software such as Capture NX 2 can be copied to a memory card and loaded into the camera, or custom Picture Controls created with the camera can be copied to the - Nikon D7000 | D7000 User's Manual - Page 159
G button. Highlight Active D-Lighting in the shooting menu and press 2. Active D-Lighting: P High 2 Choose an option. Highlight an option and press J. If Y Auto is selected, the camera will automatically adjust Active D-Lighting according to shooting conditions (in mode M, however, Y Auto - Nikon D7000 | D7000 User's Manual - Page 160
the dynamic range, while the D-Lighting option in the retouch menu (0 251) optimizes dynamic range in images after shooting. A See Also When ADL bracketing is selected for Custom Setting e5 (Auto bracketing set, 0 229), the camera varies Active D-Lighting over a series of shots. See page 114 - Nikon D7000 | D7000 User's Manual - Page 161
available for color reproduction. Choose a color space according to how photographs will be processed on leaving the camera. Option Description W sRGB Choose for photographs that will be printed or used button To display the menus, press the G button. Highlight Color space in the shooting menu - Nikon D7000 | D7000 User's Manual - Page 162
application or device does not support Exif 2.3 and DCF 2.0, select the appropriate color space manually. For more information, see the documentation provided with the application or device. A Nikon Software ViewNX 2 (supplied) and Capture NX 2 (available separately) automatically select the correct - Nikon D7000 | D7000 User's Manual - Page 163
subjects or to add a catch light to the subject's eyes. ❚❚ Using the Built-in Flash: i, k, p, n, o, s, and w Modes 1 Choose a flash mode (0 144). 2 Take pictures. The flash will pop up as required when the shutter-release button is pressed halfway, and fire when a photograph is taken. If the - Nikon D7000 | D7000 User's Manual - Page 164
at some ranges or aperture settings. If the flash fires in continuous release mode (0 78), only one picture will be taken each time the shutter-release button is pressed. The shutter release may be briefly disabled to protect the flash after it has been used for several consecutive shots. The - Nikon D7000 | D7000 User's Manual - Page 165
on auto FP high-speed sync and choosing a flash sync speed, see Custom Setting e1 (Flash sync speed, 0 222). For information on l choosing the slowest shutter speed available when using the flash, see Custom Setting e2 (Flash shutter speed, 0 223). For information on flash control and using the - Nikon D7000 | D7000 User's Manual - Page 166
is selected. The flash control mode for the built-in flash can be selected using Custom Setting e3 (Flash cntrl for built-in flash, 0 223). The information display shows the flash control mode for the built-in flash as follows: Flash sync Auto FP (0 222) i-TTL - Manual - Repeating flash - Nikon D7000 | D7000 User's Manual - Page 167
9ft. 10in. 2ft.-6ft. 11in. 2ft.-4ft. 11in. 2ft.-3ft. 7in. 2ft.-2ft. 7in. The built-in flash has a minimum range of 0.6 m (2 ft.). In mode P, the maximum aperture (minimum f-number) is limited according to ISO sensitivity, as shown below: Maximum aperture at ISO equivalent of: 100 200 400 800 - Nikon D7000 | D7000 User's Manual - Page 168
allow flash compensation to be set using the controls on the flash unit; the value selected with the flash unit is added to the value selected with the camera. A See Also l For information on choosing the size of the increments available for flash compensation, see Custom Setting b2 (EV steps for - Nikon D7000 | D7000 User's Manual - Page 169
, the flash can be raised by pressing the M button. In i, k, p, n, o, s, and w modes, the flash will pop up automatically when required. 3 Focus. Position the subject in the center of the frame and press the shutter-release button halfway to focus. 4 Lock flash level. After confirming that the flash - Nikon D7000 | D7000 User's Manual - Page 170
Lighting) AA A (master flash) Entire frame Area metered by flash exposure meter A See Also For information on using the depth-of-field preview or AE-L/AF-L button for FV lock, see Custom Setting f4 (Assign preview button, 0 232) or Custom Setting f5 (Assign AE-L/AF-L button, 0 232). 150 - Nikon D7000 | D7000 User's Manual - Page 171
a green dot). The control panel turns off briefly while settings are reset. E button QUAL button Option Default 0 Option Default 0 Image quality NORMAL 85 Focus point 1 Center 96 Image size L 88 Metering Matrix 105 White balance Fine tuning Auto > Normal 117 AE/AF lock hold 0 119 - Nikon D7000 | D7000 User's Manual - Page 172
no operations are performed for 30 s. A Extended Recording Times For an interval between exposures of more than 30 s, select On for the Image review (0 200) option in the playback menu and extend the monitor-off delay for image review using Custom Setting c4 (Monitor off delay, 0 215). The maximum - Nikon D7000 | D7000 User's Manual - Page 173
will be replaced by Reset. To continue shooting without taking a multiple exposure, return to the shooting menu and select Multiple exposure > Reset. 5 Frame a photograph, focus, and shoot. In continuous high-speed and continuous low-speed release modes (0 78), the camera records all exposures - Nikon D7000 | D7000 User's Manual - Page 174
that have been recorded to that point. If Auto gain is on, gain will be adjusted to reflect the number of exposures actually recorded. Note that shooting will end automatically if: • A two-button reset is performed (0 151) • The camera is turned off • The battery is exhausted • Pictures are deleted - Nikon D7000 | D7000 User's Manual - Page 175
remote (4) release mode when using the interval timer. Before beginning interval timer photography, take a test shot at current settings and view the results in the monitor. Before choosing a starting time, select Time zone and date in the setup menu and make sure that the camera clock is set to the - Nikon D7000 | D7000 User's Manual - Page 176
Highlight On and press J (to return to the shooting menu without starting the interval timer, highlight Off and press recorded and the start of the next shot may vary. If shooting can not proceed at current settings (for example, if a shutter speed of A is currently selected in manual exposure mode - Nikon D7000 | D7000 User's Manual - Page 177
In S (single frame) and CL (continuous low-speed) modes, photographs will be taken at the rate chosen for Custom Setting d6 (CL mode shooting speed, 0 217); in mode J, camera noise will be reduced. A Bracketing Adjust bracketing settings before starting interval timer photography. If exposure, flash - Nikon D7000 | D7000 User's Manual - Page 178
Pausing Interval Timer Photography Interval timer photography can be paused by: • Highlighting Start > Pause in the interval timer menu and pressing J • Turning the camera off and then on again (if desired, the memory card can be replaced while the camera is off ) • Rotating the release-mode dial or - Nikon D7000 | D7000 User's Manual - Page 179
-flash for digital SLR The camera can store data for up to nine non-CPU lenses. To enter or edit data for a non-CPU lens: 1 Select Non-CPU lens data. Press the G button to display the menus. Highlight Non-CPU lens data in the setup menu and press 2. G button 2 Choose a lens number. Highlight Lens - Nikon D7000 | D7000 User's Manual - Page 180
than the actual focal length of the lens. A Teleconverters and Zoom Lenses The maximum aperture for teleconverters is the combined maximum aperture of the and the lens. Note that lens data are not adjusted when non-CPU lenses are zoomed in or out. The data for different focal lengths can be - Nikon D7000 | D7000 User's Manual - Page 181
non-CPU lens number selection to a camera control. Select Choose non-CPU lens number for Custom Setting f3 (Assign Fn button, 0 230) or Custom Setting f4 (Assign preview button, 0 232). 2 Use the selected control to choose the lens number. Press the selected button and rotate the main command dial - Nikon D7000 | D7000 User's Manual - Page 182
to the camera's accessory terminal (0 281) using the cable supplied with the GP-1, allowing information on the camera's current position to be recorded when photographs are taken. Turn the camera off before connecting the GP-1; for more information, see the GP-1 manual. ❚❚ Setup Menu Options The - Nikon D7000 | D7000 User's Manual - Page 183
for Image review in the playback menu (0 200), photographs are automatically displayed in the monitor for about 4 s after shooting (because the camera is I already in the correct orientation, images are not rotated automatically during image review). In continuous release mode, display begins - Nikon D7000 | D7000 User's Manual - Page 184
by holding the D button and pressing 1 during full- frame or thumbnail playback. The dialog shown at right will be displayed; highlight the desired slot and press 2 to list the folders on the selected card, then highlight a folder and press J to view the pictures in the highlighted folder - Nikon D7000 | D7000 User's Manual - Page 185
: 18-105 / 3. 5-5.6 AF / VR : S / VR-On FLASH TYPE : Built - i n, CMD SYNC MODE : SLOW , : M : TTL, +3. 0 A: TTL, +3. 0 B : --- C : --- N I KON D7000 100--1 Shooting data pages 1-4 ❚❚ File Information 1 Protect status 174 1/ 12 2 Retouch indicator 248 3 Focus point 1, 2 96 4 AF - Nikon D7000 | D7000 User's Manual - Page 186
areas indicate highlights for the current channel. Hold W button W button and press 4 or 2 to cycle through channels as follows: RGB R (all channels) (red) G (green) B (blue) ❚❚ RGB Histogram 1 4 Retouch indicator 248 5 White balance 117 Color temperature 122 White balance fine-tuning - Nikon D7000 | D7000 User's Manual - Page 187
is displayed, press X. Use the X and W buttons to zoom in and out and scroll the image with the multi selector. The histogram will be updated to show only the data for the portion of the image visible in the monitor. A Histograms Camera histograms are intended as a guide only and may differ from - Nikon D7000 | D7000 User's Manual - Page 188
8 Focus mode 91, 99 Lens VR (vibration reduction) 4 26 N I KON D7000 9 Flash type 143, 275 100--1 Commander mode 225 1 Protect status 174 2 Retouch indicator 248 3 Metering 105 Shutter speed 67 Aperture 67 10 Flash mode 144 11 Flash control 223 Flash compensation 148 12 Camera name - Nikon D7000 | D7000 User's Manual - Page 189
is selected for Display mode (0 197). ❚❚ Shooting Data Page 4* ART I ST COPYRI GHT : NIKON TARO : NIKON 1 Protect status 174 2 Retouch indicator 248 3 Name of photographer 243 4 Copyright holder 243 5 Camera name 6 Folder number-frame number 218 N I KON D7000 100--1 * Displayed only if - Nikon D7000 | D7000 User's Manual - Page 190
107 1 Frame number/total number of images 13 Metering 105 2 Protect status 174 14 Shooting mode 6 3 Camera name 15 Shutter speed 67 4 Retouch indicator 248 16 Aperture 67 * Displayed in red if photo was taken with auto ISO sensitivity control on. 1 / 12 N I KON D7000 1/ 8000 - Nikon D7000 | D7000 User's Manual - Page 191
W button. W W W W X Full-frame playback To Display more images Display fewer images Highlight images View highlighted image Delete highlighted image Change protect status of highlighted image Return to shooting mode Display menus X X Thumbnail playback X Calendar playback Use Description - Nikon D7000 | D7000 User's Manual - Page 192
playback/Zoom in on highlighted photo Highlight dates/ Highlight images Toggle full frame playback Delete highlighted photo(s) I Change protect status of highlighted photo Return to shooting mode Display menus Use Description W Press W button in date list to place cursor in thumbnail list - Nikon D7000 | D7000 User's Manual - Page 193
Zoom Press the X button to zoom in on the image displayed in full-frame playback or on the image currently highlighted in thumbnail or calendar playback. The following operations can be performed while zoom is in effect: To Zoom in or out View other areas of image Use X / W Description Press - Nikon D7000 | D7000 User's Manual - Page 194
Protecting Photographs from Deletion In full-frame, zoom, thumbnail, and calendar playback, the L button can be used to protect photographs from accidental deletion. Protected files can not be deleted using the O button or the Delete option in the playback menu. Note that protected images will be - Nikon D7000 | D7000 User's Manual - Page 195
, or all photographs in the current playback folder, use the Delete option in the playback menu. Once deleted, photographs can not be recovered. Full-Frame, Thumbnail, and Calendar Playback Press the O button to delete the current photograph. 1 Select an image. Display the image or highlight it - Nikon D7000 | D7000 User's Manual - Page 196
select Delete in the playback menu. Highlight Selected and press 2. 2 Highlight a picture. Use the multi selector to highlight a picture (to view the highlighted picture full screen, press and hold the X button; to view images in other locations, hold the D button, press 1, and select the desired - Nikon D7000 | D7000 User's Manual - Page 197
Highlight a date. Use the multi selector to highlight a date. To view the pictures taken on the highlighted date, press W. Use the multi selector to scroll through the pictures, or press and hold X to view the current picture full screen. Press W to return to the date list. W button 3 Select - Nikon D7000 | D7000 User's Manual - Page 198
I 178 - Nikon D7000 | D7000 User's Manual - Page 199
. If in doubt, charge the battery before use or use an EH-5a AC adapter and EP-5B power connector (available separately). ❚❚ Supplied Software ViewNX 2 includes a "Nikon Transfer 2" function for copying pictures from the camera to the computer, where ViewNX 2 can be used to view and print selected - Nikon D7000 | D7000 User's Manual - Page 200
following the on-screen instructions to start Nikon Transfer 2, click Start Transfer to transfer photographs (for more information on using Nikon Transfer 2, start ViewNX 2 or Nikon Transfer 2 and select ViewNX 2 Help from the Help menu). Start Transfer 6 Turn the camera off and disconnect the - Nikon D7000 | D7000 User's Manual - Page 201
WT-4 user's manual. Be sure to update to the latest versions of the WT-4 firmware and supplied software. A Transfer Mode When the WT-4 is connected to the camera in transfer mode, the picture currently displayed in full-frame playback can be uploaded to the computer by pressing the D and J buttons - Nikon D7000 | D7000 User's Manual - Page 202
USB Connection Be sure the EN-EL15 battery is fully charged or use an optional EH-5a AC adapter and EP-5B power connector. When taking photographs to be printed via direct USB connection, set Color space to sRGB (0 141). Connecting the Printer Connect the camera using the supplied UC-E4 USB cable - Nikon D7000 | D7000 User's Manual - Page 203
173; press K to exit zoom). To view six pictures at a time, press the W button. Use the multi selector to highlight pictures, or press X to display the highlighted picture full frame; to view images in other locations, hold the D button, press 1, and select the desired card and folder as described - Nikon D7000 | D7000 User's Manual - Page 204
1 or 3 to choose Printer default (print using current printer settings), Print time stamp (print time and date of recording on photo), or No time stamp, then press J to select and return to previous menu. This option is available only with printers that support cropping. Menu shown at right will be - Nikon D7000 | D7000 User's Manual - Page 205
to insert the connectors at an angle. Close the camera connector cover when the connector is not in use. Printing Multiple Pictures 1 Display the PictBridge menu. Press the G button in the PictBridge playback display (see Step 3 on page 183). G button 2 Choose an option. Highlight one of the - Nikon D7000 | D7000 User's Manual - Page 206
and press 2 to toggle the highlighted date on or off. To view the pictures taken on the selected date, press W. Use the multi selector to scroll through the pictures, or press and hold X to view the current picture full screen. Press W again to W button: View photos for selected return to the - Nikon D7000 | D7000 User's Manual - Page 207
; options not supported by current printer are not listed). Press 1 or 3 to choose print style from Printer Border default (print at current printer settings), Print with border (print photo with white border), or No border, then press J to select and return to previous menu. Menu of time stamp - Nikon D7000 | D7000 User's Manual - Page 208
Printing Multiple Pictures" (0 185). Note that if the memory card contains more than 256 pictures, only the first 256 images will be printed. 1 Select Index print. Selecting Index print in the PictBridge menu (0 185) and press J to start printing. To cancel before printing is complete, press J. Q 188 - Nikon D7000 | D7000 User's Manual - Page 209
that support DPOF. 1 Choose Select/set for the Print set (DPOF) item in the playback menu. Press the G button and select Print set (DPOF) in the playback menu. Highlight Select/set and press 2 (to remove all photographs from the print order, select Deselect all?). G button 2 Select pictures. Use - Nikon D7000 | D7000 User's Manual - Page 210
imprint: Print shutter speed and aperture on all pictures in print order. • Imprint date: Print date of recording on all pictures in print order. 5 Complete the print order. Highlight Done and press J to complete the print order. D Print Set (DPOF) To print the current print order when the camera is - Nikon D7000 | D7000 User's Manual - Page 211
2 Connect the A/V cable as shown. Connect to video device Audio (white) Video (yellow) Connect to camera 3 Tune the television to the video channel. 4 Turn the camera on and press the K button. During playback, image will be displayed both in the camera monitor and on the television screen. Note - Nikon D7000 | D7000 User's Manual - Page 212
image is displayed, check that camera is correctly connected and that the option selected for Video mode (0 237) matches the video standard used in the TV. A Television Playback Use of an EH-5a AC adapter and EP-5B power connector (available separately) is recommended for extended playback. A Slide - Nikon D7000 | D7000 User's Manual - Page 213
devices using a type C mini-pin HDMI cable (available separately from third-party suppliers). 1 Turn the camera off. Always turn the camera off before HDMI device) Connect to camera 3 Tune the device to the HDMI channel. 4 Turn the camera on and press the K button. During playback, images will - Nikon D7000 | D7000 User's Manual - Page 214
>Device control in the setup menu when the camera is connected to a television that supports HDMI-CEC and both the camera and television are on, the display shown at right will appear on the television and the television remote can be used in place of the camera multi selector and J button during - Nikon D7000 | D7000 User's Manual - Page 215
Image review 200 Playback folder 195 After delete 200 Hide image 196 Rotate tall 200 Display mode 197 Slide show 201 Copy image(s) 197 Print set (DPOF) 189 Playback Folder G button ➜ D playback menu Choose a folder for playback (0 163): Option D7000 All Current Description Pictures - Nikon D7000 | D7000 User's Manual - Page 216
to hide or reveal selected pictures. 1 Choose Select/set. Highlight Select/set and press 2. 2 Select pictures. W button Use the multi selector to scroll through the pictures on the memory card (to view the highlighted picture full screen, press and hold the X button; to view images in other - Nikon D7000 | D7000 User's Manual - Page 217
Copy Image(s) G button ➜ D playback menu Copy images between memory cards. This option is only available when two memory cards are inserted in the camera. Option Select source Select image(s) Select destination folder Copy image(s)? Description Select the card from which pictures will be copied - Nikon D7000 | D7000 User's Manual - Page 218
and press W to select or deselect (to view the highlighted picture full screen, press and hold the X button). Selected images are marked with a L. Press J to proceed to Step 7 when your selection is complete. 7 Choose Select destination folder. Highlight Select destination folder and press - Nikon D7000 | D7000 User's Manual - Page 219
copying is complete. D Copying Images Images will not be copied if there is insufficient space on the destination card. Be sure the battery is fully be displayed. Select Replace existing image to replace the image with the image to be copied, or select Replace all to replace all existing images with - Nikon D7000 | D7000 User's Manual - Page 220
through pictures in order recorded, following U Continue as before picture will be displayed as described for Show next. If user was scrolling through pictures in reverse order, previous picture will be displayed as described for Show previous. Rotate Tall G button ➜ D playback menu Choose - Nikon D7000 | D7000 User's Manual - Page 221
J Pause or resume slide show. G End slide show and return to playback menu. K End slide show and exit to full-frame (0 163) or thumbnail playback (0 171). Press shutter-release button halfway to return to shooting mode. The dialog shown at right is displayed when the show ends. Select Restart - Nikon D7000 | D7000 User's Manual - Page 222
155 Set Picture Control 131 Remote control mode 80 Manage Picture Control 136 Note: Depending on camera settings, some items may be grayed out and unavailable. For information on the options available in each shooting mode, see page 292. Reset Shooting Menu G button ➜ C shooting menu Select - Nikon D7000 | D7000 User's Manual - Page 223
. Subsequent photographs will be stored in the selected folder unless it is already full. D Folder and File Numbers If the current folder is numbered 999 and contains 999 pictures or a picture numbered 9999, the shutter-release will be disabled and no further photographs can be taken. To continue - Nikon D7000 | D7000 User's Manual - Page 224
button ➜ C shooting menu Photographs are saved using file names consisting of "DSC_" or, in the case of images that use used: ".NEF" for NEF (RAW) images, ".JPG" for JPEG images, ".MOV" for movies, and ".NDF" for dust off reference data. In each pair of photographs recorded at image-quality settings - Nikon D7000 | D7000 User's Manual - Page 225
processing, "l m" will blink in the shutter speed/aperture displays and pictures can not be taken (if the camera is turned off before processing is complete, the picture will be saved but noise reduction will not be performed). In continuous release mode, frame rates will slow and while photographs - Nikon D7000 | D7000 User's Manual - Page 226
A Custom Settings: Fine-Tuning Camera Settings To display the Custom Settings menu, press G and select the A (Custom Settings menu) tab. G button Custom Settings are used to customize camera settings to suit individual preferences. Custom Setting groups Main menu U 206 A: Reset custom settings - Nikon D7000 | D7000 User's Manual - Page 227
Flash cntrl for built-in flash 223 b4 Center-weighted area 213 e4 Modeling flash 228 b5 Fine tune optimal exposure 213 e5 Auto bracketing set 229 c Timers/AE lock e6 Bracketing order 229 c1 Shutter-release button AE-L 213 f Controls c2 Auto meter-off delay 214 f1 D switch 229 c3 Self - Nikon D7000 | D7000 User's Manual - Page 228
AF-C Priority Selection G button ➜ A Custom Settings menu When AF-C is selected for viewfinder photography (0 91), this option controls whether photographs can be taken whenever the shutter-release button is pressed (release priority) or only when the camera is in focus (focus priority). AF-mode - Nikon D7000 | D7000 User's Manual - Page 229
the frame. E 1 (Short) The camera immediately adjusts focus when the distance to the subject Off changes. Use when photographing a series of subjects at varying distances in quick succession. a4: AF Point Illumination G button ➜ A Custom Settings menu Choose whether the active focus point is - Nikon D7000 | D7000 User's Manual - Page 230
when the camera is in AF-A mode. 2. H (auto-area AF) is chosen for AF-area mode (0 94), or an option other than H is chosen and the center focus point is selected. The AF-assist illuminator does not light to assist the focus operation. The camera may not be able to focus using autofocus when - Nikon D7000 | D7000 User's Manual - Page 231
G button ➜ A Custom Settings menu Choose how the camera focuses when autofocus is selected in live view or during movie recording. • Autofocus mode: Select the focus mode used for autofocus in live view and movie recording (0 50). Choose from Singleservo AF and Full-time-servo AF. • AF-area mode - Nikon D7000 | D7000 User's Manual - Page 232
by rotating one of the command dials (see K On (Auto reset) note below). The setting selected using the command dial is reset when the camera or exposure meters turn off (exposure compensation settings selected using the E button are not reset). As above, except that the exposure compensation - Nikon D7000 | D7000 User's Manual - Page 233
to view the amount in the fine-tuning menu. Exposure compensation (0 107) is preferred in most situations. c: Timers/AE Lock c1: Shutter-Release Button AE-L G button ➜ A Custom Settings menu At the default setting of Off, exposure only locks when the AE-L/ AF-L button is pressed. If On is selected - Nikon D7000 | D7000 User's Manual - Page 234
. The shutter-speed and aperture displays in the control panel and viewfinder turn off automatically when the exposure meters turn off. Choose a shorter meter-off delay for longer battery life. c3: Self-Timer G button ➜ A Custom Settings menu Choose the length of the shutter release delay - Nikon D7000 | D7000 User's Manual - Page 235
longer battery life. To reactivate remote mode after the timer has expired, press the camera shutter-release button halfway. d: Shooting/Display d1: Beep G button ➜ A Custom Settings menu Choose the pitch and volume of the beep that sounds when the camera focuses using single-servo AF (AF-S or - Nikon D7000 | D7000 User's Manual - Page 236
following viewfinder warnings: • s: Displayed when a monochrome Picture Control is selected • d: Displayed when the battery is low • t: Displayed if no memory card is inserted in the camera d5: Screen Tips G button ➜ A Custom Settings menu Choose On to display tool tips for items selected in the - Nikon D7000 | D7000 User's Manual - Page 237
low speed) mode (during interval timer photography, this setting also determines the frame advance rate for single-frame). Note that the frame advance rate may drop below the selected value at slow shutter speeds. d7: Max. Continuous Release G button ➜ A Custom Settings menu The maximum - Nikon D7000 | D7000 User's Manual - Page 238
d8: File Number Sequence G button ➜ A Custom Settings menu When a photograph is taken, the camera names the file by adding one to the last file number used. This option controls whether file numbering continues from the last number used when a new folder is created, the memory card is formatted, - Nikon D7000 | D7000 User's Manual - Page 239
active (0 39). Select Off for increased battery life. d11: Exposure Delay Mode G button ➜ A Custom Settings menu In situations where the slightest camera movement can blur pictures, select On to delay shutter release until about 1 s after the shutter-release button is pressed and the mirror is - Nikon D7000 | D7000 User's Manual - Page 240
only be used if no alternative is available and then only at warmer temperatures. The camera shows the level of AA batteries as follows: Control panel L I H (blinks) Viewfinder - d d (blinks) Description Batteries fully charged. Low battery. Ready fresh batteries. Shutter release disabled. Change - Nikon D7000 | D7000 User's Manual - Page 241
d14: Battery Order G button ➜ A Custom Settings menu Choose whether the battery in the camera or the batteries in the battery pack are used first when an optional MB-D11 battery pack is attached. Note that if the MB-D11 is powered by an optional EH-5a AC adapter and EP-5B power connector, the AC - Nikon D7000 | D7000 User's Manual - Page 242
Settings menu This option controls flash sync speed. Option 1/320 s (Auto FP) 1/250 s (Auto FP) 1/250 s-1/60 s Description Use auto FP high-speed sync with SB-900, SB-800, SB-700, SB-600, and SB-R200 flash units. If other flash units are used, shutter speed is set to 1/320 s. When the camera - Nikon D7000 | D7000 User's Manual - Page 243
warning when 1/320 s (Auto FP) is selected. e2: Flash Shutter Speed G button ➜ A Custom Settings menu This option determines the slowest shutter speed available when front- or rear-curtain sync or red-eye reduction is used in mode P or A (regardless of the setting chosen, shutter speeds can be as - Nikon D7000 | D7000 User's Manual - Page 244
depending on shutter speed and the option selected for Frequency, the actual number of flashes may be less than selected. Frequency Choose how often the flash fires per second. A Flash Control Mode The flash control mode for the built-in flash is shown in the information display. A "Manual" and - Nikon D7000 | D7000 User's Manual - Page 245
1/1 and 1/128 (1/128 of full power). The flash units in this group do not fire. Choose a flash mode for all flash units in group B. The options available are the same as those listed for Group A, above. Choose from channels 1-4. All flash units in both groups must be set to the same channel. U 225 - Nikon D7000 | D7000 User's Manual - Page 246
-in flash. Note that output level can not be adjusted in - - mode. 2 Adjust settings for group A. Choose the flash control mode and output level for the flash units in group A. 3 Adjust settings for group B. Choose the flash control mode and output level for the flash units in group B. 4 Select the - Nikon D7000 | D7000 User's Manual - Page 247
flash unit instruction manuals for details. 8 Raise the built-in flash. Press the M button to raise the built-in flash. Note that even if - - is selected for Built-in flash>Mode, the built-in flash must be raised so that monitor preflashes will be emitted. 9 Frame the photograph, focus, and shoot - Nikon D7000 | D7000 User's Manual - Page 248
units do not enter the camera lens (in TTL mode) or the photocells on the remote flash units (AA mode), as this may interfere with interfere with performance. e4: Modeling Flash G button ➜ A Custom Settings menu If On is selected when the camera is being used with the built-in flash or an optional - Nikon D7000 | D7000 User's Manual - Page 249
in monitor. f2: OK Button (Shooting Mode) G button ➜ A Custom Settings menu Choose the role played by the J button during shooting: selecting the center focus point (J Select center focus point), highlighting the active focus point (K Highlight active focus point), or none (Not used). U 229 - Nikon D7000 | D7000 User's Manual - Page 250
, the camera will repeat the bracketing burst while the shutter-release button is held down (in single frame release mode, photographs will be taken at about 6 fps). Press the Fn button and rotate the main command dial to choose Active D-Lighting (0 139). If image quality is set to JPEG fine, JPEG - Nikon D7000 | D7000 User's Manual - Page 251
access to a frequently-used menu item. If the Fn button is pressed when the command dials are rotated, changes v 1 step spd/ aperture to shutter speed (modes S and M) and aperture (modes A and M) are made in increments of 1 EV, regardless of the option selected for Custom Setting b2 (EV steps - Nikon D7000 | D7000 User's Manual - Page 252
f4: Assign Preview Button G button ➜ A Custom Settings menu Choose the role played by the depth-of-field preview button. The options available are the same as for Assign Fn button (0 230); the default setting is Preview. f5: Assign AE-L/AF-L Button G button ➜ A Custom Settings menu Choose the - Nikon D7000 | D7000 User's Manual - Page 253
type G lenses is still set using the subcommand dial). Note that regardless of the setting chosen, the aperture ring must be used to adjust aperture when a non-CPU lens is attached. • Menus and playback: If Off is selected, the multi selector is used to choose the picture displayed during full-frame - Nikon D7000 | D7000 User's Manual - Page 254
no pictures will be recorded (they will however be displayed in the monitor in demo mode). If Release locked is selected, the shutter-release button is only enabled when a memory card is inserted in the camera. f9: Reverse Indicators G button ➜ A Custom Settings menu At the default setting of - Nikon D7000 | D7000 User's Manual - Page 255
f10: Assign MB-D11 4 Button G button ➜ A Custom Settings menu Choose the function assigned to the AE-L/AF-L button on the optional MB-D11 battery pack. Option Description B AE/AF lock Focus and exposure lock while the MB-D11 AE-L/AF-L button is pressed. C AE lock only Exposure locks while the - Nikon D7000 | D7000 User's Manual - Page 256
286 Save/load settings 244 Video mode 237 GPS 162 HDMI 194 Virtual horizon 245 Flicker reduction 237 Non-CPU lens data 159 Time zone and date 237 AF fine tune 246 Language 238 Eye-Fi upload 2 247 Image comment 238 Firmware version 247 1 Not available when battery is low. 2 Only - Nikon D7000 | D7000 User's Manual - Page 257
starting live view. Note that flicker reduction is not available when On is selected for Movie settings > Manual movie settings (0 60) in mode M. Time Zone and Date G button ➜ B Setup menu Change time zones, set the camera clock, choose the date display order, and turn daylight saving time on or - Nikon D7000 | D7000 User's Manual - Page 258
Language G button ➜ B Setup menu Choose a language for camera menus and messages. The following options are available. Option Description Czech Danish German English Spanish French Indonesian Italian Option Description Dutch Norwegian Polish Portuguese Russian Finnish Swedish Turkish Option - Nikon D7000 | D7000 User's Manual - Page 259
Auto Image Rotation G button ➜ B Setup menu Photographs taken while On is selected contain information on camera orientation, allowing them to be rotated automatically during playback (0 163) or when viewed in ViewNX 2 (supplied) or in Capture NX 2 (available separately; 0 281). The following - Nikon D7000 | D7000 User's Manual - Page 260
ten centimeters (four inches) from a well-lit, featureless white object, frame the object so that it fills the viewfinder and then press the shutter-release button halfway. In autofocus mode, focus will automatically be set to infinity; in manual focus mode, set focus to infinity manually. U 240 - Nikon D7000 | D7000 User's Manual - Page 261
Off reference data. The monitor turns off when the shutter-release button is pressed. Note that noise reduction will be performed if the subject is poorly lit, increasing recording times. If the reference object is too bright or too dark, the camera may be unable to acquire Image Dust Off reference - Nikon D7000 | D7000 User's Manual - Page 262
Info G button ➜ B Setup menu View information on the battery currently inserted in the camera. Item Bat. meter Pic. meter Battery age Description The current battery level expressed as a percentage. The number of times the shutter has been released with the current battery since the battery was - Nikon D7000 | D7000 User's Manual - Page 263
G button ➜ B Setup menu Add copyright information to new photographs as they are taken. Copyright information is visible on the fourth shooting data page in the photo information display (0 169) and can be viewed as metadata in ViewNX 2 (supplied) or in Capture NX 2 (available separately - Nikon D7000 | D7000 User's Manual - Page 264
). Menu Option Display mode Image review Playback After delete Rotate tall File naming Role played by card in Slot 2 Image quality Image size JPEG compression NEF (RAW) recording White balance (with fine tuning and presets d-0-d-4) Shooting Set Picture Control Auto distortion control - Nikon D7000 | D7000 User's Manual - Page 265
G button ➜ B Setup menu Display a virtual horizon based on information from the camera tilt sensor. The reference line is displayed in green when the camera is level. D Tilting the Camera The virtual horizon display is not accurate when the camera is tilted at a sharp angle forward or back. If - Nikon D7000 | D7000 User's Manual - Page 266
Fine Tune G button ➜ B Setup menu Fine-tune focus for up to 12 lens types. AF tuning is not recommended in most situations and may interfere with normal focus; use only when required. Option AF fine tune (On/Off) Saved value • On: Turn AF tuning on. • Off: Turn AF tuning off. Description Tune - Nikon D7000 | D7000 User's Manual - Page 267
, and 8 GB SDHC cards in the Pro X2 and Explore X2 product categories. Eye-Fi cards are for use only in the country of purchase. Be sure the Eye-Fi card firmware has been updated to the latest version. Firmware Version View the current camera firmware version. G button ➜ B Setup menu U 247 - Nikon D7000 | D7000 User's Manual - Page 268
press G and select the N (retouch menu) tab. G button The options in the retouch menu are used to create trimmed or retouched copies of existing pictures. The retouch menu is only displayed when a memory card containing photographs is inserted in the camera. Option 0 Option 0 i D-Lighting 251 - Nikon D7000 | D7000 User's Manual - Page 269
menu and press 2. 2 Select a picture. Highlight a picture and press J (to view the highlighted picture full screen, press and hold the X button; to view images in other locations as described on page 164, hold D and press 1). A Retouch The camera can be adjusted using Custom Setting c4 (Monitor off - Nikon D7000 | D7000 User's Manual - Page 270
A Creating Retouched Copies During Playback Retouched copies can also be created during playback. 2 2 Display picture full frame and press J. Highlight an option and press J. Create retouched copy. U 250 - Nikon D7000 | D7000 User's Manual - Page 271
in the edit display. Press J to copy the photograph. Red-Eye Correction G button ➜ N retouch menu This option is used to correct "red-eye" caused by the flash, and is available only with photographs taken using the flash. The photograph selected for red-eye correction is previewed as shown at - Nikon D7000 | D7000 User's Manual - Page 272
the size of the crop. X Press the X button to increase the size of the crop. Rotate the main command dial to switch between aspect ratios of 3 : 2, 4 : 3, 5 : 4, 1 : 1, and 16 : 9. Move crop Create copy Use multi selector to move the crop to another area of the image. J Save the current crop as - Nikon D7000 | D7000 User's Manual - Page 273
Monochrome Copy photographs in Black-and-white, Sepia, or Cyanotype (blue and white monochrome). G button ➜ N retouch menu Selecting Sepia or Cyanotype displays a preview of the selected image; press 1 to increase color saturation, 3 to decrease. Press J to create a monochrome copy. Increase - Nikon D7000 | D7000 User's Manual - Page 274
the light sources affected. • Filter angle: Choose the angle of the points. • Length of points: Choose the length of points. • Confirm: Preview the effects of the filter as shown at right. Press X to preview the copy full frame. • Save: Create a retouched copy. Soft Add a soft filter effect. Press - Nikon D7000 | D7000 User's Manual - Page 275
Color Balance G button ➜ N retouch menu Use the multi selector to create a copy with modified press the X button. The histogram will be updated to show data only for the portion of the image displayed in the monitor. While the image is zoomed in, press the L button to toggle back and forth between - Nikon D7000 | D7000 User's Manual - Page 276
, with Image 1 highlighted; press J to display a list of the NEF pictures created with this camera. 2 Select the first image. Use the multi selector to highlight a photo. To view the highlighted image full frame, press and hold the X button (to view images in other locations as described on page 164 - Nikon D7000 | D7000 User's Manual - Page 277
image will be displayed full-frame in the monitor. D Image Overlay The overlay has the same photo info (including date of recording, metering, shutter speed, aperture, shooting mode, exposure compensation, focal length, and image orientation), white balance, and Picture Control as Image 1. The - Nikon D7000 | D7000 User's Manual - Page 278
). Note that white balance is not available with multiple exposures or pictures created with image overlay and that exposure compensation can only be set to values between -2 and +2 EV. Image quality Image size White balance Exposure compensation Picture Control High ISO noise reduction Color space - Nikon D7000 | D7000 User's Manual - Page 279
Resize G button ➜ N retouch menu Create small copies of selected photographs. 1 Select Resize. To resize selected images, press G to display the menus and select Resize in the retouch menu. 2 Choose a destination. If two memory cards are inserted, you can choose a destination for the resized - Nikon D7000 | D7000 User's Manual - Page 280
Select image and press 2. The dialog shown at right will be displayed; highlight pictures using the multi selector and press the W button to select or deselect (to view the highlighted picture full screen, press and hold the X button; to view images in other locations as described on page 164, hold - Nikon D7000 | D7000 User's Manual - Page 281
Control G button ➜ N retouch menu Create copies with reduced peripheral distortion. Select Auto to let the camera correct distortion automatically and then make fine adjustments using the multi selector, or select Manual to reduce distortion manually (note that Auto is not available with - Nikon D7000 | D7000 User's Manual - Page 282
Create an outline copy of a photograph to use as a base for painting. The effect can be previewed in the edit display. Press J to copy the photograph. Before After Color Sketch G button ➜ N retouch menu Create a copy of a photograph that resembles a sketch made with colored pencils. Press 1 or - Nikon D7000 | D7000 User's Manual - Page 283
button ➜ N retouch menu Create a copy that appears to be a photo of a diorama. Works best with photos taken from a high vantage point. To Press Description Choose area in focus If photo is displayed in wide orientation, press 1 or 3 to position frame showing area of copy that will be in focus - Nikon D7000 | D7000 User's Manual - Page 284
Compare retouched copies to the original photographs. This option is only available if the J button is pressed to display the retouch menu when a copy or original is played back full frame. 1 Select a picture. In full-frame playback, select a retouched copy (shown by a N icon) or a photograph that - Nikon D7000 | D7000 User's Manual - Page 285
to up to 20 options selected from the playback, shooting, Custom Settings, setup, and retouch menus. To display My Menu, press G and select the O (My Menu) tab. G button Options can be added, deleted, and reordered as described below. If desired, recent settings can be displayed in place of My - Nikon D7000 | D7000 User's Manual - Page 286
A confirmation dialog will be displayed. 4 Delete the selected items. Press J to delete the selected items. A Deleting Items in My Menu To delete the item currently highlighted in My Menu, press the O button. A confirmation dialog will be displayed; press O again to remove the selected item from My - Nikon D7000 | D7000 User's Manual - Page 287
an item. Highlight the item you wish to move and press J. 3 Position the item. Press 1 or 3 to move the item up or down in My Menu and press J. Repeat Steps 2-3 to reposition additional items. 4 Exit to My Menu. G button Press the G button to return to My - Nikon D7000 | D7000 User's Manual - Page 288
SETTINGS." Menu items are added to the top of the recent settings menu as they are used. To view My Menu again, select O My Menu for m Recent settings > Choose tab. A Removing Items from the Recent Settings Menu To remove an item from the recent settings menu, highlight it and press the O button - Nikon D7000 | D7000 User's Manual - Page 289
lens Type D lens ❚❚ Compatible CPU Lenses Camera setting Focus Mode Metering Lens/accessory 1 M (with electronic Auto and scene aZ AF rangefinder) M modes; P, S, A M 3D Color b Type G or D AF NIKKOR/AF-S, AF-I NIKKOR ✔ ✔ ✔ ✔ 2 PC-E NIKKOR series - ✔3 ✔ ✔3 ✔ 3 ✔ 3 - ✔ 2, 3 PC - Nikon D7000 | D7000 User's Manual - Page 290
lens aperture ring. For a list of non-CPU lenses and accessories that can not be used with this camera, see page 271. Camera setting Focus Mode Metering Lens/accessory M (with electronic Auto and scene aZ AF rangefinder) M modes; P, S A, M 3D Color b AI-, AI-modified, NIKKOR or Nikon Series - Nikon D7000 | D7000 User's Manual - Page 291
D Incompatible Accessories and Non-CPU Lenses The following accessories and non-CPU lenses can NOT be used with the D7000: • TC-16AS AF teleconverter • Non-AI lenses • Lenses that require the AU-1 focusing unit (400mm f/4.5, 600mm f/5.6, 800mm f/8, 1200mm f/11) • Fisheye (6mm f/5.6, 7.5mm f/5.6, 8mm - Nikon D7000 | D7000 User's Manual - Page 292
at all ranges. The built-in flash can also be used with AI-S, AI-, AI-modified NIKKOR, Nikon Series E and nonCPU lenses with a focal length of 16-300mm. AI 50-300mm f/4.5, modified AI 50-300mm f/4.5, and AI-S 50-300mm f/4.5 ED lenses must be used at a zoom position of 135mm or above, and AI 50 - Nikon D7000 | D7000 User's Manual - Page 293
AF-assist illumination is available with lenses with focal lengths of 24-200 mm. It can not however be used to assist the focus operation with the following lenses: • AF-S NIKKOR 14-24mm f/2.8G ED • Ai AF VR Zoom-Nikkor 80-400mm f/4.5-5.6D ED • AF-S VR Zoom-Nikkor 70-200mm f/2.8G IF-ED • AF-S VR - Nikon D7000 | D7000 User's Manual - Page 294
is 36 × 24 mm. The size of the area exposed by the D7000, in contrast, is 23.6 × 15.6 mm, meaning that the angle of view of a 35mm camera is approximately 1.5 times that of the D7000. The approximate focal length of lenses for the D7000 in 35mm format can be calculated by multiplying the focal - Nikon D7000 | D7000 User's Manual - Page 295
15 Sync Terminal Adapter When the AS-15 sync terminal adapter (available separately) is mounted on the camera accessory shoe, flash accessories can be connected via a sync terminal. D Use Only Nikon Flash Accessories Use only Nikon flash units. Negative voltages or voltages over 250 V applied to the - Nikon D7000 | D7000 User's Manual - Page 296
1 If a color filter is attached to the SB-900 when AUTO or N (flash) is selected for white balance, the camera will automatically detect the filter and adjust white balance appropriately. 2 Controlled remotely with built-in flash in commander mode or using optional SB-900, SB-800, or SB-700 flash - Nikon D7000 | D7000 User's Manual - Page 297
manual M Manual 6 RPT Repeating flash Auto FP High-Speed Sync 7 FV lock AF-assist for multi-area AF 8 Flash Color Information Communication REAR Rear-curtain sync Y Red-eye reduction Power zoom 1 Only available when SU-800 is used to control - Nikon D7000 | D7000 User's Manual - Page 298
to TTL and shutter-release is disabled. Set flash unit to A (non-TTL auto flash). 3 Autofocus is available with AF-S VR Micro-Nikkor 105mm f/2.8G IF-ED and AF-S Micro NIKKOR 60mm f/2.8G ED lenses only. 4 Available when camera is used to select flash mode. A Flash Control Mode The information - Nikon D7000 | D7000 User's Manual - Page 299
fired at full power and the photograph may be underexposed. When an SC-series 17, 28, or 29 sync cable is used for off-camera flash photography, correct exposure may not be achieved in i-TTL mode. We recommend that you choose spot metering to select standard i-TTL flash control. Take a test shot - Nikon D7000 | D7000 User's Manual - Page 300
computer on the network using Camera Control Pro 2 (available separately). Note that the WT-4 requires an independent power source; an EH-6 AC adapter or EN-EL3e battery is recommended. See the WT-4 manual for details. • Filters intended for special-effects photography may interfere with autofocus - Nikon D7000 | D7000 User's Manual - Page 301
control points. • Camera Control Pro 2: Control the camera remotely from a computer to record Software movies and photographs and save photographs directly to the computer hard disk. Body cap Note: Use the latest versions of Nikon software. Most Nikon software offers an auto update feature - Nikon D7000 | D7000 User's Manual - Page 302
power connector and AC adapter. 1 Ready the camera. Open the battery-chamber (q) and power connector (w) covers. 2 Insert the EP-5B power connector. Be sure to insert the connector in the orientation shown, using the connector to keep the orange battery latch pressed to one side. The latch locks - Nikon D7000 | D7000 User's Manual - Page 303
malfunction. Do not use alcohol, thinner, or other volatile chemicals. D Servicing the Camera and Accessories The camera is a precision device and requires regular servicing. Nikon recommends that the camera be inspected by the original retailer or Nikon-authorized service representative once every - Nikon D7000 | D7000 User's Manual - Page 304
The image sensor that acts as the camera's picture element is fitted with a low-pass filter to prevent moiré. If you suspect that dirt or dust on the filter is appearing in photographs, you can clean the filter using the Clean image sensor option in the setup menu. The filter can be cleaned at any - Nikon D7000 | D7000 User's Manual - Page 305
performed by vibrating the low-pass filter. If dust can not be fully removed using the options in the Clean image sensor menu, clean the image sensor manually (0 286) or consult a Nikon-authorized service representative. If image sensor cleaning is performed several times in succession, image sensor - Nikon D7000 | D7000 User's Manual - Page 306
using the Clean image sensor option in the setup menu (0 284), the filter can be cleaned manually as described below. Note, however, that the filter is extremely delicate and easily damaged. Nikon recommends that the filter be cleaned only by Nikon-authorized service personnel. 1 Charge the battery - Nikon D7000 | D7000 User's Manual - Page 307
Dirt that can not be removed with a blower can only be removed by Nikon-authorized service personnel. Under no circumstances should you touch or wipe the filter. 8 Turn the camera off. The mirror will return to the down position and the shutter curtain will close. Replace the lens or body cap. n 287 - Nikon D7000 | D7000 User's Manual - Page 308
Low-Pass Filter Nikon takes every possible precaution to prevent foreign matter from coming into contact with the low-pass filter during production and shipping. The D7000, however, is designed to be used with interchangeable lenses, and foreign matter may enter the camera when lenses are removed or - Nikon D7000 | D7000 User's Manual - Page 309
lens pointed at the sun or other strong light source for an extended period. Intense light may cause the image sensor to deteriorate or produce a white blur effect in photographs. Turn the product off before removing or disconnecting the power source: Do not unplug the product or remove the battery - Nikon D7000 | D7000 User's Manual - Page 310
. To prevent mold or mildew, take the camera out of storage at least once a month. Turn the camera on and release the shutter a few times before putting it away. Store the battery in a cool, dry place. Replace the terminal cover before putting the battery away. Notes on the monitor: The monitor - Nikon D7000 | D7000 User's Manual - Page 311
• Charge the battery before use. When taking photographs on important occasions, ready a spare EN-EL15 battery and keep it fully charged. Depending on your location, it may be difficult to purchase replacement batteries on short notice. Note that on cold days, the capacity of batteries tends to - Nikon D7000 | D7000 User's Manual - Page 312
menu 1 k, p, l, m, n, o, r, t, x, y, 1, 2, i j P S, A, M s, 0 u, v w z 3 Storage folder File naming Role played by card in Slot 2 Image quality 2 Image size 2 JPEG compression NEF (RAW) recording White balance 2 Set Picture Control Auto distortion - Nikon D7000 | D7000 User's Manual - Page 313
of focus points ✔✔ a7: Built-in AF-assist illuminator ✔ ✔ a8: Live view/movie AF 2 ✔4 ✔4 b1: ISO sensitivity step value ✔✔ b2: EV steps for exposure cntrl. ✔ ✔ b3: Easy exposure compensation - - b4: Center-weighted area -- b5: Fine tune optimal exposure ✔ ✔ c1: Shutter-release button AE - Nikon D7000 | D7000 User's Manual - Page 314
flash -- e5: Auto bracketing set -- Custom Settings 5 e6: Bracketing order -- f1: D switch ✔✔ f2: OK button (shooting mode) ✔ ✔ f3: Assign Fn button ✔✔ f4: Assign preview button ✔✔ f5: Assign AE-L/AF-L button ✔✔ f6: Customize command dials ✔ ✔ f7: Release button to use dial ✔✔ f8 - Nikon D7000 | D7000 User's Manual - Page 315
Frame interval Default 0 Off 200 2s 201 ❚❚ Shooting Menu Defaults 1 Option File naming Role played by card in Slot 2 Image quality Image size JPEG compression NEF (RAW) recording Type NEF (RAW) bit depth White balance Fine tuning Choose color temp. Set Picture Control Auto distortion control - Nikon D7000 | D7000 User's Manual - Page 316
Center-weighted area Off ø 8 mm 212 d14 Battery order 213 Use MB-D11 batteries first 221 b5 Fine tune optimal exposure e1 Flash sync speed 1/250 s 222 Matrix metering 0 e2 Flash shutter speed 1/60 s 223 Center-weighted metering Spot metering c1 Shutter-release button AE-L c2 Auto meter - Nikon D7000 | D7000 User's Manual - Page 317
0 Save user settings Time zone and date U1 U2 Shooting mode defaults to P 75 Daylight saving time Auto image rotation Off 237 On 239 LCD brightness 0 237 GPS Clean image sensor Clean at startup/shutdown Clean at startup & shutdown Auto meter-off 284 Use GPS to set camera clock Eye - Nikon D7000 | D7000 User's Manual - Page 318
f/16 (e.g., AF-S NIKKOR 50mm f/1.4G) [ EV] -5 -4 -3 -2 -1 0 1 2 3 4 5 6 7 8 9 10 11 12 13 f/1 14 f/1.4 15 f/2 16161 /3 f/2.8 17 f/4 18 f/5.6 19 f/8 20 f/11 21 f/16 22 f/22 23 f/32 30" 15" 8" 4" 2" 1" 2 4 8 15 30 60 125 250 500 1000 2000 4000 8000 Shutter speed (seconds) The - Nikon D7000 | D7000 User's Manual - Page 319
and replace the battery, taking care to avoid burns, and turn the camera on again, or, if you are using an AC adapter (available separately), disconnect and reconnect the adapter and turn the camera on again. If the problem persists, contact your retailer or Nikon-authorized service representative - Nikon D7000 | D7000 User's Manual - Page 320
AF-area mode: Manual focus selected (0 55, 99). Only one shot taken each time shutter-release button is pressed in continuous release mode: Lower built-in flash (0 143). Image size can not be changed: Image quality set to NEF (RAW) (0 85). Camera is slow to record photos: Turn long exposure noise - Nikon D7000 | D7000 User's Manual - Page 321
when the camera is in AF-A mode. Choose AF-S. If an option other than H (auto-area AF) is selected for AF-area mode, select center focus point (0 94, 96). • The camera is currently in live view or a movie is being recorded. • Off selected for Custom Setting a7 (Built-in AF-assist illuminator - Nikon D7000 | D7000 User's Manual - Page 322
rotated to S after shutter speed of A selected in mode M: choose new shutter speed (0 69). Camera is slow to respond to shutter-release button: Select Off for Custom Setting d11 (Exposure delay mode; 0 219). Full range of shutter speeds not available: • Flash in use. Flash sync speed can be selected - Nikon D7000 | D7000 User's Manual - Page 323
mode (0 165, 197). NEF (RAW) image is not played back: Photo was taken at image quality of NEF + JPEG (0 85). Can not view pictures recorded with other cameras: Pictures recorded with other makes of camera may not be displayed correctly. Message is displayed stating that no images are available - Nikon D7000 | D7000 User's Manual - Page 324
-party software does not display effects of Picture Controls or Active D-Lighting. Use ViewNX 2 (supplied) or optional Nikon software such as Capture NX 2 (available separately). Miscellaneous Date of recording is not correct: Set camera clock (0 27, 237). Menu item can not be selected: Some options - Nikon D7000 | D7000 User's Manual - Page 325
ring is not set to Set ring to minimum aperture minimum aperture. (largest f-number). 26 H d Low battery. Ready a fully-charged spare battery. 21 • Battery exhausted. • Recharge or replace battery. • Battery can not be used. • Contact Nikon-authorized service representative. H d • An - Nikon D7000 | D7000 User's Manual - Page 326
current • Delete photographs. (blinks) (blinks) settings, or camera has run out • Insert new memory card. of file or folder numbers. Release shutter. If error persists O (blinks) Camera malfunction. or appears frequently, consult Nikon-authorized service representative. 0 101 143 69 70 69 - Nikon D7000 | D7000 User's Manual - Page 327
use in camera. Format memory card or insert new memory card. 29, 32 Failed to update flash unit firmware. Flash cannot be used. Contact a Nikon- - Firmware for flash unit mounted on camera was not updated correctly. Contact a Nikon-authorized service representative. - authorized service - Nikon D7000 | D7000 User's Manual - Page 328
Control Monitor panel Problem Solution Folder contains no images. - No images on memory card or in folder(s) selected for playback. Select folder containing images from Playback folder menu using a computer or different make of camera, or file is File can not be played back on camera. - Nikon D7000 | D7000 User's Manual - Page 329
m-1 Focusing screen Type B BriteView Clear Matte Mark II screen with AF area brackets (framing grid can be displayed) Reflex mirror Quick return Depth-of-field preview Pressing depth-of-field preview button stops lens aperture down to value selected by user (A and M modes) or by camera (other - Nikon D7000 | D7000 User's Manual - Page 330
-CPU: Can be used in modes A and M; color matrix metering and aperture value display supported if user provides lens data (AI lenses only) Electronic rangefinder can be used if maximum aperture is f/5.6 or faster. Shutter Type Speed Flash sync speed Electronically-controlled vertical-travel focal - Nikon D7000 | D7000 User's Manual - Page 331
• Manual focus (M): Electronic rangefinder can be used Can be selected from 39 or 11 focus points Single-point AF; 9-, 21-, or 39-point dynamic-area AF, 3D-tracking, auto-area AF Focus can be locked by pressing shutter-release button halfway (singleservo AF) or by pressing AE-L/AF-L button n 311 - Nikon D7000 | D7000 User's Manual - Page 332
flash with auto pop-up P, S, A, M, 0: Manual pop-up with button release Guide Number Approx. 12/39, 12/39 with manual flash (m/ft, ISO 100, 20 °C/68 °F) Flash control • TTL: i-TTL balanced fill-flash and standard i-TTL flash for digital SLR using 2,016-pixel RGB sensor are available with built - Nikon D7000 | D7000 User's Manual - Page 333
servo AF-area mode Autofocus • Autofocus (AF): Single-servo AF (AF-S); full-time servo AF (AF-F) • Manual focus (M) Face-priority AF, wide-area AF, normal-area AF, subject-tracking AF Contrast-detect AF anywhere in frame (camera selects focus point automatically when face-priority AF or subject - Nikon D7000 | D7000 User's Manual - Page 334
-5B power connector (available separately) Tripod socket Tripod socket 1/4 in. (ISO 1222) Dimensions/weight Dimensions (W × H × D) Approx. 132 × 105 × 77 mm (5.2 × 4.1 × 3 in.) Weight Approx. 690 g (1 lb. 8.3 oz.; camera body only); approx. 780 g (1 lb. 11.5 oz.) with battery and memory card - Nikon D7000 | D7000 User's Manual - Page 335
in millimeters (18, 24, 35, 50, 70, 105) Distance information Output to camera Zoom Manual zoom using independent zoom ring Focusing Nikon Internal Focusing (IF) system with autofocus controlled by Silent Wave Motor; manual focus supported when A-M switch is set to A or M. Focus can be - Nikon D7000 | D7000 User's Manual - Page 336
produces soft, esthetically-pleasing blurring of point light sources in out-of-focus areas of the image (bokeh). If the camera is equipped with an AF-ON button, vibration reduction will not be activated when the AF-ON button is pressed. A Using the Built-in Flash When using the built-in flash, be - Nikon D7000 | D7000 User's Manual - Page 337
from the background 2 The subject contains many fine details. The camera may have difficulty focusing on subjects that contain many fine details or that are lacking in contrast. Example: A field of flowers In these cases, use manual focus, or use focus lock to focus on another subject at the same - Nikon D7000 | D7000 User's Manual - Page 338
widely used in the digital camera industry to ensure compatibility among different makes of camera. • DPOF: Digital Print Order Format (DPOF) is an industry-wide standard that allows pictures to be printed from print orders stored on the memory card. • Exif version 2.3: The D7000 supports Exif - Nikon D7000 | D7000 User's Manual - Page 339
Cards The following SD memory cards have been tested and approved for use in the D7000. Cards with class 6 or faster write speeds are recommended for movie recording. Recording may end unexpectedly when cards with slower write speeds are used. SD memory cards SDHC memory cards 2 SDXC memory - Nikon D7000 | D7000 User's Manual - Page 340
pictures that can be stored on a 8 GB SanDisk Extreme SDHC card at different image quality and size settings figures are approximate. File size varies with scene recorded. 2 Maximum number of exposures that can be long exposure noise reduction is on. 3 Figures assume JPEG compression is set to Size - Nikon D7000 | D7000 User's Manual - Page 341
. Live view not used. 2 Measured at 20 °C/68 °F with an AF-S NIKKOR 70-200mm f/2.8G ED VR II lens under the following test conditions: image quality set to JPEG basic, image size set to M (medium), shutter speed 1/250 s, shutter-release button pressed halfway for three seconds and focus cycled from - Nikon D7000 | D7000 User's Manual - Page 342
Menu 265 ADL bracketing 114, 229 Adobe RGB 141 AE & flash (Auto bracketing set) .... 109, 229 AE lock 106 AE only (Auto bracketing set) .109, 229 AE-L 106 AE-L/AF-L button 97, 106, 232 AF 50, 91-98 AF area brackets 9, 34 AF fine tune 246 AF point illumination 209 AF-A 91 AF-area mode 50 - Nikon D7000 | D7000 User's Manual - Page 343
..... 213 Fine-tuning white balance ....... 119 Firmware version 247 Fisheye 261 Flash..... 39, 143, 144, 148, 149, 275 Flash (White balance 117 Flash bracketing 109, 228 Flash cntrl for built-in flash....... 223 Flash compensation 148 Flash mode 144 Flash only (Auto bracketing set).... 109 - Nikon D7000 | D7000 User's Manual - Page 344
menu 195 Playback slot and folder 164 Playback zoom 173 Portrait (Set Picture Control)....131 Power connector 280, 282 Power switch 2 Predictive focus tracking 93 Preset manual (White balance)...... 117, 123 Press the shutter-release button all the way down 38, 39 Press the shutter-release - Nikon D7000 | D7000 User's Manual - Page 345
253 Set Picture Control 131 Setup menu 236 Shade (White balance 117 Shooting data 168 Shooting menu 202 Shutter-priority auto 69 Shutter-release button...38, 39, 97, 106, 213 Shutter-release button AE-L .... 213 Side-by-side comparison .......... 264 Single frame 7, 77 Single-point AF 94 - Nikon D7000 | D7000 User's Manual - Page 346
326 - Nikon D7000 | D7000 User's Manual - Page 347
- Nikon D7000 | D7000 User's Manual - Page 348
No reproduction in any form of this manual, in whole or in part (except for brief quotation in critical articles or reviews), may be made without written authorization from NIKON CORPORATION. Printed in Thailand 6MB10011-02
-
 1
1 -
 2
2 -
 3
3 -
 4
4 -
 5
5 -
 6
6 -
 7
7 -
8
-
9
-
10
-
11
-
12
-
13
-
14
-
15
-
16
-
17
-
18
-
19
-
20
-
21
-
22
-
23
-
24
-
25
-
26
-
27
-
28
-
29
-
30
-
31
-
32
-
33
-
34
-
35
-
36
-
37
-
38
-
39
-
40
-
41
-
42
-
43
-
44
-
45
-
46
-
47
-
48
-
49
-
50
-
51
-
52
-
53
-
54
-
55
-
56
-
57
-
58
-
59
-
60
-
61
-
62
-
63
-
64
-
65
-
66
-
67
-
68
-
69
-
70
-
71
-
72
-
73
-
74
-
75
-
76
-
77
-
78
-
79
-
80
-
81
-
82
-
83
-
84
-
85
-
86
-
87
-
88
-
89
-
90
-
91
-
92
-
93
-
94
-
95
-
96
-
97
-
98
-
99
-
100
-
101
-
102
-
103
-
104
-
105
-
106
-
107
-
108
-
109
-
110
-
111
-
112
-
113
-
114
-
115
-
116
-
117
-
118
-
119
-
120
-
121
-
122
-
123
-
124
-
125
-
126
-
127
-
128
-
129
-
130
-
131
-
132
-
133
-
134
-
135
-
136
-
137
-
138
-
139
-
140
-
141
-
142
-
143
-
144
-
145
-
146
-
147
-
148
-
149
-
150
-
151
-
152
-
153
-
154
-
155
-
156
-
157
-
158
-
159
-
160
-
161
-
162
-
163
-
164
-
165
-
166
-
167
-
168
-
169
-
170
-
171
-
172
-
173
-
174
-
175
-
176
-
177
-
178
-
179
-
180
-
181
-
182
-
183
-
184
-
185
-
186
-
187
-
188
-
189
-
190
-
191
-
192
-
193
-
194
-
195
-
196
-
197
-
198
-
199
-
200
-
201
-
202
-
203
-
204
-
205
-
206
-
207
-
208
-
209
-
210
-
211
-
212
-
213
-
214
-
215
-
216
-
217
-
218
-
219
-
220
-
221
-
222
-
223
-
224
-
225
-
226
-
227
-
228
-
229
-
230
-
231
-
232
-
233
-
234
-
235
-
236
-
237
-
238
-
239
-
240
-
241
-
242
-
243
-
244
-
245
-
246
-
247
-
248
-
249
-
250
-
251
-
252
-
253
-
254
-
255
-
256
-
257
-
258
-
259
-
260
-
261
-
262
-
263
-
264
-
265
-
266
-
267
-
268
-
269
-
270
-
271
-
272
-
273
-
274
-
275
-
276
-
277
-
278
-
279
-
280
-
281
-
282
-
283
-
284
-
285
-
286
-
287
-
288
-
289
-
290
-
291
-
292
-
293
-
294
-
295
-
296
-
297
-
298
-
299
-
300
-
301
-
302
-
303
-
304
-
305
-
306
-
307
-
308
-
309
-
310
-
311
-
312
-
313
-
314
-
315
-
316
-
317
-
318
-
319
-
320
-
321
-
322
-
323
-
324
-
325
-
326
-
327
-
328
-
329
-
330
-
331
-
332
-
333
-
334
-
335
-
336
-
337
-
338
-
339
-
340
-
341
-
342
-
343
-
344
-
345
-
346
-
347
-
348
 |
 |
DIGITAL CAMERA
En
User's Manual