Nokia 5190 User Guide - Page 10
Copy information from the source phone, Save the source phone data, Copy information to the target
 |
View all Nokia 5190 manuals
Add to My Manuals
Save this manual to your list of manuals |
Page 10 highlights
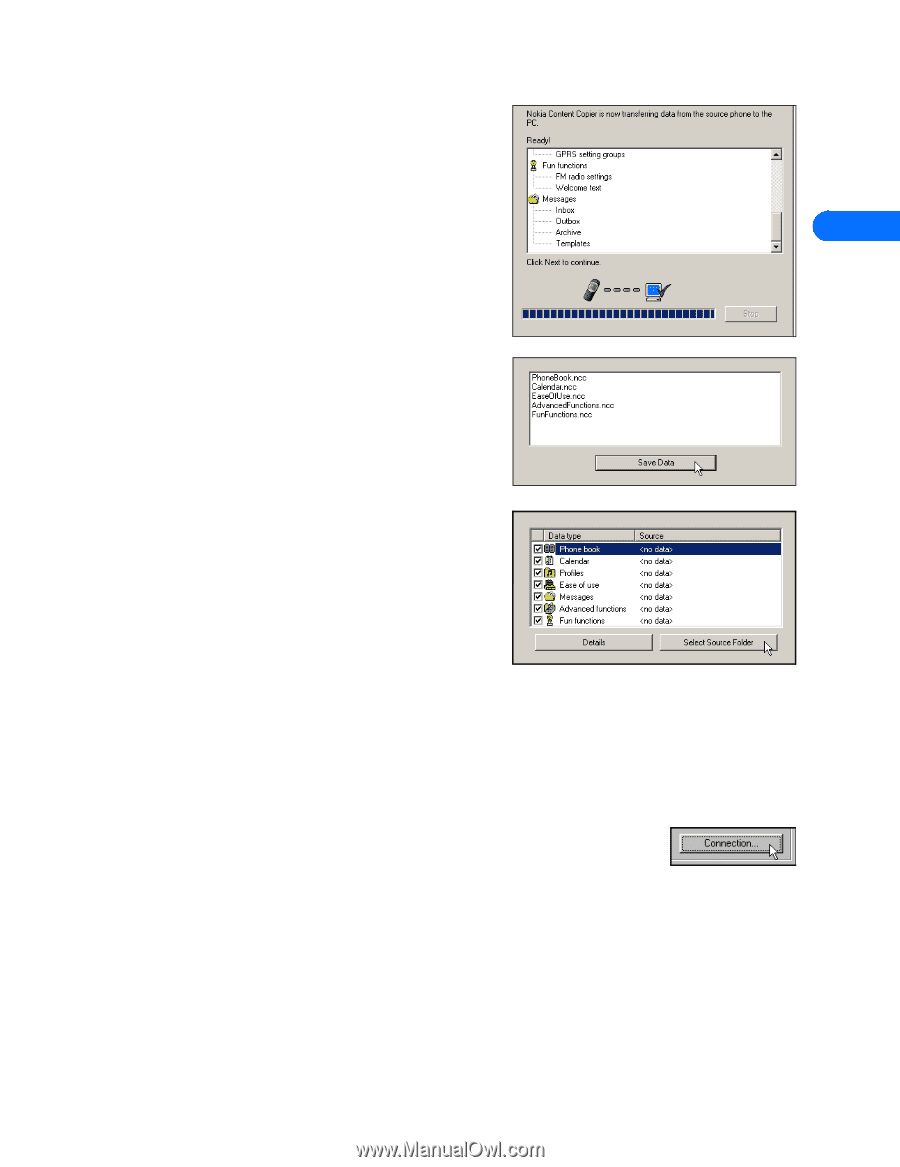
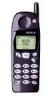
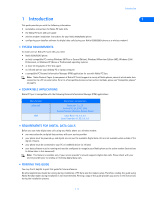
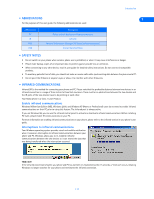
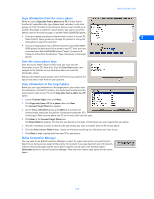
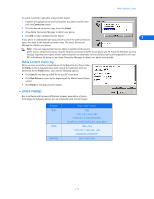
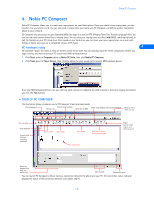
Nokia Content Copier Copy information from the source phone When you select Copy data from a phone to a PC, Content Copier transfers all compatible data types (phone book, calendar, to-do, caller groups, etc.) from the phone containing the data you want to back up or transfer. This phone is called the "source phone" and can be one of the phones listed on the previous page, or another Nokia 6590/6590i phone. • If you are copying your phone's data and want to save it on your PC, Nokia Content Copier guides you through the process of saving the 3 information to your PC's hard drive. • If you are copying data from a different source to your Nokia 6590/ 6590i phone, the data must first be saved to your PC. Once you have connected your Nokia 6590/6590i phone ("target" phone) via IR, follow the instructions found below: "Copy information to the target phone". Save the source phone data Once the source phone's data has been read, you must save the information to your PC's hard drive. Click the Save Data button, then navigate to the location on your hard drive where you want the information stored. Nokia Content Copier automatically names the files for you, based on the type of data that is read from the source phone. Copy information to the target phone Before you can copy information to the target phone, you need to load the information into the PC's memory. You should have already saved the source phone's data to your PC via the Copy data from a phone to a PC option. 1 Launch Content Copier, then click Next. 2 Click Copy data from a PC to a phone then click Next. The Connect Target Phone box appears. 3 On the Nokia 6590/6590i phone, press Menu 9 to activate the Infrared mode, then point the phone's infrared port toward the PC's infrared port. Make sure the phone and PC are no more than two feet apart. 4 Click Next in the Connect Target Phone box. The Select Data box appears. This box lets you determine the types of information you want copied into your phone. 5 Click the checkmark to select or deselect the type of data you want to transfer from the PC to your phone. 6 Click the Select source Folder button. Locate the directory containing the information you want to use. 7 Click Next to begin copying data from your PC to your phone. Nokia Connection Manager You may need to use Nokia Connection Manager to select the type of connection you want Content Copier to use during various stages of the process. For example, if you copy data from one of the phones listed on the previous page and the source phone requires a serial cable, click Content Copier's Connection button to launch Connection Manager. Then select the correct cable option for the source phone. [ 6 ]
-
 1
1 -
2
-
3
-
4
-
 5
5 -
 6
6 -
 7
7 -
 8
8 -
 9
9 -
 10
10 -
 11
11 -
 12
12 -
 13
13 -
 14
14 -
 15
15 -
16
-
17
-
18
-
19
-
20
-
21
-
22
-
23
-
24
-
25
-
26
-
27
-
28
-
29
-
30
-
31
-
32
-
33
-
34
-
35
-
36
-
37
-
38
-
39
-
40
-
41
-
42
-
43
-
44
-
45
-
46
-
47
-
48
-
49
-
50
-
51
-
52
 |
 |