Nokia 5190 User Guide - Page 25
Capture an image, Adjust and edit image - codes
 |
View all Nokia 5190 manuals
Add to My Manuals
Save this manual to your list of manuals |
Page 25 highlights
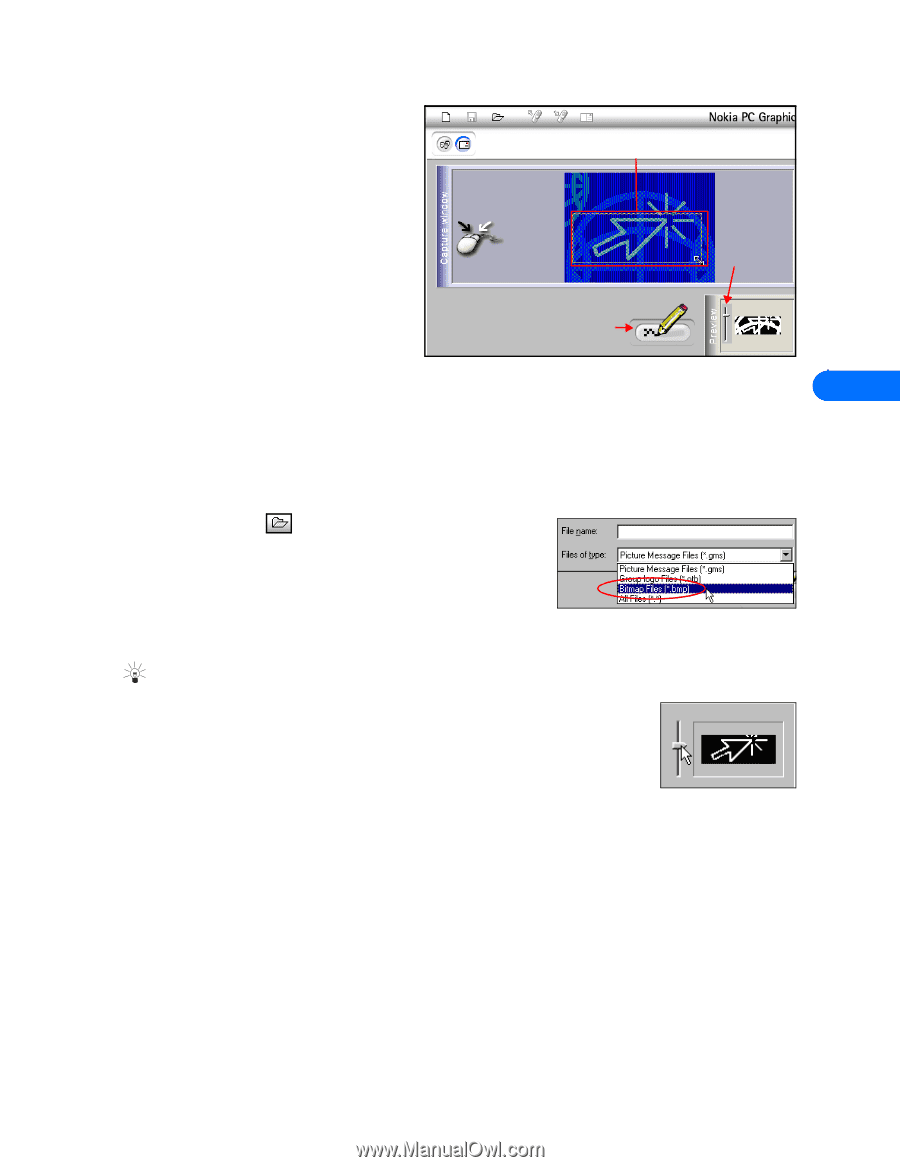
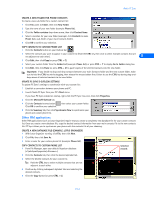
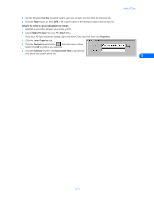
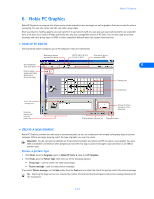
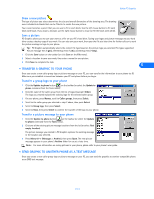
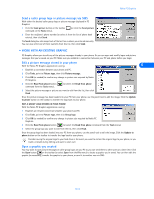
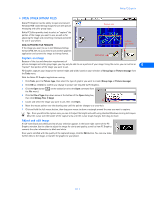
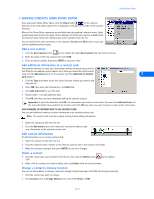
Nokia PC Graphics • OPEN OTHER BITMAP FILES Nokia PC Graphics has the ability to open and convert Windows RGB-coded bitmap images for use with picture messaging and caller group logos. Capture area Nokia PC Editor provides tools to select or "capture" the portion of the image you want to use, as well as for adjusting the image and converting it to black and white for use in your phone. NON-SUPPORTED FILE FORMATS Halftone adjustment If the image you want to use is not Windows bitmap format (JPEG, GIF, etc.), you need to use another graphics application and convert the image to bitmap format. Edit button Capture an image Because of the size and dimension requirements of picture messages and caller group logos, you may only be able to use a portion of your image. Using the cursor, you can outline or 6 "capture" that portion of the image you want to use. PC Graphics captures your image at the correct height and width, based on your selection of Group logo or Picture message from the Tools menu. With the Nokia PC Graphics application running: 1 Click Tools, point to Picture type, then select the type of graphic you want to create (Group logo or Picture message). 2 Click OK (as needed) to confirm any change in picture size required by PC Graphics. 3 Click the Open button the File menu). on the toolbar (or select the Open command from 4 Click the File of type drop-down arrow at the bottom of the Open dialog box, then click Bitmap Files (*.bmp). 5 Locate and select the image you want to use, then click Open. 6 Move the mouse pointer over the drawing area until the pointer changes to a cross-hair. 7 Click and hold the left mouse button, then drag your mouse to draw a rectangle around the area you want to capture. Tip: Once you define the capture area, you can still adjust the height and width using standard Windows resizing techniques. Move the cursor over the border of the capture area until the cursor shape changes, then drag to resize. Adjust and edit image A half-tone (black and white) preview of your selection appears in the lower right corner of the PC Graphics window. Use the slider to adjust the image for clarity and quality, as well as how PC Graphics converts the color information to black and white. Once you're satisfied with the quality of the captured image, click the Edit button. You can now make further edits to the image, or transfer the graphic to your phone. [ 21 ]
-
 1
1 -
2
-
3
-
4
-
5
-
6
-
7
-
8
-
9
-
10
-
11
-
12
-
13
-
14
-
15
-
16
-
17
-
18
-
19
-
 20
20 -
 21
21 -
 22
22 -
 23
23 -
 24
24 -
 25
25 -
 26
26 -
 27
27 -
 28
28 -
 29
29 -
 30
30 -
31
-
32
-
33
-
34
-
35
-
36
-
37
-
38
-
39
-
40
-
41
-
42
-
43
-
44
-
45
-
46
-
47
-
48
-
49
-
50
-
51
-
52
 |
 |