Oki C5100n OKI C5100 User's Guide - Page 106
Place the drive gear at the back of the belt unit in the gear at the, left rear corner of the printer
 |
View all Oki C5100n manuals
Add to My Manuals
Save this manual to your list of manuals |
Page 106 highlights
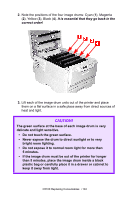
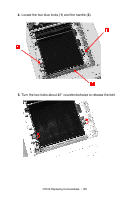
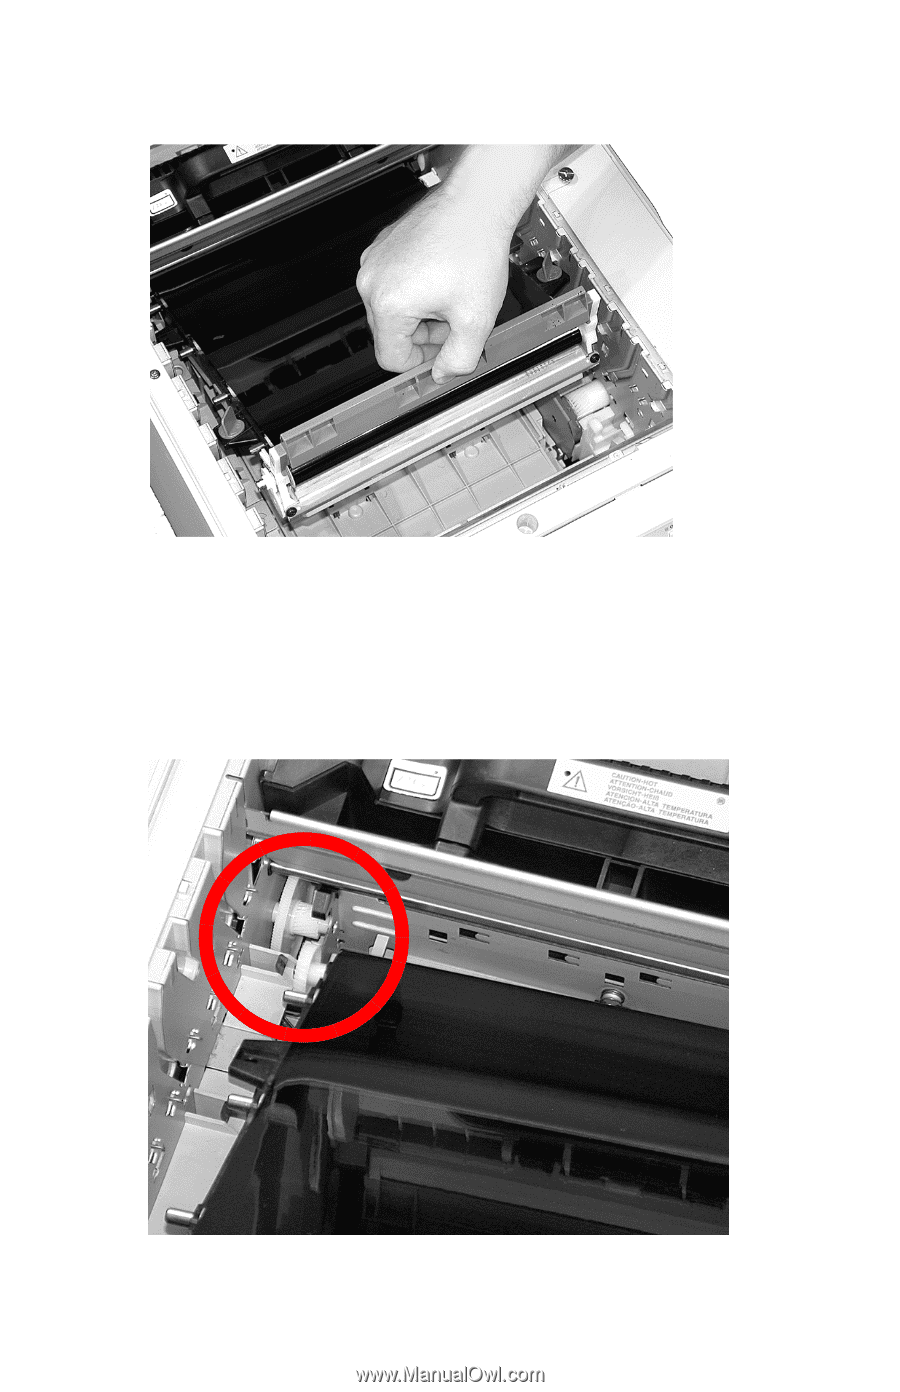
6. Pull up the handle and lift the belt unit out of the printer. 7. Unpack the new belt unit and hold it with the blue handle toward the front of the printer. 8. Place the drive gear at the back of the belt unit in the gear at the left rear corner of the printer, and lower the belt unit into the printer. C5100 Replacing Consumables • 106
-
 1
1 -
2
-
3
-
4
-
5
-
6
-
7
-
8
-
9
-
10
-
11
-
12
-
13
-
14
-
15
-
16
-
17
-
18
-
19
-
20
-
21
-
22
-
23
-
24
-
25
-
26
-
27
-
28
-
29
-
30
-
31
-
32
-
33
-
34
-
35
-
36
-
37
-
38
-
39
-
40
-
41
-
42
-
43
-
44
-
45
-
46
-
47
-
48
-
49
-
50
-
51
-
52
-
53
-
54
-
55
-
56
-
57
-
58
-
59
-
60
-
61
-
62
-
63
-
64
-
65
-
66
-
67
-
68
-
69
-
70
-
71
-
72
-
73
-
74
-
75
-
76
-
77
-
78
-
79
-
80
-
81
-
82
-
83
-
84
-
85
-
86
-
87
-
88
-
89
-
90
-
91
-
92
-
93
-
94
-
95
-
96
-
97
-
98
-
99
-
100
-
 101
101 -
 102
102 -
 103
103 -
 104
104 -
 105
105 -
 106
106 -
 107
107 -
 108
108 -
 109
109 -
 110
110 -
 111
111 -
112
-
113
-
114
-
115
-
116
-
117
-
118
-
119
-
120
-
121
-
122
-
123
-
124
-
125
-
126
-
127
-
128
-
129
-
130
-
131
-
132
-
133
-
134
-
135
-
136
-
137
-
138
-
139
-
140
-
141
-
142
-
143
-
144
-
145
-
146
-
147
-
148
-
149
-
150
-
151
-
152
-
153
-
154
-
155
-
156
-
157
-
158
-
159
-
160
-
161
-
162
 |
 |
C5100 Replacing Consumables
• 106
6.
Pull up the handle and lift the belt unit out of the printer.
7.
Unpack the new belt unit and hold it with the blue handle toward
the front of the printer.
8.
Place the drive gear at the back of the belt unit in the gear at the
left rear corner of the printer, and lower the belt unit into the
printer.