Olympus 225840 Stylus 730 Advanced Manual (English) - Page 24
AF MODE, Changing the focusing area, Recording sound with still pictures, LABEL SHOT, Taking
 |
UPC - 050332158245
View all Olympus 225840 manuals
Add to My Manuals
Save this manual to your list of manuals |
Page 24 highlights
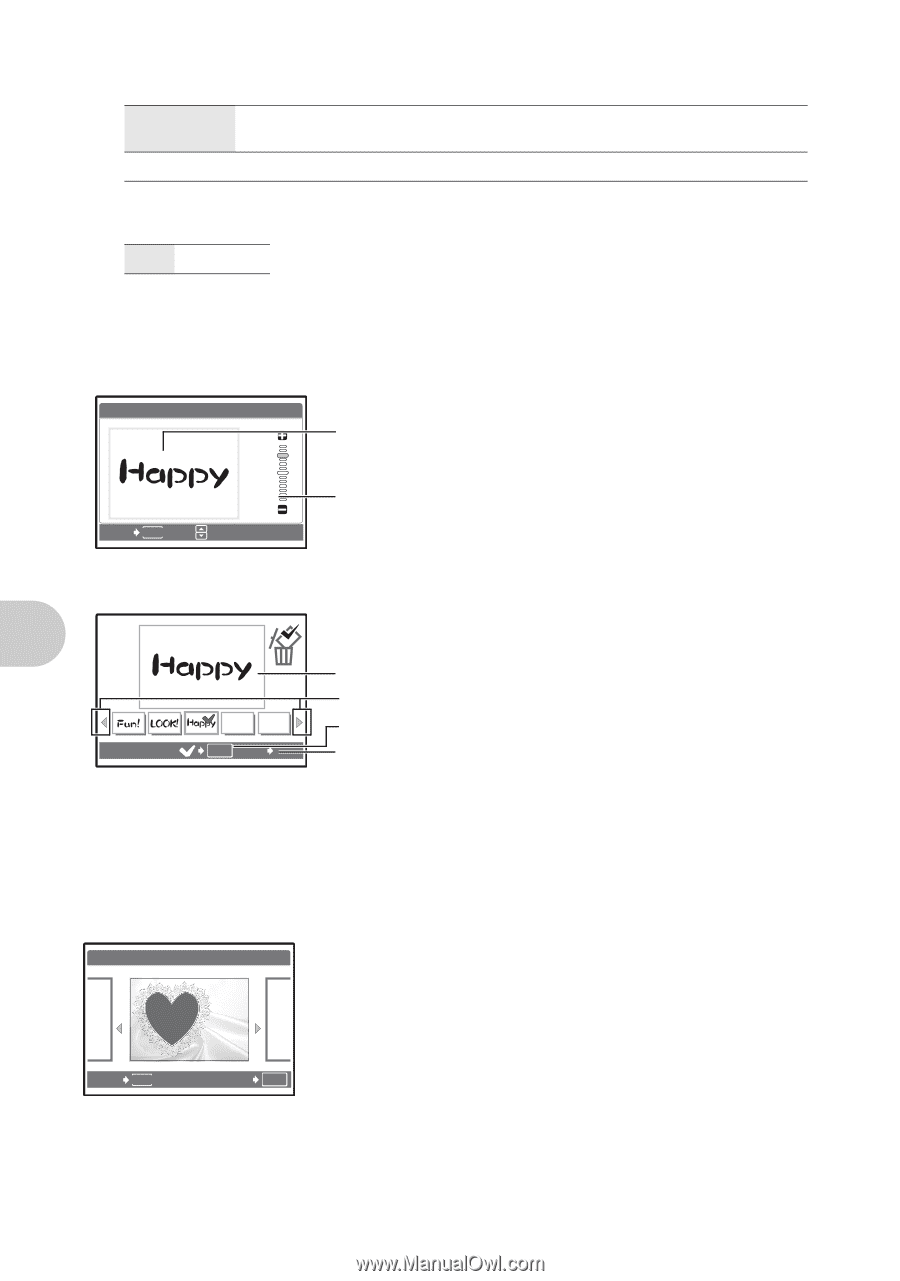
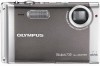
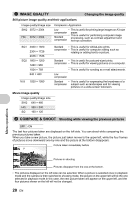
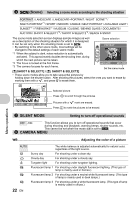
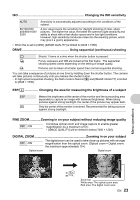
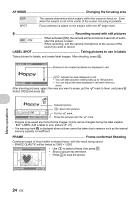
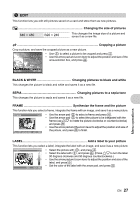
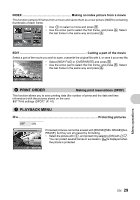
AF MODE Changing the focusing area iESP SPOT The camera determines which subject within the screen to focus on. Even when the subject is not in the center of the screen, focusing is possible. Focus selection is based on the subject within the AF target mark. R Recording sound with still pictures OFF /ON When activated [ON], the camera will record about 4 seconds of audio after the picture is taken. When recording, aim the camera microphone at the source of the sound you want to record. LABEL SHOT Taking pictures to use in labels Take pictures for labels, and create label images. After shooting, press . LABEL SHOT [IN] Pictures to be created as labels are displayed in red. 12: Adjusts the area displayed in red. • You can take pictures continuously up to 100 pictures. BACK MENU • You can adjust the area displayed in red each time you shoot. After shooting pictures, select the ones you want to erase, put the R mark to them, and press S. Select [YES] and press . OK GO S Selected picture 43: Select the pictures. Put the R mark. Erase the pictures with the R mark. • Pictures to be saved are monochrome images. Colors can be changed during the label creation. g"LABEL Add a label to your picture"(P. 27) • The warning mark g is displayed when pictures cannot be taken due to reasons such as the internal memory capacity is insufficient. FRAME Frame-conformed Shooting Combines target of shoot within a related frame, with the result being saved. • [IMAGE QUALITY] will be limited to [1600 × 1200]. FRAME [ I N ] • Use 43 to select a frame, then press . • Shoot a picture into the frame. • Press to save the picture. BACK MENU SET OK Menu operations 24 EN
-
 1
1 -
2
-
3
-
4
-
5
-
6
-
7
-
8
-
9
-
10
-
11
-
12
-
13
-
14
-
15
-
16
-
17
-
18
-
 19
19 -
 20
20 -
 21
21 -
 22
22 -
 23
23 -
 24
24 -
 25
25 -
 26
26 -
 27
27 -
 28
28 -
 29
29 -
30
-
31
-
32
-
33
-
34
-
35
-
36
-
37
-
38
-
39
-
40
-
41
-
42
-
43
-
44
-
45
-
46
-
47
-
48
-
49
-
50
-
51
-
52
-
53
-
54
-
55
-
56
-
57
-
58
-
59
-
60
-
61
-
62
-
63
-
64
-
65
-
66
-
67
-
68
-
69
-
70
-
71
-
72
-
73
-
74
-
75
-
76
-
77
-
78
-
79
-
80
 |
 |