Olympus 225840 Stylus 730 Advanced Manual (English) - Page 27
Black & White
 |
UPC - 050332158245
View all Olympus 225840 manuals
Add to My Manuals
Save this manual to your list of manuals |
Page 27 highlights
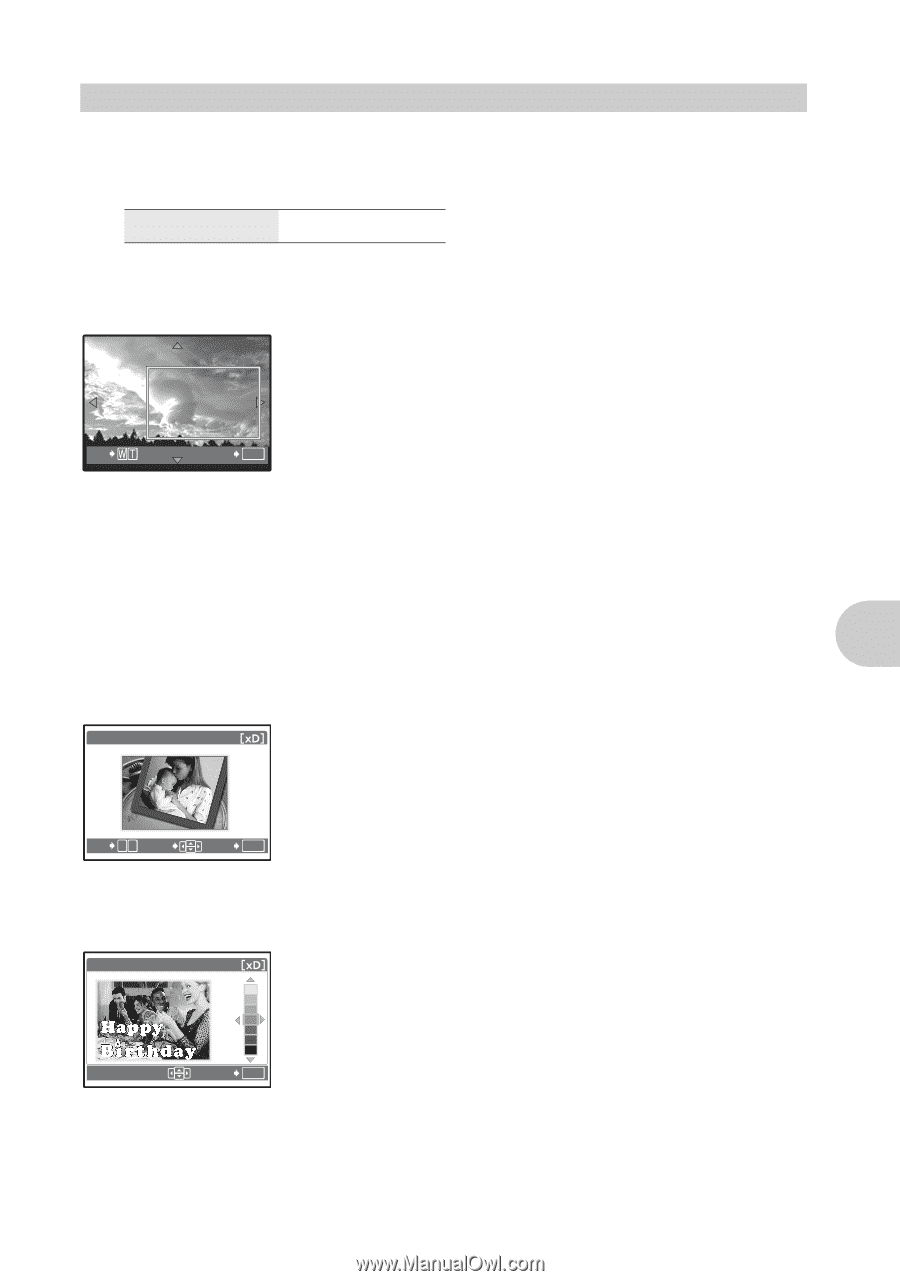
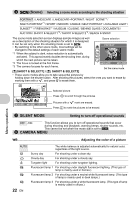
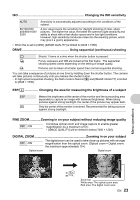
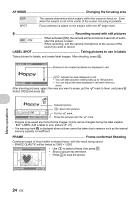
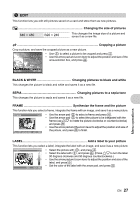
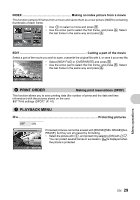
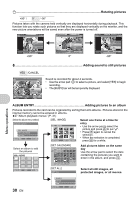
5 EDIT This function lets you edit still pictures saved on a card and store them as new pictures. Q Changing the size of pictures 640 × 480 /320 × 240 This changes the image size of a picture and saves it as a new file. P Cropping a picture Crop a picture, and save the cropped picture as a new picture. • Use 43 to select a picture to be cropped and press . • Use the arrow pad and zoom lever to adjust the position and size of the area-selection box, and press . O SET OK BLACK & WHITE Changing pictures to black and white This changes the picture to black and white and saves it as a new file. SEPIA Changing pictures to a sepia tone This changes the picture to sepia and saves it as a new file. FRAME Synthesize the frame and the picture This function lets you select a frame, integrate the frame with an image, and save it as a new picture. FRAME O W T MOVE SET OK • Use the arrow pad 43 to select a frame and press . • Use the arrow pad 43 to select the picture to be integrated with the frame (use 12 to rotate the picture clockwise or counterclockwise) and press . • Use the arrow pad and the zoom lever to adjust the position and size of the picture, and press to finish. LABEL Add a label to your picture This function lets you select a label, integrate the label with an image, and save it as a new picture. LABEL SET OK • Select the picture with 43, and press . • Select the label with 43, and press . (Press 12 to turn the label 90 degrees clockwise and 90 degrees counterclockwise.) • Use the arrow pad and zoom lever to adjust the position and size of the label, and press . • Set the color of the label with the arrow pad, and press . Menu operations EN 27
-
 1
1 -
2
-
3
-
4
-
5
-
6
-
7
-
8
-
9
-
10
-
11
-
12
-
13
-
14
-
15
-
16
-
17
-
18
-
19
-
20
-
21
-
 22
22 -
 23
23 -
 24
24 -
 25
25 -
 26
26 -
 27
27 -
 28
28 -
 29
29 -
 30
30 -
 31
31 -
 32
32 -
33
-
34
-
35
-
36
-
37
-
38
-
39
-
40
-
41
-
42
-
43
-
44
-
45
-
46
-
47
-
48
-
49
-
50
-
51
-
52
-
53
-
54
-
55
-
56
-
57
-
58
-
59
-
60
-
61
-
62
-
63
-
64
-
65
-
66
-
67
-
68
-
69
-
70
-
71
-
72
-
73
-
74
-
75
-
76
-
77
-
78
-
79
-
80
 |
 |