Olympus E10 E-10 Instructions (English)
Olympus E10 - CAMEDIA E 10 Digital Camera SLR Manual
 |
View all Olympus E10 manuals
Add to My Manuals
Save this manual to your list of manuals |
Olympus E10 manual content summary:
- Olympus E10 | E-10 Instructions (English) - Page 1
Instructions s Thank you for purchasing this digital Olympus camera. s Before you use this camera, read this manual carefully. s We recommend that you spend some time taking test shots and experimenting with all of the features before you take important pictures. - Olympus E10 | E-10 Instructions (English) - Page 2
you for purchasing the Camedia E-10. To ensure years of reliable and enjoyable service, please read this instruction manual carefully and use the camera safely. Store this instruction manual in a safe location where you can find it for future use. Copyright © Copyright 2000. Olympus Optical Co., Ltd - Olympus E10 | E-10 Instructions (English) - Page 3
. Selecting Pictures for Printing 11 Transferring Pictures to a Computer 12 Monitor Menus 13 Having a problem? Appendices*, Glossary, Index B○ a○sic○ s○fo○r E○ v○ery○ o○ne○ Advanced Features * Specifications/Available Options/Image File Compatibility/Troubleshooting/ Camera Error Messages - Olympus E10 | E-10 Instructions (English) - Page 4
a focusing ring. • Shutter speed, aperture value, other image information displayed in viewfinder. • Monitor allows waist-level view for composing pictures. Expandability • Complete conversion lens system. • Optional power battery holder kit enables prolonged uninterrupted use. • Remote cable with - Olympus E10 | E-10 Instructions (English) - Page 5
graphics software stored on the memory card. 1 5sec Previous shot is displayed in the control panel when a camera selects the shutter speed). S (Shutter priority mode) Allows you to set the shutter speed (camera selects the aperture value). M (Manual mode) Allows you to set both the shutter - Olympus E10 | E-10 Instructions (English) - Page 6
OR BACK). NO USER-SERVICEABLE PARTS INSIDE. REFER SERVICING TO QUALIFIED OLYMPUS SERVICE PERSONNEL. A lighting flash with an arrowhead, instructions for information on using the product with batteries. 10.Grounding, Polarization - If this product can be used with an optional AC adapter, the adapter - Olympus E10 | E-10 Instructions (English) - Page 7
the AC adapter from the wall outlet and refer servicing to qualified service personnel: a) If liquid has been spilled, or any object has fallen into the product. b) If the product has been exposed to water. c) If the product does not operate normally while following operating instructions. Adjust - Olympus E10 | E-10 Instructions (English) - Page 8
and never insert anything (other than the recommended battery) into the battery compartment. CAUTION 1. Olympus Ni-MH batteries are intended for use only with Olympus digital cameras. Never use these batteries with any other device. 2. Never subject batteries to strong shocks or continuous vibration - Olympus E10 | E-10 Instructions (English) - Page 9
to dry, and then remove the batteries. Contact the nearest Olympus authorized service center. CAUTION 1. During operation of the camera, if you notice any unusual odors, noise, or smoke around the camera, immediately switch the camera off, disconnect the optional AC adapter (if it is connected), and - Olympus E10 | E-10 Instructions (English) - Page 10
of the monitor and control panel has a long but limited service life. If either display becomes dark or begins to flicker, contact an Olympus authorized service center. • At low temperatures, the light could be slow to light and the color could be different. When using the camera in cold weather - Olympus E10 | E-10 Instructions (English) - Page 11
camera lenses to prevent scratching the lens. • When the camera is not in use, cover the lens with the lens camera for more than one month with the batteries camera.) * To prevent sand or dirt from interfering with the movements of the manual focusing ring and other moving parts, keep the camera - Olympus E10 | E-10 Instructions (English) - Page 12
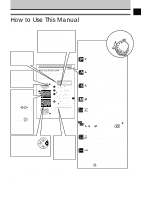
E-10 Features 2 How to Use This Manual ...3 IMPORTANT SAFETY INSTRUCTlONS 4 Caring for Your Camera ...9 Important Parts and Names 14 Getting Started 19 Box Contents: Make Sure You Have Everything 20 Attaching the Camera Strap 21 Inserting Batteries and Attaching the Optional AC Adapter 22 - Olympus E10 | E-10 Instructions (English) - Page 13
81 Changing the ISO Setting 83 Taking Pictures: Using a Flash 85 Selecting a Flash Mode 86 Using Flash Control Compensation 90 Using the Optional Dedicated External Flash FL-40 92 Using Other Flash Units with the Camera 94 Taking Pictures: Color and Quality 97 Achieving Natural Color - Olympus E10 | E-10 Instructions (English) - Page 14
Using Time-Lapse Photography 118 Selecting a Card for Storing Pictures 121 Selecting the Shutter Sound Type and Volume 122 Setting the with Olympus Printers 166 Transferring Pictures to a Computer 167 Transferring Images with a Computer Connection Kit 168 Optional Devices for Card Reading - Olympus E10 | E-10 Instructions (English) - Page 15
Appendix 3: Image File Compatibility 181 Appendix 4: Troubleshooting 182 Appendix 5: Camera Error Messages 189 Glossary of Selected Terms 191 Index ...196 13 - Olympus E10 | E-10 Instructions (English) - Page 16
or sub dial in almost all cases to select camera settings. Use whichever is more convenient for you. However, please remember that when the mode dial is set to M (Manual mode) the main dial is used to set the aperture value and the sub dial is used to select the shutter speed. 14 - Olympus E10 | E-10 Instructions (English) - Page 17
images of pictures that you have taken. If you press the menu button you can open and use the menus. Shutter button ➝ 38 Remote control receiver/ self-timer lamp ➝ 113, 115 Strap eyelet ➝ 21 AF port ➝ 64 Quick reference white balance button ➝ 101 Lens Battery compartment ➝ 23 Tripod socket 15 - Olympus E10 | E-10 Instructions (English) - Page 18
107 2nd-curtain Shutter speed ➝ 74 Aperture value ➝ 72 Macro ➝ 42 Self-timer ➝ 113 Conversion lens ➝ 133 Battery check ➝ 33 Remote control ➝ 114 Card error ➝ 189 ISO (Displays setting other than AUTO) ➝ 83 White balance (Displays setting other than AUTO) ➝ 100, 101, 102 Manual focus ➝ 68 Auto - Olympus E10 | E-10 Instructions (English) - Page 19
metering Spot metering Nothing displayed for digital ESP metering. AF correct mark ➝ 64 After half-pressing shutter button, blinks until subject is in focus, and then lights when subject is in focus. Does not blink or light when camera is in manual focus mode. Exposure compensation/ Exposure - Olympus E10 | E-10 Instructions (English) - Page 20
18 - Olympus E10 | E-10 Instructions (English) - Page 21
. In this chapter, you will learn how to install optional batteries not provided with the camera and how to connect and use the optional AC adapter which allows you to power the camera with house current. How to use this manual The following notations are used to alert you to important information - Olympus E10 | E-10 Instructions (English) - Page 22
cable Remote control Lithium battery packs (CR-V3) USB cable SmartMedia card (1) SmartMedia Staticfree case (1) SmartMedia labels (2) SmartMedia protect seals (4) Customer registration card Warranty card • Camera instructions • SmartMedia instructions • Remote control instructions • Software CD - Olympus E10 | E-10 Instructions (English) - Page 23
. 3 Caution Please make sure that the strap is connected securely to the camera. Not attaching the strap, or attaching it incorrectly, could cause you to drop and damage the camera. Olympus can assume absolutely no responsibility for damages resulting from incorrectly attaching or not attaching - Olympus E10 | E-10 Instructions (English) - Page 24
the optional AC adapter to connect the camera to a household power outlet. Battery Type Lithium battery pack CR-V3 (provided with camera) AA Ni-MH batteries (sold separately) AA Alkaline batteries AA Ni-Cd batteries Lithium polymer batteries (sold separately) (battery holder required) Battery Set - Olympus E10 | E-10 Instructions (English) - Page 25
wait for it to go off. 3 2 Card access lamp Raise the battery compartment knob and turn it to the open position in the direction of the arrow as shown in the illustration. Battery compartment knob 3 Caution If you remove the battery case with the camera power on, the current mode and time will - Olympus E10 | E-10 Instructions (English) - Page 26
Attaching the Optional AC Adapter (continued) 4 4 Remove the battery holder. Battery holder 5 Insert a battery into the battery holder as shown in the illustration. 5 If insulation seal is attached, peel it off. 6 7 Do not remove the seal. 6 Gently press down on the battery in the direction - Olympus E10 | E-10 Instructions (English) - Page 27
. You may notice a gap after loading the AA batteries into the holder, but this is normal. The batteries will make proper contact when the holder has been inserted into the camera. Battery holder Before loading batteries ... Warning Batteries with any part of the outer seal (magnetic insulation - Olympus E10 | E-10 Instructions (English) - Page 28
polymer battery and power battery holder instructions. Power battery holder Lithium polymer battery Note Connecting the AC adapter with the battery installed • The voltage of the dedicated AC adapter is higher than that of the batteries, so when you connect the AC adapter to the camera, power - Olympus E10 | E-10 Instructions (English) - Page 29
adapter with this camera only in the country where you purchased it. The AC adapter is not rated for use with different power sources, which could vary widely in different countries. Before travelling abroad, purchase extra batteries. If you have any questions, contact an Olympus authorized service - Olympus E10 | E-10 Instructions (English) - Page 30
Olympus service center. • Connecting and disconnecting the AC adapter Always make sure that the camera is switched off before you connect/disconnect the AC adapter to/from the camera. Never handle the AC adapter power cord with wet hands. When connecting the AC adapter, (1) first plug the AC adapter - Olympus E10 | E-10 Instructions (English) - Page 31
Taking Pictures (Shooting and Viewing Basics) In this chapter you will learn how to insert a memory card, take a picture, and view the picture. This chapter describes only the basic procedures for taking and viewing pictures. For more details about camera operation, refer to the later chapters. 2 - Olympus E10 | E-10 Instructions (English) - Page 32
The SmartMedia and CompactFlash card store pictures that you take with the camera. Throughout these instructions, both the SmartMedia and CompactFlash card are simply referred to as cards. Both cards can be installed together, or either card one at a time. However, at least one card must be inserted - Olympus E10 | E-10 Instructions (English) - Page 33
the CompactFlash card, see the instructions below. 4 To close the card cover, press it gently until you hear it click and lock. Removing a SmartMedia card Gently push in on the installed SmartMedia card to release it, and then pull it out of the camera. Removing a CompactFlash card Gently press - Olympus E10 | E-10 Instructions (English) - Page 34
Setting the Shooting Mode and Switching the Camera On Switch the camera on. 1 If the lens cap is attached, remove it. is at the ON position. 2 When the camera is switched on, the battery check and number of storable pictures are displayed in the control panel. OFF ON 4 Set the focus mode - Olympus E10 | E-10 Instructions (English) - Page 35
time it will switch off the control panel automatically to conserve battery power. To restore the camera to full operation, half-press the shutter button. If the control panel remains off for one hour, the camera will power itself off automatically. To restore the camera to full operation, you must - Olympus E10 | E-10 Instructions (English) - Page 36
94 shots Note • When you see "TIFF" blinking in the control panel, the camera is in the RAW data mode. (© 131) In this mode, one picture file is approximately 7.6 MB, and you will be able to save approximately 4 shots on a card (32 MB card). If you intend to use the images on a computer... Before - Olympus E10 | E-10 Instructions (English) - Page 37
is displayed, you can continue taking pictures. • Replace the card. (© 30) • If a SmartMedia and CompactFlash card are both installed, select the other card. (© 121) Control panel Monitor Viewfinder blinking in other situation (not described above)? Appendix 5: Camera Error Messages (© 189) 35 - Olympus E10 | E-10 Instructions (English) - Page 38
Holding the Camera Horizontal grip Vertical grip Incorrect! Finger blocking AF port Finger blocking flash Finger blocking the lens 36 Cannot see through the viewfinder? • Make sure that the lens cover has been removed. • Check the eyepiece shutter lever on the left side of the viewfinder. If it - Olympus E10 | E-10 Instructions (English) - Page 39
battery power than when using the viewfinder.) 2 To prevent light from behind the camera entering the viewfinder, lower the eyepiece shutter out. 5 Hold the camera as steady as possible. Hold the camera carefully without blocking the lens, flash, or AF port with the camera strap, your fingers, etc - Olympus E10 | E-10 Instructions (English) - Page 40
used to compose and shoot a picture, the time between a full shutter press and actual release time could vary from 60ms to 100ms. Also, please remember that when you use the flash, shutter release will be delayed approximately 200ms for firing the pre-flash. The camera can be set to emit a sound at - Olympus E10 | E-10 Instructions (English) - Page 41
the previous shot on the card, you can take up to 4 exposures. Flash button Card access lamp Taking pictures without half-pressing You can take pictures without half-pressing the shutter button. In such cases, the camera starts focusing when you full-press the shutter button. Therefore it takes - Olympus E10 | E-10 Instructions (English) - Page 42
All Images (© 150) Viewfinder Control panel If you see Card blinking in the viewfinder, refer to the error message summary. Appendix 5: Camera Error Messages (© 189) Four segments lit in the memory gauge? If nothing displayed on the monitor after full-pressing the shutter button, you have to wait - Olympus E10 | E-10 Instructions (English) - Page 43
the viewfinder continue to blink after you half-press the shutter button. If this occurs: • Point the camera slightly away from the subject to shift the AF target mark in the viewfinder and half-press the shutter button again. • Use manual focusing. Taking Pictures: Distance and Focus (© 63) Using - Olympus E10 | E-10 Instructions (English) - Page 44
take close-up shots within 60 cm (approx. 23.5 in.) from the camera. While pressing the macro button , turn the main dial or sub dial until you see the macro mark in the control panel or the viewfinder. Control panel not displayed displayed Macro button Main dial Autofocus can focus a subject - Olympus E10 | E-10 Instructions (English) - Page 45
(approx. 8 in.) and shoot a subject about the size of a business card (approx. 76 x 57 mm) (3 x 2.3 in.). 2 Zoom Shooting .) Note • If you use the Macro Extension Lens Pro (MCON-35), you can approach up to 12 cm (approx. 4.8 in.). At this distance, when the camera is set for the TELE limit, you can - Olympus E10 | E-10 Instructions (English) - Page 46
the shutter button. The flash fires with an intensity adjusted for the best exposure and the picture is taken. Flash will not fire? If the subject is exposed to brighter light after the built-in flash is raised, the flash will not fire. However, you can set the camera in the fill-in flash mode - Olympus E10 | E-10 Instructions (English) - Page 47
12.5 m (41.3 ft.) 1.0*2 (3.3 ft.)~10.4 m (34.3 ft.) *1 Range starts at 0.6 m (2 ft.) if you set the camera to the A (Aperture Priority) mode and stop lens hood or conversion lenses when shooting with the internal flash. These attachments will block some of the flashed light, resulting in a problem - Olympus E10 | E-10 Instructions (English) - Page 48
Viewing Pictures (Playback) In this section, you will learn how to view the pictures that you have taken. You can view the pictures that you have taken one by one. You can enlarge the singleimage display, or even display several images at once with the index display. OFF ON 1 1 Set the mode dial - Olympus E10 | E-10 Instructions (English) - Page 49
mode dial is set to P, A, S, or M. You can just press the shutter button to take a picture. Press the monitor button and wait for the monitor display to to playback . When the card access lamp goes off, the camera returns to the playback mode. Monitor blank? The camera will automatically power itself - Olympus E10 | E-10 Instructions (English) - Page 50
one time in the monitor. Index Display 1 Frame Display This feature is convenient when you want to browse the pictures stored on the selected card when you need to find a particular picture. Enlarged Display This feature is convenient when you want to confirm that a picture is correctly in focus - Olympus E10 | E-10 Instructions (English) - Page 51
to set the aperture and use the sub dial to set the shutter speed. Using the remote control You can use the RM-1 remote control unit to take pictures and view images in the index or enlarged displays. For details, refer to the instructions for the RM-1 remote control unit. Sub dial Main dial 49 - Olympus E10 | E-10 Instructions (English) - Page 52
button to remove protection. To protect all images on a card Attach a protect seal to a SmartMedia card in order to protect all images stored on the card from accidental erasure. For details, refer to the SmartMedia instructions. Do not reuse protect seals. Caution Formatting a memory erases - Olympus E10 | E-10 Instructions (English) - Page 53
by one pictures that you do not want to keep. Deleting unneeded 2 pictures creates more space on the selected card and increases the number of pictures that you can store on the card. 1 2 4 3 1 Enter the playback mode and display the picture that you want to delete. (© 46) If you are using the - Olympus E10 | E-10 Instructions (English) - Page 54
over the lens, and then release the latches. (To remove the cap: Press on the latches and pull the cap off.) 2 Caution While the card access lamp is blinking, never open the card compartment cover or unplug the AC adapter. If the power supply to the camera is interrupted while the camera is saving - Olympus E10 | E-10 Instructions (English) - Page 55
shadow. Even with sufficient light on the subject, you can set the flash to fire and reduce daylight shadows on the subject and get beautiful results camera in the macro mode, you can shoot subjects as close as 20 cm from the lens for detailed nature shots. 3 Night scenes. You can use slow shutter - Olympus E10 | E-10 Instructions (English) - Page 56
Shooting Portraits (Focused Subject, Blurred Background) When you shoot a portrait, you can create the effect of the subject floating against a blurred background. In order to achieve the effect of a floating subject, open the aperture to take the picture. The smaller the aperture value, the - Olympus E10 | E-10 Instructions (English) - Page 57
on the subject's face. You can also adjust the flash control mode. Using Exposure Compensation (© 79) Selecting the Metering Method (© 78) Shooting a Subject in Daylight Shadow (Daylight Synchro) (© 56) Note • We recommend attaching a lens hood to the camera to prevent the occurrence of the flare or - Olympus E10 | E-10 Instructions (English) - Page 58
background can be shot with the correct exposure. Flash mode button Flash button 56 Main dial Press the flash button to raise the flash unit. Hold down the flash mode button and then turn the main dial or sub dial. When you see the mark displayed in the control panel, the camera is in the fill-in - Olympus E10 | E-10 Instructions (English) - Page 59
Aperture value However, selecting a large aperture value in low light will slow down the shutter speed, causing the picture to blur as a result of camera shake. Under these conditions, try to steady the camera as much as possible by leaning against the side of a building, a tree or a lamp - Olympus E10 | E-10 Instructions (English) - Page 60
to create the artistic effect of flowing water in motion. To adjust the shutter speed manually, set the mode dial to S (Shutter priority mode), and then turn the sub dial or main dial to select the desired shutter speed. Setting the Shutter Speed (© 74) You can also use the sequence mode to shoot - Olympus E10 | E-10 Instructions (English) - Page 61
shake spoiling a picture, so try to steady the camera as much as possible, or use a tripod. • Use as fast a shutter speed as possible to prevent the wind or other movement from causing the subject to blur. • If you use the flash in some situations, the lens barrel could cause a shadow in the picture - Olympus E10 | E-10 Instructions (English) - Page 62
shutter button depressed. Note • We recommend using a tripod to avoid camera shake. Night scene shot with slow shutter speed Selecting Aperture and Shutter Speed Manually (© 76) For the metering method, select digital in focusing the subject, use manual focusing. Using Manual Focus (MF) (© 68) - Olympus E10 | E-10 Instructions (English) - Page 63
the control panel. In the slow synchronization mode, the shutter speed can be set for up to 2 seconds. With the flash mode camera again until the shutter closes and the subject can be seen through the viewfinder or the card access lamp starts blinking. Selecting a flash mode (© 86) With the flash - Olympus E10 | E-10 Instructions (English) - Page 64
sub dial until you see the number 5500 (clear daylight) appear in the control panel, and then take the picture. To increase the amount of red in 102) If fireworks are difficult to focus, move the focus mode switch to MF (manual focus), and then use the focus ring to focus the shots. Using Manual - Olympus E10 | E-10 Instructions (English) - Page 65
Taking Pictures: Distance and Focus In this section you will learn how to use both focusing methods: autofocusing and manual focusing. 4 - Olympus E10 | E-10 Instructions (English) - Page 66
centered in the monitor. 3 Half-press the shutter button. When the subject is in focus, the camera beeps and the AF correct mark in the lower the viewfinder is blinking. With the macro mode mark or conversion lens mark displayed in the control panel, focusing is performed only with the CCD. AF port - Olympus E10 | E-10 Instructions (English) - Page 67
the AF correct mark in the lower left corner of the viewfinder lights. 3 With the shutter button still halfpressed, move the camera and compose the picture in the viewfinder. 4 Full-press the shutter button. Note • To prevent interfering with the accuracy and time required for focusing, never block - Olympus E10 | E-10 Instructions (English) - Page 68
to shoot, and then fullpress the shutter button. (© 65) You can also set the focus mode switch to the MF mark to select manual focusing, and then adjust the focus manually with the manual focus ring. (© 68) Two objects at different distances from the camera The camera cannot autofocus on a single - Olympus E10 | E-10 Instructions (English) - Page 69
from the camera as the subject you want to shoot, wait for the subject to appear, and then shoot the picture. Taking a picture through window When taking a picture through window, the subject could be difficult to focus. If this problem occurs, set the focus mode switch to MF (manual focus) and - Olympus E10 | E-10 Instructions (English) - Page 70
switches the display on and off. Using the focus ring design The manual focus mechanism of this camera reads the direction and distance the manual focus ring is moved and drives the focusing lens with a small motor. Even when the camera-to-subject distance displayed in the monitor is 20 cm (8 in - Olympus E10 | E-10 Instructions (English) - Page 71
aperture the image becomes brighter (a greater area of the lens is used to increase the amount of light), but the depth of field becomes shorter, causing objects closer and farther away from the camera to be out of focus. Slower shutter speeds create brighter images but increase the possibility of - Olympus E10 | E-10 Instructions (English) - Page 72
while the camera automatically selects the correct aperture value according to the brightness of the subject. For a fast moving subject select a fast shutter speed to freeze the subject for a sharp picture, or select a slow shutter speed to create the effect of blurred movement. M (Manual mode) You - Olympus E10 | E-10 Instructions (English) - Page 73
5 mode). 2 Take the picture. P (Program mode) aperture values and shutter speeds With the camera set in the Program mode, a program automatically adjusts the aperture value and shutter speed according to the brightness of the subject. 5 6 7 8 9 10 11 12 13 14 15 16 17 18 19 4 3 2 1 0 -1 TELE - Olympus E10 | E-10 Instructions (English) - Page 74
aperture not only allows more light into the lens to compensate for low light conditions but shortens small aperture. Fine adjustment of aperture and shutter speed If the brightness is adjusted with fine occasionally occurs with digital cameras that employ CCDs. To avoid this problem, compose the - Olympus E10 | E-10 Instructions (English) - Page 75
speed indication is blinking, and the indicated speed is fast? The scene is too bright-the camera cannot set the shutter speed fast enough to expose the shot correctly. Correct the problem by reducing the aperture size (increasing the aperture value). If the indication continues to blink, reduce - Olympus E10 | E-10 Instructions (English) - Page 76
greatly when you zoom in on a subject. Caution The flash may not be effective with shutter speeds of 1/250 or faster. • The shutter speed that you select manually remains set, even after you change to another shooting mode or switch the camera off and on again. Even after changing the shooting mode - Olympus E10 | E-10 Instructions (English) - Page 77
control panel. The aperture value blinks if the camera cannot set the required aperture size. Aperture value is blinking, and the value is at the maximum? The scene is too bright-the camera cannot make the aperture small enough to expose the shot. Correct the problem by setting a faster shutter - Olympus E10 | E-10 Instructions (English) - Page 78
shooting mode. Note • If you set the aperture value and shutter speed manually, that setting will remain in effect even after you switch to another shooting mode or switch the camera off and on. If you set the camera in the shooting mode again, the camera will return to the same aperture value and - Olympus E10 | E-10 Instructions (English) - Page 79
Viewfinder Shutter speed Aperture value Exposure level Turning the main dial to the right increases the size of the aperture and moving it to the left decreases the size of the aperture. The selected exposure is displayed in the exposure indicator in the viewfinder and the control panel. A - Olympus E10 | E-10 Instructions (English) - Page 80
the camera, turn the main dial or sub dial until you see the desired metering setting displayed in the viewfinder or monitor. Viewfinder display Digital ESP metering Center weighted averaging metering Control panel . For a dark subject in strong backlighting, you can also use the flash. 78 - Olympus E10 | E-10 Instructions (English) - Page 81
(Shutter priority mode), you can press the exposure compensation button to manually increase or decrease the exposure automatically selected by the camera compensation 1 Set the mode dial to P, A, or S. Control panel Plus Minus Viewfinder 2 While pressing down the exposure compensation button - Olympus E10 | E-10 Instructions (English) - Page 82
Lock Normally the camera automatically meters the focus and the exposure when you half- press the shutter button and locks the AF (automatic focus) and AE (automatic exposure) at the same time. However, you can lock the exposure by pressing the button before pressing the shutter button. If you - Olympus E10 | E-10 Instructions (English) - Page 83
Bracketing a Shot with Three Automatic Exposures With the mode dial set to P (Program mode), A (Aperture priority mode), or S (Shutter priority mode), if you switch on autobracketing in the menu you can take three rapid multiple exposures of the same picture with different (bracketed) exposure - Olympus E10 | E-10 Instructions (English) - Page 84
resume shooting the remaining pictures after you press the shutter button again. • With the camera set in autobracketing, you cannot select the self-timer mark , or the remote control mark . To select these marks, release the camera from autobracketing with the menu. • If you select autobracketing - Olympus E10 | E-10 Instructions (English) - Page 85
with traditional SLR cameras which employ film. Three ISO settings are available with this camera: 80 With AUTO selected the camera can adjust the ISO setting automatically only when the intensity of the flash is insufficient. ( control panel only when any setting other than AUTO is selected. - Olympus E10 | E-10 Instructions (English) - Page 86
84 - Olympus E10 | E-10 Instructions (English) - Page 87
how to use the built-in flash and external dedicated flash FL-40. The built-in and external flash can be used separately or together. We also describe the limitations on using other external flash units not designed exclusively for this camera. Use the built-in flash to take pictures of subjects in - Olympus E10 | E-10 Instructions (English) - Page 88
this situation, you can select slow synchro for the flash control setting and adjust the shutter speed up to 2 seconds (for ISO 80) for the darkness of the background. However, if you use a slower shutter speed we recommend that you mount the camera on a tripod and ask the subject to remain still - Olympus E10 | E-10 Instructions (English) - Page 89
phenomenon in the eyes of photographed subjects, the camera fires 10 short burst flashes to contract the pupils of the eyes before the main flash fires. 6 When you use this flash mode, there is a 1 second delay before the flash fires after full-pressing the shutter button, so make sure that the - Olympus E10 | E-10 Instructions (English) - Page 90
NO 2nd-curtain 1st-curtain YES NO NO YES Flash control modes for the S (Shutter priority), M (Manual) modes Control Panel Display Flash mode Fill-in flash (Red-eye Reduction) Red-eye Reduction YES Flash Timimg 1st-curtain Fires automatically in dark light, backlighted subject NO Always - Olympus E10 | E-10 Instructions (English) - Page 91
to turn the dial until you see the desired combination of flash control setting marks, and then stop turning the dial. 6 3 Take the picture. When the flash is not required When you do not want to use the flash, for example when photographing subjects as a sunset or night scene, shooting - Olympus E10 | E-10 Instructions (English) - Page 92
, and the camera-to-subject distance, and because of this the image of a subject could appear too bright or too dark. In such cases you can use flash control compensation to capture images that are not too bright or too dark. Flash control may not have enough effect when using a high shutter speed - Olympus E10 | E-10 Instructions (English) - Page 93
mark and the setting is stored. When any value other than zero (0) is selected, the flash control mark is displayed in the control panel. Please remember that this setting is retained even after the camera is switched off and switched on again. To release this setting, reset the value for zero - Olympus E10 | E-10 Instructions (English) - Page 94
for TTL-AUTO, and the intensity of the dedicated external flash can be controlled from the camera. With the mode dial set to M (Manual mode), you can select MANUAL on the dedicated external flash. This allows you to set the guide number on the dedicated external flash, and select the aperture on the - Olympus E10 | E-10 Instructions (English) - Page 95
unit. Slide the hot shoe cover toward the back of the camera. Attach the dedicated external flash unit to the hot shoe. For details about attachment, refer to the dedicated external flash FL-40 instructions. Store the hot shoe cover in a safe location where you will not lose it, so you can reattach - Olympus E10 | E-10 Instructions (English) - Page 96
a ring flash, or other flash unit with long flash duration, the shutter may close during the flash and part of the light might not be used in the exposure. 3. Do not attempt to any flash unit (other than the FL-40) which employs electronic flash control between the flash unit and the camera. Setting - Olympus E10 | E-10 Instructions (English) - Page 97
Using a non-dedicated flash unit Hot shoe Flash synchro socket 1 An external flash can be attached to the camera at the hot shoe or at the flash synchro socket. 2 Set the mode dial to M (Manual mode). Select the shutter speed and aperture value. Selecting a slow shutter speed 6 increases the - Olympus E10 | E-10 Instructions (English) - Page 98
96 - Olympus E10 | E-10 Instructions (English) - Page 99
balance, select the record mode for images saved on the memory card, and how to use the sharpness, contrast, and histogram options to enhance your captured images. There can be great differences in the way the camera reproduces color in images taken in natural or artificial light, especially under - Olympus E10 | E-10 Instructions (English) - Page 100
so images are not affected by surrounding light. With a camera that uses film, you could purchase film suited for reproducing color under different light sources and adapt to shooting conditions by using filters. Similarly, with a digital camera you have the option of adjusting the white balance - Olympus E10 | E-10 Instructions (English) - Page 101
color temperature. The 4000K and 4500K preset settings in this camera are correlative color temperature, and should not be considered strictly as light bulb Candle flame White balance with a flash We recommend using the auto white balancing with the flash. If you intend to use preset white - Olympus E10 | E-10 Instructions (English) - Page 102
in the auto white balance mode, the camera automatically registers the whitest part of the subject framed in the viewfinder and uses this as a base to balance other colors in the picture. 2 1 Auto white balance mode not selected Control panel Viewfinder Monitor When the white balance button - Olympus E10 | E-10 Instructions (English) - Page 103
the same light source where you intend to take the picture, point the camera at a flat sheet of paper. Fill the viewfinder with the white monitor button and repeat from step 1. 4 Point and shoot the picture. Control panel Monitor Note • The white balance setting that you have just captured - Olympus E10 | E-10 Instructions (English) - Page 104
5500K Monitor Display Comment The camera selects the whitest portion displayed in the shutter speed display area of the control panel and viewfinder control panel or viewfinder, stop turning the dial. The WB mark appears in the control panel and the viewfinder. Take the picture. Control panel 102 - Olympus E10 | E-10 Instructions (English) - Page 105
quality, the smaller the file size, and more pictures can be stored on the memory card. (© 34) You can also adjust the resolution and compression settings for each quality 7 setting. (© 104) Record mode button 1 Control panel 1 Press and hold down the record mode button , and then turn the main - Olympus E10 | E-10 Instructions (English) - Page 106
. 1:4 Approx. 1:8 Resolution Images created from pictures taken with a digital camera are composed of vertical and horizontal colored dots called pixels. In the the card. Select as high a resolution as possible if you intend to trim the image, or enlarge the image larger than standard service size - Olympus E10 | E-10 Instructions (English) - Page 107
2 3 4 6 5 8 7 1 Press the menu button . The menu opens in the monitor. 2 On the arrow pad, press or to move the green highlight to the quality mark . 3 On the arrow pad, press to move the green highlight to the quality name. 4 On the arrow pad, press or until you see the name of the desired quality - Olympus E10 | E-10 Instructions (English) - Page 108
HARD SOFT Enabled when you purchase the camera. Defines borders to achieve best focus that you intend to process with a computer graphics software application. 1 1 Press the menu button . NORMAL, or SOFT. The mark is displayed in the control panel when a setting other than NORMAL is selected. 4 - Olympus E10 | E-10 Instructions (English) - Page 109
low contrast, ideal for images that you intend to process with a graphics software application on a computer. 7 1 1 Press the menu button . The highlight to HIGH, 2 NORMAL, or LOW. The mark is displayed in the control panel when a setting other than NORMAL is selected. 4 Press the button to - Olympus E10 | E-10 Instructions (English) - Page 110
. 6 Press the button to select the setting. The green highlight returns to the histogram mark . Press button again to close the menu. Note • If the camera is connected to a computer with a USB cable, the menu is not displayed. Disconnect the USB cable from the - Olympus E10 | E-10 Instructions (English) - Page 111
switches the histogram display on and off. To adjust exposure compensation while viewing the histogram The exposure (exposure compensation, aperture, shutter speed) cannot be adjusted with the camera in the playback mode. • With the mode dial set to P, A, S, or M, press the monitor button to set the - Olympus E10 | E-10 Instructions (English) - Page 112
110 - Olympus E10 | E-10 Instructions (English) - Page 113
in the picture. • Remote shutter release. You can use the electronic remote unit RM1 to release the shutter from in front of the camera, or use the remote cable RM-CB1 attached to the camera to release the shutter without manually pressing the shutter release and avoid camera shake during a slow - Olympus E10 | E-10 Instructions (English) - Page 114
after pressing shutter button? blinking in the viewfinder? If this mark is blinking, the built-in flash is charging. Wait for the mark to stop flashing. After the flash is charged, the flash mark will light and remain on. and number of storable pictures blinking? If the card error and the number - Olympus E10 | E-10 Instructions (English) - Page 115
out the picture with white light. 5 Full-press the shutter button. The remote control receiver/self-timer lamp on the front of the camera lights for 10 seconds, blinks for 2 seconds, and then the shutter releases. After you take the picture, the camera remains in the self-timer mode. To release the - Olympus E10 | E-10 Instructions (English) - Page 116
RM-1 With the camera in the remote mode, you can release the shutter with the electronic remote unit RM-1 while standing in front of the camera. The shutter will release 2 seconds after pressing the transmit button on the remote unit. OFF ON 4 Eyepiece shutter lever Remote control mark 1 Set the - Olympus E10 | E-10 Instructions (English) - Page 117
control receiver on the front of the camera blinks for 2 seconds and then the shutter releases. To take more pictures, just press the transmit button on the remote unit. 8 After pressing remote transmit button shutter did not release? • Remote batteries low? The remote batteries have a service - Olympus E10 | E-10 Instructions (English) - Page 118
speed, you can mount the camera on a tripod and use the optional Remote Cable RM-CB1 to prevent camera shake caused by pressing the shutter button with your finger. The remote cable is connected to the remote cable jack on the camera. You can also half-press the shutter button and lock the exposure - Olympus E10 | E-10 Instructions (English) - Page 119
5 To take the picture, press the shutter button at the end of the remote cable. Even with the remote cable connected to 5 the camera you can still release the shutter by pressing the shutter button. Note • The remote cable jack on the camera can only 8 be used with the Remote Cable RM-CB1. 117 - Olympus E10 | E-10 Instructions (English) - Page 120
interval setting. (See "Actual time interval" on page 120.) The camera will continue to take pictures in the time lapse mode until the batteries discharge or until the memory card fills up. To cancel time lapse photography, just switch the camera off and on. OFF ON 1 2 34 5 1 Set the mode dial - Olympus E10 | E-10 Instructions (English) - Page 121
of shots taken are displayed in the monitor for about 5 seconds. Before the next picture is taken, the camera enters the sleep mode and all the displays are switched off to conserve battery power. To cancel at any time, switch the camera off. Switch the camera off to cancel Time interval 119 - Olympus E10 | E-10 Instructions (English) - Page 122
from the time lapse mode.) • Time-lapse operation stops if batteries go dead. We recommend that you connect the optional AC adapter or use the optional lithium polymer battery during time-lapse sessions. • Set up the camera indoors where it will not be exposed to direct sunlight for a long period - Olympus E10 | E-10 Instructions (English) - Page 123
, and then slowly turn the main dial or sub dial to switch the display alternately between the SM or CF mark in the control panel. 8 Control panel SmartMedia card CompactFlash card When you switch the camera on The card where the last picture was stored is automatically selected. If only one - Olympus E10 | E-10 Instructions (English) - Page 124
use the menu to select the type and volume of the sound emitted by the camera when the shutter is released, or you can switch off the sound. For the sound type, you can select the camera or camera mark. You can also adjust the volume between two levels, or shut the sound off - Olympus E10 | E-10 Instructions (English) - Page 125
are selected and the green highlight returns to the shutter sound mark . Press the button again to close the menu. Note • The shutter sound tells the subject to pose for 8 the next shot, or tells you when the shutter has released if you are using the remote unit or the remote cable to release the - Olympus E10 | E-10 Instructions (English) - Page 126
to P, A, S, or M. 2 Press the menu button . The menu opens in the monitor. 3 On the arrow pad, press or to move the green highlight to the 2 camera beep mark . 4 On the arrow pad, press to move the green highlight to the 3 right. 5 On the arrow pad, press or to move the green - Olympus E10 | E-10 Instructions (English) - Page 127
5sec Previous shot is not displayed. Previous shot is displayed for as long as it takes for the image to be stored on the memory card. Previous shot is displayed for 5 seconds. 3 1 Set the mode dial to P, A, S, or M. 2 Press the menu button . 8 The menu opens in the monitor. 3 On the arrow - Olympus E10 | E-10 Instructions (English) - Page 128
Setting the Date and Time Follow this procedure to set the camera clock. When you take a picture, the current date and time are recorded with the image. You can select one of the following date formats. -Y-M-D -M-D-Y -D-M-Y Year, - Olympus E10 | E-10 Instructions (English) - Page 129
year, month, day, hours, and minutes with 2-digit numbers. On the arrow pad, press or to increase Note • When the image is processed with a graphic software application on a computer, the information of image that CAMEDIA Master 2.5, this information is not lost after you save the image. 127 - Olympus E10 | E-10 Instructions (English) - Page 130
for 10 minutes. minutes. Once the camera has switched itself off, you must switch it off and on again to restore full operation. Note • After the camera enters the sleep mode, monitor and control panel go off. If the mode dial is set to setup/connection mode mark or with the AC adapter connected - Olympus E10 | E-10 Instructions (English) - Page 131
OFF ON 1 2 1 Set the mode dial to P, A, S, or M. 2 Press the menu button . The menu opens in the monitor. 3 On the arrow pad, press or to move the green highlight to the sleep mode mark . 3 4 On the arrow pad, press to move the highlight to the right. 5 On the arrow pad, press or to select - Olympus E10 | E-10 Instructions (English) - Page 132
-frame mode (not Metering mode Digital ESP White balance mode Auto Exposure compensation ±0 Flash mode Auto Record mode HQ Monitor menu settings See page 173. , ,) Resetting the camera has no effect on the following settings: • Battery selection • Memory card selection • Time/date and - Olympus E10 | E-10 Instructions (English) - Page 133
later with CAMEDIA Master 2.5. CAMEDIA Master 2.5 restores RAW data images to displayable form using the same type of processing that the camera uses. The stored on a memory card. • After the camera is set in the RAW data mode, it will remain in this mode even after the camera is switched off and - Olympus E10 | E-10 Instructions (English) - Page 134
off, select OFF. 4 5 6 6 Press the setting. button to select the The green highlight returns to the RAW mark . You will see TIFF blinking in the control panel. Press button again to close the menu. 7 Set the mode dial to P, A, S, or M and take the picture. The TIFF mark blinks after you - Olympus E10 | E-10 Instructions (English) - Page 135
can be used with this camera. Conversion Lens Type Attachment Method Zoom Setting Control Panel Display 3x Extension Lens Tele 300 Pro TCON-300 F2.8 f=420mm equivalent Filter diameter 49mm Complete Multi-Coat Support arm TELE 8 flashing 1.45x Tele Extension Lens Pro TCON-14B F2.4 f=200mm - Olympus E10 | E-10 Instructions (English) - Page 136
mode by holding down the macro button and rotating the main dial, so follow the procedure below to set the camera for taking close-up pictures with a conversion lens. 3 4 5 1 Set the mode dial to the setup/ connection mode . 2 Press the menu button . The menu opens in the monitor. 3 On the - Olympus E10 | E-10 Instructions (English) - Page 137
Selecting conversion lens mode with conversion lens attached When a conversion lens is attached to the camera, switch on the conversion lens mark control panel. in the 1 2 Conversion lens mark display Control panel 1 Press and hold down the macro button , and then turn the main dial or sub dial - Olympus E10 | E-10 Instructions (English) - Page 138
136 - Olympus E10 | E-10 Instructions (English) - Page 139
monitor brightness, and how to play images on a TV screen connected to the camera. With the mode dial set for playback , you can play back and view pictures in the monitor that you have taken and stored as images on a memory card. You can also play back images in the same way with the mode dial set - Olympus E10 | E-10 Instructions (English) - Page 140
four methods to display information about the settings used to take the pictures (record mode, date and time, shutter speed, aperture setting, etc.) in the monitor. 1 Set the mode dial to playback . If you leave is saved and used again after the camera is switched off and on again. 2 138 - Olympus E10 | E-10 Instructions (English) - Page 141
if it set to display. (© 108) 9 Selected for printing Record mode (resolution, compression) Shutter speed, aperture value Exposure compensation White balance setting ISO (AUTO, ISO setting) Flash intensity compensation Frame number (or rate of enlargement if image enlarged for display) Note • When - Olympus E10 | E-10 Instructions (English) - Page 142
play back in order all the images stored on a memory card as a continuous slide show. Starting from the currently selected displayed, the automatic slide show will start again from the first image stored on the card and continue to show all the pictures until you switch this feature off. 1 Set - Olympus E10 | E-10 Instructions (English) - Page 143
4 On the arrow pad, press to move the green highlight to START. 5 5 Press the button. 4 The slide show begins. If you want to skip to the next image before the 5 second display for the current image ends, on the arrow pad press . If you want to display the previous image again, press . 6 To - Olympus E10 | E-10 Instructions (English) - Page 144
the provided video cable, you can use the TV screen to display images of pictures taken with the camera. To conserve battery power, we recommend connecting the optional AC adapter to the camera when the camera is connected to a TV. 3 6 1 Switch off the television. OFF ON 2 Make sure that the - Olympus E10 | E-10 Instructions (English) - Page 145
directly to a video printer. Viewing pictures, index display, enlarged display (© 46) Note • The brightness of the image displayed on a TV screen cannot be adjusted with controls on the camera. • This camera can only be connected to video equipment that supports NTSC signal. 9 143 - Olympus E10 | E-10 Instructions (English) - Page 146
. 4 On the arrow pad, press . The image is displayed and the camera enters the brightness adjustment mode. If no image is displayed, then you can still However, we recommend that you adjust the monitor brightness by reviewing an image stored on a card. 5 On the arrow pad, press or to brighten or - Olympus E10 | E-10 Instructions (English) - Page 147
pictures that you do not want to lose. 10 Deleting images. You can delete images stored on a memory card one at a time or all at one time to create more storage space on a memory card. Formatting a card. Some memory cards may require formatting in the camera before they can be used. Formatting is - Olympus E10 | E-10 Instructions (English) - Page 148
all images from a source card, provided the target card has sufficient space to store the copied images. Control panel Displays the mark for the source card 2 OFF ON 3 5 6 9 4 7 1 Insert the copy source and target cards in the camera. (© 30) 2 Check the control panel display and make sure - Olympus E10 | E-10 Instructions (English) - Page 149
image appears. Cannot copy? • NO CARD displayed? The destination card is not inserted in the camera. Insert the destination card. • CARD FULL displayed? Storage space on the destination card is 10 insufficient. Create more space on the destination card by deleting images. You can also copy - Olympus E10 | E-10 Instructions (English) - Page 150
continued) Copying only selected images Images can be copied one by one between the two types of memory cards installed in the camera. 3 2 1 Follow Steps 1~5 for copying all images. (© 146) The copy mark is highlighted green. 2 On the arrow pad, press to move the green highlight to SELECT. 3 - Olympus E10 | E-10 Instructions (English) - Page 151
Caution • To avoid interrupting the copy operation, while images are being copied from one card to another, never switch the camera off, never reset the mode dial, and never open the memory card cover. If 10 you interrupt the copy operation in progress, the copying will be canceled and cannot - Olympus E10 | E-10 Instructions (English) - Page 152
the pictures that you want to delete is inserted in the camera. (© 30) 3 2 Make sure that the card selection mark for the card with the pictures to be deleted, for the SmartMedia card or for the CompactFlash card, is displayed in the control panel. If the mark is not displayed, press and hold down - Olympus E10 | E-10 Instructions (English) - Page 153
can delete them one by one or format the card. (© 51, 152) 10 You can also delete images one by one. (© 51) Note • Deleting 500 images requires a few seconds. While the card access lamp is blinking, never switch the camera off, never reset the mode Card access dial, and never open the memory - Olympus E10 | E-10 Instructions (English) - Page 154
protected by an attached protect seal cannot be formatted. 1 Insert the card that you want to format into the camera. (© 30) 2 OFF ON 2 3 Check the control panel display and make sure that the mark for the card that you want to format, SmartMedia or CompactFlash , is displayed. If the mark - Olympus E10 | E-10 Instructions (English) - Page 155
off after formatting has been completed. Note • Formatting a card requires a few seconds. While the card access lamp is blinking, never switch the camera off, never reset the mode dial, and never open the memory card cover. 10 Card access lamp Blinks during formatting, goes off after formatting is - Olympus E10 | E-10 Instructions (English) - Page 156
OLYMP Folder number (100~999) File name Pmdd .jpg Day (01~31) Month (10, 11, 12 are numbered A, B, C) File number (0001~9999) After taking determine how numbering is restarted every time you change a memory card. When you purchase the camera, the AUTO method is already selected for you. With - Olympus E10 | E-10 Instructions (English) - Page 157
or RESET. 6 Press the setting. button to select the The green highlight returns to the FILE 10 NAME mark . Press button again to close the menu. Note • If there is no OLYMP folder on the memory card, a new folder is created and the image is stored in the new folder. • Once the - Olympus E10 | E-10 Instructions (English) - Page 158
156 - Olympus E10 | E-10 Instructions (English) - Page 159
card with the stored pictures from the camera and print them on a DPOF printer, or have them printed by a DPOF printing service. You can also transfer the pictures to a computer and then print them on a printer connected to the computer. Pictures cannot be printed on an Olympus Digital Printer - Olympus E10 | E-10 Instructions (English) - Page 160
number of copies for printing. With the memory card in the camera, you can select one or more pictures for card to a print service which can provide DPOF printing. You can select up to 998 images on the same card for printing, and you can specify 1~10 copies for each selected picture. Memory card - Olympus E10 | E-10 Instructions (English) - Page 161
the number of copies If you need single prints of nearly all the pictures stored on the card, first select all the pictures for printing. (© 160) Second, select each image one by and you could experience some problems in printing pictures selected for printing with the print reserve features on the - Olympus E10 | E-10 Instructions (English) - Page 162
for Printing You can select all pictures stored on a card to print one by one. Memory card with pictures to be selected for printing 1 Insert the memory card that contains the pictures that you want to select for printing. (© 30) 2 Check the control panel display and make sure that the mark for - Olympus E10 | E-10 Instructions (English) - Page 163
of pictures for printing, check the battery check in the viewfinder and make sure sufficient battery power is available, or if possible, connect the optional AC adapter. While selecting pictures for printing, never switch the camera off or open the memory card cover. If you are interrupted during - Olympus E10 | E-10 Instructions (English) - Page 164
pictures to be selected for printing OFF ON 3 4 1 Insert the memory card that contains the pictures that you want to select for printing. (© 30) 2 Check the control panel display and make sure that the mark for the source card, SmartMedia or CompactFlash , is displayed. If the mark is not displayed - Olympus E10 | E-10 Instructions (English) - Page 165
of pictures for printing, check the battery check in the viewfinder and make sure sufficient battery power is available, or if possible, connect the optional AC adapter. While selecting pictures for printing, never switch the camera off or open the memory card cover. If you are interrupted during - Olympus E10 | E-10 Instructions (English) - Page 166
that contains the pictures that you want to select for date or time stamp printing. (© 30) 2 Check the control panel display 2 and make sure that the mark for the source card, SmartMedia or CompactFlash , is displayed. OFF ON If the mark is not displayed, press and 3 hold down the SM/CF - Olympus E10 | E-10 Instructions (English) - Page 167
check in the viewfinder and make sure sufficient battery power is available, or if possible, connect the optional AC adapter. While selecting 11 pictures for printing, never switch the camera off or open the memory card cover. If you are interrupted during picture selection for printing, you - Olympus E10 | E-10 Instructions (English) - Page 168
below describes to what extent Olympus printers are compatible with the DPOF format. Olympus Printers and DPOF Compatibility card. More than 999 images cannot be recognized. *3 Some printer features may allow you to rotate and trim images, but these functions are not available on this camera - Olympus E10 | E-10 Instructions (English) - Page 169
compatible computer or Macintosh. Setting up computer connection. An included computer connection kit can be used to connect the camera directly to your computer. Options for reading images from memory cards. A variety of optional devices allow you alternate methods for reading images from memory - Olympus E10 | E-10 Instructions (English) - Page 170
A USB driver is provided with CAMEDIA Master 2.5, or you can download the most recently updated drivers and software from the Olympus Web Site at www.olympus.com • An Apple Macintosh with Mac OS 8.6 installed. A dedicated USB cable required. USB Mass Storage Support 1.3.5 required. For more details - Olympus E10 | E-10 Instructions (English) - Page 171
how to install the USB driver, refer to the instructions that you received with the CAMEDIA Master. 2 Select the memory card that holds the images you want to read with the computer. (© 121) Note that you cannot change the card selection once the camera is connected the computer. If you wish to - Olympus E10 | E-10 Instructions (English) - Page 172
Kit (continued) Removing a card while the camera is connected to a computer Improperly removing a card while the camera is connected to the computer may cause the computer to operate incorrectly. Always follow the procedure below to remove a card. (To recover from a computer problem, you may need to - Olympus E10 | E-10 Instructions (English) - Page 173
to the computer. • The camera does not enter sleep mode or automatically switch off the power while operating in setup/connection mode. If you intend to leave the camera connected to the computer for a long time, we recommend connecting the optional AC adapter to avoid draining of the batteries. 171 - Olympus E10 | E-10 Instructions (English) - Page 174
an Olympus authorized service center. Card Type Device What you need on the computer Floppy Disk Adapter FlashPath MAFP-2N 3.5-inch floppy drive required. Smart Media PC Card Adapter MA-2 PCMCIA card slot required. SmartMedia Reader/ Writer MAUSB-1 USB connector required. Compact Flash - Olympus E10 | E-10 Instructions (English) - Page 175
Monitor Menus Use the monitor menu to set up camera operation and perform important functions like formatting a memory card. 13 - Olympus E10 | E-10 Instructions (English) - Page 176
Monitor Menus Use the monitor menus to set up camera operation and perform important functions like formatting a memory card. Four different menus are available, with the menu display determined by the setting of the mode dial: • Shooting mode menu (P, A, S, or M) • Playback mode menu ( ) • Print - Olympus E10 | E-10 Instructions (English) - Page 177
Shooting mode menus for P (Program mode), A (Aperture priority mode), S (Shutter priority mode), M (Manual mode) 1/3 Delete all images from selected SmartMedia or CompactFlash card, and format a card. Default Setting after and Page pressed at the same time − © 150 © 152 ISO (sensitivity) - Olympus E10 | E-10 Instructions (English) - Page 178
Macro selected is selected when marcro button without conversion © 133 is pressed. lens . Set year/month/day format. Set current date and time. After you replace a memory card, you can restart file numbering (RESET) or continue sequential file numbering (AUTO). Year/month/day (unchanged even - Olympus E10 | E-10 Instructions (English) - Page 179
, additional options available for the camera, some important details about files, and how to troubleshoot minor problems. 1. Specifications 2. Available Options 3. Image File Compatibility 4. Troubleshooting Troubleshooting camera operation Troubleshooting image problems 5. Camera Error Messages - Olympus E10 | E-10 Instructions (English) - Page 180
to 35~140 mm lens on standard SLR 35 mm camera) Filter diameter 62 mm Metering system Digital ESP (Electro Selective Pattern) metering, Center weighted averaging metering, Spot metering Exposure control P (Program mode), A (Aperture priority), S (Shutter priority), M (Manual mode) Aperture - Olympus E10 | E-10 Instructions (English) - Page 181
10- batteries x 4 AA Lithium polymer battery AC Adapter Note: Never use AA Manganese or AA Lithium batteries. They could overheat and damage the camera. Dimensions Weight 128.5 W x 103.5 H x 161 L mm (protuberances not included) 5.1 W x 4.1 H x 6.8 L in. 1050 g (without cards, batteries, and lens - Olympus E10 | E-10 Instructions (English) - Page 182
1.45x Tele Extension Lens Pro (TCON-14B) 3x Extension Lens Tele 300 Pro (TCON-300) Support Arm 2 (TCON-SA2) Remote Cable (RM-CB1) Camera Case (Semi-Hard Case) AC Adapter AA Ni-MH (Nickel-Metal Hydride) battery Dedicated Recharge Device Lithium Polymer Battery (B-10LPB) Power Battery Holder (B-HLD10 - Olympus E10 | E-10 Instructions (English) - Page 183
on using another Olympus digital camera to play back and print images taken with the CAMEDIA E-10, or playing back images taken with another Olympus digital camera on the CAMEDIA E-10. Printing, playing back images taken with CAMEDIA E-10 on other Olympus digital cameras Feature Monitor playback - Olympus E10 | E-10 Instructions (English) - Page 184
Appendix 4: Troubleshooting Operational problems Cannot operate the camera, monitor and control panel blank. Problem White mark on the power switch at the ON position? Solution Move the power switch toward you and position it at the ON position. Has the camera been left idle for over 1 hour with - Olympus E10 | E-10 Instructions (English) - Page 185
Camera does not operate when you press the shutter button? Is "0" and the panel? Problem mark blinking in the control Is the battery check mark blinking in the control panel? Solution The card is full. Replace the card with a fresh card, or you can delete unneeded images on the card to create - Olympus E10 | E-10 Instructions (English) - Page 186
Appendix 4: Troubleshooting (continued) The monitor and viewfinder displays are different. Problem Did you press the monitor the camera, monitor and control panel? Cannot operate the camera? control panel blank." Page © 37 © 70 © 46 © 182 Cannot play back images on the monitor. Problem "NO CARD" - Olympus E10 | E-10 Instructions (English) - Page 187
other than lines displayed in the See "Cannot operate the camera, monitor control panel? Cannot operate the camera? and control panel blank." Is the USB driver correctly installed? Install the USB driver in accordance with the installation instructions, and confirm that the driver recognizes the - Olympus E10 | E-10 Instructions (English) - Page 188
? If you stand in front of the camera and press the shutter button, the camera will focus on you. Compose the picture by looking through the viewfinder and then press the shutter button. Is the flash mark flashing in the viewfinder? This is the flash warning telling you that there is not enough - Olympus E10 | E-10 Instructions (English) - Page 189
Pictures are too bright. Problem Is the flash mark displayed in the control panel? Is there strong light in the picture? Was there something dark in the center of the picture? Solution When the flash mark is displayed, the flash will fire if the camera is in the fill-in flash mode, even on a well - Olympus E10 | E-10 Instructions (English) - Page 190
the control panel) and then take the picture with the flash. Set the white balance setting appropriate for the subject and then take the picture again. Page © 86 © 102 Date incorrect. Problem Did you set the date and time? Has more than 1 month passed with dead batteries in the camera? Solution - Olympus E10 | E-10 Instructions (English) - Page 191
Appendix 5: Camera Error Messages If a problem occurs with a memory card, a message will be displayed in the control panel and the monitor. When a memory card error message is displayed, first remove the card and then insert it again. If the error message occurs again, refer to the table below to - Olympus E10 | E-10 Instructions (English) - Page 192
Appendix 5: Camera Error Messages (continued) Viewfinder Control Panel Monitor (No more images can be stored on the card.) CARD FULL (Card is full. No space for storing more pictures.) *1 During Shooting Explanation Card is full and you cannot continue shooting. Folder numbering has reached - Olympus E10 | E-10 Instructions (English) - Page 193
the camera selects the shutter speed. AC adapter The alternate power source for the camera. Connect the AC adapter to the DC IN jack on the camera, and then plug the adapter into a common household wall outlet. When you use the AC adapter, the camera does not use battery power. Use the AC adapter - Olympus E10 | E-10 Instructions (English) - Page 194
and inserted into the memory card adapter, then the memory card adapter with the memory card inserted are loaded in the card slot of the computer. DCF Denotes Design rule for Camera Files. A camera file system standard employed with this camera and other digital cameras. difficult subjects These are - Olympus E10 | E-10 Instructions (English) - Page 195
of a picture into sharp, clear definition. With a SLR type camera, when the image in the viewfinder is clearly focused, the photographer is also assured that the lens is also correctly focused on the subject. focus locking Half-pressing the shutter button while aiming at a subject that is different - Olympus E10 | E-10 Instructions (English) - Page 196
to change the angle of the flash. remote control Allows you to trigger shutter release from a distance so you can include yourself in the picture. With this camera you can use an electronic remote unit or a remote cable attached to the camera. S mode Denotes Shutter priority mode. You choose the - Olympus E10 | E-10 Instructions (English) - Page 197
camera has different operating modes from which you can choose: Program (P), Aperture priority (A), Shutter priority (S), and Manual (M). shutter speed The shutter controls digital ESP card. The number of pictures that you can store on one card is first determined by the capacity of the card - Olympus E10 | E-10 Instructions (English) - Page 198
location 14 card error mark in control panel 16 CARD FULL monitor message 147, 149 CD-ROM installer, software provided with camera 20 center weighted averaging metering defined 78 mark in control panel 16 mark in viewfinder 17 CF CompactFlash card 121 cleaning camera body 9 lens 9 close-up - Olympus E10 | E-10 Instructions (English) - Page 199
bracket 16 automatic power off 33 battery check 16 brightness adjustment 32 card error 16 center weighted averaging metering .. 16 CF: CompactFlash card 121 conversion lens 16 digital ESP metering 16 fill-in flash 16 flash intensity control 16 image adjustment (sharpness, contrast) .. 16 - Olympus E10 | E-10 Instructions (English) - Page 200
provided with camera 20 lens hood provided with camera 20 light button control panel brightness 32 location 14 lithium batteries provided with camera 20 lithium polymer batteries inserting batteries 26 low battery warning described 39 low-light warning flashing in viewfinder 44 shutter does - Olympus E10 | E-10 Instructions (English) - Page 201
eye reduction function 87 mark in control panel 16 remote cable function 116 shutter release 117 using 116 remote cable jack location 14 remote control mark in control panel 16 provided with camera 20 remote control instructions provided with camera 20 remote unit cancelling 115 using 114 - Olympus E10 | E-10 Instructions (English) - Page 202
mark in control panel 16 slow synchronization mode flash 86 SM SmartMedia card 121 SM/CF memory card button location 14 SmartMedia card control panel (SM 121 Floppy Disk Adapter FlashPath MAFP-2N . 172 formatting card 152 inserting 30 PC Card Adapter MA-2 172 provided with camera 20 Reader - Olympus E10 | E-10 Instructions (English) - Page 203
, Melville, NY 11747-3157, U.S.A. Tel. 631-844-5000 (Customer support) Tel. 1-888-553-4448 http://www.olympus.com OLYMPUS OPTICAL CO. (EUROPA) GMBH. (Premises/Goods delivery) Wendenstraße 14-18, 20097 Hamburg, Germany. Tel. 040-237730 (Letters) Postfach 10 49 08, 20034 Hamburg, Germany. http://www
-
 1
1 -
 2
2 -
 3
3 -
 4
4 -
 5
5 -
 6
6 -
 7
7 -
8
-
9
-
10
-
11
-
12
-
13
-
14
-
15
-
16
-
17
-
18
-
19
-
20
-
21
-
22
-
23
-
24
-
25
-
26
-
27
-
28
-
29
-
30
-
31
-
32
-
33
-
34
-
35
-
36
-
37
-
38
-
39
-
40
-
41
-
42
-
43
-
44
-
45
-
46
-
47
-
48
-
49
-
50
-
51
-
52
-
53
-
54
-
55
-
56
-
57
-
58
-
59
-
60
-
61
-
62
-
63
-
64
-
65
-
66
-
67
-
68
-
69
-
70
-
71
-
72
-
73
-
74
-
75
-
76
-
77
-
78
-
79
-
80
-
81
-
82
-
83
-
84
-
85
-
86
-
87
-
88
-
89
-
90
-
91
-
92
-
93
-
94
-
95
-
96
-
97
-
98
-
99
-
100
-
101
-
102
-
103
-
104
-
105
-
106
-
107
-
108
-
109
-
110
-
111
-
112
-
113
-
114
-
115
-
116
-
117
-
118
-
119
-
120
-
121
-
122
-
123
-
124
-
125
-
126
-
127
-
128
-
129
-
130
-
131
-
132
-
133
-
134
-
135
-
136
-
137
-
138
-
139
-
140
-
141
-
142
-
143
-
144
-
145
-
146
-
147
-
148
-
149
-
150
-
151
-
152
-
153
-
154
-
155
-
156
-
157
-
158
-
159
-
160
-
161
-
162
-
163
-
164
-
165
-
166
-
167
-
168
-
169
-
170
-
171
-
172
-
173
-
174
-
175
-
176
-
177
-
178
-
179
-
180
-
181
-
182
-
183
-
184
-
185
-
186
-
187
-
188
-
189
-
190
-
191
-
192
-
193
-
194
-
195
-
196
-
197
-
198
-
199
-
200
-
201
-
202
-
203
 |
 |
■
Thank you for purchasing this digital
Olympus camera.
■
Before you use this camera, read this
manual carefully.
■
We recommend that you spend some time
taking test shots and experimenting with
all of the features before you take
important pictures.
Instructions