Olympus SP 500 SP-500 UZ Advanced Manual (English) - Page 141
Connecting the camera to a computer, The camera is recognized by
 |
UPC - 050332156173
View all Olympus SP 500 manuals
Add to My Manuals
Save this manual to your list of manuals |
Page 141 highlights
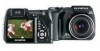
Connecting the camera to a computer Connecting the camera to a computer Connect the camera to the computer using the USB cable provided with the camera. 1 Make sure the camera is turned off. • The monitor is off. • The lens is retracted. Monitor 2 Plug the USB cable into the USB port on the computer. • Refer to your computer's instruction manual to locate the position of the USB port. 3 Plug the USB cable into the Connector cover multi-connector of the camera. • The camera turns on automatically. • The monitor turns on and the selection screen for the USB connection is displayed. Multi-connector 4 Select [PC], and press Z. 5 The camera is recognized by the computer. USB P C EASY PRINT • Windows CUSTOM PRINT When you connect the camera to your computer for the first time, the computer attempts to recognize the camera. Click "OK" to exit the message SELECT EXIT GO OK 9 that is displayed. The camera is recognized as a "Removable Disk". • Macintosh The iPhoto program is the default application for managing digital images. When you connect your digital camera for the first time, the iPhoto application starts automatically, so close this application and start OLYMPUS Master. 141
-
 1
1 -
2
-
3
-
4
-
5
-
6
-
7
-
8
-
9
-
10
-
11
-
12
-
13
-
14
-
15
-
16
-
17
-
18
-
19
-
20
-
21
-
22
-
23
-
24
-
25
-
26
-
27
-
28
-
29
-
30
-
31
-
32
-
33
-
34
-
35
-
36
-
37
-
38
-
39
-
40
-
41
-
42
-
43
-
44
-
45
-
46
-
47
-
48
-
49
-
50
-
51
-
52
-
53
-
54
-
55
-
56
-
57
-
58
-
59
-
60
-
61
-
62
-
63
-
64
-
65
-
66
-
67
-
68
-
69
-
70
-
71
-
72
-
73
-
74
-
75
-
76
-
77
-
78
-
79
-
80
-
81
-
82
-
83
-
84
-
85
-
86
-
87
-
88
-
89
-
90
-
91
-
92
-
93
-
94
-
95
-
96
-
97
-
98
-
99
-
100
-
101
-
102
-
103
-
104
-
105
-
106
-
107
-
108
-
109
-
110
-
111
-
112
-
113
-
114
-
115
-
116
-
117
-
118
-
119
-
120
-
121
-
122
-
123
-
124
-
125
-
126
-
127
-
128
-
129
-
130
-
131
-
132
-
133
-
134
-
135
-
 136
136 -
 137
137 -
 138
138 -
 139
139 -
 140
140 -
 141
141 -
 142
142 -
 143
143 -
 144
144 -
 145
145 -
 146
146 -
147
-
148
-
149
-
150
-
151
-
152
-
153
-
154
-
155
-
156
-
157
-
158
-
159
-
160
-
161
-
162
-
163
-
164
-
165
-
166
-
167
-
168
-
169
-
170
-
171
-
172
-
173
-
174
-
175
-
176
-
177
-
178
-
179
-
180
-
181
-
182
-
183
-
184
-
185
-
186
-
187
-
188
-
189
 |
 |
