Olympus SP 500 SP-500 UZ Advanced Manual (English) - Page 43
Flash intensity control, Press the shutter button halfway., take the picture., Press
 |
UPC - 050332156173
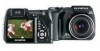
View all Olympus SP 500 manuals
Add to My Manuals
Save this manual to your list of manuals |
Page 43 highlights
Basic shooting functions Flash shooting 3 Press the shutter button halfway. • In conditions where the flash will fire, the # mark lights (flash stand-by). 4 Press the shutter button fully to take the picture. # mark 1/200 F4.0 0.0 TIPS SQ1 1600×1200 4 3 The # (flash charge) mark blinks. j Flash charging. Wait until the # mark turns off. Note • The flash does not fire in the following situations: High-speed sequential shooting, auto bracketing, super macro shooting, and panorama shooting. • The flash may not give you the optimum result in macro mode with the zoom set to wide-angle (W). Check the resulting picture on the monitor. Flash intensity control You can adjust the amount of light emitted by the flash. In some situations, you may get better results by adjusting the light emission. Examples include small subjects, distant backgrounds, or situations when increased contrast is desired. SET MEM PIC CAMERA Top menu [MODE MENU] [CAMERA] [w] g"Using the menus" (P. 17) 1 Press sr to adjust the flash intensity, and press Z. 0.0 SYNCRO FLASH DIGITAL ZOOM 43
-
 1
1 -
2
-
3
-
4
-
5
-
6
-
7
-
8
-
9
-
10
-
11
-
12
-
13
-
14
-
15
-
16
-
17
-
18
-
19
-
20
-
21
-
22
-
23
-
24
-
25
-
26
-
27
-
28
-
29
-
30
-
31
-
32
-
33
-
34
-
35
-
36
-
37
-
 38
38 -
 39
39 -
 40
40 -
 41
41 -
 42
42 -
 43
43 -
 44
44 -
 45
45 -
 46
46 -
 47
47 -
 48
48 -
49
-
50
-
51
-
52
-
53
-
54
-
55
-
56
-
57
-
58
-
59
-
60
-
61
-
62
-
63
-
64
-
65
-
66
-
67
-
68
-
69
-
70
-
71
-
72
-
73
-
74
-
75
-
76
-
77
-
78
-
79
-
80
-
81
-
82
-
83
-
84
-
85
-
86
-
87
-
88
-
89
-
90
-
91
-
92
-
93
-
94
-
95
-
96
-
97
-
98
-
99
-
100
-
101
-
102
-
103
-
104
-
105
-
106
-
107
-
108
-
109
-
110
-
111
-
112
-
113
-
114
-
115
-
116
-
117
-
118
-
119
-
120
-
121
-
122
-
123
-
124
-
125
-
126
-
127
-
128
-
129
-
130
-
131
-
132
-
133
-
134
-
135
-
136
-
137
-
138
-
139
-
140
-
141
-
142
-
143
-
144
-
145
-
146
-
147
-
148
-
149
-
150
-
151
-
152
-
153
-
154
-
155
-
156
-
157
-
158
-
159
-
160
-
161
-
162
-
163
-
164
-
165
-
166
-
167
-
168
-
169
-
170
-
171
-
172
-
173
-
174
-
175
-
176
-
177
-
178
-
179
-
180
-
181
-
182
-
183
-
184
-
185
-
186
-
187
-
188
-
189
 |
 |
