Onkyo TX-NR3009 Owner Manual - Page 65
Hardware Setup, OSD Setup, Remote ID, Multi Zone, Tuner
 |
View all Onkyo TX-NR3009 manuals
Add to My Manuals
Save this manual to your list of manuals |
Page 65 highlights
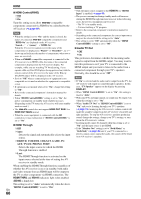
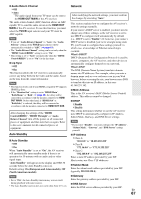
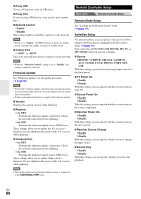
■ Power On Volume ` Last, Min, 1 to 99 or Max (Absolute display) ` Last, -2dB, -81dB to +18dB (Relative display) With this preference, you can specify the volume setting to be used each time the AV receiver is turned on. To use the same volume level that was used when the AV receiver was turned off, select "Last". The "Power On Volume" cannot be set higher than the "Maximum Volume" setting. ■ Headphone Level ` -12dB to 0dB to +12dB With this preference, you can specify the headphone volume relative to the main volume. This is useful if there's a volume difference between your speakers and your headphones. OSD Setup ■ On Screen Display ` On ` Off This preference determines whether operation details are displayed on-screen when an AV receiver function is adjusted. Even when "On" is selected, operation details may not be output if the input source is connected to an HDMI IN. ■ Language (North American models) ` English, Deutsch, Français, Español, Italiano, Nederlands, Svenska (European and Asian models) ` English, Deutsch, Français, Español, Italiano, Nederlands, Svenska, ʕ˖ This setting determines the language used for the onscreen setup menus. Hardware Setup Main menu Hardware Setup Remote ID ■ Remote ID ` 1, 2, or 3 When several Onkyo components are used in the same room, their remote ID codes may overlap. To differentiate the AV receiver from the other components, you can change its remote ID from "1", to "2" or "3". Note • If you do change the AV receiver's remote ID, be sure to change the remote controller to the same ID (see below), otherwise, you won't be able to control it with the remote controller. Changing the remote controller's ID 1 While holding down RECEIVER, press and hold down SETUP until RECEIVER lights (about 3 seconds) (➔ page 47). 2 Use the number buttons to enter ID 1, 2, or 3. RECEIVER flashes twice. Multi Zone ■ Zone 2 Out, Zone 3 Out ` Fixed: The Zone 2/3 volume must be set on the amp in that zone. ` Variable: The Zone 2/3 volume can be set on the AV receiver. If you've connected your Zone 2/3 speakers to an amp with no volume control, set the "Zone 2 Out" and "Zone 3 Out" setting, respectively, to "Variable" so that you can set the volume, balance, and tone of zone 2 and volume of zone 3 on the AV receiver. ■ Zone 2 Maximum Volume, Zone 3 Maximum Volume `Off, 50 to 99 (Absolute display) `Off, -32dB to +17dB (Relative display) With this setting, you can limit the maximum volume for Zone 2/3. ■ Zone 2 Power On Volume, Zone 3 Power On Volume `Last, Min, 1 to 99 or Max (Absolute display) `Last, -2dB, -81dB to +18dB (Relative display) This setting determines what the volume will be for Zone 2/3 each time the AV receiver is turned on. To use the same volume level as when the AV receiver was last turned off, select "Last". The "Zone 2 Power On Volume" and "Zone 3 Power On Volume" cannot be set higher than the "Zone 2 Maximum Volume" and "Zone 3 Maximum Volume" setting. Tuner For AM/FM tuning to work properly, you must specify the AM/FM frequency step used in your area. Note that when this setting is changed, all radio presets will be deleted. ■ AM/FM Frequency Step (North American models) ` 10kHz/200kHz: ` 9kHz/50kHz: Select the frequency step according to your area. ■ AM Frequency Step (European and Asian models) ` 10kHz: ` 9kHz: Select the frequency step according to your area. En 65
-
 1
1 -
2
-
3
-
4
-
5
-
6
-
7
-
8
-
9
-
10
-
11
-
12
-
13
-
14
-
15
-
16
-
17
-
18
-
19
-
20
-
21
-
22
-
23
-
24
-
25
-
26
-
27
-
28
-
29
-
30
-
31
-
32
-
33
-
34
-
35
-
36
-
37
-
38
-
39
-
40
-
41
-
42
-
43
-
44
-
45
-
46
-
47
-
48
-
49
-
50
-
51
-
52
-
53
-
54
-
55
-
56
-
57
-
58
-
59
-
 60
60 -
 61
61 -
 62
62 -
 63
63 -
 64
64 -
 65
65 -
 66
66 -
 67
67 -
 68
68 -
 69
69 -
 70
70 -
71
-
72
-
73
-
74
-
75
-
76
-
77
-
78
-
79
-
80
-
81
-
82
-
83
-
84
-
85
-
86
-
87
-
88
-
89
-
90
-
91
-
92
-
93
-
94
-
95
-
96
-
97
-
98
-
99
-
100
-
101
-
102
-
103
-
104
-
105
-
106
-
107
-
108
 |
 |
