Panasonic AG-HMC40 User Manual - Page 47
Backlight compensation, Color bars, Wave form monitor function - hdmi output
 |
UPC - 791871304891
View all Panasonic AG-HMC40 manuals
Add to My Manuals
Save this manual to your list of manuals |
Page 47 highlights
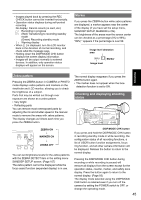
Shooting Backlight compensation Press the USER button you have allocated to the BACKLIGHT feature when shooting subjects lit from the back. BACK LIGHT appears on the screen, and appears at the bottom right of the screen. Backlight compensation adjusts the iris so the subject doesn't come out dark. Press the same USER button to turn the feature off. (If you perform backlight compensation in manual iris mode and it is disabled, the camera switches to auto iris control.) Adjusting the headphone volume while shooting 1 Touch the LCD monitor and display the Function Navi. 2 Touch to display the operation menu. 3 Touch . • This only appears when headphones are connected. Color bars Press the BARS button in the CAMERA mode to output a color bar screen to a television or monitor so you can adjust them. Press the button again to turn the feature off. • While the color bar is displayed, a test tone of 1 kHz will be output from the headphone terminal, the A/V OUT terminal, or the HDMI terminal. There will be no speaker output. • The color bar can be recorded by pressing the START/STOP button. • The BARS button does not work in the PB mode or PHOTO mode. • The color bar display is canceled when the power is turned off. Wave form monitor function During CAMERA mode, you can display a waveform for an image on the LCD monitor by pressing the USER button to which the WFM function has been assigned. Press the button again to return to the normal display. • Wave forms will not be displayed in the viewfinder. • This function cannot be used while the focus assist and touch auto focus functions are enabled. • Wave forms cannot be recorded. • While wave forms are displayed, use the viewfinder as well since part of the recording screen will be hidden by the wave forms. 4 Touch 5 Touch 6 Touch or to adjust the volume. to close the operation menu. to close the Function Navi. Shot mark function The marks attached to the thumbnails of clips are called shot marks. On the thumbnail screen monitor you can select only those clips with a shot mark and display them or play them back. During recording, when you press the USER button to which the SHOT MARK function has been allocated, MARK ON appears in the LCD monitor or the viewfinder, and a shot mark is set for the thumbnail of the clip being recorded. If you press the button again, the shot mark is released. You can also set or release the shot marks by performing the thumbnail operations for clips. (Page 69) However, note that you cannot set or release shot marks during playback. • INVALID appears when you cannot set or release shot marks. • Shot marks are not displayed when the thumbnail screen is set to 20 photo display. 47
-
 1
1 -
2
-
3
-
4
-
5
-
6
-
7
-
8
-
9
-
10
-
11
-
12
-
13
-
14
-
15
-
16
-
17
-
18
-
19
-
20
-
21
-
22
-
23
-
24
-
25
-
26
-
27
-
28
-
29
-
30
-
31
-
32
-
33
-
34
-
35
-
36
-
37
-
38
-
39
-
40
-
41
-
 42
42 -
 43
43 -
 44
44 -
 45
45 -
 46
46 -
 47
47 -
 48
48 -
 49
49 -
 50
50 -
 51
51 -
 52
52 -
53
-
54
-
55
-
56
-
57
-
58
-
59
-
60
-
61
-
62
-
63
-
64
-
65
-
66
-
67
-
68
-
69
-
70
-
71
-
72
-
73
-
74
-
75
-
76
-
77
-
78
-
79
-
80
-
81
-
82
-
83
-
84
-
85
-
86
-
87
-
88
-
89
-
90
-
91
-
92
-
93
-
94
-
95
-
96
-
97
-
98
-
99
-
100
-
101
-
102
-
103
-
104
-
105
-
106
-
107
-
108
-
109
-
110
-
111
-
112
-
113
-
114
-
115
-
116
-
117
-
118
-
119
-
120
-
121
-
122
 |
 |
