Panasonic CF-29CRKGZKM Service Manual - Page 54
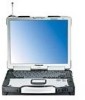
Setting the KB Cable Cover, Keyboard and PCMCIA Protector, Arranging the Keyboard
 |
UPC - 092281833422
View all Panasonic CF-29CRKGZKM manuals
Add to My Manuals
Save this manual to your list of manuals |
Page 54 highlights
7.2.17. Setting the KB Cable Cover, Keyboard and PCMCIA Protector 1. Fix the PCMCIA Protector using the five Screws. No1 to No6 2. Connect the two Cables of the Keyboard to the two Connectors (CN932, CN933) on the KBD PCB. 3. Set the Keyboard. :No8 :No10 :No11 :No7 :No9 4. Fix the KB Cable Cover using the five Screws. No7 to No11 Note: Tighten the Screws in the numbered order (No1 to No11). Screws : DRHM0002ZA Screws : DRQT2+I35FKL KB Cable Cover to Connector (CN933) to Connector (CN932) :No4 :No1 :No5 :No6 :No2 PCMCIA Protector :No3 Keyboard KB PCB n Arranging the Keyboard 1. Attach the KB Spacer Sheet and the two Gaskets to the Keyboard. Keyboard KB Spacer Sheet Gasket View "A" Connector (CN933) Connector (CN932) Gasket View "B" 0~1mm View "A" Gasket 0~0.5mm KB Spacer Sheet 7-36 View "B" 0~1mm KB Spacer Sheet 0~0.5mm Gasket
-
 1
1 -
2
-
3
-
4
-
5
-
6
-
7
-
8
-
9
-
10
-
11
-
12
-
13
-
14
-
15
-
16
-
17
-
18
-
19
-
20
-
21
-
22
-
23
-
24
-
25
-
26
-
27
-
28
-
29
-
30
-
31
-
32
-
33
-
34
-
35
-
36
-
37
-
38
-
39
-
40
-
41
-
42
-
43
-
44
-
45
-
46
-
47
-
48
-
 49
49 -
 50
50 -
 51
51 -
 52
52 -
 53
53 -
 54
54 -
 55
55 -
 56
56 -
 57
57 -
 58
58 -
 59
59 -
60
-
61
-
62
-
63
-
64
-
65
-
66
-
67
-
68
-
69
-
70
-
71
-
72
-
73
-
74
-
75
-
76
-
77
-
78
-
79
-
80
-
81
-
82
-
83
-
84
-
85
-
86
-
87
-
88
-
89
-
90
-
91
-
92
-
93
-
94
-
95
-
96
-
97
-
98
-
99
-
100
-
101
-
102
-
103
-
104
 |
 |
