Panasonic PT-D4000U Operating Instructions
Panasonic PT-D4000U - XGA DLP Projector Manual
 |
UPC - 791871111529
View all Panasonic PT-D4000U manuals
Add to My Manuals
Save this manual to your list of manuals |
Panasonic PT-D4000U manual content summary:
- Panasonic PT-D4000U | Operating Instructions - Page 1
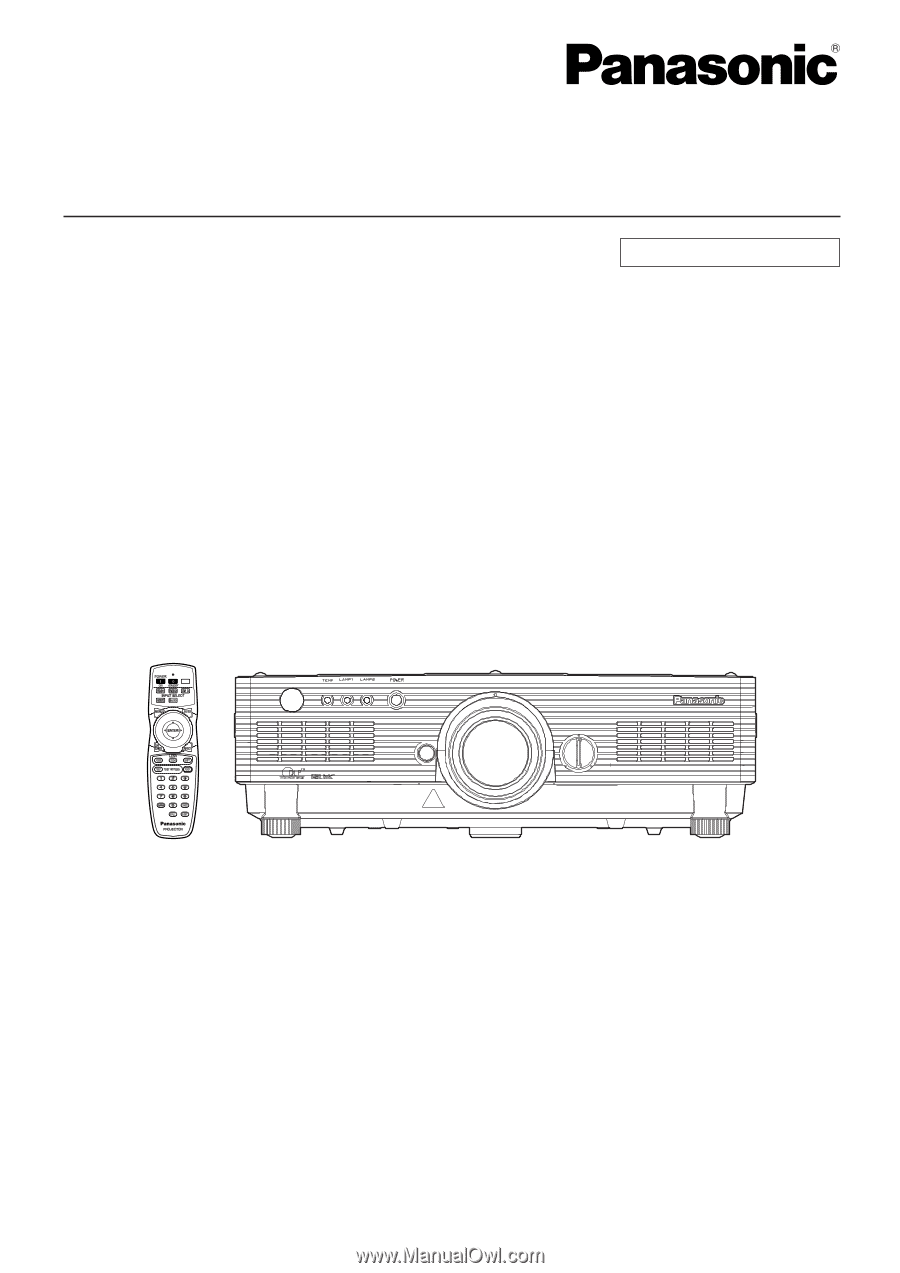
Operating Instructions DLP® Based Projector Commercial Use PT-D4000U Model No. Read these instructions completely before operating this unit. TQBJ0222 - Panasonic PT-D4000U | Operating Instructions - Page 2
Panasonic DLP® based projector. The serial number of your product may be found on its back. You should note it in the space provided below and retain this booklet in case service is required. Model number: PT-D4000U user to the presence of important operating and maintenance (servicing) instructions - Panasonic PT-D4000U | Operating Instructions - Page 3
equipment could void the user's authority to operate. WARNING: Not for use in a computer room as defined in the Standard for the Protection of Electronic Computer/Data Processing Equipment, ANSI/NFPA 75. Declaration of Conformity Model Number: PT-D4000U Trade Name: Panasonic Responsible Party - Panasonic PT-D4000U | Operating Instructions - Page 4
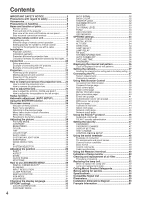
49 Using the Remote 2 terminal 49 Indication of lamp monitor 50 Cleaning and replacement of air filter 51 Procedure of cleaning 51 Replacing the lamp unit 52 When to replace the Lamp unit 52 Lamp unit replacement steps 53 Ceiling Mount Bracket Safeguards 54 Before asking for service 55 - Panasonic PT-D4000U | Operating Instructions - Page 5
Do not overload the wall outlet. • If the power supply is overloaded (for example, by using too many adapters), overheating may occur and fire may result. Do not look into the lens while the projector is being used. • Strong light is emitted from the projector's lens. If you look directly into this - Panasonic PT-D4000U | Operating Instructions - Page 6
Using the projector under such conditions may result in fire, electric shocks or plastic deterioration. The plastic deterioration may cause the falling down of the projector which is mounted in the ceiling. Do not place the projector Before replacing the lamp, be sure to disconnect the power cord - Panasonic PT-D4000U | Operating Instructions - Page 7
got into your eyes or mouth, seek medical advice immediately. • Ask your dealer about the replacement of the lamp unit and check the inside of the projector. If not using the projector for an extended period of time, disconnect the power cord plug from the mains socket. • If dust builds up on the - Panasonic PT-D4000U | Operating Instructions - Page 8
turning the power on and off frequently and/or repeatedly will greatly affect the life cycle. • In rare cases, it may burst shortly after the first lighting. • The possibility of burst increases when the lamp is used beyond the replacement time. • If the lamp bursts, gas inside the lamp is released - Panasonic PT-D4000U | Operating Instructions - Page 9
Name and function of parts Remote control Remote control operation indicator lamp The lamp flashes when any remote control button is pressed. POWER STANDBY ( ) button (page 23) Switched the power to the "standby" mode if the MAIN POWER has been put to the "l" position. POWER ON ( I ) button (page - Panasonic PT-D4000U | Operating Instructions - Page 10
Name and function of parts Bottom LENS (FOCUS, ZOOM, SHIFT) buttons (page 24) These buttons are used to adjust the projection lens. Function 1 (FUNC1) button (page 33) This button can control the functions set in "FUNC1" of the "OPTION1" screen from the MAIN MENU. DEFAULT button (page - Panasonic PT-D4000U | Operating Instructions - Page 11
50) This lamp lights up when the time to replace lamp unit 1 is reached. It also blinks if something unusual occurs in the lamp circuit. LAMP2 monitor (page 50) This lamp lights up when the time to replace lamp unit 2 is reached. It also blinks if something unusual occurs in the lamp circuit. Power - Panasonic PT-D4000U | Operating Instructions - Page 12
parts Lamp unit cover The lamp unit is housed. MAIN POWER switch (page 22) Use this switch to turn on "I" and off "O" the main power applied to the projector . LENS button (page 24) Switches to the adjustment mode for lens focus, zoom and shift (position). Arrow ( ) buttons (page 27) Use to - Panasonic PT-D4000U | Operating Instructions - Page 13
) This terminal is used to control the projector from the PC. (10BASE-T/100BASE-TX compliant) LAN terminal (10BASE-T/100BASE-TX) Connect LAN cable. LAN 10/100 lamp (Yellow) Lights up when 100BASE-TX connected. LAN LINK/ACT lamp (Green) Lights up when connected. Flashes when receiving/sending signals - Panasonic PT-D4000U | Operating Instructions - Page 14
Close the battery compartment lid. Replace the battery compartment lid over to any liquid. • Do not use NiCd batteries. Remote control receiver window light path. • The remote control receiver may not function properly in intense ambient light such as fluorescent lamps. Carefully site the projector - Panasonic PT-D4000U | Operating Instructions - Page 15
user can operate the remote control. The ID number of the projector is set to "ALL" on shipping, and use the ID ALL button of the remote control when using only a single projector When the dry cells are replaced, set the same ID number again. Connect to the projector to use with a cable When - Panasonic PT-D4000U | Operating Instructions - Page 16
reference. After the projector is roughly positioned, picture size and vertical picture positioning can be finely adjusted with the powered zoom lens and lens tilt mechanism. REAR Side view Top view unit : mm, ( ) : inch SH 417-497 (16.4-19.6) SW With optional ceiling mount bracket (ET-PKD56H - Panasonic PT-D4000U | Operating Instructions - Page 17
120) 0 to 3.81 (0 to 150) 0 to 4.57 (0 to 180) *1 The throw ratio is based on the value during projection onto an 80-inch screen size. *2 Lens shift is not available when using the ET-DLE050, and so the height position (H) is SH/2. 17 - Panasonic PT-D4000U | Operating Instructions - Page 18
] [252.18] [353.08] (-49 1/32 to 147 5/64) *1 The throw ratio is based on the value during projection onto an 80-inch screen size. *2 Lens shift is not available when using the ET-DLE050, and so the height position (H) is SH/2. 18 - Panasonic PT-D4000U | Operating Instructions - Page 19
Calculation formulas for projection distance by lens types Lens type Standard zoom lens Wide-angle fixed- Model No. : focus lens ET-DLE050 Wide-angle zoom lens Model No. : ET-DLE100 Intermediate-focus Model No. : zoom lens ET-DLE200 Long-focus zoom lens Model No. : ET-DLE300 Ultra-long- - Panasonic PT-D4000U | Operating Instructions - Page 20
's video line will relieve this problem. • The projector only accepts composite-video, S-Video, analog-RGB (with TTL sync. level) and digital signal. • Some PC models are not compatible with PT-D5700U/PT-D5700UL/PT-DW5100U/PT-DW5100UL projectors. • When using long cables to connect various equipment - Panasonic PT-D4000U | Operating Instructions - Page 21
9-pin straight cable Digital Hi-vision video deck Attention • When connecting with a video deck, be sure to use the one with a built-in time base corrector (TBC) or use a TBC between the projector and the video deck. • If nonstandard burst signals are connected, the image may be distorted. If this - Panasonic PT-D4000U | Operating Instructions - Page 22
using an optional lens, install a projection lens before powering up the projector. (Refer to page 24.) Remove the lens cover beforehand. Connect the supplied power cord. (120 V AC, 50 Hz/60 Hz) Press the " I " marked side of the MAIN POWER switch to turn on the power. The power indicator lights - Panasonic PT-D4000U | Operating Instructions - Page 23
stops). Press the " " marked side of the MAIN POWER switch to remove all power from the projector. Attention • Do not turn the power supply off and then immediately back on again. Turning on the power supply may not light up the light source lamp if the lamp is in the process of cooling down after - Panasonic PT-D4000U | Operating Instructions - Page 24
as far as it will go. While holding down the lens release button, turn the lens further counterclockwise. Remove the lens. Lens release button Note • Before replacing the lens, turn off the projector's power. • Do not touch the lens signal contact. Dust or dirt may cause defective contact. • Do - Panasonic PT-D4000U | Operating Instructions - Page 25
, manually adjust LAMP MAIN VERSION NETWORK VERSION REMOTE2 XGA60 RGB1 48.36kHz/60.00Hz 33h 13h/ ON/ 13h/ ON/ 25 °C / 77 °F 37 °C / 98 °F 37 °C / 98 °F 1.00.00 1.00 DISABLE SEND STATUS VIA E-MAIL EXIT Using the SHUTTER function If the projector is not going to be used for a certain period of time - Panasonic PT-D4000U | Operating Instructions - Page 26
used for configuring, adjusting or reconfiguring the projector PROJECTOR ID INSTALLATION ALTITUDE DIRECTION LAMP SELECT LAMP RELAY RS-232C SYSTEM INFORMATION AUTO POWER OFF DATE AND TIME POSITION XGA MODE SXGA MODE AUTO 1 XGA SXGA LEVEL FUNC1 OSD POSITION OSD MEMORY USER NORMAL OFF BLUE OFF EDID2:PC - Panasonic PT-D4000U | Operating Instructions - Page 27
the setting. • A prompt " ADJUST " appears for a separate bar graph. Resetting to the factory default DEFAULT button is used to reset all of the projector adjustment values to the default levels which were set at the time of shipment from the factory. PICTURE PICTURE MODE CONTRAST BRIGHTNESS - Panasonic PT-D4000U | Operating Instructions - Page 28
DEFAULT: This is the standard setting. USER : The RGB values of the white parts of the image can be adjusted. : The intensity of white color increases. : Reverts to natural image. SYSTEM DAYLIGHT VIEW This adjusts the vividness of the projected images when the projector is used under bright lighting - Panasonic PT-D4000U | Operating Instructions - Page 29
the top and bottom portions cut off. V FIT : Pictures are displayed using all the panel pixels in the vertical direction. When a signal has an is added the detection signal output from the video deck or other unit which supports the wide-screen format. *2 Here, the standard signal means 4:3 or 5:4 - Panasonic PT-D4000U | Operating Instructions - Page 30
projector is used for profitable purpose or in the presence of an audience (for example, in a coffee shop or at a hotel etc.), it may infringe the rights of the copyright owner of the original picture. • If a picture with the standard (4:3) aspect ratio is projected at a wide aspect ratio, parts user - Panasonic PT-D4000U | Operating Instructions - Page 31
the image is partly missing, increase picture can be displayed is not used, the picture can be moved XGA MODE This mode takes effect only when XGA (RGB) signals are input. XGA user chooses. The available languages are: ENGLISH, DEUTSCH, FRANÇAIS, ESPAÑOL, ITALIANO, , , , . Note • The projector - Panasonic PT-D4000U | Operating Instructions - Page 32
the remote control each time signals are input when signals are input frequently such as when the projector is used at a conference. ON projector. BLUE : Set screen color to blue. BLACK : Set screen color to black. LOGO1 : The picture registered by the user will be projected. LOGO2 : The Panasonic - Panasonic PT-D4000U | Operating Instructions - Page 33
external equipment (personal computer, etc.) using the DVI terminal output. 16-235 Select this mainly instructions for the external equipment, etc. • Depending on the setting, some equipment may not provide images or otherwise operate properly. FUNC1 The user power of the projector is turned off. 33 - Panasonic PT-D4000U | Operating Instructions - Page 34
ID INSTALLATION ALTITUDE DIRECTION LAMP SELECT LAMP RELAY RS-232C SYSTEM INFORMATION AUTO POWER OFF DATE AND TIME PASSWORD ALL FRONT-FLOOR LOW HORIZONTAL DUAL OFF DISABLE MENU SELECT CHANGE PROJECTOR ID The projector has an ID number setting function that helps the user to control two or more - Panasonic PT-D4000U | Operating Instructions - Page 35
Current setting (when a lamp fails or fails to light) Red Lamp that has failed to light White Any other status • If the projector is repeatedly used for short periods of time, the lamps will need to be replaced more frequently. LAMP RELAY If using the projector for a continuous period of - Panasonic PT-D4000U | Operating Instructions - Page 36
20 20 AUTO POWER OFF The projector can be automatically time for the projector's internal clock. TIME ZONE : Set the time zone of your country. ADJUST CLOCK : Set the current date and time. LOCAL DATE/LOCAL TIME : Date and time set in above are displayed. PASSWORD This function is used by a service - Panasonic PT-D4000U | Operating Instructions - Page 37
use the Web browser (page 38) functions that the PC uses to control the projector. NETWORK HOST NAME DHCP IP ADDRESS SUBNET MASK GATEWAY NETWORK STATUS STORE PROJECTOR to the factory setting The user can return all settings of parts of the LAN cable. • Please connect the LAN cable to indoor - Panasonic PT-D4000U | Operating Instructions - Page 38
message when the projector has a problem Accessing from the Web browser Start the Web browser on your PC, then enter the IP address which was set in the projector. Enter "user1" in the user name field, then enter the password in the password field. The default setting is "panasonic" (all lower case - Panasonic PT-D4000U | Operating Instructions - Page 39
the status of the Click this item, and an E-mail setting projector is displayed. page appears. POWER: Power On/Off control SHUTTER: Shutter control OSD (On-screen Display): display/non-display SYSTEM: Signal System Switching Use these to select the input signals. Network set up button Click this - Panasonic PT-D4000U | Operating Instructions - Page 40
the lamp2 lit hours. Displays the type of projector. Displays used hours of the projector. Error information page When is displayed on the status information screen, click it to display the error details. OK: Normal operation FAILED: Occurrence of trouble Note • Depending on the nature of the - Panasonic PT-D4000U | Operating Instructions - Page 41
time, and it is now time to replace the lamp. The lamp has failed to light. Wait a short while for the lamp to cool off, and then turn on the power. Trouble has occurred in the shutter circuitry. Consult your dealer. Too much dust accumulates on the air filter. Turn off the MAIN POWER switch using - Panasonic PT-D4000U | Operating Instructions - Page 42
Using Web Browser Control E-mail set up page (Continuing) Enter the E-mail address of your desired recipient. Select the conditions for sending E-mail. ERROR: an error is detected by selfdiagnosis. LAMP RUNTIME: remaining lamp service time has reached the value set in the field. INPUT AIR - Panasonic PT-D4000U | Operating Instructions - Page 43
method as desired. For SMTP authentication, change the authentication method to use, as desired. Enter the POP server name. Available input characters: alphanumeric characters (A - Z, a - z, 0 - 9), hyphen (-) period (.) Enter the user name for the SMTP or POP server. Enter the password for the - Panasonic PT-D4000U | Operating Instructions - Page 44
INPUT AIR TEMPERATURE AROUND LAMP TEMPERATURE LAMP2 REMAIN TIME LAMP1 REMAIN TIME • • • [ OK ] [ OK ] [ OK ] [ OK ] [ OK ] [ OK ] [ OK ] • Mail with the contents shown below is sent when an error has occurred. === Panasonic projector report(ERROR) === Projector Type : D4000 ----- check system - Panasonic PT-D4000U | Operating Instructions - Page 45
enable the DHCP client function. Enter the IP address if DHCP server is not used. Enter the subnet mask if DHCP server is not used. Enter the gateway address if DHCP server is not used. Enter the name of the projector here. Enter the host name here if it is required when the DHCP - Panasonic PT-D4000U | Operating Instructions - Page 46
the PJLink™ protocol. • Projector settings • Projector status inquiry Supported commands The commands for controlling the projector using the PJLink™ protocol are as given in the table below. Command Control Description POWR Power control POWR ? Power status inquiry INPT Input selection INPT - Panasonic PT-D4000U | Operating Instructions - Page 47
images. PASSWORD INPUT SET (When using the projector for the first time) Press the and buttons in this time the power is turned on. If this option is used, no operations except for the POWER : The picture registered by the user will be projected. LOGO2 : The Panasonic logo is projected. TEXT CHANGE - Panasonic PT-D4000U | Operating Instructions - Page 48
• If a command is sent within about 60 seconds after the lamp is turned on, the response may be returned late or the projector will send an "ER401" response to the computer. • If an invalid command is received, the projector will send an "ER402" response to the computer. • Projector ID supported - Panasonic PT-D4000U | Operating Instructions - Page 49
terminal External control Remote terminal /External control STANDBY ON LAMP RGB1 VIDEO RGB2 Projector set up in a meeting room S-VIDEO DVI of the projector can no longer be operated when pins and are shorted: POWER button and SHUTTER button. Neither will it be possible to use the RS232C - Panasonic PT-D4000U | Operating Instructions - Page 50
monitor This projector is equipped with 3 indicators to show when a lamp needs replacement or there is an abnormal internal temperature. These lamps flash or light up to indicate a problem. Turn the power off and follow the steps below. (Power indicator) Lamp 2 monitor (LAMP 2) Lamp 1 monitor (LAMP - Panasonic PT-D4000U | Operating Instructions - Page 51
are sucked into the projector, causing failure. Note • If cleaning cannot remove the dust completely, then it is a sign to replace the air filter. Consult the dealer. In addition, when the lamp unit is replaced, also replace the air filter. • Be absolutely sure to use the air filter specifically - Panasonic PT-D4000U | Operating Instructions - Page 52
the power unless two lamp units are installed. • A lamp unit is an optional part. Contact the dealer. Replacement lamp unit model No.: ET-LAD40 (single bulb), ET-LAD40W (double bulbs) • Other lamps than specified above cannot be used. Be sure to use the specified lamp. When to replace the Lamp unit - Panasonic PT-D4000U | Operating Instructions - Page 53
Lamp unit replacement steps Turn the power off by following the steps on page 23, remove the power plug and confirm that the surroundings of the lamp unit have cooled off. Check that the fan has stopped running. Have a Phillips screwdriver ready ahead of time. Remove the screw securing the lamp unit - Panasonic PT-D4000U | Operating Instructions - Page 54
Install the ceiling mount bracket according to the Installation Instructions. Attach anchor nuts or curl plugs available in the market (M8 or 5/16") to a strong ceiling surface in positions (left figure) so that there is no slack in the Anchoring nuts wire cable provided with the projector. or - Panasonic PT-D4000U | Operating Instructions - Page 55
lamp monitor (LAMP) indicator on the front of the unit flashing or turned on? (See page 51) • Is the lamp unit door installed correctly? • A wrong ID is set. (See pages 15 and 34) • Is the lens cap still on the lens using the REMOTE2 IN terminal? (See page 49) • Is there any external light - Panasonic PT-D4000U | Operating Instructions - Page 56
PT-D4000U Power supply Power consumption Amps DLP® panel Panel size Display system Number of pixels Lens Powered zoom Powered focus control Projection lamp SECAM/PAL60) 50 inch - 600 inch*2 4:3 Menu-selectable from front/rear/ceiling mount, and floor standing 1 600:1 (when "HIGH" is selected as the - Panasonic PT-D4000U | Operating Instructions - Page 57
to 45 °C Ambient humidity : 20 % to 80 % (no condensation) Remote control Power source Operation range Mass Outside dimensions Option Hanging attachment (For high ceiling) Hanging attachment (For low ceiling) Projection lens Replacement lamp unit 3 V DC (two AA dry cells) approx. 30 m (98'5") (in - Panasonic PT-D4000U | Operating Instructions - Page 58
1080/50i 720/60p 720/50p VGA400 VGA480 *3 SVGA *3 MAC16 XGA *3 *3 MXGA WXGA *3 *3 *3 *3 MAC21 MSXGA *3 stands for interlace signal. *2 The symbols used to denote the image quality have the simplified images are projected. *3 These signals support the frame lock function. Note • The - Panasonic PT-D4000U | Operating Instructions - Page 59
tallation dimensions diagram (Figure 1 : Dimensions applying when one unit is used) (Figure 2 : Dimensions applying when two units are used) ; Exhaust 50 cm (19.7") or more 30 cm (11.8") or within the range 0 °C to 40 °C while the projector is running. Also ensure that the air intake and - Panasonic PT-D4000U | Operating Instructions - Page 60
equipment includes the rights to use this software (the built by such actions. Trademark Acknowledgement • VGA and XGA are trademarks of International Business Machines Corporation. • the U.S. and other countries. • Digital Light Processing, DLP, and DLP® CHIP are registered trademarks of the Texas - Panasonic PT-D4000U | Operating Instructions - Page 61
constituer un risque de choc éIectrique aux personnes. Le point d'exclamation dans un triangle avertit l'usager de la présence d'instructions importantes concernant l'utilisation et l'entretien (réparation) dans la littérature accompagnant le produit. ATTENTION: Cet appareil est équipé d'une fiche - Panasonic PT-D4000U | Operating Instructions - Page 62
s'il est installé au plafond. • Si l'installation n'est pas faite correctement, cela peut entraîner des blessures ou des chocs électriques. • Utiliser le support de montage au plafond spécifié pour ce modèle. • Utiliser le câble métallique de sûreté fourni et prendre les mesures nécessaires pour - Panasonic PT-D4000U | Operating Instructions - Page 63
ées. • Ne pas laisser de piles épuisées dans l'appareil, car elles risqueraient de fuir, de surchauffer ou d'éclater. Avant de remplacer la lampe, veiller à débrancher la fiche du cordon d'alimentation de la prise de courant. • Il y a risque d'électrocution ou d'explosion. Lors du remplacement de la - Panasonic PT-D4000U | Operating Instructions - Page 64
de surchauffer, de prendre en feu ou d'éclater, ce qui peut causer un incendie ou endommager les zones adjacentes. Ne pas utiliser la lampe usée. • Le bloc lampe risquerait de se casser. Ne pas placer le projecteur dans des endroits extrêmement chauds. • Cela peut causer la détérioration du boîtier - Panasonic PT-D4000U | Operating Instructions - Page 65
service sera grandement affectée si vous allumez et éteignez la lampe de manière fréquente et/ou répétée. • La vie de service d'une lampe un chiffon sec. En cas d'utilisation d'un produit chimique, suivez ses instructions. Ne nettoyez pas la surface de l'objectif avec un chiffon pelucheux ou poussi - Panasonic PT-D4000U | Operating Instructions - Page 66
au fil de l'utilisation, il est nécessaire de la remplacer régulièrement. La lampe doit être remplacée après environ 3 000 heures d'utilisation, mais il se peut qu'elle atteigne la fin de sa durée de service avant 3 000 heures suivant ses caractéristiques ou d'autres facteurs tels que les conditions - Panasonic PT-D4000U | Operating Instructions - Page 67
ventilateur. Faites glisser le cache un peu vers la droite et fixez-le au moyen de la vis pour monter solidement le cache de lampe. Attention • La lampe et le cache doivent être correctement fixés. Si ce n'est pas le cas, un circuit de protection entre en action et la mise sous - Panasonic PT-D4000U | Operating Instructions - Page 68
handling may apply. See www.dtsc.ca.gov/hazardouswaste/perchlorate. Projectors Panasonic Projector Systems Company Unit of Panasonic Corporation of North America One Panasonic Way, Secaucus, New Jersey 07094 PHONE: (201)392-6591 Technical Support: PHONE: (888)-411-1996 FAX: (201)348-7523 E-Mail
-
 1
1 -
 2
2 -
 3
3 -
 4
4 -
 5
5 -
 6
6 -
 7
7 -
8
-
9
-
10
-
11
-
12
-
13
-
14
-
15
-
16
-
17
-
18
-
19
-
20
-
21
-
22
-
23
-
24
-
25
-
26
-
27
-
28
-
29
-
30
-
31
-
32
-
33
-
34
-
35
-
36
-
37
-
38
-
39
-
40
-
41
-
42
-
43
-
44
-
45
-
46
-
47
-
48
-
49
-
50
-
51
-
52
-
53
-
54
-
55
-
56
-
57
-
58
-
59
-
60
-
61
-
62
-
63
-
64
-
65
-
66
-
67
-
68
 |
 |
DLP
®
Based Projector
Commercial Use
Operating Instructions
Read these instructions completely before operating this unit.
TQBJ0222
Model No.
PT-D4000U