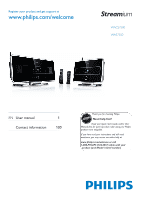
Philips WAS7500 User manual - Page 4
Norge
 |
UPC - 609585143814
View all Philips WAS7500 manuals
Add to My Manuals
Save this manual to your list of manuals |
Page 4 highlights
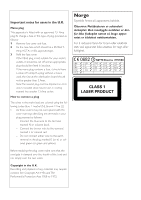
Important notes for users in the U.K. Mains plug This apparatus is fitted with an approved 13- Amp plug.To change a fuse in this type of plug, proceed as follows: 1 Remove fuse cover and fuse. 2 Fix the new fuse which should be a BS1362 5- Amp, A.S.T.A. or BSI approved type. 3 Refit the fuse cover. If the fitted plug is not suitable for your socket outlets, it should be cut off and an appropriate plug should be fitted in its place. If the mains plug contains a fuse, it should have a value of 5 Amp. If a plug without a fuse is used, the fuse at the distribution board should not be greater than 5 Amp. Note: The severed plug must be disposed, so as to avoid a possible shock hazard due to it being inserted into another 13-Amp socket. How to connect a plug The wires in the mains lead are colored using the following codes: blue = neutral (N), brown = live (L). • As these colors may not correspond with the color markings identifying the terminals in your plug, proceed as follows: - Connect the blue wire to the terminal marked N or colored black. - Connect the brown wire to the terminal marked L or colored red. - Do not connect either wire to the earth terminal in the plug, marked E (or e) or colored green (or green and yellow). Before replacing the plug cover, make sure that the cord grip is clamped over the sheath of the lead and not simply over the two wires. Copyright in the U.K. Recording and playback of any materials may require consent. See Copyright Act 1956 and The Performerb's Protection Acts 1958 to 1972. Norge Typeskilt finnes på apparatens bakside. Observer: Nettbryteren er sekundert innkoplet. Den innebygde netdelen er derfor ikke frakoplet nettet så lenge apparatet er tilsluttet nettkontakten. For å redusere faren for brann eller elektrisk støt, skal apparatet ikke utsettes for regn eller fuktighet. CLASS 1 LASER PRODUCT
-
 1
1 -
 2
2 -
 3
3 -
 4
4 -
 5
5 -
 6
6 -
 7
7 -
 8
8 -
 9
9 -
 10
10 -
11
-
12
-
13
-
14
-
15
-
16
-
17
-
18
-
19
-
20
-
21
-
22
-
23
-
24
-
25
-
26
-
27
-
28
-
29
-
30
-
31
-
32
-
33
-
34
-
35
-
36
-
37
-
38
-
39
-
40
-
41
-
42
-
43
-
44
-
45
-
46
-
47
-
48
-
49
-
50
-
51
-
52
-
53
-
54
-
55
-
56
-
57
-
58
-
59
-
60
-
61
-
62
-
63
-
64
-
65
-
66
-
67
-
68
-
69
-
70
-
71
-
72
-
73
-
74
-
75
-
76
-
77
-
78
-
79
-
80
-
81
-
82
-
83
-
84
-
85
-
86
-
87
-
88
-
89
-
90
-
91
-
92
-
93
-
94
-
95
-
96
-
97
-
98
-
99
-
100
-
101
-
102
-
103
-
104
-
105
-
106
-
107
-
108
-
109
-
110
-
111
-
112
-
113
-
114
-
115
-
116
-
117
-
118
-
119
-
120
-
121
-
122
-
123
-
124
-
125
-
126
-
127
 |
 |
