Pioneer DV-45A Owner's Manual - Page 13
Connecting Up, Easy connections - remote
 |
View all Pioneer DV-45A manuals
Add to My Manuals
Save this manual to your list of manuals |
Page 13 highlights
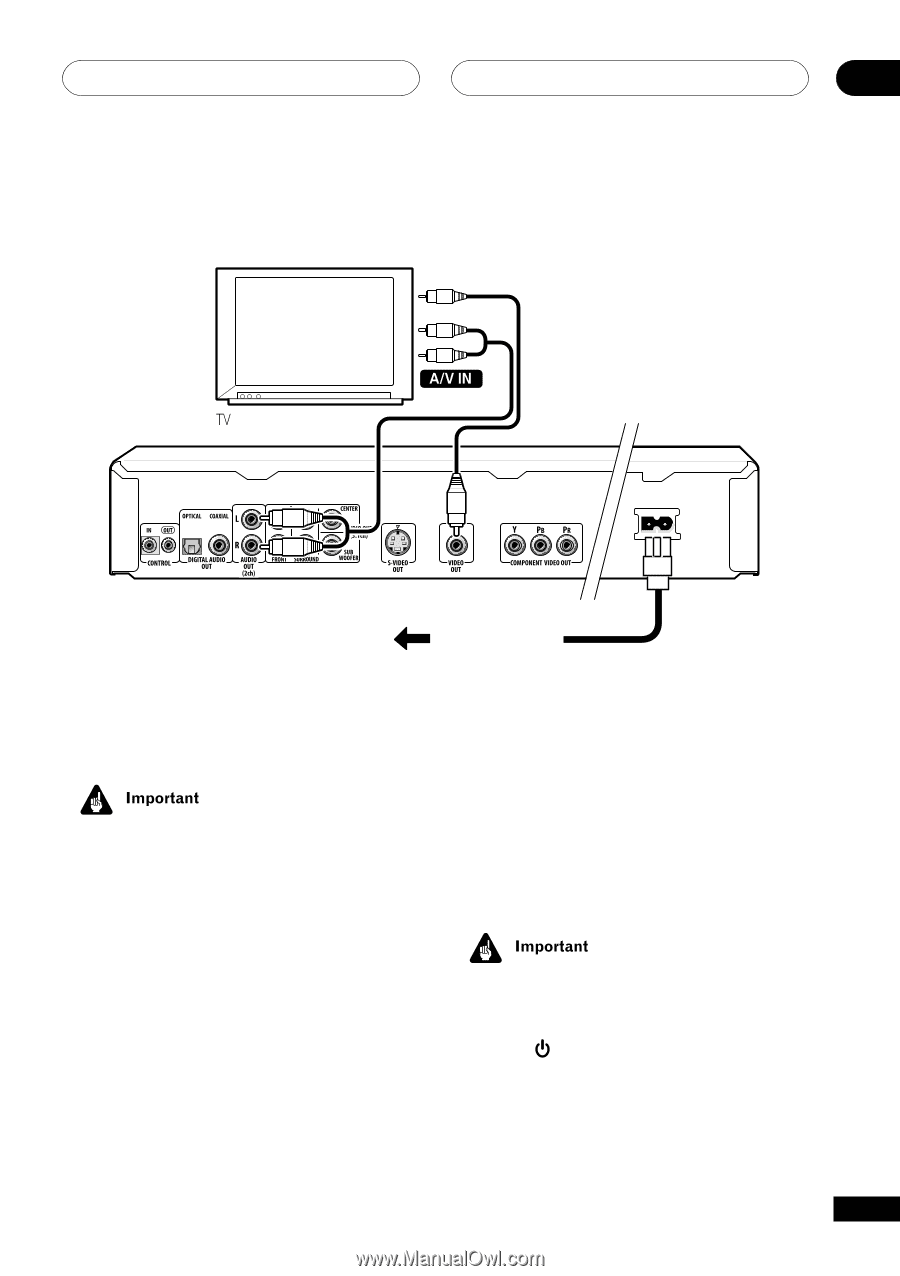
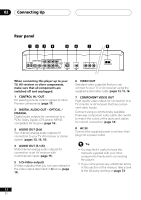
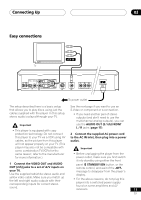
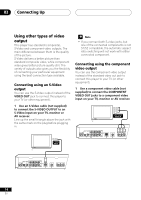
Connecting Up 02 Easy connections To power outlet The setup described here is a basic setup See the next page if you want to use an that allows you to play discs using just the S-Video or component or a connection. cables supplied with the player. In this setup, stereo audio is played through your TV. • If you need another pair of stereo outputs (and don't need to use the multichannel analog outputs), you can use the AUDIO OUT (5.1ch) FRONT • This player is equipped with copy L / R jacks (page 15). protection technology. Do not connect 2 Connect the supplied AC power cord this player to your TV via a VCR using AV to the AC IN inlet, then plug into a power cables, as the picture from this player outlet. will not appear properly on your TV. (This player may also not be compatible with some combination TV/VCRs for the same reason; refer to the manufacturer for more information.) • Before unplugging the player from the power outlet, make sure you first switch it into standby using either the front 1 Connect the VIDEO OUT and AUDIO panel STANDBY/ON button, or the OUT (2ch) jacks to a set of A/V inputs on remote control, and wait of the -OFF- your TV. message to disappear from the player's Use the supplied red/white stereo audio and display. yellow video cable. Make sure you match up the left and right audio outputs with their corresponding inputs for correct stereo sound. • For the above reasons, do not plug this player into a switched power supply found on some amplifiers and AV receivers. 13 En
-
 1
1 -
2
-
3
-
4
-
5
-
6
-
7
-
 8
8 -
 9
9 -
 10
10 -
 11
11 -
 12
12 -
 13
13 -
 14
14 -
 15
15 -
 16
16 -
 17
17 -
 18
18 -
19
-
20
-
21
-
22
-
23
-
24
-
25
-
26
-
27
-
28
-
29
-
30
-
31
-
32
-
33
-
34
-
35
-
36
-
37
-
38
-
39
-
40
-
41
-
42
-
43
-
44
-
45
-
46
-
47
-
48
-
49
-
50
-
51
-
52
-
53
-
54
-
55
-
56
-
57
-
58
-
59
-
60
-
61
-
62
-
63
-
64
-
65
-
66
-
67
-
68
-
69
-
70
-
71
-
72
-
73
-
74
-
75
-
76
-
77
-
78
-
79
-
80
 |
 |