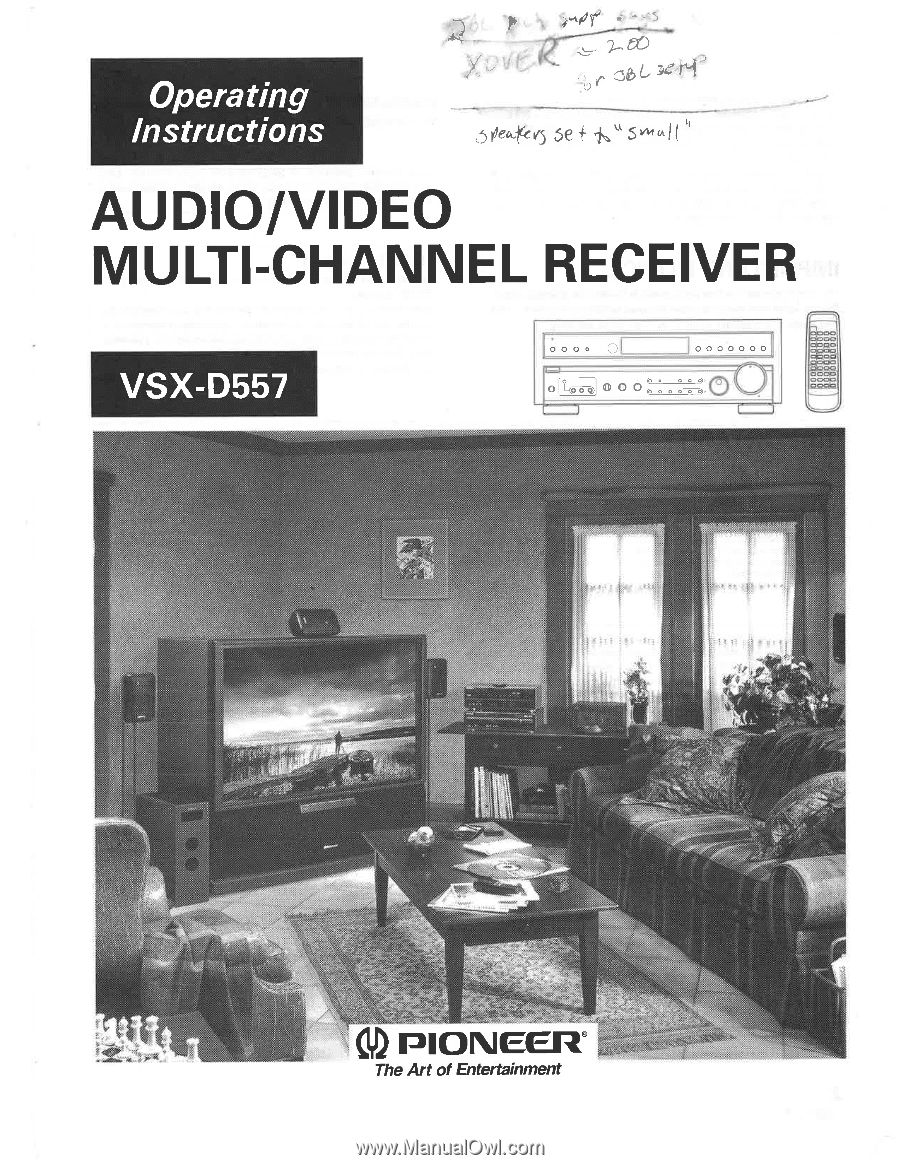
Pioneer VSX-D557 Operating Instructions
Pioneer VSX-D557 Manual
 |
View all Pioneer VSX-D557 manuals
Add to My Manuals
Save this manual to your list of manuals |
Pioneer VSX-D557 manual content summary:
- Pioneer VSX-D557 | Operating Instructions - Page 1
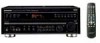
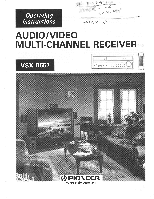
on, Operating Instructions oymcvrevi 5e+ 5,44ail AUDIO/VIDEO MULTI-CHANNEL RECEIVER VSX-D557 0 0 OOO 6 6 6 OO OOOOO G,CO:2.Q O'S 1.004, 0a, t. zi • • PIONEER® The Art of Entertainment - Pioneer VSX-D557 | Operating Instructions - Page 2
intended to alertthe userto the presence of important operating and maintenance (servicing) instructions in the literature accompanying the appliance. This equipment has been tested and found to comply with the limits for a Class B digital device, pursuant to Part 15 of the FCC Rules. These limits - Pioneer VSX-D557 | Operating Instructions - Page 3
product and in the operating instructions should be adhered to. FOLLOW INSTRUCTIONS - All operating and use instructions should be followed. CLEANING to keep from touching such power lines or circuits as contact with them might be fatal. OVERLOADING - Do not overload wall outlets, extension cords, - Pioneer VSX-D557 | Operating Instructions - Page 4
is required for playing back Dolby Digital (AC-3) sounds of LDs.). u DOLBY PRO LOGIC COMPATIBLE Best suited for playing back movies and music by reproducing surround effects. CONTENTS 1. BEFORE USE CHECKING ACCESSORIES 7 REMOTE CONTROL UNIT 7 INSTALLATION 8 2.NAMES AND CONNECTIONS - Pioneer VSX-D557 | Operating Instructions - Page 5
PCM/DOLBY DIGITAL input (OPTICAL button) ENJOYING SURROUND EFFECTS LISTENING TO FM/AM BROADCASTS RECORDING OPERATIONS OF OTHER PIONEER EQUIPMENTS DVD PLAYER operation LD PLAYER operation CD PLAYER operation CASSETTE DECK operation TV operation SETTING MODE SURROUND TROUBLESHOOTING SPECIFICATIONS - Pioneer VSX-D557 | Operating Instructions - Page 6
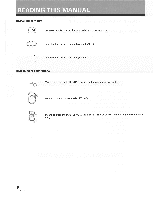
THIS MANUAL ■Meaning of Marks memo Provides detailed precautions and advice on operations, etc. Indicates that buttons or displays are blinking. Indicates that buttons or displays are lit. ■Meaning of Illustrations SURROUND Means to press the SURROUND button (of the remote control unit - Pioneer VSX-D557 | Operating Instructions - Page 7
. Operating the remote control unit By connecting a control cord (optional), other PIONEER products can be operated using this remote control unit. Point the remote control unit towards the remote sensor of this unit and operate. The remote control signals are received by the remote sensor of this - Pioneer VSX-D557 | Operating Instructions - Page 8
cause interference such as the TV color to change. In such cases, use magnetically shielded speakers or install the speakers away from the TV. • by the transformer of the receiver. In such cases, change the place of installation or install it away from the receiver. Listening Position * In the - Pioneer VSX-D557 | Operating Instructions - Page 9
VSX-D557 received broadcast signal is weak, press this button to set the monaural mode. CLASS button (R23) O Function buttons (P.16-) O O (power) STANDBY/ON button O PHONES jack (Headphone terminal) 0 VIDEO INPUT button/terminal (R13) Connect to a video camera, etc. 8 TONE and BALANCE controls Use - Pioneer VSX-D557 | Operating Instructions - Page 10
CONNECTIONS OF PARTS Displaii""1111111116. 0 ® 9j (115) SIGNAL DOLBY SELECT DIGITAL DIGITAL ANALOG L R AUTO Ls S Rs OVERLOAD LFE 'PAD LOGIC' LOUDNESS GPO' AO DELAY 1D1RECTI DSP MODE I AM FM. I11%I 10 PM. SS fflEffl E2 MOND TUNED STEREO JOG MODE ST FREQ MEMORY 10 URI. VAL vGiDi - Pioneer VSX-D557 | Operating Instructions - Page 11
Remote control unit PIONEER CE Sst Rgl Eq (Dl ICS D Dcm DDD,th -O-L nithim 3 4 AuxDM ApDicpp', ( FUNC. (FUNCTION) button (P.16) Use to switch the function setting of this unit. 0 DO button (P.19) Turns ON/OFF the Dolby Surround mode. ® CH. SELECT button Use to select the channel for which level - Pioneer VSX-D557 | Operating Instructions - Page 12
turn OFF the POWER switch, and disconnect the power cord from the wall outlet. • For better reception of signals, use an FM external onto a wall, etc. Face towards the direction with the best reception. 12 CONTROL (OUT) IN r VIDEO OUT 113 MOWTOR O III LOI RH IN O R LOOP ANTENNi - Pioneer VSX-D557 | Operating Instructions - Page 13
on and off by the z receiver's POWER switch. Total electrical power consumption of connected equipment should not exceed 100 W (0.8 A). 0 memo Liu • This unit should be discon- nected by removing the power plug from the wall socket when not in regular use, e.g., when on vacation. 0 • Do - Pioneer VSX-D557 | Operating Instructions - Page 14
of Connection Using a Demodulator When using the PIONEER RFD-1 0 DVD LD player 00LXY DIGITAL AC-3 RF GUT POZIT/ATLTT ® I PCIN OUT O OPTICAL OUT RF demodulator RFD-1 Set the DIGITAL IN selector to COAXIAL DIGITAL IN OPTICAL COAXIAL PCNI/No Pcm/ILDJ IOPT Mira elti VSX-D557 L Set the - Pioneer VSX-D557 | Operating Instructions - Page 15
LD player's VIDEO output terminals to the receiver's both of LD/SAT and DVD/TV VIDEO IN terminals. LD player DVD player 1 =1 RF g L'4lT" ® OPTICAL OUT RF Demodulator I OUT VSX-D557 L 09 PCM/DOLAY LD/SAT 01/0/11/ r-OFRICAL When play back the Dolby Digital audio of the LD, set the OPTICAL - Pioneer VSX-D557 | Operating Instructions - Page 16
THE INPUT SIGNAL Select the source to be played (1,0 PIONEER WAX SEW C3 I-. 1 . Turn ON the power of the equipment to be played. * Set the input selector of the TV monitor to the source input from this unit. 2• Turn ON the power of the receiver. RECEIVER GRAC01.04 O STANDBY indicator goes off - Pioneer VSX-D557 | Operating Instructions - Page 17
and LD, SIGNAL SELECT I will be set to "ANALOG". Switching PCM/DOLBY DIGITAL input (OPTICAL button) Cm/1AM WM% Cv YgpsrfP. PI DI Cat used for a DIGITAL input terminal. OPTICAL DVD/TV Set the OPTICAL as a DIGITAL input terminal for DVD or TV. OPTICAL LD/SAT Set the OPTICAL as a DIGITAL input - Pioneer VSX-D557 | Operating Instructions - Page 18
B is turned off automatically. • If SPEAKER B is ON, the surround mode will not be set. Switching the sound effects LE:6P MODE] (0 PIONEER SELECT C:1 cm NER .) IZNO ) CONTROL CO 0160 CH SELECT - LEN/EL ON AV Mt, T4DIARAITIML.TOMM.E., rl.E94.14 4CP.T1nOt WAY eu-Luisxias Select the surround - Pioneer VSX-D557 | Operating Instructions - Page 19
the Dolby Surround Mode When the Dolby Surround mode is ON, Dolby Pro Logic Surround and Dolby Digital (AC-3) are automatically switched according to the input signal, and playback is performed. DO - -----. PIONEER 11.6.7 PAU O (C) (C9 NIPX CLASS 0 ACCESS DO Set to the desired Dolby Surround - Pioneer VSX-D557 | Operating Instructions - Page 20
, OPERATIONS Select the SURROUND button to enable surround operations. Enjoying movie and music sources in surround mode 1 E SOURCE SELECT PIONEER 1. Select the Dolby 00 Surround mode and DSP mode (either mode can be set independently). DSP MODE IE9 2. Adjust to the de- sired volume. M VCE - Pioneer VSX-D557 | Operating Instructions - Page 21
memo Turn OFF TAPE 2 MONITOR (the Indicator goes off). PIONEER SELECT co pv..c 1. - Pioneer VSX-D557 | Operating Instructions - Page 22
using the main unit 1. Press the d.) (power) using the number buttons on the remote control unit. memo Turn OFF the TAPE 2 MONITOR (the indicator goes off). 1. Select the TUNER function. FUNC. - 11ci OP/ H - PIONEER bers of the fre- For example, to receive FM (- C11) cast station. 4 quency - Pioneer VSX-D557 | Operating Instructions - Page 23
frequently used stations (main unit only) 3 0)PIONEER AUDIO/MO o nnum-c.NNEL .1E. on Erh.-O O O V5X-D557 O InoE0 14TA0 k .04 I\ 00) I.NIM 11 TIMMS IMMMX GIMMIL PIM • 0 O O • wen •INIMIINNIM 0n O 2 OPERATIONS 'uein-armt'' 246.STrIII MIN MAX memo • The frequency received and - Pioneer VSX-D557 | Operating Instructions - Page 24
iJ MHZ Example: When FM99.50 MHz has been memorized in channel 7 of CLASS 2. memo Use the CHANNEL +/- buttons to select other memorized station numbers. 3 2 10000 0 0 0 0 desired station number which has been memorized. memo When the power cord of the unit is disconnected from the wall outlet - Pioneer VSX-D557 | Operating Instructions - Page 25
of the input signal to "ANALOG" referring to "Select the digital or analog input signal" on page 17. Recording with TAPE 1 or TAPE 2 PIONEER - . =I =I INPX 00 (CI LASS ACCESS ( memo Turn ON the power of all equipment to be used. Select the source to FUNIC 1. be recorded. TUNER-. PHONO VIDEO - Pioneer VSX-D557 | Operating Instructions - Page 26
.11..INANNIrli. C•IVIIN 01le1.5O11. PVINrOKL14 ONO 1 0. O O . 0 o am, 6 6 6 = I100000ool • Operating with the main unit 1. Select the source to be recorded using the Function buttons. 2. Start recording with a VCR. 3. Play back the source to be recorded. memo • The signal from VCR/TAPE 1 cannot - Pioneer VSX-D557 | Operating Instructions - Page 27
OF OTHER PIONEER EQUIPMENTS (D PIONEER SOURCE SELECT 4 1 i= ..1 " 0 0 CD 9 1 ) D rataill-Glia.tar, lvca FAOTP. /24.1.0,104. yroer DVD PLAYER operation Press the DVD button in the SOURCE SELECT area, and operate as desired using the following buttons. CD 0 (power) STANDBY/ON Use to - Pioneer VSX-D557 | Operating Instructions - Page 28
Ca PIONEER 6 -® 9 ( Dnor D CVO) 1,441,11EHANIcat MiCsaiv.... REMOTE eXcl414... CONTROL button in the SOURCE SELECT area, and operate as desired using the fol- lowing buttons. C) 0 (power) STANDBY/ON Use to turn STANDBY/ON the TV. © TV FUNC. Use to select the TV input. O,O CHANNEL -, + Use - Pioneer VSX-D557 | Operating Instructions - Page 29
system in use. (When using for the first time, or when the speaker system has been changed, set the setting mode.) Operating the setting mode MIL 0.0 PIONEER • LA delay time setting mode REAR delay time setting mode Dynamic range control setting mode REAR balance setting mode 4 • While the - Pioneer VSX-D557 | Operating Instructions - Page 30
Contents and changes of the setting mode C) SPEAKER setting mode Sets whether front, center and rear speakers of the system are used or not, and their sizes. Switch the setting mode according to the speaker system currently installed. B F L E 5 -- 1= 5 It I L C 5 -- 11 11 # R5 It I:- 5 C 5 -- - Pioneer VSX-D557 | Operating Instructions - Page 31
setting mode Sets whether SUB WOOFER (special bass speaker) is used or not. Turn ON/OFF the SUB WOOFER. a ILI is set to 100Hz. It is recommended that it be set to 200Hz when only small speakers are used, although this depends on the efficiency of the speaker. LU ft- • If all speakers (front, - Pioneer VSX-D557 | Operating Instructions - Page 32
set to no CENTER speaker in CI SPEAKER setting mode, the CENTER delay time cannot be set. • The CENTER delay time is effective only in Dolby Digital. © REAR delay time setting mode Like the ® CENTER delay time setting mode, set so that the sound from the FRONT speakers to the listening position - Pioneer VSX-D557 | Operating Instructions - Page 33
when watching a movie with the volume set to a lowlevel, setting this function enables low level sounds to be heard more easily. Set the dynamic range control mode. 6 illYE OFF OFF 1- MAX memo • Initially, it is set to OFF. • When raising the volume level, set to OFF. ® REAR balance setting mode - Pioneer VSX-D557 | Operating Instructions - Page 34
beautiful sounds characteristic of concert halls and powerful orchestral performances. JAZZ Simulates the acoustic Dolby Digital (AC-3) or Dolby Pro Logic effects when used in .... combination. _./ memo Use of THEATER 1 or 2 together with the Dolby Surround mode [Dolby Digital (AC-3) or Dolby - Pioneer VSX-D557 | Operating Instructions - Page 35
recording of different format audio signals on the laser disc raises the important question of compatibility with existing laser discs. Dolby Digital (AC-3) records signals using one analog audio channel to maintain this compatibility with existing discs and players. As shown in the following figure - Pioneer VSX-D557 | Operating Instructions - Page 36
used. If the trouble cannot be rectified even after exercising the checks listed below, ask your nearest PIONEER authorized service center or your dealer to carry out repair work. Symptom Cause Remedy The power • Press the MUTING button on the remote control unit. • Adjust MASTER VOLUME. • Press - Pioneer VSX-D557 | Operating Instructions - Page 37
DVD player. Either no Dolby digital sound. • SIGNAL SELECT remote sensor to the light. If the unit does not operate normally due to external effects such as static electricity, press the RESET button on the front panel or disconnect the power not use furniture wax or cleaners. • Never use thinners - Pioneer VSX-D557 | Operating Instructions - Page 38
oz) Furnished Parts FM Antenna 1 AM Loop Antenna 1 Dry Cell Batteries (AA/R6P) 2 Remote Control Unit 1 Operating Instructions 1 Sub Instruction Manual [Dolby Digital (AC-3)] 1 NOTE: Specifications and the design are subject to possible modifications without notice, due to improvements - Pioneer VSX-D557 | Operating Instructions - Page 39
39 - Pioneer VSX-D557 | Operating Instructions - Page 40
instructions, service manuals, or accessories, please call the number shown below. 1- 8 0 0 - 4 2 1- 1 4 0 4 Please do not ship your product to Pioneer without first calling the Customer Service Department at the above listed number for assistance. PIONEER ELECTRONICS SERVICE, INC. CUSTOMER SUPPORT
-
 1
1 -
 2
2 -
 3
3 -
 4
4 -
 5
5 -
 6
6 -
 7
7 -
8
-
9
-
10
-
11
-
12
-
13
-
14
-
15
-
16
-
17
-
18
-
19
-
20
-
21
-
22
-
23
-
24
-
25
-
26
-
27
-
28
-
29
-
30
-
31
-
32
-
33
-
34
-
35
-
36
-
37
-
38
-
39
-
40
 |
 |
on
,
Operating
Instructions
oymcvrevi
5e+
5
,
44
ail
AUDIO/VIDEO
MULTI
-CHANNEL
RECEIVER
VSX-D557
t.
O'S
1.004,
0
a,
•
0
O
O
O
O O O O
0
OOO
6
6 6
PIONEER®
The
Art
of
Entertainment
zi
•
G,CO:2.Q