Ricoh 8200DN Administration Guide
Ricoh 8200DN - Aficio SP B/W Laser Printer Manual
 |
UPC - 026649063268
View all Ricoh 8200DN manuals
Add to My Manuals
Save this manual to your list of manuals |
Ricoh 8200DN manual content summary:
- Ricoh 8200DN | Administration Guide - Page 1
SafeCom Go Ricoh Administrator's Manual D60703-17 April 2012 - Ricoh 8200DN | Administration Guide - Page 2
Go, SafeCom ePay and the SafeCom logo are trademarks of SafeCom a/s. Company and product names mentioned in this manual are trademarks or registered trademarks of their respective owners. SafeCom a/s cannot be held responsible for any technical or typographical errors and reserves the right to make - Ricoh 8200DN | Administration Guide - Page 3
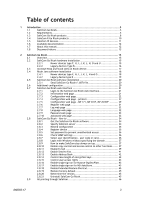
2.7.4 Configuration web page - printers 27 2.7.5 Configuration web page - MP 171, MP 201F, MP 201SPF .......... 29 2.7.6 Register web page 31 2.7.7 Log web page 32 2.7.8 Language web page 32 2.7.9 Password web page 33 2.7.10 Advanced web page 33 2.8 SafeCom Go Ricoh - How to 34 - Ricoh 8200DN | Administration Guide - Page 4
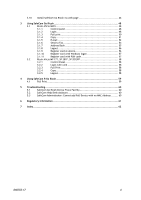
PUK code 57 3.2 Ricoh Aficio MP 171, SP 201F, SP 201SPF 58 3.2.1 Control Panel 58 3.2.2 Login with card 58 3.2.3 Pull Print 58 3.2.4 Copy 58 3.2.5 Logout 58 4 Using SafeCom P:Go Ricoh 59 4.1 Pull Print 59 5 Troubleshooting 60 5.1 SafeCom Go Ricoh Device Trace Facility 60 - Ricoh 8200DN | Administration Guide - Page 5
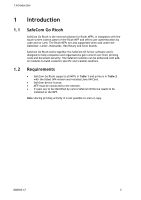
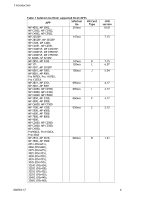
and document security. The SafeCom solution can be enhanced with addon modules to build customer specific and scalable solutions. Requirements SafeCom Go Ricoh supports all MFPs in Table 1 and printers in Table 2 with the listed JVM version and installed Java VM Card. SafeCom device license - Ricoh 8200DN | Administration Guide - Page 6
supported Ricoh MFPs MFP SafeCom VM Card Go Type MP 4002, MP 5002, 210xxx - MP C3002, MP C3502, MP C4502, MP C5502 MP 2352SP, 147xxx - MP 2852SP, MP 3352SP MP C300, MP C400, MP C2051, MP C2551, MP C3001SP, MP C3501SP, MP C4501SP, MP C5501SP, MP C6501SP, MP C7501SP, SP 5200S, SP - Ricoh 8200DN | Administration Guide - Page 7
5560C (CS555) Table 2 SafeCom P:Go Ricoh supported Ricoh printers Printer SafeCom VM Card P:Go Type SP C431DN, SP 5210DN 150xxx - SP C320DN, SP C430DN, 150xxx O SP 4310N, SP 5200DN SP 4210N, 110xxx K SP C820DN, SP C821DN SP C420DN, SP 8200DN 080xxx H JVM version 7.02 7.02 - Ricoh 8200DN | Administration Guide - Page 8
C7501SP, MP 2851, MP 3351, MP 4001, MP 5001, SP 5200S, SP 5210SF MP C3002, MP C3502 MP 4002, MP 5002, MP C4502, MP C5502, SafeCom Go Ricoh Type N SafeCom Go Ricoh Type L SafeCom Go Ricoh Type J SafeCom Go Ricoh Type I SafeCom Go Ricoh Type F Order license and USB ID device separately. Devices are - Ricoh 8200DN | Administration Guide - Page 9
MP 7500, MP 8000, MP 9000, MP C2000, MP C2500, MP C3000, MP C3500, MP C4500, Pro906EX, Pro1106EX, Pro1356E SafeCom Ricoh SD ID Kit: SafeCom Go Ricoh SD Card, SD ID Kit, a switch mode power supply (Input: 100-240V~, 50-60Hz/150mA, Output: 5V, 1.0A). Order license and serial ID device separately. Java - Ricoh 8200DN | Administration Guide - Page 10
Card Type O is required and MUST be ordered through a Ricoh reseller. SP 4210N, SP C820DN, SP C821DN Order license and USB ID device separately. Java VM Card Type K is required and MUST be ordered through a Ricoh reseller. SP C420DN, SP 8200DN Order license and USB ID device separately. Java VM Card - Ricoh 8200DN | Administration Guide - Page 11
SafeCom ID devices Table 3 SafeCom Go Ricoh supported SafeCom ID Devices Identification Method USB Serial Felica Reader SafeCom HID Reader 35 bit [E] SafeCom HID Reader 35 bit [R] SafeCom HID Reader 37 bit SafeCom iCLASS Reader [E] SafeCom iCLASS G3 Administrator's Manual D60603. D60703-17 11 - Ricoh 8200DN | Administration Guide - Page 12
control panel when SafeCom Go Ricoh is installed. Chapter 4 Using SafeCom P:Go Ricoh describes how to login by card and Pull Print on Ricoh printers. Chapter 5 Troubleshooting, contains hints for troubleshooting. Chapter 6 Regulatory information, contains regulatory information. D60703-17 12 - Ricoh 8200DN | Administration Guide - Page 13
MFPs: MP C300, MP C400, MP C2051, MP C2551, MP C3001SP, MP C3501SP, MP C4501SP, MP C5501SP, MP C6501SP and MP C7501SP. Support for Ricoh printers: SP C320DN, SP C430DN, and SP C431DN. The main screen will show the name of the logged in user. If the user is a Pay user, the credits is also shown - Ricoh 8200DN | Administration Guide - Page 14
Introduction of SafeCom P:Go for Ricoh printers (1.4 and 2.7.4). Device can reference multiple SafeCom servers (2.8.2). How to install SafeCom Go Ricoh via web page (2.10). Revision D60703-09 SafeCom Go Ricoh version S87 nnn.010*28 Support for Windows authentication (2.7.3). To increase - Ricoh 8200DN | Administration Guide - Page 15
Smart Printing Administrator's Quick Guide D10600. 1. SafeCom Go Ricoh hardware installation: Newer Ricoh: 1. Press the operation switch to turn off power. Wait for the On indicator to go off (stop blinking) and then turn off the main power switch. Disconnect the power cable. 2. Locate the printer - Ricoh 8200DN | Administration Guide - Page 16
ID device can be used. However, the SafeCom Ricoh SD ID Kit still needs to be installed to have copy control. Reconnect power: 8. Connect the power cable. Turn on the main power switch. Press the operation switch to turn on power. 9. The printer's control panel displays Please wait... for 30 seconds - Ricoh 8200DN | Administration Guide - Page 17
(admin) and Login Password (by default there is no password) and then click Login. 3. Click Configuration on the left menu. 4. Under Extended Feature Settings click Administrator Tools. 5. Change Heap Size to 16 MB. 6. Change Stack Size to 64 KB. 7. Click Apply. 8. Restart the printer. On Ricoh Type - Ricoh 8200DN | Administration Guide - Page 18
the JavaTM platform: 1. Open a web browser and enter the printer's address. Use of JavaScript (Active Scripting) must be enabled. 2. Click Login and enter Login User Name (admin) and Login Password (by default there is no password) and then click Login. 3. Click Configuration on the left menu - Ricoh 8200DN | Administration Guide - Page 19
2 SafeCom Go Ricoh 2.4.2 Legacy device type B Install the Java VM software from the card: 1. On the printer press the User Tools button (/123). 2. Tap . Tap Exit. 6. Tap Exit. Tap Exit. Power cycle printer: 1. Press the operation switch to turn off power. Wait for the On indicator to go - Ricoh 8200DN | Administration Guide - Page 20
SafeCom Go Ricoh (*.b87) file 1. Make sure the printer is powered on and ready. 2. Start SafeCom Administrator and login to the server. 3. Invoke the Add device function from the A) Devices menu, B) System overview or C) SafeCom Assistant as part of step 2 Add a SafeCom Pull Printer. 4. Enter the - Ricoh 8200DN | Administration Guide - Page 21
2) a password-protected part. 2.7.1 Login to the SafeCom Go Ricoh web interface 1. Open a web browser and enter the printer's address followed support issue, use Mail to SafeCom Support. In your email to [email protected], describe the issue in enough detail that SafeCom can reproduce the problem - Ricoh 8200DN | Administration Guide - Page 22
web page for printers is described in section 2.7.4. The configuration web page for Ricoh MP 171, MP 201F, and MP 201SPF are described in 2.7.5. Under SafeCom Server, click Broadcast to get a complete list of servers to select from, or enter Group name, SafeCom server TCP port (default is 7500) and - Ricoh 8200DN | Administration Guide - Page 23
2 SafeCom Go Ricoh Under Device enter specific details. Make sure to click Apply in the upper right corner when you allows the user to login by either card or by entering their Windows user name, password, and domain. The SafeCom G3 server must be a member of the domain or trusted by the domain. D60703 - Ricoh 8200DN | Administration Guide - Page 24
their Windows user name and password. Make sure the Default domain is specified, otherwise appropriate. Pull Print - collect documents at any printer. E- Manual D60603 High speed print allows faster printing. Print speed becomes comparable to that of printing the document directly to the printer - Ricoh 8200DN | Administration Guide - Page 25
and click Remove to remove them. 4. To enter a driver name manually, click Add driver and then Add. Timeout automatically logs users out after the specified amount of time. Timeout is configured in seconds with a default of 60. If there the printer requires intervention (IRQ), timeout is stopped so - Ricoh 8200DN | Administration Guide - Page 26
2 SafeCom Go Ricoh Use Send to Fax if SafeCom handles user authentication for Send to Fax (Send to Fax 13. Use Encryption to configure the maximum length of encryption keys. Refer to 2.8.14. Use Restore factory default to reset all settings back to their default values. Click Restore. D60703-17 26 - Ricoh 8200DN | Administration Guide - Page 27
your SafeCom Go Ricoh printer. Identification requires connecting an ID Device (card reader) to the USB port at the back of the printer. Under SafeCom Server, click Broadcast to get a complete list of servers to select from, or enter Group name, SafeCom server TCP port (default is 7500) and - Ricoh 8200DN | Administration Guide - Page 28
not printed until after the logged in user's jobs are done. Drivers safeguards document fidelity in the SafeCom solution. When pull printing, SafeCom compares the name of the printer driver embedded in the print job with the list of driver names returned by the SafeCom device. If there is no match - Ricoh 8200DN | Administration Guide - Page 29
201F, MP 201SPF Use the Configuration web page to configure SafeCom Go Ricoh for the above models. Identification requires connecting an ID Device (card reader) to the USB port at the back of the printer. Under Device enter specific details. Make sure to click Apply in the upper right corner when - Ricoh 8200DN | Administration Guide - Page 30
and click Remove to remove them. 4. To enter a driver name manually, click Add driver and then Add. Timeout automatically logs users out after the specified amount of time. Timeout is configured in seconds with a default of 60. If there the printer requires intervention (IRQ), timeout is stopped so - Ricoh 8200DN | Administration Guide - Page 31
2 SafeCom Go Ricoh 2.7.6 Register web page Use the Register web page to register the device with the SafeCom server. The printer can be used with SafeCom once it has been registered with the SafeCom server. 1. Enter the User logon and PIN code of a user with Technician - Ricoh 8200DN | Administration Guide - Page 32
2 SafeCom Go Ricoh 2.7.7 Log web page Use the Log web page to enable, disable and view log information. Only enable logging if advised to do so as part of a troubleshooting process. 1. Click Enable to start logging. 2. Click Disable to stop logging (text changes on the button). If the printer has - Ricoh 8200DN | Administration Guide - Page 33
2 SafeCom Go Ricoh 2.7.9 Password web page Use the Password web page to change the password. 2.7.10 Advanced web page Use the Advanced web page to configure parameters required for SafeCom Go Ricoh to authenticate the Nuance DigiDocFlow solution (2.8.16) NSi AutoStore (2.8.17) or Extended Feature - Ricoh 8200DN | Administration Guide - Page 34
Ricoh - How to The following subsections contain step-by-step instructions for some common administrator tasks. 2.8.1 Get the SafeCom Go Ricoh software The SafeCom Go Ricoh software files (*.b87) and SafeCom Go Ricoh uninstall files (*.uin) were installed from the SafeCom CD or can be downloaded - Ricoh 8200DN | Administration Guide - Page 35
Ricoh additional information about failover servers refer to SafeCom G3 Administrator's Manual D60603 If broadcasting fails you may have to directly enter effect. Wait, otherwise there may be a login error at the printer. 2.8.3 Resend configuration If a device added in the SafeCom Administrator - Ricoh 8200DN | Administration Guide - Page 36
password you need to uninstall SafeCom Go Ricoh. 2.8.6 Check SNMP settings If SNMP v1/v2 is disabled, SafeCom Go Ricoh is unable to obtain the correct MAC address of the printer and will report the MAC card reader) and possibly a SafeCom Go Ricoh SD ID Kit. 1. Open the Configuration web page - Ricoh 8200DN | Administration Guide - Page 37
password, and domain. If all users belong to the same domain you can avoid prompting users to enter the domain at the device. 1. Open the Configuration web page (2.7.3). 2. Specify a Default Have your Ricoh technician bring the Ricoh device into SP mode. SP-5401 Access Control: Default Document ACL - Ricoh 8200DN | Administration Guide - Page 38
Go Ricoh 1. On the printer press the User Tools button (/123). 2. On the touch-screen, tap System Settings and then tap Administrator Tools tab. 3. Tap Enhanced External charge Unit Management and select the functions you want to have access control for. The relevant functions include Copier - Ricoh 8200DN | Administration Guide - Page 39
2.8.11 Enable E-mail SafeCom Go Ricoh comes with its own intuitive E-mail function (3.1.5). 1. Open the Configuration web page (2.7.3). 2. Check E-mail in MFP authentication. 3. Make your selections in the E-mail section. 4. Click Apply. By default the From: field is not Editable and the To: field - Ricoh 8200DN | Administration Guide - Page 40
buttons are available in the E-mail dialog on the services touchscreen if you check Show (3.1.5.) Default file attachment can be Single-file or Multi-file. Default scan format can be TIFF or PDF. Default color mode can be Color, Grayscale, or Mono. Default job build can be Yes or No defining whether - Ricoh 8200DN | Administration Guide - Page 41
Enable Send to Fax SafeCom Go Ricoh comes with its own intuitive Send to Fax function (3.1.6). Note: the user John Smith with the e-mail address [email protected] will appear as: From: [email protected] Default From: address: Use if the user does not have an e-mail address. If this is not configured then - Ricoh 8200DN | Administration Guide - Page 42
Password of the administrator of the Ricoh MFP. 4. Click Apply. Note: Refer to the documentation l that came with the Ricoh MFP in order to learn how to build and maintain the Address Book. Note: Address Book support from the device is always encrypted. Pull printed documents are sent encrypted to - Ricoh 8200DN | Administration Guide - Page 43
2 SafeCom Go Ricoh 2.8.15 Control user access rights When using SafeCom G3 Server version S82 070.440*03 or newer, you can control users' access rights to specific features via SafeCom Administrator, refer to SafeCom G3 Administrator's Manual D60603. You can control access rights to the following - Ricoh 8200DN | Administration Guide - Page 44
2 SafeCom Go Ricoh The steps below need to be performed on the Ricoh device: 1. Increase the Heap Size on the Ricoh device to about 24 MB (2.3). 2. Open the Advanced web page (2.7.10). 3. Check Enable under External authentication. Leave all other fields at their default. 4. Click Apply. D60703-17 - Ricoh 8200DN | Administration Guide - Page 45
default 1. Open the Configuration web page (2.7.3). 2. Click Restore. 2.8.20 Determine the version The version of the SafeCom Go Ricoh properties dialog in SafeCom Administrator. 2.8.21 Uninstall SafeCom Go Ricoh 1. Make sure the printer is powered on and ready. 2. Start SafeCom Administrator - Ricoh 8200DN | Administration Guide - Page 46
(2.8.1) contains the Ricoh type specific subfolders, /ricoh_deploy_files_type_? Type C, F, I, J, L and N: 1. Open a web browser and enter the printer's address. Use of JavaScript (Active Scripting) must be enabled. 2. Click Login and enter Login User Name (admin) and Login Password (by default there - Ricoh 8200DN | Administration Guide - Page 47
Name (admin) and Login Password (by default there is no password) and then click Login. 3. Click Configuration on the left menu. 4. Under Extended Feature Settings click Install. 5. Select Local File and click Browse... to locate the Ricoh type specific subfolders, /ricoh_deploy_files_type_h and - Ricoh 8200DN | Administration Guide - Page 48
3 Using SafeCom Go Ricoh 3 Using SafeCom Go Ricoh 3.1 Ricoh Aficio MFPs 3.1.1 Control panel 3.1.2 Login The recommended login sequences are described in the following. Login with card: 1. Press the Other Function function button on the device. (Type B devices, press the Printer function button and - Ricoh 8200DN | Administration Guide - Page 49
Pull Print or E-mail icon or press the Copy function button. Login with user code: 1. Press the Other Function button on the device. (Type B devices press Printer and enter User name on the touch-screen. Tap OK. 4. Tap Password and enter Password on the touch-screen. Tap OK. 5. Tap Domain and enter - Ricoh 8200DN | Administration Guide - Page 50
3 Using SafeCom Go Ricoh 3.1.3 Pull print Tap Pull Print to access the Document list that allows you to print individual documents. Documents are listed chronologically with the newest at the top. If Print all at login is checked, documents pending collection are printed first. D60703-17 50 - Ricoh 8200DN | Administration Guide - Page 51
3 Using SafeCom Go Ricoh In the document list a document with a preceding R shows the document is to delete the selected documents. Tap Info for information about the selected documents, including cost, driver name, use of color and duplex. Tap Refresh to update the list of documents with - Ricoh 8200DN | Administration Guide - Page 52
3 Using SafeCom Go Ricoh 3.1.5 E-mail Tap the E-mail icon. The To: field can be pre-filled with the User e-mail, Blank or Default To: address. The From: field can be pre-filled with User e-mail, Device name, Blank or Default From: address. See 2.8.11. To enter an email address, tap the field enter - Ricoh 8200DN | Administration Guide - Page 53
Original [Mixed, Photo, Text] Attachment [PDF | TIFF] Color mode [Color, Grayscale, B/W] Resolution (dpi) [200, 300, 600] Single file attachment [Yes, No] Job Build [Yes, No] - allows multiple documents to be scanned to a single file. By default Job Build is turned off. Tap OK to return to - Ricoh 8200DN | Administration Guide - Page 54
3 Using SafeCom Go Ricoh 3.1.6 Send to Fax Tap the Send to Fax icon. In the To: and CC: field enter the receiver's fax number. The From: field can be pre-filled with User e-mail, Device name, Blank or Default From: address. See 2.8.12. Tap To, CC and Subject and use the touch-screen - Ricoh 8200DN | Administration Guide - Page 55
3 Using SafeCom Go Ricoh 3.1.7 Address Book Enable the Ricoh MFP's Address Book (2.8.13) and use it for easy selection of Email (3.1.5) and Send to Fax (3.1.6) recipients. Address Book support is NOT available on Type B models. Tap any Address Book button in E-mail or Send to Fax. In Find enter - Ricoh 8200DN | Administration Guide - Page 56
3 Using SafeCom Go Ricoh Send to Fax recipients look like this: Select the recipients and tap Add. 3.1.8 Logout There is a configurable Timeout with a default time of 60 seconds. Users are logged out if the device is idle for this period of time. To logout actively: Tap Logout in the - Ricoh 8200DN | Administration Guide - Page 57
3 Using SafeCom Go Ricoh 3.1.10 Register card with Windows logon 1. Use card reader. If there in this dialog. 2. Tap User name and enter User name on the touch-screen. Tap OK. 3. Tap Password and enter Password on the touch-screen. Tap OK. 4. Tap Domain and enter Domain on the touch-screen. Tap OK. - Ricoh 8200DN | Administration Guide - Page 58
3 Using SafeCom Go Ricoh 3.2 Ricoh Aficio MP 171, SP 201F, SP 201SPF 3.2.1 Control Panel 3.2.2 Login with card Use card reader 3.2.3 Pull Print Press the start key to start printing all jobs sent to the device. 3.2.4 Copy Press the Copy function button and then the Start button - Ricoh 8200DN | Administration Guide - Page 59
4 Using SafeCom P:Go Ricoh 4 Using SafeCom P:Go Ricoh 4.1 Pull Print 1. Use card reader. 2. If there are documents to be printed the data LED starts flashing and the documents are printed. 3. User is logged out. - Ricoh 8200DN | Administration Guide - Page 60
also easy to support. In the following you will find useful troubleshoot hints. The most common problems reported by end-users have been compiled into an online SafeCom Help Desk Assistant available at safecom.eu/help SafeCom Administrator: Cannot add Pull Device with no MAC Address If the SafeCom - Ricoh 8200DN | Administration Guide - Page 61
FCC rules. This equipment generates, uses, and can radiate radio frequency energy and if not installed and used in accordance with the instruction manual, may cause interference to radio communications. It has been tested and found to comply with the limits for a Class A computing device pursuant - Ricoh 8200DN | Administration Guide - Page 62
, 35 SafeCom Go Ricoh, 5, 8, 15 Printer firmware, 6, 7 SafeCom Help Desk Assistant, 60 Send to e-mail, 24, 30 Send to folder, 24, 30 System requirements SafeCom Go Ricoh, 5, 8 Timeout, 25, 30 Trace facility, 60 Tracking data adjustment, 24, 27, 30 Trademarks, 2 Troubleshooting, 60 Update software
-
 1
1 -
 2
2 -
 3
3 -
 4
4 -
 5
5 -
 6
6 -
 7
7 -
8
-
9
-
10
-
11
-
12
-
13
-
14
-
15
-
16
-
17
-
18
-
19
-
20
-
21
-
22
-
23
-
24
-
25
-
26
-
27
-
28
-
29
-
30
-
31
-
32
-
33
-
34
-
35
-
36
-
37
-
38
-
39
-
40
-
41
-
42
-
43
-
44
-
45
-
46
-
47
-
48
-
49
-
50
-
51
-
52
-
53
-
54
-
55
-
56
-
57
-
58
-
59
-
60
-
61
-
62
 |
 |

SafeCom Go Ricoh
Administrator’s Manual
D60703-17
April 2012