Roku R1000 User Guide - Page 67
Steps for using Windows Connect Now, Multiple Wi-Fi Networks - driver
 |
UPC - 829610841199
View all Roku R1000 manuals
Add to My Manuals
Save this manual to your list of manuals |
Page 67 highlights
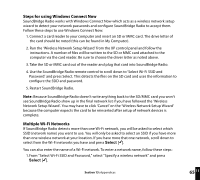
Steps for using Windows Connect Now SoundBridge Radio works with Windows Connect Now which acts as a wireless network setup wizard to detect your network passwords and configure SoundBridge Radio to accept them. Follow these steps to use Windows Connect Now: 1. Connect a card reader to your computer and insert an SD or MMC card. The drive letter of the card should be noted (this can be found in My Computer). 2. Run the 'Wireless Network Setup Wizard' from the XP control panel and follow the instructions. A number of files will be written to the SD or MMC card attached to the computer via the card reader. Be sure to choose the driver letter as noted above. 3. Take the SD or MMC card out of the reader and plug that card into SoundBridge Radio. 4. Use the SoundBridge Radio remote control to scroll down to 'Select Wi-Fi SSID and Password' and press Select. This detects the files on the SD card and uses the information to configure the SSID and password. 5. Restart SoundBridge Radio. Note: Because SoundBridge Radio doesn't write anything back to the SD/MMC card you won't see SoundBridge Radio show up in the final network list if you have followed the 'Wireless Network Setup Wizard'. You may have to click 'Cancel' on the 'Wireless Network Setup Wizard' because the computer expects the card to be reinserted after setup of network devices is complete. Multiple Wi-Fi Networks If SoundBridge Radio detects more than one Wi-Fi network, you will be asked to select which SSID (network name) you want to use. You will only be asked to select an SSID if you have more than one wireless network at your location. If you have more that one network, scroll down to select from the Wi-Fi networks you have and press Select [ ]. You can also enter the name of a Wi-Fi network. To enter a network name, follow these steps: 1. From "Select Wi-Fi SSID and Password," select "Specify a wireless network" and press Select [ ]. Section 13: Appendices 11 65 13
-
 1
1 -
2
-
3
-
4
-
5
-
6
-
7
-
8
-
9
-
10
-
11
-
12
-
13
-
14
-
15
-
16
-
17
-
18
-
19
-
20
-
21
-
22
-
23
-
24
-
25
-
26
-
27
-
28
-
29
-
30
-
31
-
32
-
33
-
34
-
35
-
36
-
37
-
38
-
39
-
40
-
41
-
42
-
43
-
44
-
45
-
46
-
47
-
48
-
49
-
50
-
51
-
52
-
53
-
54
-
55
-
56
-
57
-
58
-
59
-
60
-
61
-
 62
62 -
 63
63 -
 64
64 -
 65
65 -
 66
66 -
 67
67 -
 68
68 -
 69
69 -
 70
70 -
 71
71 -
 72
72 -
73
-
74
-
75
-
76
-
77
-
78
-
79
-
80
-
81
-
82
-
83
-
84
-
85
-
86
-
87
-
88
 |
 |
