Samsung CLP 610ND SyncThru 5.0 Device Map Plug-in Guide (ENGLISH) - Page 12
Quick start
 |
UPC - 635753720587
View all Samsung CLP 610ND manuals
Add to My Manuals
Save this manual to your list of manuals |
Page 12 highlights
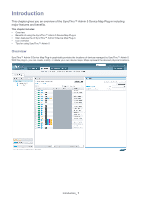
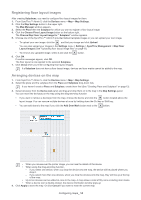
Quick start 3. This chapter explains a quick way to start map configuration. If you are familiar with the Device Map Plug-in, you can skip the detailed information and begin map configuration with this chapter. If you want detailed information, go to the Configuring map chapter (See "Configuring maps" on page 13). This chapter include steps for starting map configuration: • 1. Configuring the locations • 2. Registering floor layout images to a location • 3. Arranging devices 1. Configuring the locations First of all, you need to know where the devices are located. SyncThru™ Admin 5 provides a two-level location definition system: Place and Subplace. Subplace should be included under the Place. Maps can be created only with Subplace. 1. From SyncThru™ Admin 5, click the Devices menu Map > Map Settings. 2. Click the Map Settings button on the upper right. The Map Manager window appears. 3. Use the , and buttons to configure devices' locations based on the physical organization of your workplace. You can only create a Subplace after creating a Place. 2. Registering floor layout images to a location After configuring the locations, you need to set the floor layout images for each location. 1. From SyncThru™ Admin 5, click the Devices menu Map > Map Settings. 2. Click the Map Settings button on the upper right. The Map Manager window appears. Make sure that the Places panel has the location you want to configure. Otherwise, you need to configure it first (See "1. Configuring the locations" on page 12). 3. Choose the Subplace for which you want to configure a floor layout image. 4. Click the Choose Floor Layout Image button. The Choose Map Floor Layout for " Subplace" window appears. 5. Choose the floor layout and click OK. 3. Arranging devices Now you can configure devices within the maps. 1. From SyncThru™ Admin 5, click the Devices menu > Map > Map Settings. 2. Select the Place and Subplace from the drop-down list on the upper left. 3. Arrange the devices on the map using the drag-and-drop function (See "Drag-and-drop" on page9). You can add doors to a map if you click the Add Door Mark button. Quick start_ 12
-
 1
1 -
2
-
3
-
4
-
5
-
6
-
 7
7 -
 8
8 -
 9
9 -
 10
10 -
 11
11 -
 12
12 -
 13
13 -
 14
14 -
 15
15 -
 16
16 -
 17
17 -
18
-
19
-
20
-
21
-
22
-
23
-
24
-
25
-
26
-
27
-
28
-
29
-
30
-
31
-
32
-
33
-
34
-
35
-
36
-
37
-
38
-
39
 |
 |
