Samsung CLP 610ND SyncThru 5.0 Device Map Plug-in Guide (ENGLISH) - Page 19
Related features - troubleshooting
 |
UPC - 635753720587
View all Samsung CLP 610ND manuals
Add to My Manuals
Save this manual to your list of manuals |
Page 19 highlights
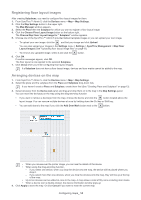
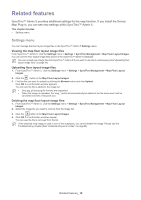
Related features 8. SyncThru™ Admin 5 provides additional settings for the map function. If you install the Device Map Plug-in, you can see new settings within SyncThru™ Admin 5. This chapter includes: • Settings menu Settings menu You can manage the floor layout image files in the SyncThru™ Admin 5 Settings menu. Viewing the map floor layout image files From SyncThru™ Admin 5, click the Settings menu > Settings > SyncThru Management > Map Floor Layout Images. You can see the floor layout image files stored in the SyncThru™ Admin 5 database. You can upload new image files into SyncThru™ Admin 5 if you want to use them continuously (See"Uploading floor layout image files" on page 19). Uploading floor layout image files 1. From SyncThru™ Admin 5, click the Settings menu > Settings > SyncThru Management > Map Floor Layout Images. 2. Click the button in the Map Floor Layout Images. 3. Find the file you want to upload by clicking the Browse button and click Upload. Click OK if a confirmation window appears. You can see the file is added to the image list. • Only jpg, gif and png file formats are supported. • When the image is uploaded, the 'map_' prefix will automatically be added to the file-name and it will be converted into 400 x 400 pixel size. Deleting the map floor layout image files 1. From SyncThru™ Admin 5, click the Settings menu > Settings > SyncThru Management > Map Floor Layout Images. 2. Select the image file you want to remove from the image list. 3. Click the button in the Map Floor Layout Images. 4. Click OK if a confirmation windows appear. You can see the file is removed from the list If the selected map image is used in one of the subplaces, you cannot delete the image. Please see the Troubleshooting chapter (See "Understanding error codes" on page 20). Related features_ 19
-
 1
1 -
2
-
3
-
4
-
5
-
6
-
7
-
8
-
9
-
10
-
11
-
12
-
13
-
 14
14 -
 15
15 -
 16
16 -
 17
17 -
 18
18 -
 19
19 -
 20
20 -
 21
21 -
 22
22 -
 23
23 -
 24
24 -
25
-
26
-
27
-
28
-
29
-
30
-
31
-
32
-
33
-
34
-
35
-
36
-
37
-
38
-
39
 |
 |
