Samsung DVDVR357 User Manual (ENGLISH) - Page 10
Unpacking, Accessories, Connecting the Power Cord, Step 4 : Playing, Step 5 : Editing a recorded disc - battery
 |
UPC - 036725607774
View all Samsung DVDVR357 manuals
Add to My Manuals
Save this manual to your list of manuals |
Page 10 highlights
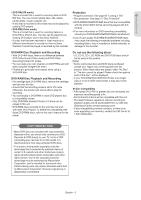
Getting Started ▌Step 4 : Playing To start playback, select the title you want to play from the title list. A DVD consists of sections called titles, and sub sections called chapters. During recording, a title is created between two points where you start and stop recording. Chapters will be created automatically when you finalize recording on DVD-R/DVD-RW discs in Video mode. You can make your own chapters on DVD+RWs and edit them using the Chapter Edit menu. The chapter's length (interval between chapters) varies according to the recording mode. ▌Step 5 : Editing a recorded disc Editing on discs is easier than conventional video tapes. The recorder supports many different edit functions, possible only with DVDs. With a simple and easy edit menu, you can operate various edit functions, such as delete, copy, rename, lock, etc., on a recorded title. Creating a playlist (DVD-RAM/-RW in VR mode) With this recorder, you can create/edit a new playlist on the same disc without changing the original recording. Unpacking ▌Accessories Check for the supplied accessories below. Video/Audio Cable (AC39-00073A) IR Blaster cable (AK39-00055A) Remote Control (AK59-00062A) Batteries for Remote Control (AAA Size) (AC43-12002H) ▌Step 6 : Finalizing & Playing on other DVD components To play your DVD on other DVD players, finalizing may be necessary. First, finish all editing and recording operations, then finalize the disc. When using a DVD-RW disc in VR Mode Although finalizing is generally unnecessary when playing the disc on a VR Mode compatible component, a finalized disc should be used for playback. When using a DVD-RW disc in Video Mode The disc should be finalized first to enable playback on anything other than this recorder. No more editing or recording can be made on the disc once it has been finalized. When using a DVD±R disc You should finalize the disc to play it on other DVD players. No more editing or recording can be made on the disc once it has been finalized. Instruction Manual (AK68-01287A) Quick Guide (AK68-01288A) ▌Connecting the Power Cord After all connections are complete, plug the power cord into a wall outlet. ■ You can finalize automatically using the EZ REC MODE. (See page 59) English - 10
-
 1
1 -
2
-
3
-
4
-
 5
5 -
 6
6 -
 7
7 -
 8
8 -
 9
9 -
 10
10 -
 11
11 -
 12
12 -
 13
13 -
 14
14 -
 15
15 -
16
-
17
-
18
-
19
-
20
-
21
-
22
-
23
-
24
-
25
-
26
-
27
-
28
-
29
-
30
-
31
-
32
-
33
-
34
-
35
-
36
-
37
-
38
-
39
-
40
-
41
-
42
-
43
-
44
-
45
-
46
-
47
-
48
-
49
-
50
-
51
-
52
-
53
-
54
-
55
-
56
-
57
-
58
-
59
-
60
-
61
-
62
-
63
-
64
-
65
-
66
-
67
-
68
-
69
-
70
-
71
-
72
-
73
-
74
-
75
-
76
-
77
-
78
-
79
-
80
-
81
-
82
-
83
-
84
-
85
-
86
-
87
-
88
-
89
 |
 |
