Sanyo VPC E1 Instruction Manual, VPC-E1000 - Page 27
Photography Mode
 |
UPC - 086483067532
View all Sanyo VPC E1 manuals
Add to My Manuals
Save this manual to your list of manuals |
Page 27 highlights
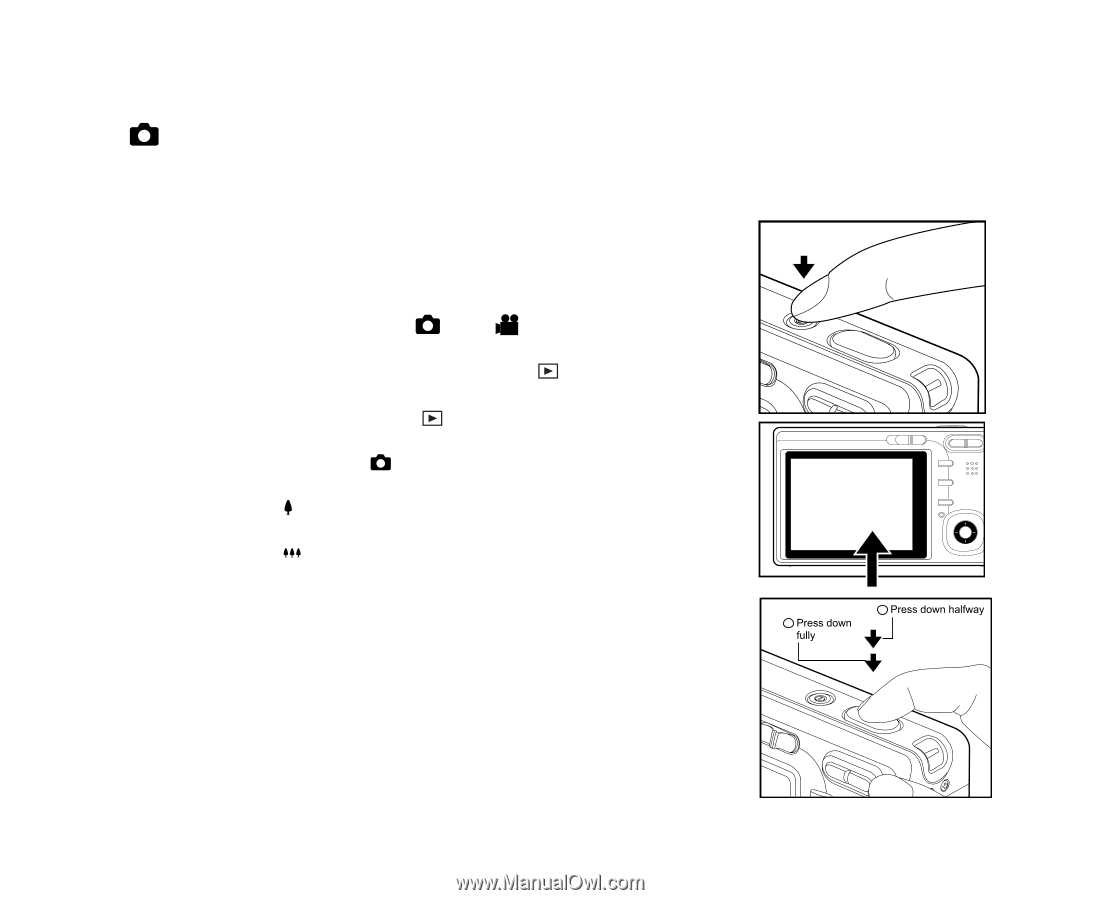
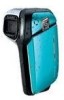
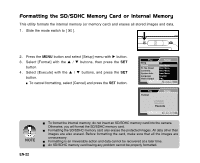
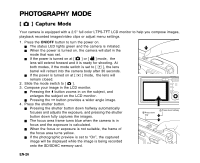
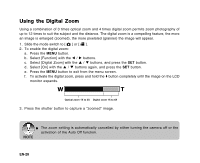
PHOTOGRAPHY MODE [ ] Capture Mode Your camera is equipped with a 2.5" full color LTPS-TFT LCD monitor to help you compose images, playback recorded images/video clips or adjust menu settings. 1. Press the ON/OFF button to turn the power on. The status LED lights green and the camera is initiated. When the power is turned on, the camera will start in the mode that was set. If the power is turned on at [ ] or [ ] mode, the lens will extend forward and it is ready for shooting. At both modes, if the mode switch is set to [ ], the lens barrel will retract into the camera body after 30 seconds. If the power is turned on at [ ] mode, the lens will remain closed. 2. Slide the mode switch to [ ]. 3. Compose your image in the LCD monitor. Pressing the button zooms in on the subject, and enlarges the subject on the LCD monitor. Pressing the button provides a wider angle image. 4. Press the shutter button. Pressing the shutter button down halfway automatically focuses and adjusts the exposure, and pressing the shutter button down fully captures the images. The focus area frame turns blue when the camera is in focus and the exposure is calculated. When the focus or exposure is not suitable, the frame of the focus area turns yellow. If the photographic preview is set to "On", the captured image will be displayed while the image is being recorded onto the SD/SDHC memory card. a b EN-26
-
 1
1 -
2
-
3
-
4
-
5
-
6
-
7
-
8
-
9
-
10
-
11
-
12
-
13
-
14
-
15
-
16
-
17
-
18
-
19
-
20
-
21
-
 22
22 -
 23
23 -
 24
24 -
 25
25 -
 26
26 -
 27
27 -
 28
28 -
 29
29 -
 30
30 -
 31
31 -
 32
32 -
33
-
34
-
35
-
36
-
37
-
38
-
39
-
40
-
41
-
42
-
43
-
44
-
45
-
46
-
47
-
48
-
49
-
50
-
51
-
52
-
53
-
54
-
55
-
56
-
57
-
58
-
59
-
60
-
61
-
62
-
63
-
64
-
65
-
66
-
67
 |
 |