Sharp FO-2080 FO-2080 Operation Manual for General Use - Page 52
Select whether or not you wish the printer to be your default
 |
View all Sharp FO-2080 manuals
Add to My Manuals
Save this manual to your list of manuals |
Page 52 highlights
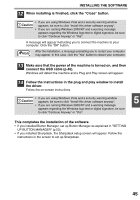
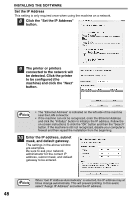
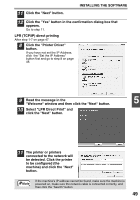
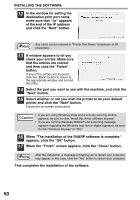
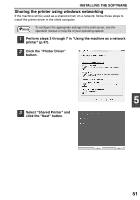
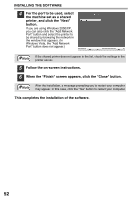
INSTALLING THE SOFTWARE 12 In the window for setting the destination print port name, make sure that ":lp" appears at the end of the IP address and click the "Next" button. Note Any name can be entered in "Printer Port Name" (maximum of 38 characters). 13 A window appears to let you check your entries. Make sure that the entries are correct and then click the "Finish" button. If any of the entries are incorrect, click the "Back" button to return to the appropriate window and correct the entry. 14 Select the port you want to use with the machine, and click the "Next" button. 15 Select whether or not you wish the printer to be your default printer and click the "Next" button. Follow the on-screen instructions. Caution • If you are using Windows Vista and a security warning window appears, be sure to click "Install this driver software anyway". • If you are running Windows 2000/XP and a warning message appears regarding the Windows logo test or digital signature, be sure to click "Continue Anyway" or "Yes". 16 When "The installation of the SHARP software is complete." appears, click the "OK" button. 17 When the "Finish" screen appears, click the "Close" button. Note After the installation, a message prompting you to restart your computer may appear. In this case, click the "Yes" button to restart your computer. This completes the installation of the software. 50
-
 1
1 -
2
-
3
-
4
-
5
-
6
-
7
-
8
-
9
-
10
-
11
-
12
-
13
-
14
-
15
-
16
-
17
-
18
-
19
-
20
-
21
-
22
-
23
-
24
-
25
-
26
-
27
-
28
-
29
-
30
-
31
-
32
-
33
-
34
-
35
-
36
-
37
-
38
-
39
-
40
-
41
-
42
-
43
-
44
-
45
-
46
-
 47
47 -
 48
48 -
 49
49 -
 50
50 -
 51
51 -
 52
52 -
 53
53 -
 54
54 -
 55
55 -
 56
56 -
 57
57 -
58
-
59
-
60
-
61
-
62
-
63
-
64
-
65
-
66
-
67
-
68
-
69
-
70
-
71
-
72
-
73
-
74
-
75
-
76
-
77
-
78
-
79
-
80
-
81
-
82
-
83
-
84
-
85
-
86
-
87
-
88
-
89
-
90
-
91
-
92
-
93
-
94
-
95
-
96
-
97
-
98
-
99
-
100
-
101
-
102
-
103
-
104
-
105
-
106
-
107
-
108
-
109
-
110
-
111
-
112
 |
 |
