Sony DCR-HC36 Operating Guide - Page 59
PICT.APPLI. menu
 |
UPC - 027242688667
View all Sony DCR-HC36 manuals
Add to My Manuals
Save this manual to your list of manuals |
Page 59 highlights
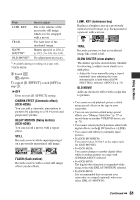
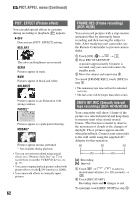
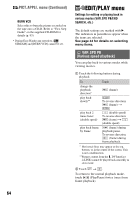
NEW FOLDER You can create a new folder (102MSDCF to 999MSDCF) on a "Memory Stick Duo." When 9,999 images are stored in the current folder, a new folder is automatically created for storing subsequent images. Touch [YES] t . • You cannot delete the created folders using your camcorder. You will have to format the "Memory Stick Duo" (p. 58), or delete them using your computer. • The number of recordable pictures on a "Memory Stick Duo" may decrease as the number of folders increases. REC FOLDER (Recording folder) Select the folder to be used for recording with / , then touch . • As the default setting, pictures are saved in the 101MSDCF folder. • Once you record a picture in a folder, the same folder will be set as the default folder for playback. PB FOLDER (Playback folder) Select the playback folder with / , then touch . PICT.APPLI. menu Special effects on pictures or additional functions on recording/playback (SLIDE SHOW/PICT. EFFECT/FRAME REC, etc.) The default settings are marked with B. The indicators in parentheses appear when the items are selected. See page 44 for details on selecting menu items. FADER You can add the following effects to currently recording pictures. 1 Select the desired effect in standby mode (to fade in) or recording mode (to fade out), then touch . When [OVERLAP], [WIPE] or [DOT FADER] is selected, the screen turns to blue while storing the image, then the image on a tape is stored as a still image. 2 Press REC START/STOP. The fader indicator stops flashing and disappears when the fade is complete. To cancel [FADER] before starting the operation, touch [OFF] in step 1. • If you press REC START/STOP once, the setting is canceled. STBY Fading out WHITE FADER REC Fading in Using the Menu BLACK FADER MOSAIC FADER MONOTONE When fading in, the picture gradually changes from black and white to color. When fading out, it gradually changes from color to black and white. Continued , 59
-
 1
1 -
2
-
3
-
4
-
5
-
6
-
7
-
8
-
9
-
10
-
11
-
12
-
13
-
14
-
15
-
16
-
17
-
18
-
19
-
20
-
21
-
22
-
23
-
24
-
25
-
26
-
27
-
28
-
29
-
30
-
31
-
32
-
33
-
34
-
35
-
36
-
37
-
38
-
39
-
40
-
41
-
42
-
43
-
44
-
45
-
46
-
47
-
48
-
49
-
50
-
51
-
52
-
53
-
 54
54 -
 55
55 -
 56
56 -
 57
57 -
 58
58 -
 59
59 -
 60
60 -
 61
61 -
 62
62 -
 63
63 -
 64
64 -
65
-
66
-
67
-
68
-
69
-
70
-
71
-
72
-
73
-
74
-
75
-
76
-
77
-
78
-
79
-
80
-
81
-
82
-
83
-
84
-
85
-
86
-
87
-
88
-
89
-
90
-
91
-
92
-
93
-
94
-
95
-
96
-
97
-
98
-
99
-
100
-
101
-
102
-
103
-
104
-
105
-
106
-
107
-
108
-
109
-
110
-
111
-
112
-
113
-
114
-
115
-
116
-
117
-
118
-
119
-
120
-
121
-
122
-
123
-
124
-
125
-
126
-
127
-
128
-
129
-
130
-
131
-
132
-
133
-
134
-
135
-
136
-
137
-
138
-
139
-
140
 |
 |
