Sony HTCT500 Operating Instructions - Page 61
BRAVIA Sync features, BD, DVD, SAT/CATV, and repeat step
 |
UPC - 027242757561
View all Sony HTCT500 manuals
Add to My Manuals
Save this manual to your list of manuals |
Page 61 highlights
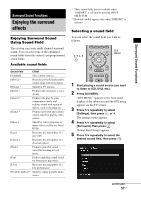
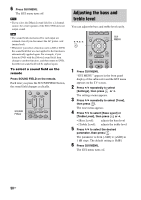
"BRAVIA" Sync features 4 Set the Control for HDMI function of the TV to on. The Control for HDMI function for the system and the connected component is simultaneously set to on. During the setting, "SCANNING" appears in the front panel display. After you finish the setting, "COMPLETE" appears in the front panel display. Wait until the setting is complete. If "SCANNING" or "COMPLETE" does not appear after performing the steps above Set the Control for HDMI function to on for the system and the connected component individually. 1 Press GUI MENU. "GUI MENU" appears in the front panel display of the subwoofer and the GUI menu appears on the TV screen. 2 Press X/x repeatedly to select [Settings], then press or c. The settings menu appears. 3 Press X/x repeatedly to select [HDMI], then press . The HDMI menu appears. 4 Press X/x repeatedly to select [Control for HDMI], then press or c. 5 Press X/x to select [ON], then press . The Control for HDMI is set to on. 6 Press GUI MENU. The GUI menu turns off. 7 Set the Control for HDMI function of the connected component to on. For details, refer to the operating instructions of the connected component. 8 Select the input of the system connected to the component you want to use the Control for HDMI function for (BD, DVD, SAT/CATV), and repeat step 7. If you add or reconnect the component Perform the steps in "Preparing for the "BRAVIA" Sync" and "If "SCANNING" or "COMPLETE" does not appear after performing the steps above" again. Notes • While setting the Control for HDMI function for the system, the System Audio Control function does not work. • If the Control for HDMI function for the connected component cannot be set simultaneously by setting "Control for HDMI" of the TV, set the Control for HDMI function using the menu of the connected component. • For details on setting the TV and the connected components, refer to their operating instructions. Tip • The default setting of the Control for HDMI function of the system is [ON]. 61US
-
 1
1 -
2
-
3
-
4
-
5
-
6
-
7
-
8
-
9
-
10
-
11
-
12
-
13
-
14
-
15
-
16
-
17
-
18
-
19
-
20
-
21
-
22
-
23
-
24
-
25
-
26
-
27
-
28
-
29
-
30
-
31
-
32
-
33
-
34
-
35
-
36
-
37
-
38
-
39
-
40
-
41
-
42
-
43
-
44
-
45
-
46
-
47
-
48
-
49
-
50
-
51
-
52
-
53
-
54
-
55
-
 56
56 -
 57
57 -
 58
58 -
 59
59 -
 60
60 -
 61
61 -
 62
62 -
 63
63 -
 64
64 -
 65
65 -
 66
66 -
67
-
68
-
69
-
70
-
71
-
72
-
73
-
74
-
75
-
76
-
77
-
78
-
79
-
80
-
81
-
82
-
83
-
84
-
85
-
86
-
87
-
88
-
89
-
90
-
91
-
92
-
93
-
94
-
95
-
96
-
97
-
98
-
99
-
100
-
101
-
102
-
103
-
104
-
105
-
106
-
107
-
108
-
109
-
110
-
111
-
112
-
113
-
114
-
115
-
116
-
117
-
118
-
119
-
120
-
121
-
122
-
123
-
124
-
125
-
126
-
127
-
128
-
129
-
130
-
131
-
132
-
133
-
134
-
135
-
136
-
137
-
138
-
139
-
140
-
141
-
142
-
143
-
144
-
145
-
146
-
147
-
148
-
149
-
150
-
151
-
152
-
153
-
154
-
155
-
156
-
157
-
158
-
159
-
160
-
161
-
162
-
163
-
164
-
165
-
166
-
167
-
168
-
169
-
170
-
171
-
172
-
173
-
174
-
175
-
176
-
177
-
178
-
179
-
180
-
181
-
182
-
183
-
184
-
185
-
186
-
187
-
188
-
189
-
190
-
191
-
192
-
193
-
194
-
195
-
196
-
197
-
198
-
199
-
200
-
201
-
202
-
203
-
204
-
205
-
206
-
207
-
208
-
209
-
210
-
211
-
212
-
213
-
214
-
215
-
216
-
217
-
218
-
219
-
220
-
221
-
222
-
223
-
224
-
225
-
226
-
227
-
228
-
229
-
230
-
231
-
232
-
233
-
234
-
235
-
236
-
237
-
238
-
239
-
240
-
241
-
242
-
243
-
244
-
245
-
246
-
247
-
248
-
249
-
250
-
251
-
252
-
253
-
254
-
255
-
256
-
257
-
258
-
259
-
260
-
261
-
262
-
263
-
264
-
265
-
266
-
267
-
268
-
269
-
270
-
271
-
272
-
273
-
274
-
275
-
276
-
277
-
278
-
279
-
280
-
281
-
282
-
283
-
284
-
285
-
286
-
287
-
288
-
289
-
290
-
291
-
292
-
293
-
294
-
295
-
296
-
297
-
298
-
299
-
300
-
301
-
302
-
303
-
304
-
305
-
306
-
307
-
308
-
309
-
310
-
311
-
312
-
313
-
314
-
315
-
316
-
317
-
318
-
319
-
320
-
321
-
322
-
323
-
324
-
325
-
326
-
327
-
328
-
329
-
330
-
331
-
332
-
333
-
334
-
335
-
336
-
337
-
338
-
339
-
340
 |
 |
