Sony KDL-40SL140 Operating Instructions - Page 8
Bundling the Connecting Cables, Preparation for Wall-Mounting - tv
 |
UPC - 027242248960
View all Sony KDL-40SL140 manuals
Add to My Manuals
Save this manual to your list of manuals |
Page 8 highlights
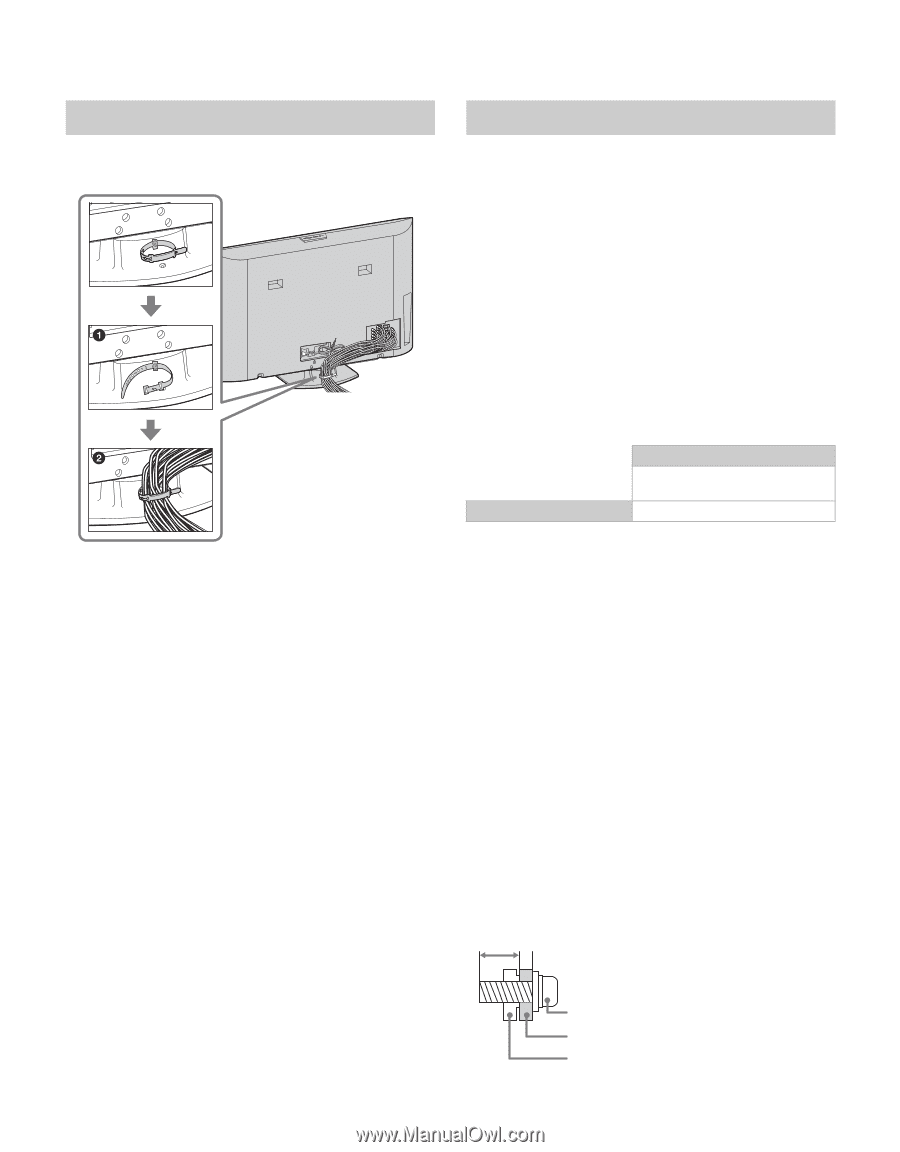
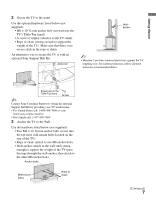
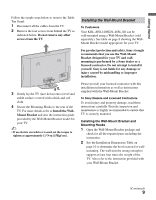
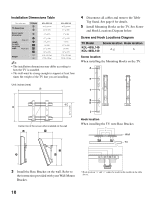
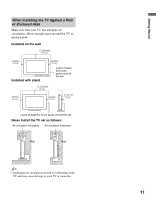
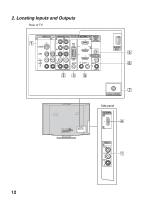
Bundling the Connecting Cables You can bundle the connecting cables as illustrated below. ~ • Do not bundle the AC power cord with other connecting cables. Preparation for Wall-Mounting This TV can be installed on a wall by using a WallMount Bracket (sold separately). Before mounting the TV on a wall, the Table-Top Stand must be removed from the TV. ~ • Do not remove the Table-Top Stand for any reason other than to wall-mount the TV. • For product protection and safety reasons, Sony strongly recommends that you use the Wall-Mount Bracket model designed for your TV and the wallmounting of your TV should be performed by a Sony dealer or licensed contractor. Use your TV with the following WALL-MOUNT BRACKET only. Sony TV Model No. KDL-40SL140 KDL-46SL140 Sony Wall-Mount Bracket Model No. SU-WL500 • For bracket installation, refer to the instructions on page 9 and the instruction guide provided by the WallMount Bracket model for your TV. Sufficient expertise is required for installing this TV, especially to determine the strength of the wall that will withstand the TV's weight. • Be sure to store the removed screws and Table-Top Stand in a safe place until you are ready to reattach the Table-Top Stand. Keep the screws away from children. • Be sure to use the screws supplied with the Wall-Mount Bracket when attaching the mounting hooks to the TV set. The supplied screws are designed so that they are 8 mm to 12 mm in length when measured from the attaching surface of the mounting hook. The diameter and length of the screws differ depending on the Wall-Mount Bracket model. Use of screws other than those supplied may result in internal damage to the TV set or cause it to fall, etc. 8-12 mm Screw (supplied with the Wall-Mount Bracket) Mounting Hook Rear of the TV set 8
-
 1
1 -
2
-
 3
3 -
 4
4 -
 5
5 -
 6
6 -
 7
7 -
 8
8 -
 9
9 -
 10
10 -
 11
11 -
 12
12 -
 13
13 -
14
-
15
-
16
-
17
-
18
-
19
-
20
-
21
-
22
-
23
-
24
-
25
-
26
-
27
-
28
-
29
-
30
-
31
-
32
-
33
-
34
-
35
-
36
-
37
-
38
-
39
-
40
-
41
-
42
-
43
-
44
-
45
-
46
-
47
-
48
 |
 |