Sony LF-B1 Setting and Usage Guide for PSP™ System (for PSP firmware - Page 15
Read the Dynamic DNS Terms-of, on, select [Next], and then press
 |
View all Sony LF-B1 manuals
Add to My Manuals
Save this manual to your list of manuals |
Page 15 highlights
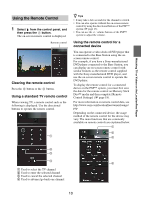
4 Select [Enter], and then press the button. 7 Follow the on-screen instructions to confirm the NETWORK LED is turned on, select [Next], and then press the button. Watching TV or Videos Away From Home The password input screen appears. 5 Enter the user name and password, select [OK], and then press the button. User name: lfx (lowercase letters) (The user name cannot be changed) Initial password: WebPassword printed on the sticker of the Base Station z Tip If the NETWORK LED is off, check that the router is turned on and the network cable is connected properly. 8 Read the "Dynamic DNS Terms-of- Use Agreement" included with the Base Station, select [Agree], and then press the button. The screen shown in step 6 appears when you log in to [Base Station Settings]. 6 Select [Easy Setup], and then press the button. The information required for the dynamic DNS is saved to the Base Station. z Tip Dynamic DNS is one of the network services used to connect to the Base Station from outside your home. By selecting [Agree], you can use the Dynamic DNS service that is registered as part of the Base Station. If you will not be using this Dynamic DNS, you can change settings under [Advanced Settings] (1 page 20). The [Easy Setup] screen appears. 15
-
 1
1 -
2
-
3
-
4
-
5
-
6
-
7
-
8
-
9
-
 10
10 -
 11
11 -
 12
12 -
 13
13 -
 14
14 -
 15
15 -
 16
16 -
 17
17 -
 18
18 -
 19
19 -
 20
20 -
21
-
22
-
23
-
24
-
25
-
26
-
27
-
28
-
29
-
30
 |
 |
