Sony PCV-E314DS Reference Manual - Page 52
Installing an Internal Hard Disk Drive, Removing the Left Side Panel
 |
View all Sony PCV-E314DS manuals
Add to My Manuals
Save this manual to your list of manuals |
Page 52 highlights
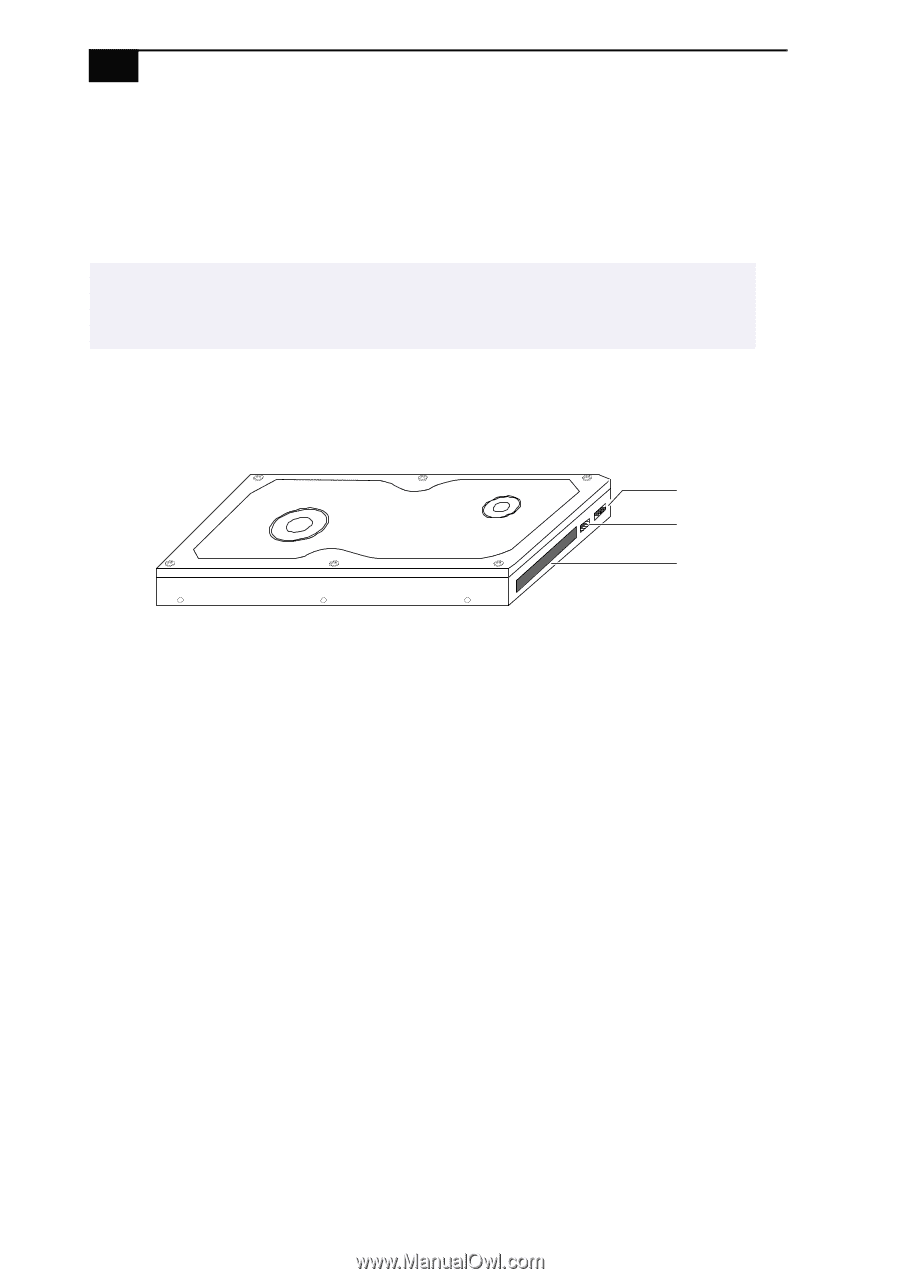
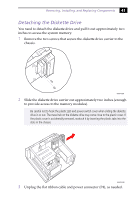
44 VAIO Digital Studio Reference Manual Installing an Internal Hard Disk Drive Your system comes with an available bay to hold an additional hard disk drive. The drive you install must not require front panel access. The hard disk drive access light blinks when either internal drive is active. ! Before opening the system unit, save any open files, exit Windows, turn off the power of the computer and all attached peripherals, and then unplug the power cord. 1 Configure the jumpers on the new drive as a secondary master (see your drive's documentation for configuration instructions). Power connector Jumpers Drive connector KY0084.VSD 2 Remove the left side panel (see "Removing the Left Side Panel" on page 24). 3 Remove the front panel (see "Removing the Front Panel" on page 26). 4 Remove the bottom panel (see "Removing the Bottom Panel" on page 25). 5 Lay the system on its right side (left side faces up - see diagram that follows). 6 Remove the two screws (A) that secure the drive holder.
-
 1
1 -
2
-
3
-
4
-
5
-
6
-
7
-
8
-
9
-
10
-
11
-
12
-
13
-
14
-
15
-
16
-
17
-
18
-
19
-
20
-
21
-
22
-
23
-
24
-
25
-
26
-
27
-
28
-
29
-
30
-
31
-
32
-
33
-
34
-
35
-
36
-
37
-
38
-
39
-
40
-
41
-
42
-
43
-
44
-
45
-
46
-
 47
47 -
 48
48 -
 49
49 -
 50
50 -
 51
51 -
 52
52 -
 53
53 -
 54
54 -
 55
55 -
 56
56 -
 57
57 -
58
-
59
-
60
-
61
-
62
-
63
-
64
-
65
-
66
-
67
-
68
-
69
-
70
-
71
-
72
-
73
-
74
-
75
-
76
-
77
-
78
-
79
-
80
-
81
-
82
-
83
-
84
-
85
-
86
-
87
-
88
-
89
-
90
-
91
-
92
-
93
-
94
-
95
-
96
-
97
-
98
-
99
-
100
-
101
-
102
-
103
-
104
-
105
-
106
-
107
-
108
-
109
-
110
-
111
-
112
-
113
-
114
 |
 |