Sony PCV-E314DS Reference Manual - Page 55
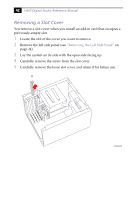
Replacing the Bottom Panel
 |
View all Sony PCV-E314DS manuals
Add to My Manuals
Save this manual to your list of manuals |
Page 55 highlights
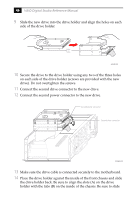
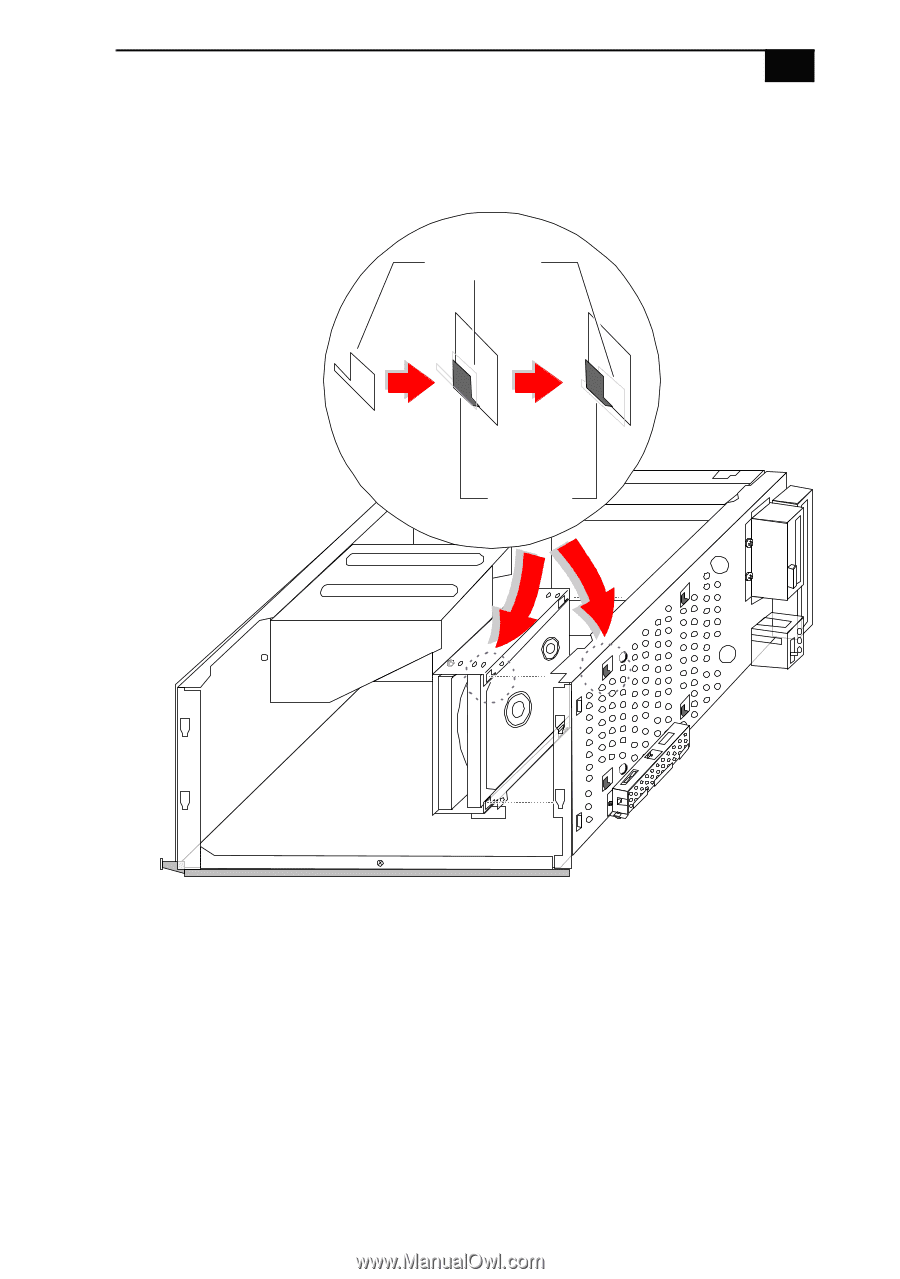
Removing, Installing, and Replacing Components 47 the drive holder back so that the tabs slip into the notches at the bottom of the slot (C). Slot on drive holder AA AB AC Tab on chassis KY0086.VSD 15 Replace the two screws that secure the drive holder to the chassis. 16 Replace the bottom panel (see "Replacing the Bottom Panel" on page 28). 17 Replace the front panel (see "Replacing the Front Panel" on page 27). 18 Replace the left side panel (see "Replacing the Left Side Panel" on page 29). 19 Reconnect the power cord and then turn on your computer.
-
 1
1 -
2
-
3
-
4
-
5
-
6
-
7
-
8
-
9
-
10
-
11
-
12
-
13
-
14
-
15
-
16
-
17
-
18
-
19
-
20
-
21
-
22
-
23
-
24
-
25
-
26
-
27
-
28
-
29
-
30
-
31
-
32
-
33
-
34
-
35
-
36
-
37
-
38
-
39
-
40
-
41
-
42
-
43
-
44
-
45
-
46
-
47
-
48
-
49
-
 50
50 -
 51
51 -
 52
52 -
 53
53 -
 54
54 -
 55
55 -
 56
56 -
 57
57 -
 58
58 -
 59
59 -
 60
60 -
61
-
62
-
63
-
64
-
65
-
66
-
67
-
68
-
69
-
70
-
71
-
72
-
73
-
74
-
75
-
76
-
77
-
78
-
79
-
80
-
81
-
82
-
83
-
84
-
85
-
86
-
87
-
88
-
89
-
90
-
91
-
92
-
93
-
94
-
95
-
96
-
97
-
98
-
99
-
100
-
101
-
102
-
103
-
104
-
105
-
106
-
107
-
108
-
109
-
110
-
111
-
112
-
113
-
114
 |
 |
Removing, Installing, and Replacing Components
47
the drive holder back so that the tabs slip into the notches at the
bottom of the slot (C).
15
Replace the two screws that secure the drive holder to the chassis.
16
Replace the bottom panel (see
“Replacing the Bottom Panel”
on
page 28).
17
Replace the front panel (see
“Replacing the Front Panel”
on page 27).
18
Replace the left side panel (see
“Replacing the Left Side Panel”
on
page 29).
19
Reconnect the power cord and then turn on your computer.
KY0086.VSD
A
A
A
B
A
C
Slot on drive holder
Tab on chassis