Sony SLT-A35K Instruction Manual (Large File - 12.9 MB) - Page 111
Correcting the brightness of the image (D-Range Optimizer)
 |
View all Sony SLT-A35K manuals
Add to My Manuals
Save this manual to your list of manuals |
Page 111 highlights
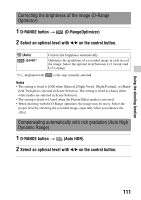
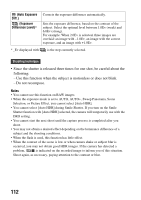
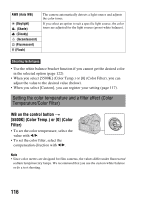
Using the shooting function Correcting the brightness of the image (D-Range Optimizer) 1 D-RANGE button t (D-RangeOptimizer) 2 Select an optimal level with b/B on the control button. (Auto) (Level)* Corrects the brightness automatically. Optimizes the gradations of a recorded image in each area of the image. Select the optimal level between Lv1 (weak) and Lv5 (strong). * Lv_ displayed with is the step currently selected. Notes • The setting is fixed to [Off] when [Sunset], [Night View], [Night Portrait], or [Hand- held Twilight] is selected in Scene Selection. The setting is fixed to [Auto] when other modes are selected in Scene Selection. • The setting is fixed to [Auto] when the Picture Effect mode is activated. • When shooting with the D-Range optimizer, the image may be noisy. Select the proper level by checking the recorded image, especially when you enhance the effect. Compensating automatically with rich gradation (Auto High Dynamic Range) 1 D-RANGE button t (Auto HDR) 2 Select an optimal level with b/B on the control button. 111
-
 1
1 -
2
-
3
-
4
-
5
-
6
-
7
-
8
-
9
-
10
-
11
-
12
-
13
-
14
-
15
-
16
-
17
-
18
-
19
-
20
-
21
-
22
-
23
-
24
-
25
-
26
-
27
-
28
-
29
-
30
-
31
-
32
-
33
-
34
-
35
-
36
-
37
-
38
-
39
-
40
-
41
-
42
-
43
-
44
-
45
-
46
-
47
-
48
-
49
-
50
-
51
-
52
-
53
-
54
-
55
-
56
-
57
-
58
-
59
-
60
-
61
-
62
-
63
-
64
-
65
-
66
-
67
-
68
-
69
-
70
-
71
-
72
-
73
-
74
-
75
-
76
-
77
-
78
-
79
-
80
-
81
-
82
-
83
-
84
-
85
-
86
-
87
-
88
-
89
-
90
-
91
-
92
-
93
-
94
-
95
-
96
-
97
-
98
-
99
-
100
-
101
-
102
-
103
-
104
-
105
-
 106
106 -
 107
107 -
 108
108 -
 109
109 -
 110
110 -
 111
111 -
 112
112 -
 113
113 -
 114
114 -
 115
115 -
 116
116 -
117
-
118
-
119
-
120
-
121
-
122
-
123
-
124
-
125
-
126
-
127
-
128
-
129
-
130
-
131
-
132
-
133
-
134
-
135
-
136
-
137
-
138
-
139
-
140
-
141
-
142
-
143
-
144
-
145
-
146
-
147
-
148
-
149
-
150
-
151
-
152
-
153
-
154
-
155
-
156
-
157
-
158
-
159
-
160
-
161
-
162
-
163
-
164
-
165
-
166
-
167
-
168
-
169
-
170
-
171
-
172
-
173
-
174
-
175
-
176
-
177
-
178
-
179
-
180
-
181
-
182
-
183
-
184
-
185
-
186
-
187
-
188
-
189
-
190
-
191
-
192
-
193
-
194
-
195
-
196
-
197
-
198
-
199
-
200
-
201
-
202
 |
 |
