Stihl FS 460 C-EM Product Instruction Manual
Stihl FS 460 C-EM Manual
 |
View all Stihl FS 460 C-EM manuals
Add to My Manuals
Save this manual to your list of manuals |
Stihl FS 460 C-EM manual content summary:
- Stihl FS 460 C-EM | Product Instruction Manual - Page 1
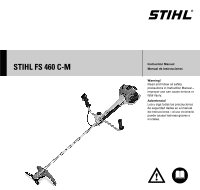
STIHL FS 460 C-M { Instruction Manual Manual de instrucciones Warning! Read and follow all safety precautions in Instruction Manual - improper use can cause serious or fatal injury. Advertencia! Lea y siga todas las precauciones de seguridad dadas en el manual de instrucciones - el uso incorrecto - Stihl FS 460 C-EM | Product Instruction Manual - Page 2
Instruction Manual 1 - 47 Manual de instrucciones 49 - 99 - Stihl FS 460 C-EM | Product Instruction Manual - Page 3
39 Main Parts 41 Specifications 43 Special Accessories Maintenance and Repairs STIHL Incorporated Federal Emission Control Warranty Statement Trademarks { FS 460 C-M, FS 460 C-M L English 44 Allow only persons who fully understand 44 this manual to operate your trimmer / brushcutter. To - Stihl FS 460 C-EM | Product Instruction Manual - Page 4
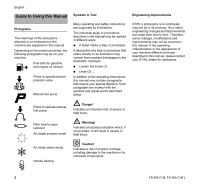
Manual fuel pump Symbols in Text Many operating and safety instructions are supported by illustrations. The individual steps or procedures described in the manual in this manual, please contact your STIHL dealer for assistance. Press to operate manual fuel pump Danger FS 460 C-M, FS 460 C-M L - Stihl FS 460 C-EM | Product Instruction Manual - Page 5
the power tool is referred in this manual as a "trimmer / brushcutter." Some smaller and / or lightweight FS models may only be used as a trimmer, i.e., they may not be used with metal blades. The term "clearing saw" indicates a high-powered trimmer / brushcutter that is particularly suited for use - Stihl FS 460 C-EM | Product Instruction Manual - Page 6
STIHL clearing saws. Different models may have different parts and controls. See the appropriate section of your instruction manual for a description of the controls and the function of the parts of your model. Safe use of a clearing saw before operating this tool. 4 FS 460 C-M, FS 460 C-M L - Stihl FS 460 C-EM | Product Instruction Manual - Page 7
your unit, see the chapter "Approved Combinations of Cutting Attachment, Deflector, Limit Stop and Harness" in the instruction manual or the STIHL "Cutting Attachments, Parts & Accessories" catalog. If this tool is subjected to unusually high loads for which it was not designed (e.g. heavy impact - Stihl FS 460 C-EM | Product Instruction Manual - Page 8
parts of the machine and the gear housing when they are hot. Warning! Always shut off the engine and make sure the cutting attachment has stopped before putting a clearing saw down. When transporting it in a vehicle, properly secure it to prevent turnover, fuel spillage and damage to the unit. STIHL - Stihl FS 460 C-EM | Product Instruction Manual - Page 9
the Deflector" and "Mounting the Cutting Attachment" of your instruction manual). A B 000BA006 KN 000BA007 KN Warning! Never operate proper installation of all required parts. Failure to use the proper parts may cause the blade or head to fly off and seriously injure FS 460 C-M, FS 460 C-M L 7 - Stihl FS 460 C-EM | Product Instruction Manual - Page 10
be used in combination with brush knives. The deflector must not be used in combination with circular saw blades. Adjust carrying harness and hand grip to suit your size before starting work. The machine should be properly balanced as specified in your instruction manual for proper control and - Stihl FS 460 C-EM | Product Instruction Manual - Page 11
your hand or any other part of your body. Warning! stumbling. For better footing, clear away scrub and cuttings. or on any other insecure support. Never hold the cutting cause respiratory problems, cancer instructions and warnings that accompanied the substance at issue. FS 460 C-M, FS 460 C-M L 9 - Stihl FS 460 C-EM | Product Instruction Manual - Page 12
/ MSHA for the type of dust encountered. Operating Instructions Warning! Do not operate your power tool using the starting may be more difficult to control. Never use your clearing saw as a hedge trimmer. Warning! During cutting, check head for cracks, wear and damage. 10 FS 460 C-M, FS 460 C-M L - Stihl FS 460 C-EM | Product Instruction Manual - Page 13
muffler serviced and repaired by your STIHL servicing dealer only. USING THE CUTTING ATTACHMENT For an illustration of the various cutting attachments and instructions on proper mounting see the chapter on "Mounting the Cutting Attachment" in your instruction manual. FS 460 C-M, FS 460 C-M L 11 - Stihl FS 460 C-EM | Product Instruction Manual - Page 14
cause the cutting attachment to rotate at idle. Mowing heads are to be used only on clearing saws equipped with a linelimiting blade in the deflector in order to keep the line at the proper length (see "Main Parts" chapter in your instruction manual). 002BA354 KN 002BA396 KN If the lawn edges are - Stihl FS 460 C-EM | Product Instruction Manual - Page 15
use of a brush knife may cause it to crack, chip or shatter. Thrown blade fragments may seriously or fatally injure the operator or bystanders. To reduce the risk of injury, avoid contact with hard or solid foreign objects such as stones, rocks or pieces of metal. FS 460 C-M, FS 460 C-M L 13 - Stihl FS 460 C-EM | Product Instruction Manual - Page 16
cut with uniform pressure. STIHL recommends that the circular saw blade Warning! In order to reduce the risk of injury from thrown objects or operator contact with the blade or head, be sure to remount the standard deflector when no longer using a circular saw blade. 14 FS 460 C-M, FS 460 C-M L - Stihl FS 460 C-EM | Product Instruction Manual - Page 17
solid jet of water may damage parts of the machine. Store the power tool in a dry and high or locked location out of reach of children. Before storing for longer than a few days, always empty the fuel tank. See chapter "Storing the Machine" in the instruction manual. FS 460 C-M, FS 460 C-M L 15 - Stihl FS 460 C-EM | Product Instruction Manual - Page 18
English Approved Combinations of Cutting Attachment, Deflector, Limit Stop and Harness Cutting attachment Deflector, limit stop Harness 1 2 3 13 4 5 14 6 7 8 15 9 10 17 16 11 12 681BA172 KN 16 FS 460 C-M, FS 460 C-M L - Stihl FS 460 C-EM | Product Instruction Manual - Page 19
support 2 1 6BA018 KN Mowing heads 1 STIHL SuperCut 40-2 2 STIHL AutoCut 40-2 3 STIHL AutoCut 40-4 4 STIHL TrimCut 41-2 5 STIHL PolyCut 41-3 Metal cutting attachments 6 Grass cutting blade 230-4 7 Grass cutting blade 255-8 8 Brush knife 300-3 9 Circular saw 002BA352 KN FS 460 C-M, FS 460 C-M L 17 - Stihl FS 460 C-EM | Product Instruction Manual - Page 20
from the parts kit supplied support 1 2 11 Assembly of the swivelling handle support involves equipping the clamp moldings with a spring and mounting them on the handle support. N Position the clamp moldings (1) with handlebar (2) on the handle support (11). 6BA020 KN 18 FS 460 C-M, FS 460 - Stihl FS 460 C-EM | Product Instruction Manual - Page 21
the wing screw counterclockwise as far as stop. N Push the wing screw into the handle support as far as stop and then screw it down - but do not finally tighten yet. the handle support can be moved. 6BA004 KN N Fold the grip of the wing screw down so that it is flush. FS 460 C-M, FS 460 C-M L 19 - Stihl FS 460 C-EM | Product Instruction Manual - Page 22
is approved only for mowing heads, thus deflector (1) must be attached before attaching a mowing head. 2 002BA401 KN Limit stop (3) is approved only for circular saw blades, thus limit stop Set the deflector on the gearbox (5), N screw in and tighten the screws (6) 20 FS 460 C-M, FS 460 C-M L - Stihl FS 460 C-EM | Product Instruction Manual - Page 23
for securing all cutting attachments. FS 460 C-M, FS 460 C-M L 002BA407 KN 002BA406 KN saw blades. Mounting the cutting attachment Use the appropriate deflector for the cutting attachment - see "Mounting the deflector". Mounting the mowing heads STIHL SuperCut, STIHL AutoCut, STIHL TrimCut, STIHL - Stihl FS 460 C-EM | Product Instruction Manual - Page 24
hand - otherwise there is a risk of injury! Proceed as described in the mowing head information sheet. Attaching grass cutting blades, brush knives 4 3 2 1 b a With the grass cutting blade 255-8 (1), the clockwise A nut that moves too easily should be replaced. 22 FS 460 C-M, FS 460 C-M L - Stihl FS 460 C-EM | Product Instruction Manual - Page 25
curvature faces upward N Position thrust plate (3) A thrust plate (3) for sawing use, with which the entire cutting depth of the circular saw blade can be used, is available as a special accessory. N Block the (a) must engage the hole (b) in the cutting attachment! FS 460 C-M, FS 460 C-M L 23 - Stihl FS 460 C-EM | Product Instruction Manual - Page 26
or even damage the engine. For this reason STIHL recommends that you use only high-quality unleaded gasoline! Gasoline with an ethanol content of more than 10% can cause running problems and major damage in engines with a manually adjustable carburetor and should not be used in such engines. Engines - Stihl FS 460 C-EM | Product Instruction Manual - Page 27
this position. N While pressing the cap down, twist it firmly clockwise as far as it will go (approx. 1/4 turn). N Fold down the grip. 001BA222 KN FS 460 C-M, FS 460 C-M L 25 - Stihl FS 460 C-EM | Product Instruction Manual - Page 28
described in detail in the instruction sheet supplied. 001BA227 KN is not properly installed. Misalignment of the cap parts N If the cap does not drop fully into of the unit and take it to your authorized STIHL dealer for repair. N Put on the full harness Brushcutter". 26 FS 460 C-M, FS 460 C-M L - Stihl FS 460 C-EM | Product Instruction Manual - Page 29
Balancing the Trimmer/Brushcutter The machine will balance differently Controls 3 2 1 6BA009 KN 002BA392 KN Mowing heads, grass cutting blades and brush knives should rest lightly on the ground. Circular saw blades should "hover" approx. 8 in. comes to a standstill. FS 460 C-M, FS 460 C-M L 27 - Stihl FS 460 C-EM | Product Instruction Manual - Page 30
Hold the machine firmly with your right hand on the drive tube, handle support or handlebar. N With the machine behind you, press it against the left otherwise break. N Do not let the starter grip snap back. Guide it slowly back into the housing so that the starter rope can FS 460 C-M, FS 460 C-M L - Stihl FS 460 C-EM | Product Instruction Manual - Page 31
a servicing dealer. STIHL recommends that such work be performed by a STIHL servicing dealer fuel. N Start the engine. English Operating Instructions During break-in period A factory-new machine should break-in period. As all moving parts have to bed in during the break FS 460 C-M, FS 460 C-M L 29 - Stihl FS 460 C-EM | Product Instruction Manual - Page 32
also "Winter operation". N Knock the filter (3) out on the palm of your hand or blow it clear with compressed air from the inside outwards. In case of stubborn dirt or sticky filter fabric: N Wash filter cover. The filter (3) consists of a pleated paper filter element. 30 FS 460 C-M, FS 460 C-M L - Stihl FS 460 C-EM | Product Instruction Manual - Page 33
by an authorized STIHL servicing dealer. At temperatures below +50 °F (+10 °C) Pre-heat carburetor Moving a shutter causes heated air to be drawn in from around the cylinder and mixed with cold in summer position. Change the position of the shutter as necessary. FS 460 C-M, FS 460 C-M L 31 - Stihl FS 460 C-EM | Product Instruction Manual - Page 34
chain saw is part throttle etc.) affect the condition of the spark plug. These factors cause deposits to form on the insulator nose which may result in trouble in operation. Removing the Spark Plug 1 N Rotate the screw (1) in the cap (2) until the screw head projects from it. 32 FS 460 C-M, FS 460 - Stihl FS 460 C-EM | Product Instruction Manual - Page 35
conditions (mostly at part throttle etc.) affect result in trouble in operation approved range. Rectify problems which have caused spark plugs authorized by STIHL. Always press spark plug cylinder. N Press the spark plug boot firmly onto the spark plug. 000BA036 TR FS 460 C-M, FS 460 C-M L 33 - Stihl FS 460 C-EM | Product Instruction Manual - Page 36
checked by a servicing dealer for contamination (carbonization). STIHL recommends that you have servicing and repair work carried out exclusively by an authorized STIHL servicing dealer. Replacing the the starter post. N Carefully remove the E-clip (3). 9926BA024 KN 34 FS 460 C-M, FS 460 C-M L - Stihl FS 460 C-EM | Product Instruction Manual - Page 37
9926BA025 KN 1 2 N Thread the rope through the top of the guide bushing (1) and rope rotor (2). 9926BA027 KN 3 4 5 5 N Fit into the grip. 9926BA026 KN N Coat starter post uniformly with STIHL gear lubricant - see "Special Accessories". N Slip the rope rotor FS 460 C-M, FS 460 C-M L 35 - Stihl FS 460 C-EM | Product Instruction Manual - Page 38
- pay special attention to the cylinder fins and air filter. N Store the machine in a dry and secure location - out of the reach of children and other unauthorized persons. 9926BA030 KN 1 1 N Take out the screws (1). N Remove the spring housing and pieces of spring. 36 FS 460 C-M, FS 460 C-M L - Stihl FS 460 C-EM | Product Instruction Manual - Page 39
instructions. Balancing N After resharpening about 5 times, check the cutting attachment for out-of-balance on a STIHL balancer (special accessory) or have it checked by a dealer and rebalanced as necessary - STIHL recommends a STIHL servicing . 6BA022 KN 6BA021 KN FS 460 C-M, FS 460 C-M L 37 - Stihl FS 460 C-EM | Product Instruction Manual - Page 40
English Inspections and Maintenance by Dealer Maintenance Work STIHL recommends that you have servicing and repair work carried out exclusively by an authorized STIHL servicing dealer. Fuel Pickup Body in Tank N there is a noticeable increase in vibrations. 6BA015 KN 38 FS 460 C-M, FS 460 C-M L - Stihl FS 460 C-EM | Product Instruction Manual - Page 41
stop weekly monthly every 12 months if problem if damaged if required Complete machine is idling, have machine repaired by servicing dealer1) Spark plug Readjust electrode gap screws) Retighten Check X Antivibration elements Replace1) FS 460 C-M, FS 460 C-M L X X X X X X X X X - Stihl FS 460 C-EM | Product Instruction Manual - Page 42
attachment Sharpen X Safety labels Replace 1) STIHL recommends that this work be done by a STIHL servicing dealer before starting work after finishing work or daily after each refueling stop weekly monthly every 12 months if problem if damaged if required X X X 40 FS 460 C-M, FS 460 C-M L - Stihl FS 460 C-EM | Product Instruction Manual - Page 43
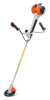
with Spark Arresting Screen 6 Spacer 7 Guard Plate 8 Throttle Trigger 9 Momentary Stop Switch 10 Throttle Trigger Lockout 11 Handlebar 12 Handle Support 13 Clamp Screw 14 Carrying Strip 15 Choke Lever 16 Fuel Pump 17 Filter Cover 18 Fuel Tank # Serial Number 3BA002 KN FS 460 C-M, FS 460 C-M L 41 - Stihl FS 460 C-EM | Product Instruction Manual - Page 44
Support Connects the shaft and bike handle. 13 Clamp Screw Locks handlebar in selected position. 14 Carrying Strip The device to connect the clearing saw the deflector in order to keep the line of the mowing head at the proper length. 4 Metal Mowing Tool The cutting attachment FS 460 C-M, FS 460 C-M L - Stihl FS 460 C-EM | Product Instruction Manual - Page 45
Saw Blade Designed to position the brushcutter Engine Single cylinder two- FS 460 C-M: 18.7 lb (8.5 kg) FS 460 C-M L: 19.0 lb (8.6 kg) Overall length Without cutting attachment FS 460 C-M: 70.47 in (1790 mm) FS 460 C-M L: 72.83 in (1850 mm) Electronic magneto ignition FS 460 C-M, FS 460 - Stihl FS 460 C-EM | Product Instruction Manual - Page 46
and other emission-related assemblies. Where a warrantable condition exists, STIHL Incorporated will repair your small off-road equipment engine at no cost to you including diagnosis (if the diagnostic work is performed at an authorized dealer), parts and labor. 44 FS 460 C-M, FS 460 C-M L - Stihl FS 460 C-EM | Product Instruction Manual - Page 47
a warranted part is defective. However, if you claim warranty for a component and the machine is tested as non-defective, STIHL Incorporated will charge you for the cost of the emission test. Mechanical diagnostic work will be performed at an authorized STIHL servicing dealer. Emission test may be - Stihl FS 460 C-EM | Product Instruction Manual - Page 48
® OILOMATIC® STIHL Cutquik® STIHL DUROMATIC® STIHL Quickstop® STIHL ROLLOMATIC® STIHL WOOD BOSS® TIMBERSPORTS® YARD BOSS® Some of STIHL's Common Law Trademarks The maintenance instructions in this manual are based on the application of the recommended 2-stroke fuel-oil 46 FS 460 C-M, FS 460 C-M L - Stihl FS 460 C-EM | Product Instruction Manual - Page 49
Series™ STIHL Protech™ STIHL RAPID™ STIHL SuperCut™ STIHL Territory™ TapAction™ TrimCut™ This listing of trademarks is subject to change. Any unauthorized use of these trademarks without the express written consent of ANDREAS STIHL AG & Co. KG, Waiblingen is strictly prohibited. FS 460 C-M, FS 460 - Stihl FS 460 C-EM | Product Instruction Manual - Page 50
English 48 FS 460 C-M, FS 460 C-M L - Stihl FS 460 C-EM | Product Instruction Manual - Page 51
es reciclable. Impreso en papel libre de cloro. Acerca de este manual de instrucciones 50 Medidas de seguridad y técnicas de manejo 51 . Siempre protéjase adecuadamente los ojos. FS 460 C-M, FS 460 C-M L 49 © ANDREAS STIHL AG & Co. KG, 2010 0458-746-8621-A. M0-4.L10.DDS. - Stihl FS 460 C-EM | Product Instruction Manual - Page 52
, modificaciones y mejoras no se describen en este manual. Si las características de funcionamiento o la apariencia de su máquina difieren de las descritas en este manual, comuníquese con el concesionario STIHL para obtener la ayuda que requiera. Calentador de manillar 50 FS 460 C-M, FS 460 C-M L - Stihl FS 460 C-EM | Product Instruction Manual - Page 53
FS. Pida a su concesionario STIHL que le enseñe el manejo de la herramienta motorizada. Respete todas las disposiciones, reglamentos y normas de seguridad locales del caso. Advertencia! No preste ni alquile nunca su herramienta motorizada sin entregar el manual máquina. FS 460 C-M, FS 460 C-M L 51 - Stihl FS 460 C-EM | Product Instruction Manual - Page 54
y avisos contenidos en este manual se refieren al uso de todas las sierras despejadoras de STIHL. Los distintos modelos pueden contar , sírvase notar lo siguiente: - La mayor parte de las herramientas motorizadas de STIHL se ofrecen con un sistema antivibración ("AV") FS 460 C-M, FS 460 C-M L - Stihl FS 460 C-EM | Product Instruction Manual - Page 55
de seguridad bien ajustados con una protección adecuada en las partes superior y laterales que satisfagan la norma ANSI Z 87.1 correspondiente). Para reducir el riesgo de lesionarse la cara, STIHL recomienda usar también una careta o protector facial adecuado sobre ". FS 460 C-M, FS 460 C-M L 53 - Stihl FS 460 C-EM | Product Instruction Manual - Page 56
Combinaciones aprobadas de accesorio de corte, deflector, mango y arnés", en el manual de instrucciones o en el catálogo STIHL "Accesorios de corte, piezas y accesorios". Si la máquina experimenta cargas a ellos. Puede escapar vapor inflamable del sistema de combustible. 54 FS 460 C-M, FS 460 C-M L - Stihl FS 460 C-EM | Product Instruction Manual - Page 57
y apriétela en la boca de llenado del tanque. Para hacer esto con esta tapa STIHL, levante la empuñadura en la parte superior de la tapa hasta dejarla vertical a un ángulo de 90°. Inserte la tapa ñada, mal ajustada o mantenida o que no fue armada completa y debidamente. FS 460 C-M, FS 460 C-M L 55 - Stihl FS 460 C-EM | Product Instruction Manual - Page 58
y/o el arnés. Mantenga siempre el deflector (y la faldilla en su caso) bien ajustado (vea en su manual de instrucciones los capítulos de "Montaje del deflector" y "Montaje del accesorio de corte"). A B Las cuchillas para cortar pasto. 000BA007 KN 000BA006 KN 56 FS 460 C-M, FS 460 C-M L - Stihl FS 460 C-EM | Product Instruction Manual - Page 59
de resorte de su arnés (vea el capítulo correspondiente en este manual). Advertencia! Su herramienta motorizada es una máquina que debe ser manejada por a su representante de STIHL que revise la herramienta motorizada y haga los ajustes o reparaciones correspondientes. FS 460 C-M, FS 460 C-M L 57 - Stihl FS 460 C-EM | Product Instruction Manual - Page 60
y los pies alejados del accesorio de corte. No toque nunca con las manos ni con cualquier parte del cuerpo un accesorio de corte en movimiento. Advertencia! No trate de alcanzar más lejos de lo ), lea y siga las instrucciones suministradas con la sustancia en cuestión. 58 FS 460 C-M, FS 460 C-M L - Stihl FS 460 C-EM | Product Instruction Manual - Page 61
directa o indirectamente. 15m (50ft) Para reducir el riesgo de ocasionar lesiones a los ojos u otras partes del cuerpo (vea el capítulo "Vestimenta adecuada"), asegúrese que las personas estén a por lo cuchilla o el cabezal en busca de grietas, desgaste y daños. FS 460 C-M, FS 460 C-M L 59 - Stihl FS 460 C-EM | Product Instruction Manual - Page 62
motorizada o daños a la cuchilla. Para ese tipo de trabajo, STIHL recomienda el uso de cabezas con hilo de nilón. Además, tenga en el largo del hilo de nilón en las cabezas segadoras de ajuste manual. Advertencia! La caja de engranajes está caliente durante el funcionamiento FS 460 C-M, FS 460 C-M L - Stihl FS 460 C-EM | Product Instruction Manual - Page 63
en el manual de STIHL Los hilos deshilachados se reemplazan con un ajuste sencillo (consulte la hoja de instrucciones provista con la cabeza segadora). Cabeza segadora PolyCut de STIHL Utiliza ya sea hilos de nilón o cuchillas de polímero pivotantes no rígidas. 002BA396 KN FS 460 C-M, FS 460 - Stihl FS 460 C-EM | Product Instruction Manual - Page 64
de cortar pasto y malezas. Tiene 4 cuchillos con filo en los dos lados, esto es, en las partes delantera y trasera. Cuando los bordes cortantes en un lado se desafilan, es posible invertir la cuchilla para usar ser afiladas al desgastarse sus filos o bordes cortantes. 62 FS 460 C-M, FS 460 C-M L - Stihl FS 460 C-EM | Product Instruction Manual - Page 65
pequeños, STIHL recomienda retirar el deflector estándar y sustituirlo con el deflector de tope especial (vea el capítulo "Montaje del deflector"). Este tope ayuda a mantener la máquina en su posición contra el árbol durante el proceso de corte. Los usuarios con poca FS 460 C-M, FS 460 C-M L 63 - Stihl FS 460 C-EM | Product Instruction Manual - Page 66
, reparación o limpieza de la herramienta motorizada. No intente hacer ningún trabajo de mantenimiento o reparación que no esté descrito en su manual de instrucciones. Este tipo de trabajo debe ser realizado únicamente por el concesionario de servicio de STIHL. 64 FS 460 C-M, FS 460 C-M L - Stihl FS 460 C-EM | Product Instruction Manual - Page 67
vacíe el tanque de combustible. Consulte el capítulo "Almacenamiento de la máquina" en el manual de instrucciones. Nunca maneje su herramienta motorizada si el silenciador está dañado, se ha perdido es mayor durante las estaciones calurosas y secas. FS 460 C-M, FS 460 C-M L español / EE.UU 65 - Stihl FS 460 C-EM | Product Instruction Manual - Page 68
español / EE.UU Combinaciones aprobadas de accesorio de corte, deflector, tope limitador y arnés Accesorio de corte Deflector, límite de tope Arnés 1 2 3 13 4 5 14 6 7 8 15 9 10 17 16 11 12 681BA172 KN 66 FS 460 C-M, FS 460 C-M L - Stihl FS 460 C-EM | Product Instruction Manual - Page 69
accidentes! Accesorios de corte Cabezas segadoras 1 STIHL SuperCut 40-2 2 STIHL AutoCut 40-2 3 STIHL AutoCut 40-4 4 STIHL TrimCut 41-2 5 STIHL PolyCut 41-3 Accesorios de corte metálicos (3) y quitar la tuerca (4) del mango de control (5). 002BA352 KN 6BA018 KN FS 460 C-M, FS 460 C-M L 67 - Stihl FS 460 C-EM | Product Instruction Manual - Page 70
las mismas en el soporte del mango. N Coloque las piezas moldeadas de fijación (1) con el manillar (2) en el soporte del mango (11). 6BA020 KN 68 FS 460 C-M, FS 460 C-M L - Stihl FS 460 C-EM | Product Instruction Manual - Page 71
ñadura del tornillo mariposa hasta que quede al ras. N Gire el tornillo mariposa en sentido contrahorario hasta que se pueda mover el soporte del mango. FS 460 C-M, FS 460 C-M L 69 - Stihl FS 460 C-EM | Product Instruction Manual - Page 72
necesario instalar el deflector (2) antes de fijar una hoja segadora de pasto. 5 N Coloque el deflector en la caja de engranajes (5), N Atornille y apriete los tornillos (6) 70 FS 460 C-M, FS 460 C-M L - Stihl FS 460 C-EM | Product Instruction Manual - Page 73
corte - vea "Montaje del deflector". Montaje de las cabezas segadoras STIHL SuperCut, STIHL AutoCut, STIHL TrimCut, STIHL PolyCut N Utilice el anillo protector con las herramientas de segado N ón de la cabeza segadora contiene una descripción detallada. 002BA408 KN FS 460 C-M, FS 460 C-M L 71 - Stihl FS 460 C-EM | Product Instruction Manual - Page 74
(2) - la curvatura queda orientada hacia arriba. N Coloque la placa de empuje (3) N Bloquee el eje N Enrosque la tuerca (4) en sentido contrahorario y apriétela 002BA409 KN 72 FS 460 C-M, FS 460 C-M L - Stihl FS 460 C-EM | Product Instruction Manual - Page 75
circular, se ofrece como accesorio especial. N Bloquee el eje N Enrosque la tuerca (4) en sentido contrahorario y apriétela Quite la herramienta usada para bloquear el eje. FS 460 C-M, FS 460 C-M L 73 - Stihl FS 460 C-EM | Product Instruction Manual - Page 76
pueden utilizar gasolina con un contenido de etanol de hasta un 25% (E25). Use solamente el aceite STIHL para motores de dos tiempos o un aceite de marca equivalente para motores de dos tiempos diseñado para la máquina y el envase en que se guarda la mezcla de combustible. FS 460 C-M, FS 460 C-M L - Stihl FS 460 C-EM | Product Instruction Manual - Page 77
vigorosamente a mano para asegurar que se mezclen bien el aceite y la gasolina. Gasolina Aceite (STIHL 50:1 ó aceite de alta calidad equivalente) Preparaciones español / EE.UU Para reducir en sentido contrahorario (aprox. 1/4 de vuelta). 001BA219 KN 001BA218 KN FS 460 C-M, FS 460 C-M L 75 - Stihl FS 460 C-EM | Product Instruction Manual - Page 78
girarla, la base de la tapa puede rotar hasta salir de posición con respecto a la parte superior. N El manejo, la limpieza o un intento de apriete incorrecto pueden ocasionar una alineaci el mango debe quedar totalmente a ras con respecto a la parte superior de la tapa. 76 FS 460 C-M, FS 460 C-M L - Stihl FS 460 C-EM | Product Instruction Manual - Page 79
dañada o rota; deje de utilizar la unidad de inmediato y llévela a su concesionario autorizado de STIHL para que la reparen. español / EE.UU Colocación del arnés completo La instalación del arnés vea la sección "Equilibrio de la cortadora de matorrales". 002BA411 KN FS 460 C-M, FS 460 C-M L 77 - Stihl FS 460 C-EM | Product Instruction Manual - Page 80
posición el encendido está conectado - el motor está listo para arrancar y puede arrancarse. El encendido se apaga al pulsar el interruptor de parada. El 78 FS 460 C-M, FS 460 C-M L - Stihl FS 460 C-EM | Product Instruction Manual - Page 81
enrolle correctamente. N Continúe haciendo girar el motor hasta que arranque. 6BA012 KN N Sujete el mango de arranque con la mano derecha. Método alternativo de arranque: FS 460 C-M, FS 460 C-M L 79 - Stihl FS 460 C-EM | Product Instruction Manual - Page 82
de corte gira, pida que un concesionario de servicio repare la herramienta motorizada. STIHL recomienda que un concesionario de servicio STIHL efectúe este trabajo. Su máquina está lista para trabajar. Parada del de encendido, hasta que la vuelva a utilizar. Para los 80 FS 460 C-M, FS 460 C-M L - Stihl FS 460 C-EM | Product Instruction Manual - Page 83
tierra suelta de alrededor del elemento de filtro (3) y del interior de la cubierta de filtro. El filtro (3) consta de un elemento de papel con pliegues. FS 460 C-M, FS 460 C-M L 81 - Stihl FS 460 C-EM | Product Instruction Manual - Page 84
comuníquese con el concesionario de servicio para obtener ayuda. STIHL recomienda que un concesionario STIHL autorizado efectúe los trabajos de mantenimiento y reparación. A = funcionamiento de verano - Símbolo "Copo de nieve" = funcionamiento de invierno 9926BA016 KN 82 FS 460 C-M, FS 460 C-M L - Stihl FS 460 C-EM | Product Instruction Manual - Page 85
"O" que se instala en la tapa de llenado con el "juego de placa de tapa" puede dejarse instalado en la máquina. Según la temperatura ambiente: FS 460 C-M, FS 460 C-M L 83 - Stihl FS 460 C-EM | Product Instruction Manual - Page 86
sitos en la punta aislante, los cuales pueden perjudicar el rendimiento. Retiro de la bujía 3 N Levante la parte delantera de la tapa (2) y empújela hacia atrás para desengancharla. N Deje la tapa a un lado intermedias) se afecta la condición de la bujía. Estos factores 84 FS 460 C-M, FS 460 C-M L - Stihl FS 460 C-EM | Product Instruction Manual - Page 87
parte trasera y empuje la orejeta (2) dentro de la abertura (3) de la envuelta al mismo tiempo. N Gire la tapa hacia delante sobre la envuelta, e inserte y apriete el tornillo (4) firmemente. N Atornille la bujía en el cilindro. N Presione el casquillo firmemente sobre la bujía FS 460 C-M, FS 460 - Stihl FS 460 C-EM | Product Instruction Manual - Page 88
al concesionario que revise si hay contaminación (coquización) en el silenciador. STIHL recomienda que un concesionario STIHL autorizado efectúe los trabajos de mantenimiento y reparación. Sustitución de la . N Tire del nudo de vuelta en el mango. 9926BA026 KN 86 FS 460 C-M, FS 460 C-M L - Stihl FS 460 C-EM | Product Instruction Manual - Page 89
parte superior del buje guía (1) y el rotor de la cuerda (2). N Cubrir el poste del arrancador de modo uniforme con lubricante para engranajes STIHL cuerda de la forma descrita en "Retiro de la cuerda del rotor". Las partes del resorte aún pueden estar bajo tensión y podrían desprenderse al quitar - Stihl FS 460 C-EM | Product Instruction Manual - Page 90
placa inferior debe quedar orientada hacia arriba. Si el resorte se sale de la caja durante la instalación: Usar una careta protectora y el trabajo se lo haga el concesionario - STIHL recomienda acudir a un concesionario de STIHL. N Afile frecuentemente, quitando la menor FS 460 C-M, FS 460 C-M L - Stihl FS 460 C-EM | Product Instruction Manual - Page 91
la revise y vuelva a ajustar el equilibrio según sea necesario - STIHL recomienda acudir a un concesionario STIHL para servicio. Inspección y mantenimiento por el usuario Zona fijada del mango trapo humedecido con una solución limpiadora no inflamable fresca. FS 460 C-M, FS 460 C-M L 89 - Stihl FS 460 C-EM | Product Instruction Manual - Page 92
ol / EE.UU Inspección y mantenimiento por el concesionario Trabajos de mantenimiento STIHL recomienda que un concesionario STIHL autorizado efectúe los trabajos de mantenimiento y reparación. Captador de combustible en el . El parachispas no se usa en todos los países 90 FS 460 C-M, FS 460 C-M L - Stihl FS 460 C-EM | Product Instruction Manual - Page 93
ón Descarbonizar después de las primeras 139 horas de funcionamiento, y luego cada 150 horas Todos los tornillos y tuercas accesibles (salvo los tornillos de ajuste) Volver a apretar FS 460 C-M, FS 460 C-M L X X X X X X X X X X X X X X X X X X 91 - Stihl FS 460 C-EM | Product Instruction Manual - Page 94
de servicio STIHL efectúe este trabajo antes de comenzar el trabajo después de terminar el trabajo o diariamente después de cada parada para cargar combustible semanalmente mensualmente cada 12 meses si hay problema si tiene daños si se requiere X X X X X X 92 FS 460 C-M, FS 460 C-M L - Stihl FS 460 C-EM | Product Instruction Manual - Page 95
ón 14 Correa de transporte 15 Palanca del estrangulador 16 Bomba de combustible 17 Cubierta del filtro 18 Tanque de combustible # Número de serie 3BA002 KN FS 460 C-M, FS 460 C-M L 93 - Stihl FS 460 C-EM | Product Instruction Manual - Page 96
cabeza segadora al largo adecuado. 4 Herramienta segadora metálica El accesorio de corte, por ejemplo la cuchilla, hecho de metal para varios propósitos. 94 FS 460 C-M, FS 460 C-M L - Stihl FS 460 C-EM | Product Instruction Manual - Page 97
del tanque de combustible: 0,75 l (7,4 fl.oz) Peso seco, sin accesorio de corte y deflector FS 460 C-M: 8,5 kg (18,7 lb) FS 460 C-M L: 8,6 kg (19,0 lb) Largo total Sin accesorio de corte FS 460 C-M: 1790 mm (70,47 pulg) FS 460 C-M L: 1850 mm (72,83 pulg) Encendido por magneto electrónico - Stihl FS 460 C-EM | Product Instruction Manual - Page 98
quina deben efectuar únicamente los trabajos de mantenimiento descritos en este manual. Solamente los talleres autorizados por STIHL deben llevar a cabo los demás trabajos de reparación. Los reclamos incluye piezas tales como el carburador y el sistema de encendido. 96 FS 460 C-M, FS 460 C-M L - Stihl FS 460 C-EM | Product Instruction Manual - Page 99
usted tiene la responsabilidad de realizar el mantenimiento requerido descrito en su manual de instrucciones. STIHL Incorporated le recomienda guardar todos los recibos comprobantes de los trabajos de hasta el primer punto de reemplazo programado para esa pieza. FS 460 C-M, FS 460 C-M L 97 - Stihl FS 460 C-EM | Product Instruction Manual - Page 100
y/o la durabilidad, y las alteraciones o modificaciones no recomendadas o aprobadas por escrito por STIHL Incorporated, y N la sustitución de piezas y otros servicios y ajustes necesarios para el mantenimiento requerido en y después del primer punto de reemplazo programado. FS 460 C-M, FS 460 C-M L - Stihl FS 460 C-EM | Product Instruction Manual - Page 101
™ STIHL SuperCut™ español / EE.UU STIHL Territory™ TapAction™ TrimCut™ Esta lista de marcas comerciales está sujeta a cambios. Queda terminantemente prohibido todo uso de estas marcas comerciales sin el consentimiento expreso por escrito de ANDREAS STIHL AG & Co. KG, Waiblingen. FS 460 C-M, FS 460 - Stihl FS 460 C-EM | Product Instruction Manual - Page 102
español / EE.UU 100 FS 460 C-M, FS 460 C-M L - Stihl FS 460 C-EM | Product Instruction Manual - Page 103
- Stihl FS 460 C-EM | Product Instruction Manual - Page 104
chemicals known to the State of California to cause cancer, birth defects or other reproductive harm. 0458-746-8621-A englisch / spanisch USA U G U www.stihl.com ! ADVERTENCIA! El gas de escape del motor de esta máquina contiene productos químicos que en el estado de California son considerados
-
 1
1 -
 2
2 -
 3
3 -
 4
4 -
 5
5 -
 6
6 -
 7
7 -
8
-
9
-
10
-
11
-
12
-
13
-
14
-
15
-
16
-
17
-
18
-
19
-
20
-
21
-
22
-
23
-
24
-
25
-
26
-
27
-
28
-
29
-
30
-
31
-
32
-
33
-
34
-
35
-
36
-
37
-
38
-
39
-
40
-
41
-
42
-
43
-
44
-
45
-
46
-
47
-
48
-
49
-
50
-
51
-
52
-
53
-
54
-
55
-
56
-
57
-
58
-
59
-
60
-
61
-
62
-
63
-
64
-
65
-
66
-
67
-
68
-
69
-
70
-
71
-
72
-
73
-
74
-
75
-
76
-
77
-
78
-
79
-
80
-
81
-
82
-
83
-
84
-
85
-
86
-
87
-
88
-
89
-
90
-
91
-
92
-
93
-
94
-
95
-
96
-
97
-
98
-
99
-
100
-
101
-
102
-
103
-
104
 |
 |
{
STIHL FS 460 C-M
Warning!
Read and follow all safety
precautions in Instruction Manual –
improper use can cause serious or
fatal injury.
Advertencia!
Lea y siga todas las precauciones
de seguridad dadas en el manual
de instrucciones – el uso incorrecto
puede causar lesiones graves o
mortales.
Instruction Manual
Manual de instrucciones