Thermador VCIN36JP Installation Instructions - Page 5
Advance Planning - hoods
 |
View all Thermador VCIN36JP manuals
Add to My Manuals
Save this manual to your list of manuals |
Page 5 highlights
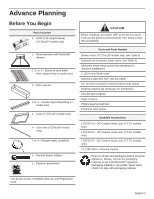
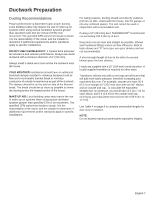
Advance Planning Before You Begin Parts Included 1 - 1000 CFM integral blower (VCIBxxJP models only) 1 - Metal transition with backdraft damper 2, 3, or 4 - Stainless steel baffle filters (depending on model size) 2 - Filter spacers 2 or 3 - Grease trays (depending on model size) 1 - Liner (VCIBxxJP models only) 4 - Side trims (VCINxxJP models only) 2 or 4 - Halogen lights (installed) 1 - Remote blower adaptor 1 - Fastener assortment CAUTION: Before installing, turn power OFF at the service panel. Lock service panel to prevent power from being turned ON accidentally. Tools and Parts Needed Blower motor (VCINxxJP models only, see Table 5) Ductwork as necessary (style varies, see Table 4) Additional sheet metal screws (as necessary for ductwork installation) 1" (25.4 mm) Strain relief Aluminum tape (DO NOT use duct tape) 1/2" (13 mm) Conduit if required (follow local codes) Framing material (as necessary for framework) Circular saw or jigsaw Tape measure Phillips head screwdriver Protective work gloves Available Accessories LINER236 - 36" Custom Hood Liner (VCIN models only) LINER248 - 48" Custom Hood Liner (VCIN models only) LINER254 - 54" Custom Hood Liner (VCIN models only) VCI2REMKS - Remote Control Remove all tape and packaging before using the appliance. Please, recycle the packaging material, as all THERMADOR® appliance packaging material is recyclable. Never allow children to play with packaging material. Use & Care Guide, Installation Manual, and Registration Card English 3
-
 1
1 -
 2
2 -
 3
3 -
 4
4 -
 5
5 -
 6
6 -
 7
7 -
 8
8 -
 9
9 -
 10
10 -
 11
11 -
12
-
13
-
14
-
15
-
16
-
17
-
18
-
19
-
20
-
21
-
22
-
23
-
24
-
25
-
26
-
27
-
28
-
29
-
30
-
31
-
32
-
33
-
34
-
35
-
36
-
37
-
38
-
39
-
40
-
41
-
42
-
43
-
44
-
45
-
46
-
47
-
48
-
49
-
50
-
51
-
52
-
53
-
54
-
55
-
56
-
57
-
58
-
59
-
60
-
61
-
62
-
63
-
64
-
65
-
66
-
67
-
68
-
69
-
70
-
71
-
72
-
73
-
74
-
75
-
76
-
77
-
78
-
79
-
80
-
81
-
82
-
83
-
84
-
85
-
86
-
87
-
88
-
89
-
90
-
91
-
92
-
93
-
94
-
95
-
96
 |
 |