Toshiba 8100 Tecra 8100 Users Guide (PDF) 20030103
Toshiba 8100 - Tecra - PIII 600 MHz Manual
 |
View all Toshiba 8100 manuals
Add to My Manuals
Save this manual to your list of manuals |
Toshiba 8100 manual content summary:
- Toshiba 8100 | Tecra 8100 Users Guide (PDF) 20030103 - Page 1
Tecra® 8100 Series User's Guide If you need assistance: ❖ www.pcsupport.toshiba.com ❖ InTouchsm Center Calling within the United States (800) 457-7777 Calling from outside the United States (949) 859-4273 For more information, see Chapter 10 on page 206 in this guide. - Toshiba 8100 | Tecra 8100 Users Guide (PDF) 20030103 - Page 2
ii Model: Tecra 8100 Series FCC Notice "Declaration of Conformity Information" This equipment has been tested and found to comply with the limits for a Class B digital device, pursuant to Part 15 of the FCC rules. These limits are designed to provide reasonable protection against harmful - Toshiba 8100 | Tecra 8100 Users Guide (PDF) 20030103 - Page 3
: Toshiba America Canada. FCC Requirements The following information is pursuant to FCC CFR 47, Part 68 and refers to internal modems. Installation When you are ready to Service Your modem is designed to be used on standard-device telephone lines. Connection to telephone company-provided coin service - Toshiba 8100 | Tecra 8100 Users Guide (PDF) 20030103 - Page 4
service. If Problems Arise If any of your telephone equipment is not operating properly, you should immediately remove it unlawful to use a computer or other electronic device to send any message via a telephone fax machine a message. Notes for users in Australia and New Zealand For information on - Toshiba 8100 | Tecra 8100 Users Guide (PDF) 20030103 - Page 5
above conditions may not prevent degradation of service in some situations. Repairs to certified user manual of analog equipment must contain the equipment's Ringer Equivalence Number (REN) and an explanation notice similar to the following: The Ringer Equivalence Number (REN) of this device - Toshiba 8100 | Tecra 8100 Users Guide (PDF) 20030103 - Page 6
vi CD-ROM / DVD-ROM Safety Instruction The CD-ROM / DVD-ROM drive employs a laser system. To ensure proper use of this product, please read this instruction manual carefully and retain for future reference. Should the unit ever require maintenance, contact an authorized service location. Use of - Toshiba 8100 | Tecra 8100 Users Guide (PDF) 20030103 - Page 7
guide cannot be reproduced in any form without the prior written permission of Toshiba. No patent liability is assumed, however, with respect to the use of the information contained herein. ©1999 by Toshiba BETWEEN THE PRODUCT AND THE MANUAL. IN NO EVENT SHALL TOSHIBA BE LIABLE FOR ANY INCIDENTAL, - Toshiba 8100 | Tecra 8100 Users Guide (PDF) 20030103 - Page 8
viii Trademarks Tecra, AccuPoint II, Fn-esse, Noteworthy, and SelectBay are registered trademarks, and InTouch is a service mark of Toshiba America Information Systems, Inc. and/or Toshiba Corporation. IBM and Wake on LAN are registered trademarks, and PS/2 is a trademark of IBM Corporation. MS-DOS, - Toshiba 8100 | Tecra 8100 Users Guide (PDF) 20030103 - Page 9
Contents Part I: Getting to Know Your Computer Chapter 1: Finding Your Way Around 1 Making sure you panel open 8 Indicator panel lights 9 External diskette drive 11 Chapter 2: Getting Started 13 Selecting a place to work 13 Creating a computer-friendly environment 13 Keeping yourself - Toshiba 8100 | Tecra 8100 Users Guide (PDF) 20030103 - Page 10
printer 38 Connecting the external diskette drive 39 Connecting external speakers or headphones 40 Connecting an external microphone 40 Using an expansion device 40 Adding memory 41 Memory module sizes 42 Installing a memory module 43 Removing a memory module 47 Swapping SelectBay modules - Toshiba 8100 | Tecra 8100 Users Guide (PDF) 20030103 - Page 11
50 Using the secondary battery in the SelectBay 51 Inserting and removing PC Cards 53 Inserting a PC Card 53 Removing a PC Card 55 Setting the taskbar...... 70 Saving your work 71 Printing your work 72 Using diskettes 73 Inserting and removing diskettes 74 Diskette care 74 Backing - Toshiba 8100 | Tecra 8100 Users Guide (PDF) 20030103 - Page 12
87 Toshiba's energy-saver design 87 Running the computer on battery power 88 Charging the batteries 88 Monitoring battery power 89 What to do when the battery alarm sounds 92 Starting where you left off 93 Using Standby command 94 Using Suspend/Resume (memory) mode 95 Using Hibernation - Toshiba 8100 | Tecra 8100 Users Guide (PDF) 20030103 - Page 13
Part II: Technical Reference Chapter 6: Exploring Your Options 113 Setting up Windows to work with your printer 113 Setting up Windows 98 Second Edition to work with your printer 114 Setting up Windows NT to work 137 Toshiba's online resources 138 Using MS-DOS programs 138 Chapter 7: Toshiba - Toshiba 8100 | Tecra 8100 Users Guide (PDF) 20030103 - Page 14
a hard disk drive Master password 179 Deleting a hard disk drive Master password 181 Hard disk drive passwords - Windows NT 182 Setting a hard disk drive password 182 Creating a password backup diskette 187 Deleting the hard disk drive password 188 Chapter 9: Managing Your Tecra 8100 Computer - Toshiba 8100 | Tecra 8100 Users Guide (PDF) 20030103 - Page 15
troubleshooting feature 213 A plan of action 213 Resolving hardware conflicts on your own 213 Fixing device-related problems 216 Memory card problems 216 Power and the batteries 217 Keyboard problems 219 AccuPoint II problems 220 Display problems 220 Disk drive problems 222 Modem problems - Toshiba 8100 | Tecra 8100 Users Guide (PDF) 20030103 - Page 16
or DVD-ROM drive........ 226 Sound system problems 227 Optional devices 228 PC Card problems 228 Printer problems 232 DVD operating problems-Windows 98 Second Edition. 233 DVDExpress problems 236 Developing good computing habits 242 If you need further assistance 243 Contacting Toshiba 244 - Toshiba 8100 | Tecra 8100 Users Guide (PDF) 20030103 - Page 17
xvii - Toshiba 8100 | Tecra 8100 Users Guide (PDF) 20030103 - Page 18
About this guide xx Safety icons xx Other documentation xxii Operating system differences xxii Service options xxiii - Toshiba 8100 | Tecra 8100 Users Guide (PDF) 20030103 - Page 19
of powerful, portable multimedia computing. Your new Toshiba Tecra® 8100 notebook computer is designed just for you. Because you or your company's IT personnel have been given the opportunity to choose among so many options-display, memory, hard disk drive capacity, processor speed, CD-ROM or DVD - Toshiba 8100 | Tecra 8100 Users Guide (PDF) 20030103 - Page 20
to computers or have not used a notebook computer before, read through the first couple of chapters to familiarize yourself with the components of the computer. After that, seek out whatever interests you most. Safety icons This manual contains safety instructions that must be observed in order to - Toshiba 8100 | Tecra 8100 Users Guide (PDF) 20030103 - Page 21
is not observed. CAUTION: This icon indicates the existence of a hazard that could result in damage to equipment or property if the safety instruction is not observed. NOTE: This icon indicates information that relates to the safe operation of the equipment or related items. Other icons used - Toshiba 8100 | Tecra 8100 Users Guide (PDF) 20030103 - Page 22
diskette that are not discussed in this guide. ❖ The Toshiba Configuration Builder CD Instructions explain how to completely recover, selectively supported: ❖ Suspend/Resume (memory) mode Under Windows NT, the following features are not supported: ❖ CardAid ❖ Universal Serial Bus (USB) port ❖ Device - Toshiba 8100 | Tecra 8100 Users Guide (PDF) 20030103 - Page 23
Play device installation ❖ Safe mode TECHNICAL NOTE: Though Windows NT does not support USB (Universal Serial Port) specifications, you can still use a USB-compliant mouse or keyboard by setting the USB Legacy item in TSETUP to Enabled. Service options Toshiba offers a full line of service options - Toshiba 8100 | Tecra 8100 Users Guide (PDF) 20030103 - Page 24
- Toshiba 8100 | Tecra 8100 Users Guide (PDF) 20030103 - Page 25
PART I GETTING TO KNOW YOUR COMPUTER What's in Part I This part explains the computer components of your Tecra 8100 and how to use them. Don't hesitate to skip around. Guides, such as this one, are not meant to be read from cover to cover. - Toshiba 8100 | Tecra 8100 Users Guide (PDF) 20030103 - Page 26
Chapter 1 Making sure you have everything 1 Finding where everything's located 1 Keyboard and display features 8 External diskette drive 11 - Toshiba 8100 | Tecra 8100 Users Guide (PDF) 20030103 - Page 27
Finding Your Way Around This chapter presents a "grand tour" of your Tecra 8100 computer with illustrations to guide you along your way. It serves as a reference when you need to locate specific parts of the computer. Making sure you have everything Before you do anything else, consult the Quick - Toshiba 8100 | Tecra 8100 Users Guide (PDF) 20030103 - Page 28
battery powers the computer when it is not connected to an AC outlet. The volume control dial lets you adjust the loudness of the system speakers. Pressing the reset button restarts the computer. This button overrides the Suspend/Standby command in Windows, which enable you to continue working - Toshiba 8100 | Tecra 8100 Users Guide (PDF) 20030103 - Page 29
PC Card ejection tabs PC Card slots Speaker Headphone jack Microphone jack Cooling vent PC Card lock External diskette drive port cover Power button Power button cover The PC Card ejection tabs allow easy removal of PC Cards. The PC Card slots allow you to use Type I, Type II, or Type III PC - Toshiba 8100 | Tecra 8100 Users Guide (PDF) 20030103 - Page 30
removal of the PC Cards. The external diskette drive cover protects the external drive port. To connect the external diskette drive, fold back the cover to expose the port. For more information about the external diskette drive, see "External diskette drive" on page 11. On The power button - Toshiba 8100 | Tecra 8100 Users Guide (PDF) 20030103 - Page 31
expansion stations. These devices provide additional expansion capability. For more information, see "Using an expansion device" on page 40 connect a serial mouse, serial printer, or other serial device. The parallel port lets you connect a parallel printer or other parallel device. For more - Toshiba 8100 | Tecra 8100 Users Guide (PDF) 20030103 - Page 32
® allows you to use one of several possible SelectBay modules. The DVD-ROM drive is shown in place. For more information on using your DVD-ROM, see "Using the optional DVD-ROM drive" on page 75. For further information on SelectBay devices, see "Swapping SelectBay modules" on page 47. The modem port - Toshiba 8100 | Tecra 8100 Users Guide (PDF) 20030103 - Page 33
. For further information about using the battery, see "Power Management" on page 87. The SelectBay lock ejects the SelectBay module from the computer. The SelectBay of the Tecra can contain one of several interchangeable devices, offering exceptional system flexibility. For more information - Toshiba 8100 | Tecra 8100 Users Guide (PDF) 20030103 - Page 34
point where it moves easily, and never use it to lift the computer. Front with the display panel open Screen System indicator panel AccuPoint II buttons Part I: Getting to Know Your Computer Keyboard indicator panel AccuPoint II pointing device Microphone - Toshiba 8100 | Tecra 8100 Users Guide (PDF) 20030103 - Page 35
the panel lights. The AccuPoint® II pointing device combines the function of a mouse with the convenience of never having to remove your hands from the keyboard. See "Using The AC power light glows green when the computer is connected to an external power source. Part I: Getting to Know Your Computer - Toshiba 8100 | Tecra 8100 Users Guide (PDF) 20030103 - Page 36
. The light glows amber when the battery is charging and green when the battery is fully charged. The light does not glow if there is no battery in the SelectBay. The hard disk drive light indicates that the hard disk is currently in use. The SelectBay drive light indicates that the module installed - Toshiba 8100 | Tecra 8100 Users Guide (PDF) 20030103 - Page 37
of the computer, or you may remove the drive from its case and install it in the SelectBay. To do this, follow the instructions in "Connecting the external diskette drive" on page 39. For information on using the external diskette drive, see "Using diskettes" on page 73. Part I: Getting to Know Your - Toshiba 8100 | Tecra 8100 Users Guide (PDF) 20030103 - Page 38
Chapter 2 Selecting a place to work 13 Other precautions 17 Setting up your computer 19 Turning on the computer 22 Operating system 24 Using the computer for the first time 24 When and how to turn off the computer 26 - Toshiba 8100 | Tecra 8100 Users Guide (PDF) 20030103 - Page 39
comfortably, describes how to connect components, and explains what to do the first time you use your Tecra computer. Selecting a place to work Your computer is designed to be used in a variety of locations and situations. This section provides guidelines for setting up your computing environment - Toshiba 8100 | Tecra 8100 Users Guide (PDF) 20030103 - Page 40
14 Getting Started Selecting a place to work CAUTION: If you spill liquid into the computer, turn off the computer, unplug it from the AC power source, and let it dry out completely books on ergonomics, repetitivemotion injury, and repetitive-stress syndrome. Part I: Getting to Know Your Computer - Toshiba 8100 | Tecra 8100 Users Guide (PDF) 20030103 - Page 41
Getting Started Selecting a place to work 15 Placement of the computer Proper placement of the computer and external devices is important to avoid stress-related injuries. Consider the following when and positioning of the computer Approximately 90° angles Part I: Getting to Know Your Computer - Toshiba 8100 | Tecra 8100 Users Guide (PDF) 20030103 - Page 42
support. Lower-back support cushions are available at many office supply stores. ❖ Sit with your back straight so that your knees, hips, and elbows form approximately 90-degree angles when you work possible, use soft, indirect lighting in your computer work area. Arms and wrists ❖ Avoid bending, - Toshiba 8100 | Tecra 8100 Users Guide (PDF) 20030103 - Page 43
to vary your activities. If possible, schedule a variety of tasks into your working day. Finding ways to break up the routine can reduce stress and improve your for at least 30 seconds. Other precautions Your Tecra computer is designed to optimize safety, minimize strain, and withstand the rigors - Toshiba 8100 | Tecra 8100 Users Guide (PDF) 20030103 - Page 44
if only one is used extensively. Overheating of a PC Card can result in errors or instability in the PC Card operation. Be careful when you remove a PC Card that has been used for lengthy periods of time. Part I: Getting to Know Your Computer - Toshiba 8100 | Tecra 8100 Users Guide (PDF) 20030103 - Page 45
the computer from an electrical outlet and to charge the computer's batteries. Power cable AC adapter Power cable and AC adapter To connect AC power to the computer: 1 Connect the power cable to the AC adapter. Connecting the power cable to the AC adapter Part I: Getting to Know Your Computer - Toshiba 8100 | Tecra 8100 Users Guide (PDF) 20030103 - Page 46
cause an electric shock. CAUTION: Use of the wrong AC adapter could damage your computer. Toshiba assumes no liability for any damage in such cases. Never pull directly on the power cable to unplug it. Hold the power plug when removing the cable from the outlet. Part I: Getting to Know Your Computer - Toshiba 8100 | Tecra 8100 Users Guide (PDF) 20030103 - Page 47
on battery power" on page 88. Connecting other external components You should attach any other external components and devices to your Tecra computer before you turn it on. For more information about other external components, see "Connecting Other External Devices" on page 31. Part I: Getting - Toshiba 8100 | Tecra 8100 Users Guide (PDF) 20030103 - Page 48
any external devices (such as the AC adapter) are properly connected and ready. 2 If the diskette drive is connected, check that it is empty. 3 Slide the power button cover on the left side of the computer toward the rear, revealing the power button. Exposing the power button Part I: Getting to - Toshiba 8100 | Tecra 8100 Users Guide (PDF) 20030103 - Page 49
is charging and green when the battery is fully charged. Otherwise the light is off. The hard disk drive light flashes to indicate that the hard disk drive is currently in use. If there is a disk device installed in the SelectBay, the SelectBay drive light flashes periodically to indicate that - Toshiba 8100 | Tecra 8100 Users Guide (PDF) 20030103 - Page 50
first time, don't turn off the power again until the operating system has loaded operating system documentation comes with your Toshiba computer. Using the computer for the devices it finds on your computer. Follow the instructions on the screen to properly set up and register your computer. Part - Toshiba 8100 | Tecra 8100 Users Guide (PDF) 20030103 - Page 51
registration card provided by Toshiba. HINT: After you turn on the computer for the first time, it may give you the option to register online. To register online, double-click the icon provided and follow the instructions.(Online registration is not available in Windows NT). Part I: Getting to Know - Toshiba 8100 | Tecra 8100 Users Guide (PDF) 20030103 - Page 52
Turning off the computer for a short period of time If you have work in progress and expect to resume shortly, use the Windows Suspend/Standby off, press and hold the power button until the computer stops beeping (4-5 beeps). You may configure your Tecra 8100 for additional Suspend/ Standby options - Toshiba 8100 | Tecra 8100 Users Guide (PDF) 20030103 - Page 53
dialog box appears. Shut down the computer (Windows 98 Second Edition) 2 Select Shut down and click OK. The computer shuts down and turns itself off. Part I: Getting to Know Your Computer - Toshiba 8100 | Tecra 8100 Users Guide (PDF) 20030103 - Page 54
to keep in mind when you turn off the power. ❖ Never turn off the power while the hard disk drive light or the SelectBay drive light on the system indicator panel is on. Doing so may damage your hard disk, diskette drive, or DVD/CD-ROM drive. ❖ If you close the display panel while the computer - Toshiba 8100 | Tecra 8100 Users Guide (PDF) 20030103 - Page 55
Getting Started When and how to turn off the computer 29 Part I: Getting to Know Your Computer - Toshiba 8100 | Tecra 8100 Users Guide (PDF) 20030103 - Page 56
36 Using a mouse 36 Connecting a local printer 38 Connecting the external diskette drive 39 Connecting external speakers or headphones 40 Connecting an external microphone 40 Using an expansion device 40 Adding memory 41 Swapping SelectBay modules 47 Inserting and removing PC Cards 53 - Toshiba 8100 | Tecra 8100 Users Guide (PDF) 20030103 - Page 57
This chapter describes how to connect devices that can increase the capabilities of your Tecra computer. Using external display devices Your Tecra computer comes with a built-in LCD display, but you can also connect three different types of external display devices to one of two available video - Toshiba 8100 | Tecra 8100 Users Guide (PDF) 20030103 - Page 58
an external monitor" on page 33. Selecting video cables To connect a device to the composite video port, you need a composite video cable. For the best video quality, always use a properly shielded cable. HINT: Toshiba recommends using a cable no longer than 20 feet (approximately 6 meters). Using - Toshiba 8100 | Tecra 8100 Users Guide (PDF) 20030103 - Page 59
the left side of the computer. 4 Turn on the external video device. 5 Set the display mode by pressing Fn + F5, or by the monitor port on the back of the computer. 2 Connect the monitor's power cable to a live electrical outlet. 3 Turn on the external monitor. 4 Part I: Getting to Know Your Computer - Toshiba 8100 | Tecra 8100 Users Guide (PDF) 20030103 - Page 60
external display device, you can choose to use the internal display only, the external device only, or (or other external video device) simultaneously ❖ TV (or other external video device) only 3 Release the Settings tab, click the Advanced Properties button and select S3 Dual View. For more information - Toshiba 8100 | Tecra 8100 Users Guide (PDF) 20030103 - Page 61
. ❖ If the external video device, such as an SVGA monitor, is capable of displaying at a maximum resolution of 640 x 480 and your system is set for a higher resolution, only part of the desktop will appear on the screen. You can view the "lost" area by scrolling to it. ❖ Since most televisions and - Toshiba 8100 | Tecra 8100 Users Guide (PDF) 20030103 - Page 62
mouse/keyboard port supports any PS/2-compatible keyboard. HINT: You can only connect one PS/2 device Control Panel Toshiba Hardware Setup mouse You may want to use a mouse instead of the computer's built-in pointing device, the AccuPoint II. You can use a serial mouse or a PS/2-compatible mouse. Part - Toshiba 8100 | Tecra 8100 Users Guide (PDF) 20030103 - Page 63
set the PS/2 mouse to work simultaneously with the AccuPoint II: 1 Click Start, select Programs, then select Toshiba Utilities. 2 Click Hardware Setup, click the Hardware Options button, and then select the Pointing Devices tab. 3 Select the Simultaneous radio button and click OK. Part I: Getting to - Toshiba 8100 | Tecra 8100 Users Guide (PDF) 20030103 - Page 64
Devices Connecting a local printer Your computer will prompt you to reboot in order for your changes to take effect. Connecting a local printer CAUTION: Never connect the printer cable while the computer's power cable. These instructions assume you have guide. Part I: Getting to Know Your Computer - Toshiba 8100 | Tecra 8100 Users Guide (PDF) 20030103 - Page 65
"Printing your work" on page 72. Connecting the external diskette drive To connect the external diskette drive, connect the cable to the diskette drive port. Connecting the external diskette drive TECHNICAL NOTE: You can also install the diskette drive as a SelectBay device. For more information - Toshiba 8100 | Tecra 8100 Users Guide (PDF) 20030103 - Page 66
connected, the recording process is the same as with the built-in microphone. For more information, see "Recording sounds" on page 119. Using an expansion device The expansion port allows you to connect your computer to an expansion device, which is an excellent Part I: Getting to Know Your Computer - Toshiba 8100 | Tecra 8100 Users Guide (PDF) 20030103 - Page 67
to all the devices. Toshiba offers the following expansion devices for the Tecra 8100: ❖ NetDock ❖ Expansion Station NOTE: The Expansion Station must be used with the NetDock (purchased separately). For more information, see "Expansion capability" on page 269 and the user guide that comes with - Toshiba 8100 | Tecra 8100 Users Guide (PDF) 20030103 - Page 68
system will beep and will not boot beyond the BIOS memory check. A message may display. If this occurs, contact Toshiba's support center at (800) 457-7777. Since your Tecra 8100 computer was built to order, it should have enough memory to run your current applications. However, if your requirements - Toshiba 8100 | Tecra 8100 Users Guide (PDF) 20030103 - Page 69
Devices Adding memory 43 Total Memory 256 MB Memory Module Size Memory Module Size (slot A) (slot B) 128 MB 128 MB Installing a memory module You install additional memory modules into the memory to install memory with Windows 98 Second Edition Before you can install a memory module, you - Toshiba 8100 | Tecra 8100 Users Guide (PDF) 20030103 - Page 70
install one or two memory modules. 1 Unplug the computer. CAUTION: Installing a memory module with the computer's power on may damage the computer, the module, or both. 2 Close the display panel and remove any cables you may have connected. 3 Turn the computer upside down. Part I: Getting to Know - Toshiba 8100 | Tecra 8100 Users Guide (PDF) 20030103 - Page 71
Connecting Other External Devices Adding memory 45 4 Locate and remove the screws that hold the cover plate in place. Unscrewing the memory module cover 5 Lift off the cover. Removing the memory module cover Part I: Getting to Know Your Computer - Toshiba 8100 | Tecra 8100 Users Guide (PDF) 20030103 - Page 72
, be careful not to touch its pin connector on the side you insert into the computer. 6 Remove the memory module from its anti-static packaging. 7 Insert the memory module in the slot and gently press it down into place. The clips on either side of the module will click to secure the module - Toshiba 8100 | Tecra 8100 Users Guide (PDF) 20030103 - Page 73
Other External Devices Swapping SelectBay modules 47 8 Replace the cover plate and the screws. 9 Turn the computer over and restart it. When you turn on the computer, it automatically recognizes the additional memory. Removing a memory module If you need to remove a memory module: 1 Complete - Toshiba 8100 | Tecra 8100 Users Guide (PDF) 20030103 - Page 74
battery ❖ An optional secondary hard disk drive (HDD) HINT: Items from this list that didn't ship with your computer may be purchased. See the Toshiba Accessories Catalog. Removing a module from the SelectBay 1 Turn off the power. CAUTION: Installing or removing a module while the computer power - Toshiba 8100 | Tecra 8100 Users Guide (PDF) 20030103 - Page 75
Devices Swapping SelectBay modules 49 Unlatching the SelectBay 4 Slide the module out of the computer. Sliding the module out If you are removing the modules. However, you must remove the diskette drive module from its cover to use it in the external casing. Part I: Getting to Know Your Computer - Toshiba 8100 | Tecra 8100 Users Guide (PDF) 20030103 - Page 76
a case, ready to connect to the external diskette drive port. Before installing the diskette drive module into the SelectBay, you must remove it from the case. 1 Simultaneously pinch the two eject buttons. The diskette drive will partially eject from the case. Part I: Getting to Know Your Computer - Toshiba 8100 | Tecra 8100 Users Guide (PDF) 20030103 - Page 77
Devices Swapping SelectBay modules 51 2 Carefully pull the diskette drive by the front edges to completely remove it from the case. Eject buttons Releasing the drive module Once the drive module is out of its case, you can attach it to the SelectBay drive cover. Using the secondary battery - Toshiba 8100 | Tecra 8100 Users Guide (PDF) 20030103 - Page 78
External Devices Swapping SelectBay modules Battery Adapter Battery release lever Snapping the battery into the adapter To place the battery into the adapter: 1 Align the contacts on the battery with the contacts on the adapter. 2 Push down to snap the battery into the adapter. Removing the battery - Toshiba 8100 | Tecra 8100 Users Guide (PDF) 20030103 - Page 79
Devices Inserting and removing PC Cards 53 Inserting and removing PC Cards Your Tecra 8100 computer comes with two stacked PC Card slots and supports anything before you insert it. CAUTION: Your Tecra 8100 computer came with all the Card and Socket Services programs you need. Even if your PC - Toshiba 8100 | Tecra 8100 Users Guide (PDF) 20030103 - Page 80
54 Connecting Other External Devices Inserting and removing PC Cards 3 Insert the PC Card. If you have a Type III card, insert it into the lower part of the slot. If you have a Type I or Type II card, insert it into either the upper or lower part of the slot. Inserting a PC Card 4 When the card - Toshiba 8100 | Tecra 8100 Users Guide (PDF) 20030103 - Page 81
be set up to work with your computer. To set up your PC Card, refer to the documentation that came with the card or refer to your operating system manual or online help. Connecting a modem A modem allows you to: ❖ Access a bulletin board service (BBS) or the Internet. Part I: Getting to Know Your - Toshiba 8100 | Tecra 8100 Users Guide (PDF) 20030103 - Page 82
56 Connecting Other External Devices Connecting a modem ❖ Communicate with fax directly from your computer. TECHNICAL NOTE: Windows 98 Second Edition does not support fax capability. Connecting to a phone line Before you can communicate using the modem jack. Part I: Getting to Know Your Computer - Toshiba 8100 | Tecra 8100 Users Guide (PDF) 20030103 - Page 83
Connecting Other External Devices Connecting a modem 57 Connecting to a wall jack CAUTION: The modem is designed the modem. Now you're ready to send a fax or use the modem to connect to an online service or the Internet. HINT: If you're using a telephone line at home, disable Call Waiting before - Toshiba 8100 | Tecra 8100 Users Guide (PDF) 20030103 - Page 84
basics 61 Using the keyboard 63 Using the AccuPoint II 68 Starting a program 69 Saving your work 71 Printing your work 72 Using diskettes 73 Backing up your files 75 Using the optional DVD-ROM drive 75 Using PC Cards 80 Using your computer at the office 82 Using a computer lock 82 - Toshiba 8100 | Tecra 8100 Users Guide (PDF) 20030103 - Page 85
you use it again. ❖ Don't turn off the computer if a drive indicator light indicates a drive is active. Turning off the computer while it is reading from or writing to a disk may damage the disk, the drive, or both. ❖ Keep the computer and disks away from objects that - Toshiba 8100 | Tecra 8100 Users Guide (PDF) 20030103 - Page 86
your work frequently. Your work stays in the computer's temporary memory until you save it to the disk. You will lose all the work since battery runs out of charge while you are working. HINT: Some programs have an automatic-save feature which you can turn on. This feature saves your file to the hard - Toshiba 8100 | Tecra 8100 Users Guide (PDF) 20030103 - Page 87
is not connected to a network. To turn on your computer and log on to Windows NT: 1 If the external diskette drive is connected to the computer, check that it is empty. 2 If a printer or other external device is connected to the computer, turn on the device. Part I: Getting to Know Your Computer - Toshiba 8100 | Tecra 8100 Users Guide (PDF) 20030103 - Page 88
battery is not charged or you are running the computer on AC power, connect the AC adapter. For information on how to do this, refer to "Connecting the AC adapter" in your Tecra® 8100 User's Guide. 4 With the power button Workstation 4.0 (VGA mode) - for troubleshooting 6 Press Enter. The Begin Logon - Toshiba 8100 | Tecra 8100 Users Guide (PDF) 20030103 - Page 89
Learning the Basics Using the keyboard 63 Using the keyboard The Tecra keyboard contains character keys, control keys, function keys, and special Windows keys, providing all the caps lock light on the keyboard indicator glows when you press the Caps Lock key. Part I: Getting to Know Your Computer - Toshiba 8100 | Tecra 8100 Users Guide (PDF) 20030103 - Page 90
the Basics Using the keyboard Making your keyboard emulate a full-size keyboard Although the Tecra computer's keyboard layout is compatible with a standard full-size keyboard, it has fewer you are using. For more information, see your program documentation. Part I: Getting to Know Your Computer - Toshiba 8100 | Tecra 8100 Users Guide (PDF) 20030103 - Page 91
secondary mouse (or AccuPoint II) button. Overlay keys The keys with white numbers and symbols on the front of them form the numeric and cursor overlay. This overlay lets you enter numeric data or control the cursor as you would using the 10-key keypad on a desktop computer's keyboard. Part - Toshiba 8100 | Tecra 8100 Users Guide (PDF) 20030103 - Page 92
numeric overlay is on. ❖ Press and hold down Shift while you use the cursor control overlay keys. ❖ To return to the numeric overlay, release Shift. Part I: Getting to Know Your Computer - Toshiba 8100 | Tecra 8100 Users Guide (PDF) 20030103 - Page 93
the cursor control overlay, hold down the Fn key and press F10 again. The cursor control mode light on the keyboard indicator panel goes out. Part I: Getting to Know Your Computer - Toshiba 8100 | Tecra 8100 Users Guide (PDF) 20030103 - Page 94
the direction you want the cursor to move. Pushing harder on the pointing device moves the cursor faster. The primary button acts as the left button on a mouse. The secondary button acts as the right mouse button. The small left button performs the same function as the Page Up key. The small right - Toshiba 8100 | Tecra 8100 Users Guide (PDF) 20030103 - Page 95
-a scaled-down word processor. That's all there is to it. To close the program, click the Close button at the upper-right corner of the window. Starting a program from Explorer If a program is not in from Windows Explorer: 1 Click Start, then point to Programs. Part I: Getting to Know Your Computer - Toshiba 8100 | Tecra 8100 Users Guide (PDF) 20030103 - Page 96
70 Learning the Basics Starting a program 2 Click Windows Explorer. Windows opens Explorer. 3 In the left part of the screen, under the C: icon, double-click the folder containing the program, in this case Program Files. Explorer shows the contents of the Program - Toshiba 8100 | Tecra 8100 Users Guide (PDF) 20030103 - Page 97
work 71 Saving your work Before you turn off the computer, save your work to the hard disk drive or a diskette. This is one of the most important rules of computing. NOTE: Save data even when you are using Standby, in case the battery systems support file Part I: Getting to Know Your Computer - Toshiba 8100 | Tecra 8100 Users Guide (PDF) 20030103 - Page 98
Windows NT supports the following file systems: ❖ File Allocation Table (FAT) - The computer can access files in a FAT primary partition or logical drive when it NTFS or FAT volumes. Printing your work Make sure that Windows 98 Second Edition is set up for Part I: Getting to Know Your Computer - Toshiba 8100 | Tecra 8100 Users Guide (PDF) 20030103 - Page 99
diskette pops out for easy removal. CAUTION: Check the diskette in-use indicator light when you use the diskette drive. Do not press the eject button or turn off the computer while the light is glowing. Doing so could destroy data and damage the diskette or the drive. Part I: Getting to Know Your - Toshiba 8100 | Tecra 8100 Users Guide (PDF) 20030103 - Page 100
points toward the drive. 2 Push the diskette gently into the drive slot. When the diskette is in place, the eject button pops out. To remove a diskette from the drive, push the eject button. Diskette care as speakers and radios, since these can destroy data. Part I: Getting to Know Your Computer - Toshiba 8100 | Tecra 8100 Users Guide (PDF) 20030103 - Page 101
button, then point to Send To and click 3.5-inch Floppy (A:). Using the optional DVD-ROM drive DVD (Digital Versatile Disc) is primarily a video medium. Because it provides a significant increase in data storage, it can support features that are not available on any other video platform. Part - Toshiba 8100 | Tecra 8100 Users Guide (PDF) 20030103 - Page 102
installed in the SelectBay, follow the instructions in "Swapping SelectBay modules" on page 47. HINT: Your DVD-ROM drive is designed to play Region 1 (North America) DVD-ROMs. DVD in-use indicator light Eject button Manual eject hole The DVD-ROM drive The DVD in-use indicator light indicates when - Toshiba 8100 | Tecra 8100 Users Guide (PDF) 20030103 - Page 103
release the DVD-ROM tray when the power is off. HINT: The DVD-ROM drive will not open if the computer's power is off. If you cannot turn on the computer, you can open the DVD-ROM drive manually. Use a straightened paper clip or other narrow object to press the manual eject button. This button is in - Toshiba 8100 | Tecra 8100 Users Guide (PDF) 20030103 - Page 104
described in "Problems with the CD-ROM or DVD-ROM drive" on page 226. 5 Place the disc carefully in the tray, label side up. Positioning the disc in the drive 6 Gently may jam in the drive. If this happens, contact your network administrator for assistance. Part I: Getting to Know Your Computer - Toshiba 8100 | Tecra 8100 Users Guide (PDF) 20030103 - Page 105
DVDExpress DVD Player" on page 122. Removing compact discs To remove a compact disc with the computer turned on: 1 Press the eject button on the drive. CAUTION: Do not press the eject button while the computer is accessing the DVD-ROM drive. Wait for the system indicator panel's DVD-ROM drive light - Toshiba 8100 | Tecra 8100 Users Guide (PDF) 20030103 - Page 106
edge. Fingerprints on the surface can prevent the DVD-ROM drive from reading the data properly. ❖ Don't work with your computer, but are likely to be much more difficult to set up and use. For information on inserting or removing a PC Card, see "Inserting and removing PC Cards" on page 53. Part - Toshiba 8100 | Tecra 8100 Users Guide (PDF) 20030103 - Page 107
computer: 1 Start TSETUP. For instructions, see "TSETUP" on page remove a card while it is in use. Otherwise, you could lose valuable information. For example: ❖ Don't remove a hard disk card while the system is accessing it. ❖ Don't remove a network card while you are connected to a network. Part - Toshiba 8100 | Tecra 8100 Users Guide (PDF) 20030103 - Page 108
full-size keyboard, and a mouse, you can work with your notebook as if it were a standard office computer. An external monitor connects to the monitor port. An external PS/2-compatible keyboard or a PS/2 mouse connects to the PS/2 port. An optional Y-cable lets you connect both devices to the port - Toshiba 8100 | Tecra 8100 Users Guide (PDF) 20030103 - Page 109
Computer Lock Cable To secure the computer: 1 Loop the cable through or around some part of a heavy object. Make sure there is no way for a potential thief to key a quarter turn and remove it. The computer is now securely locked. Locking the computer Part I: Getting to Know Your Computer - Toshiba 8100 | Tecra 8100 Users Guide (PDF) 20030103 - Page 110
computer's battery, see "Running the computer on battery power" on dampened cloth. Ask your Toshiba dealer for suggestions for appropriate activity has ended (the drive indicator light stops glowing) and the ports are located). Although your notebook computer is built to withstand reasonable shock - Toshiba 8100 | Tecra 8100 Users Guide (PDF) 20030103 - Page 111
Learning the Basics Caring for your computer 85 Part I: Getting to Know Your Computer - Toshiba 8100 | Tecra 8100 Users Guide (PDF) 20030103 - Page 112
Chapter 5 Toshiba's energy-saver design 87 Running the computer on battery power 88 What to do when the battery alarm sounds 92 Starting where you left off 93 Changing batteries 102 Taking care of your battery 104 Conserving power 106 Additional options for power 108 - Toshiba 8100 | Tecra 8100 Users Guide (PDF) 20030103 - Page 113
-power, standby state when it is not being used, thereby conserving energy. Many of these energy-saving features have been set by Toshiba power usage, see "Using Power Management" on page 152, and "Power Saver" on page 154. This chapter covers all the aspects of using your computer on battery power - Toshiba 8100 | Tecra 8100 Users Guide (PDF) 20030103 - Page 114
contains a removable lithium ion (Li-Ion) battery pack that provides power when you are away from an AC outlet. This is the main battery. You can recharge it many times. In addition to the main battery, you may also have a second battery installed in the SelectBay. If you travel and need to work for - Toshiba 8100 | Tecra 8100 Users Guide (PDF) 20030103 - Page 115
battery power The computer's main battery light gives you an indication of the main battery's current charge: ❖ Green indicates the AC adapter has fully charged the battery. ❖ Amber indicates the AC adapter is charging the battery. ❖ Off indicates that the battery is not being charged. Part - Toshiba 8100 | Tecra 8100 Users Guide (PDF) 20030103 - Page 116
, or Windows NT Suspend command). Displaying remaining battery power You can monitor the battery's remaining charge. The computer calculates the remaining battery charge as it operates, based on your current rate of power use. To show remaining power in Windows 98 Second Edition 1 Click Start - Toshiba 8100 | Tecra 8100 Users Guide (PDF) 20030103 - Page 117
as long as a new battery, even when both are fully charged. HINT: Wait at least 16 seconds after turning on the computer before trying to monitor the remaining battery power. The computer needs this time to check the battery's remaining capacity and perform its calculations. Part I: Getting to Know - Toshiba 8100 | Tecra 8100 Users Guide (PDF) 20030103 - Page 118
For more information, see "Using Power Management" on page 152, or "Power Saver" on page 154. What to do when the battery alarm sounds Your Tecra computer can be configured to warn you of a low battery charge condition so you may take the necessary steps to save your work. Windows 98 Second Edition - Toshiba 8100 | Tecra 8100 Users Guide (PDF) 20030103 - Page 119
and replace the main battery with a charged one as outlined in "Changing batteries" on page 102. ❖ Install a secondary battery module in the computer's SelectBay. ❖ Connect your computer to an AC power source. Starting where you left off With your Tecra 8100 computer, you have the opportunity - Toshiba 8100 | Tecra 8100 Users Guide (PDF) 20030103 - Page 120
Hibernation mode. While Standby or Suspend/Resume (memory) mode saves your current work to memory in Long Life mode, Hibernation mode saves it to the hard disk. TECHNICAL NOTE: If you use Standby and your battery dies, you will lose the information held in memory. With Hibernation mode, you will not - Toshiba 8100 | Tecra 8100 Users Guide (PDF) 20030103 - Page 121
the power button. For more information, see "Shutdown mode" on page 257. Using Suspend/Resume (memory) mode Suspend/Resume (memory) mode is a Toshiba utility that maintains the operating state of your computer in memory while the computer is off. With Suspend/Resume (memory) mode Part I: Getting - Toshiba 8100 | Tecra 8100 Users Guide (PDF) 20030103 - Page 122
/Resume (memory) mode icon is highlighted, then release the Fn key. ❖ Open the Power Saver utility in Control panel, click select Battery Power, click device is being accessed. If you suspend the computer and decide to continue working, wait a few seconds before turning the computer on again. Part - Toshiba 8100 | Tecra 8100 Users Guide (PDF) 20030103 - Page 123
normal conditions, a fully charged battery will sustain Suspend/Resume (memory) mode for about two work you had not previously saved to disk will be lost. To recharge the battery, connect the computer to an AC power to hard disk before shutting down completely. Hibernation mode uses no battery power - Toshiba 8100 | Tecra 8100 Users Guide (PDF) 20030103 - Page 124
the Enable hibernate support check box, then click OK. TECHNICAL NOTE: Toshiba recommends that you always have the Hibernate option enabled. Hibernate is the function that causes your system to save anything you have in shortterm memory to the hard disk drive should your battery fail. If Hibernate - Toshiba 8100 | Tecra 8100 Users Guide (PDF) 20030103 - Page 125
Panel window, double-click the Power Saver icon. 3 In the Power Save Mode tab, click the Details button, then select the System Power Mode tab. The following display appears. System power mode settings 4 Select Hibernate for any or all of the applicable modes. Part I: Getting to Know Your Computer - Toshiba 8100 | Tecra 8100 Users Guide (PDF) 20030103 - Page 126
when you press the power button. ❖ When I work before leaving your machine, or manually put it into Hibernation. If your machine enters Standby while running from the battery, you will lose data if the battery fully discharges. 5 Once you have made your selections, click OK to return to the Power - Toshiba 8100 | Tecra 8100 Users Guide (PDF) 20030103 - Page 127
1 Press Fn and F3 simultaneously to display the power usage pop-up window. Shutdown mode pop-up press Fn, press F3 until you select the desired power usage mode. The Shutdown modes are: Standby, Hibernation, Fn and F3 simultaneously to display the power usage pop-up window. Shutdown mode pop-up - Toshiba 8100 | Tecra 8100 Users Guide (PDF) 20030103 - Page 128
Power Management Changing batteries The Shutdown modes are: Boot and Suspend/Resume (memory Standby, Suspend, or Hibernate mode, press the power button, or if you suspended your system by To change the battery: 1 Save your work. 2 Shut down and turn off the computer. 3 Remove all cables connected to - Toshiba 8100 | Tecra 8100 Users Guide (PDF) 20030103 - Page 129
103 Power Management Changing batteries Unlocking the battery (bottom view) 6 Pull the discharged battery module out of the computer. Removing the discharged battery WARNING: If the battery is leaking or its case is cracked, put on protective gloves to handle it, and discard it immediately following - Toshiba 8100 | Tecra 8100 Users Guide (PDF) 20030103 - Page 130
104 Power Management Taking care of your battery The battery pack has been designed so that you cannot install it with reverse polarity. CAUTION: If the battery does not slide into the slot easily, move the battery lock to the unlocked position and try again. Don't force the battery into position. 9 - Toshiba 8100 | Tecra 8100 Users Guide (PDF) 20030103 - Page 131
105 Power Management Taking care of your battery ❖ When you need to replace the main battery, use an identical battery from the same manufacturer. Maximizing battery life ❖ If you're not going to use the computer for a long period, remove the battery pack. ❖ Alternate between battery packs if you - Toshiba 8100 | Tecra 8100 Users Guide (PDF) 20030103 - Page 132
, such as: ❖ How the computer is configured. ❖ How much you use the hard disk, DVD-ROM/CD-ROM, and diskette drives. ❖ Whether you use any optional devices to which the battery supplies power. ❖ Where you are working, since operating time decreases at low temperatures. There are various ways in which - Toshiba 8100 | Tecra 8100 Users Guide (PDF) 20030103 - Page 133
Edition) 2 While continuing to press Fn, press F2 until you select the desired power usage mode. The power usage modes under battery power are: Long Life, Normal, and High Power. The power usage mode under AC power is Full Power only 3 Release the Fn key. The pop-up window disappears. You're now - Toshiba 8100 | Tecra 8100 Users Guide (PDF) 20030103 - Page 134
, the capacity of one battery pack may be sufficient for your needs. However, if you need more portable power, Toshiba provides these options: ❖ Purchase extra battery packs. ❖ Install a secondary battery module in the SelectBay. See "Swapping SelectBay modules" on page 47. Part I: Getting to Know - Toshiba 8100 | Tecra 8100 Users Guide (PDF) 20030103 - Page 135
109 Power Management Additional options for power ❖ Purchase a battery charger that charges one main battery pack and one secondary battery module at a time. Part I: Getting to Know Your Computer - Toshiba 8100 | Tecra 8100 Users Guide (PDF) 20030103 - Page 136
- Toshiba 8100 | Tecra 8100 Users Guide (PDF) 20030103 - Page 137
PART II TECHNICAL REFERENCE What's in Part II This part documents the Toshiba utility programs that come with your computer. - Toshiba 8100 | Tecra 8100 Users Guide (PDF) 20030103 - Page 138
Chapter 6 Setting up Windows to work with your printer 113 Exploring audio features 118 Using the DVDExpress DVD Player 122 Exchanging data with another computer 132 Using MS-DOS programs 138 - Toshiba 8100 | Tecra 8100 Users Guide (PDF) 20030103 - Page 139
some of the special features of your Tecra 8100 notebook computer. Setting up Windows to work with your printer When you turned on your Setting up a printer involves choosing a printer driver. This special program acts as a translator that turns your work into a form the printer can understand. This - Toshiba 8100 | Tecra 8100 Users Guide (PDF) 20030103 - Page 140
work with your printer To set up a printer with the Windows 98 Second Edition Add Printer Wizard: 1 Click the Start button, then point to Settings, and click Printers. The Printers display panel opens. Printers panel 2 Double-click Add Printer. The Add Printer Wizard starts. Add Printers Wizard Part - Toshiba 8100 | Tecra 8100 Users Guide (PDF) 20030103 - Page 141
Your Options Setting up Windows to work with your printer 3 Click Next. prompts for the printer port. 7 Select the port settings according to the instructions in your printer's documentation and the port to which your printer is connected, 98 Second Edition, click Yes. Part II: Technical Reference - Toshiba 8100 | Tecra 8100 Users Guide (PDF) 20030103 - Page 142
116 Exploring Your Options Setting up Windows to work with your printer ❖ Available when specifically requested, you may see various messages indicating the status of your print job. Setting up Windows NT to work with your printer To set up a printer with the Windows NT Add Printer Wizard: 1 Open - Toshiba 8100 | Tecra 8100 Users Guide (PDF) 20030103 - Page 143
117 Exploring Your Options Setting up Windows to work with your printer Add Printer Wizard dialog box 3 Select one printer and a local printer are as follows: For a local printer, you must install a printer driver on your computer. For a network printer, you must specify the path to the printer (or - Toshiba 8100 | Tecra 8100 Users Guide (PDF) 20030103 - Page 144
audio features 5 Follow the on-screen instructions to complete the printer setup process. speakers. TECHNICAL NOTE: Use amplified speakers that require an external power source. Other types of speakers will be inadequate to produce sound computer's volume control dial. Part II: Technical Reference - Toshiba 8100 | Tecra 8100 Users Guide (PDF) 20030103 - Page 145
, connect it to the external microphone jack. 2 Click Start, point to Programs, Accessories, and then click Multimedia. 3 Click Sound Recorder. The Sound Recorder screen displays. Part II: Technical Reference - Toshiba 8100 | Tecra 8100 Users Guide (PDF) 20030103 - Page 146
new sound file as a waveform. 7 To hear what you just recorded, click the Play button. 8 To save the file, select Save from the File menu. Adjusting recording quality The better Sound Recorder. 3 In the Sound Recorder window, click Edit, then click Audio Properties. Part II: Technical Reference - Toshiba 8100 | Tecra 8100 Users Guide (PDF) 20030103 - Page 147
dialog box, adjust the Recording Volume, Preferred device, and Preferred quality according to your needs. 5 Click OK. Your new settings take effect the next time you record. Using Microsoft CD Player If your Tecra 8100 came with a CD-ROM or DVD-ROM drive, you can use your computer to play audio - Toshiba 8100 | Tecra 8100 Users Guide (PDF) 20030103 - Page 148
full-featured multimedia control center that helps you get the most out of the exciting world of DVD technology. NOTE: DVDExpress is not supported in Windows NT. To use the player, simply insert a disc into your DVD-ROM drive, launch DVDExpress and press the Play button. Part II: Technical Reference - Toshiba 8100 | Tecra 8100 Users Guide (PDF) 20030103 - Page 149
DVDExpress, then click Mediamatics DVD Player. Display Window DVD player controls Mediamatics DVDExpress DVD Player Status display window includes the following indicators: Disc type indicates one of the following: ❖ DVD Video ❖ Video CD ❖ Audio CD Additional disc information is displayed using one - Toshiba 8100 | Tecra 8100 Users Guide (PDF) 20030103 - Page 150
of the DVD Player controls and indicators: Description Keyboard shortcut Open-Opens video and/or audio files for selection L and playback. Eject-Opens the DVD-ROM drive for loading and/ E or removal of discs. Some systems also use this button as a toggle between Eject and Insert. Part II - Toshiba 8100 | Tecra 8100 Users Guide (PDF) 20030103 - Page 151
125 Exploring Your Options Using the DVDExpress DVD Player Description Keyboard shortcut Options-Displays the DVDExpress Options dialog box, which provides information the content forward at double F speed to a selected location. Click Play to resume playback. Part II: Technical Reference - Toshiba 8100 | Tecra 8100 Users Guide (PDF) 20030103 - Page 152
Control buttons to resume audio. Help-Displays the Help file. F1 Minimize-Minimizes the DVDExpress display N window. Close-Exits the DVDExpress application. X Camera Angle-Changes the camera angle (or view) V of the content currently being played. This feature is enabled by the DVD content - Toshiba 8100 | Tecra 8100 Users Guide (PDF) 20030103 - Page 153
root menu R for selection of DVD content for playback. The functionality of the Resume feature depends on the content being played. Some content resumes playback when you click the Root Menu/Resume button again. This action starts the playback of the content from the location where you left - Toshiba 8100 | Tecra 8100 Users Guide (PDF) 20030103 - Page 154
the DVDExpress control panel when the video is in full screen mode, move your mouse pointer out of the screen area (for example, to the bottom of the secondary AccuPoint II button on the DVDExpress control panel. It offers alternative access to a number of features. Part II: Technical Reference - Toshiba 8100 | Tecra 8100 Users Guide (PDF) 20030103 - Page 155
is not already running. 2 On the DVDExpress control panel, click the Options button. The DVD Options dialog box contains the following tabs: ❖ About - This tab displays copyright is available only when playback is stopped. ❖ DVD Region - Use this tab to change the current region code for DVDExpress - Toshiba 8100 | Tecra 8100 Users Guide (PDF) 20030103 - Page 156
Your Options Using the DVDExpress DVD Player Region codes Region coding is part of the protection system for DVD content. It divides the world to an external video source and play full-screen DVD movies on your TV. If you prefer to continue working on your computer while others enjoy the movie, you - Toshiba 8100 | Tecra 8100 Users Guide (PDF) 20030103 - Page 157
the DVD-ROM drive. 2 Launch DVDExpress and press the Play button. The playback controls for a VideoCD are slightly different from those for a DVD disc. To access some of the features of VideoCD, use your PC keyboard as follows: ❖ Playback controls - Play, Pause, and Stop within DVDExpress work the - Toshiba 8100 | Tecra 8100 Users Guide (PDF) 20030103 - Page 158
mouse button. TECHNICAL NOTE: VideoCD playback capability is not enabled on all systems. Playing an audio CD 1 Place the audio CD in the DVD-ROM drive. 2 Launch DVDExpress and press the Play button. files through: ❖ The serial port, you need a null modem serial cable. Part II: Technical Reference - Toshiba 8100 | Tecra 8100 Users Guide (PDF) 20030103 - Page 159
tab. 3 In the dialog box, type communicating. 4 Follow the online instructions. Using the computer's telephony feature Your computer comes with RingCentral®, an -processing or spreadsheet program. NOTE: Windows NT does not support RingCentral. To start RingCentral, double-click its icon on the - Toshiba 8100 | Tecra 8100 Users Guide (PDF) 20030103 - Page 160
an online service, or communicate across the telephone lines with another computer, you need: ❖ A modem (one comes with your Tecra 8100 computer) ❖ A telephone line ❖ A browser or communications program ❖ An Internet Service Provider (ISP) or online service if you plan to use the Internet Part II - Toshiba 8100 | Tecra 8100 Users Guide (PDF) 20030103 - Page 161
procedure is intended to support you if you need to either upgrade your modem or reset with the serial port or other serial devices. If you're having trouble connecting through the modem, you may the Modem Properties dialog box. 3 Click the Diagnostics tab. Your modem should be listed next to one - Toshiba 8100 | Tecra 8100 Users Guide (PDF) 20030103 - Page 162
run the Windows 98 Second Edition Modem Diagnostics. Windows 98 Second Edition communicates with it displays an error message. Consult the troubleshooting sections of your modem and Windows 98 Second error message. If this happens, consult the troubleshooting sections of your modem and Windows NT - Toshiba 8100 | Tecra 8100 Users Guide (PDF) 20030103 - Page 163
folder and click RingCentral. 2 Select Next and follow the instructions on the screen. Connecting directly to a remote computer If connecting directly to a remote computer or a bulletin board service (BBS), you need a general-purpose communications program. Connecting Part II: Technical Reference - Toshiba 8100 | Tecra 8100 Users Guide (PDF) 20030103 - Page 164
These sites can provide information about Toshiba products, give help with technical questions, and keep you up to date with future upgrades. For more information, see "Contacting Toshiba" on page 244. Using MS- . 4 At the system prompt, type the command and press Enter. Part II: Technical Reference - Toshiba 8100 | Tecra 8100 Users Guide (PDF) 20030103 - Page 165
based disk programs to repair or defragment a FAT primary partition or logical drive used by Windows NT unless the disk program has been certified as of third-party utilities corrupting FAT volumes are relatively rare, some problems have occurred. Using non-NT utilities is simply not worth the - Toshiba 8100 | Tecra 8100 Users Guide (PDF) 20030103 - Page 166
Chapter 7 Fn-esse 141 Hardware Setup 146 TSETUP 151 Using Power Management 152 Power Saver 154 Expansion device properties 158 - Toshiba 8100 | Tecra 8100 Users Guide (PDF) 20030103 - Page 167
utilities designed to help you to reconfigure your system to best meet your individual needs. Additionally, Toshiba has added a tab to the Microsoft Windows 98 Second Edition Power Management utility. Together, these allow you to ascertain certain system details, set additional options or change - Toshiba 8100 | Tecra 8100 Users Guide (PDF) 20030103 - Page 168
142 Toshiba Utilities Fn-esse describes how to use the Fn-esse program to a hot key or a keyboard overlay. Starting Fn-esse To start Fn-esse, click Start, then point to Programs, Toshiba Utilities, and then click Fn-esse. The Fn-esse keyboard appears. The Fn-esse window The keys are color-coded - Toshiba 8100 | Tecra 8100 Users Guide (PDF) 20030103 - Page 169
143 Toshiba Utilities Fn- you wish to assign to a key. 4 Click and hold the primary button as you drag the highlighted item from Explorer to the key on the Fn keyboard to which you wish to assign it. 5 Release the primary button. Fn-esse displays the Add/Edit Command dialog box completely filled in - Toshiba 8100 | Tecra 8100 Users Guide (PDF) 20030103 - Page 170
, move the pointing device over the desired key and press the secondary button. The Assignment Type dialog box appears. The Fn-esse assignment type dialog box HINT: If you are making a direct key assignment, complete step 3. If you are making a pop-up assignment, complete step 4. Part II: Technical - Toshiba 8100 | Tecra 8100 Users Guide (PDF) 20030103 - Page 171
Toshiba Utilities Fn-esse 3 To make a direct key assignment, select Direct. The Add/Edit Command dialog box appears. ❖ Enter the Description, Command Line, and Working Directory for the new Fn-esse key assignment, or click the Browse button Expand popup lists check box. Part II: Technical Reference - Toshiba 8100 | Tecra 8100 Users Guide (PDF) 20030103 - Page 172
with the secondary button. Fn-esse displays the Assignment Type dialog box. 2 To change the key assignment, click Direct or Popup and continue as if you were creating a new assignment. 3 To remove the key assignment, click Clear. Hardware Setup Hardware Setup is the Toshiba configuration management - Toshiba 8100 | Tecra 8100 Users Guide (PDF) 20030103 - Page 173
Setup Toshiba Hardware Setup has the following tabs: ❖ General - Shows the BIOS version, memory configuration, and Hard Disk Drive (HDD) mode. ❖ Password - Allows you to set the user password, an expansion station eject password, and an owner string. ❖ Device Config. - Shows the Device configuration - Toshiba 8100 | Tecra 8100 Users Guide (PDF) 20030103 - Page 174
BIOS version. ❖ Memory panel - Shows how the computer's memory is allocated. ❖ HDD panel - Displays the type of hard disk drive installed in your computer. Hardware Options button - Opens the Hardware Configurations Options window, where you specify the hardware profile of your computer. Part - Toshiba 8100 | Tecra 8100 Users Guide (PDF) 20030103 - Page 175
Toshiba Utilities Hardware Setup Hardware Configuration online help You can access Hardware Configuration online help: ❖ Directly, through the Help button NT Explorer: 1 Click the Start menu button, then click Run. 2 In the Run a hardware device, click the tab associated with the device. Hardware - Toshiba 8100 | Tecra 8100 Users Guide (PDF) 20030103 - Page 176
Toshiba Utilities Hardware Setup ❖ Pointing Devices - Allows you to specify whether you want to use the AccuPoint II, a PS/2 mouse drives for the operating system. TECHNICAL NOTE: Booting from a CD-ROM is not supported by all CD-ROM drives reset the user password for power on and instant security. ❖ - Toshiba 8100 | Tecra 8100 Users Guide (PDF) 20030103 - Page 177
151 Toshiba Utilities TSETUP compliant mouse or keyboard by setting the USB Legacy item in TSETUP to Enabled. ❖ PC Card - Allows you to set the PC Card Controller MS-DOS screen. At the MS-DOS prompt, type cd \windows and press Enter. Then, type TSETUP and press Enter. Part II: Technical Reference - Toshiba 8100 | Tecra 8100 Users Guide (PDF) 20030103 - Page 178
152 Toshiba Utilities Using Power Management The first page of TSETUP appears. MEMORY Total=65536KB PASSWORD NotRegistered BATTERY BatterySaveMode=FullPower PERIPHERAL OperatingSystem=Non-ACPI PointingDevices=Auto-Selected ExtKeyboard"Fn"=Disabled USBLegacyEmulation=Disabled ParallelPortMode=ECP - Toshiba 8100 | Tecra 8100 Users Guide (PDF) 20030103 - Page 179
box appears. Power Management Properties dialog box The Power Management Properties dialog box contains the following tabs: ❖ Power Schemes - Allows you to choose from among a group of preset power options. ❖ Advanced - Allows you to choose additional power management options. Part II: Technical - Toshiba 8100 | Tecra 8100 Users Guide (PDF) 20030103 - Page 180
to set the power mode for the DS-XG audio device. TECHNICAL NOTE: Toshiba recommends that you always have the Hibernation option enabled. Hibernation is the function that causes your system to save anything you have in short-term memory to the hard disk drive should your battery fail. If Hibernation - Toshiba 8100 | Tecra 8100 Users Guide (PDF) 20030103 - Page 181
you can reconfigure that function. You may choose a power-saving management strategy to best suit your computing needs. If you are running on batteries and the programs that you are using do not require a lot of system resources, you may experience longer work sessions by enabling the Normal or Long - Toshiba 8100 | Tecra 8100 Users Guide (PDF) 20030103 - Page 182
you wish the computer to automatically turn itself on. Power Save Modes tab There are five Power Save modes from which to choose. You can use different modes for battery operation and for AC adapter operation. ❖ Full Power mode - Does not perform power saving. This mode is the default for AC adapter - Toshiba 8100 | Tecra 8100 Users Guide (PDF) 20030103 - Page 183
Save settings: 1 Select Battery Power (or External Power). 2 Select a Power Save mode. 3 Click the Details... button. The Power Mode Setup dialog appears. It has five tabs: ❖ Display Auto Off - Displays power management options ❖ HDD Auto Off - Hard disk drive power management options ❖ Processor - Toshiba 8100 | Tecra 8100 Users Guide (PDF) 20030103 - Page 184
2 In the Control Panel window, double-click the Toshiba Services Configuration icon. The Toshiba Services Configuration dialog box appears. Toshiba Services Configuration dialog box For more information about expansion devices, see "Using an expansion device" on page 40. Part II: Technical Reference - Toshiba 8100 | Tecra 8100 Users Guide (PDF) 20030103 - Page 185
159 Toshiba Utilities Expansion device properties Part II: Technical Reference - Toshiba 8100 | Tecra 8100 Users Guide (PDF) 20030103 - Page 186
Chapter 8 Using passwords in Windows 161 User-level passwords 162 Supervisor-level passwords 170 Hard disk drive passwords - Windows 98 Second Edition 175 Hard disk drive passwords - Windows NT 182 - Toshiba 8100 | Tecra 8100 Users Guide (PDF) 20030103 - Page 187
your files. When you set a password, you must enter the password before you can work on your computer again. Toshiba supports the following types of passwords on the Tecra 8100 computer: ❖ A power-on (user-level) password that requires you to enter the password whenever you start the computer. ❖ An - Toshiba 8100 | Tecra 8100 Users Guide (PDF) 20030103 - Page 188
hard disk drive User password and/or a hard disk drive Master password. User-level passwords The user-level password is the basic level of password security. You can use it as both a power service diskette. Refer to "Setting a user-level password in TSETUP" on page 164 for instructions. Part - Toshiba 8100 | Tecra 8100 Users Guide (PDF) 20030103 - Page 189
you start the computer (power-on password), or when you use the hot key Fn + F1 (instant password). To set (register) a user-level password in Windows NT: 1 Click Start, point to Programs, and then point to Toshiba Utilities. 2 Click Hardware Setup, click the Hardware Options button, and then select - Toshiba 8100 | Tecra 8100 Users Guide (PDF) 20030103 - Page 190
. Use it when you start the computer (power-on password), or when you use the hot key Fn + F1 (instant password). Setting a user-level password in TSETUP HINT: If you forget your password and have lost your password service diskette, contact the Toshiba InTouch Center (US telephone number (800) 457 - Toshiba 8100 | Tecra 8100 Users Guide (PDF) 20030103 - Page 191
Safe User-level passwords TSETUP displays a setup screen. MEMORY Total=65536KB PASSWORD NotRegistered BATTERY BatterySaveMode MultiDisplayAdapt.=SingleAdapt. TVConfig. OTHERS Power-upMode=Boot CPUCache=Enabled Level2Cache=Enabled Press Y to confirm you want to quit. Part II: Technical Reference - Toshiba 8100 | Tecra 8100 Users Guide (PDF) 20030103 - Page 192
create a new password service diskette. Disabling the user-level password You can disable a user-level password in either Hardware Setup or in TSETUP. Disabling a user-level password in Toshiba Hardware Setup To delete a user-level password in Windows 98 Second Edition: Part II: Technical Reference - Toshiba 8100 | Tecra 8100 Users Guide (PDF) 20030103 - Page 193
OK at the bottom of the Hardware Setup window. The user password is disabled. To delete a user-level password in Windows NT: 1 Click Start, point to Programs, and then point to Toshiba Utilities. 2 Click Hardware Setup, click the Hardware Options button, and then select the Password tab. 3 Click Not - Toshiba 8100 | Tecra 8100 Users Guide (PDF) 20030103 - Page 194
168 Keeping Your Files Safe User-level passwords The computer shuts down and turns itself off. HINT: Run TSETUP outside Windows, at a system prompt. If you try to run TSETUP from an MS-DOS session under Windows, results can be unpredictable. 2 Slide the power button cover on the left side of the - Toshiba 8100 | Tecra 8100 Users Guide (PDF) 20030103 - Page 195
password service diskette is not reusable. Once you use it, you must create a new diskette, even if you set the same password. 4 To enter TSETUP and reset your password, press Y. Follow the instructions in "Setting a user-level password in TSETUP" on page 164 to reset your password. To remove your - Toshiba 8100 | Tecra 8100 Users Guide (PDF) 20030103 - Page 196
Using the instant (user-level) password An mouse or trackball. If you have not registered a user-level password, press Enter to unlock your system. If you have registered a user must enter the supervisor password to make changes using Toshiba Utilities or TSETUP. To set a supervisor-level password - Toshiba 8100 | Tecra 8100 Users Guide (PDF) 20030103 - Page 197
mode and displays a system prompt. 3 Type c:\toshiba\svpw and press Enter. The Supervisor Password program password in Windows NT: 1 If Suspend/Resume (memory) Mode is enabled, turn it off. 2 Click diskette drive to the computer. 5 Insert the Toshiba Companion Diskette into the diskette drive and - Toshiba 8100 | Tecra 8100 Users Guide (PDF) 20030103 - Page 198
appears. 7 Use the arrow keys to select Exit to DOS. 8 At the A:\ prompt, type c:\toshiba\svpw and press Enter. The following message appears: SUPERVISOR PASSWORD = Not Registered Do you want to register . 13 Press Ctrl, Alt, and Del simultaneously to return to Windows. Part II: Technical Reference - Toshiba 8100 | Tecra 8100 Users Guide (PDF) 20030103 - Page 199
MS-DOS mode and displays a system prompt. 3 Type c:\toshiba\svpw and press Enter. The Supervisor Password program starts and a supervisor-level password in Windows NT: 1 If Suspend/Resume (Memory) mode is enabled, turn it off. 2 Click Start, then drive to the computer. Part II: Technical Reference - Toshiba 8100 | Tecra 8100 Users Guide (PDF) 20030103 - Page 200
-level passwords 5 Insert the Toshiba Companion Diskette into the diskette drive and turn on the computer. After a few minutes, a Welcome screen appears. 6 Press Enter. The Toshiba Companion Utility main menu appears Ctrl, Alt, and Del simultaneously to return to Windows. Part II: Technical Reference - Toshiba 8100 | Tecra 8100 Users Guide (PDF) 20030103 - Page 201
alert you that this feature is not supported by your drive. If this happens and you want to establish a Master password for your hard disk, contact your network administrator for instructions. Setting a hard disk drive User password To set a hard disk drive User password in Windows 98 Second Edition - Toshiba 8100 | Tecra 8100 Users Guide (PDF) 20030103 - Page 202
toshiba\hddpwd32 and press Enter. The Hard Disk Drive Password program, HDDPWD32, displays a warning screen. 5 To set a hard disk drive User hard disk drive User password. 6 To set a hard disk drive User hard disk drive User password. 7 To set a hard disk drive User a hard disk drive User password - Toshiba 8100 | Tecra 8100 Users Guide (PDF) 20030103 - Page 203
, type N. The hard disk drive User password will be registered the next time you restart the computer. Each time you start the computer from the hard disk, the system will prompt you to enter your password. When prompted, type your hard disk drive User password and press Enter. Part II: Technical - Toshiba 8100 | Tecra 8100 Users Guide (PDF) 20030103 - Page 204
the system prompt, type c:\toshiba\hddpwd32 and press Enter. HDDPWD32 displays a warning screen. 4 To delete the hard disk drive User password, type 1 and press you whether you want to delete the hard disk drive User password. 5 To delete the hard disk drive User password, type Y. To exit without - Toshiba 8100 | Tecra 8100 Users Guide (PDF) 20030103 - Page 205
in MS-DOS mode and displays a system prompt. 4 At the system prompt, type c:\toshiba\hddpwd32 and press Enter. The Hard Disk Drive Password program HDDPWD32 displays a warning screen. 5 To set a hard disk drive Master password, type 2 and press Enter. To quit without setting a password, type 3 and - Toshiba 8100 | Tecra 8100 Users Guide (PDF) 20030103 - Page 206
hard disk drive Master password you can remember easily. If you set a hard disk drive User diskette in the diskette drive and press any key hard disk drive Master password. 11 To finish setting the hard disk drive Master password, type Y. To exit without setting a password, type N. The hard disk drive - Toshiba 8100 | Tecra 8100 Users Guide (PDF) 20030103 - Page 207
and does not delete your hard disk drive Master password. If there is no hard disk drive User password set, HDDPWD32 displays a warning and asks you whether you want to delete the hard disk drive Master password. 5 To delete the hard disk drive Master password, type Y. Part II: Technical Reference - Toshiba 8100 | Tecra 8100 Users Guide (PDF) 20030103 - Page 208
it. The Toshiba folder opens. 4 Select and double-click the hddpwdnt.exe file. A warning screen appears and asks you to confirm that you want to use this optional security feature. Once you set a hard disk drive password, forgetting the password renders the hard drive inoperable. Part II: Technical - Toshiba 8100 | Tecra 8100 Users Guide (PDF) 20030103 - Page 209
setting a hard disk drive password, click Cancel. 6 The Toshiba Hard Drive Password Utility dialog box appears. Click on the box next to the readme file, then click OK. The readme file appears, which explains in detail the difference between the Master and User password features. Part II: Technical - Toshiba 8100 | Tecra 8100 Users Guide (PDF) 20030103 - Page 210
User button. A drop down box appears which lists all available hard drives. When you first buy your machine there should be only one hard drive listed. 9 Click Register. The Register Password dialog box appears, listing all the unregistered hard disk drives available for password assignments. Part - Toshiba 8100 | Tecra 8100 Users Guide (PDF) 20030103 - Page 211
for all devices." 11 Click OK to continue setting the password. The Register User Password dialog box appears, informing you that the user password is used to protect against unauthorized access to your drive. Read this information carefully. Register User Password dialog box Part II: Technical - Toshiba 8100 | Tecra 8100 Users Guide (PDF) 20030103 - Page 212
Hard disk drive passwords - Windows NT 12 Click Yes to continue registering the user password. The Register Password dialog box appears, displaying the name of the drive To exit without setting a hard disk drive password, click Cancel. 15 Click OK. The Register User Password dialog box warns you for - Toshiba 8100 | Tecra 8100 Users Guide (PDF) 20030103 - Page 213
Creating a password backup diskette Once a password is registered for each selected hard disk drive, the HDD Password utility prompts you to create a password backup file a blank formatted diskette into the diskette drive, press any key to continue, then click Yes. Part II: Technical Reference - Toshiba 8100 | Tecra 8100 Users Guide (PDF) 20030103 - Page 214
on another computer and find out what the password is. 3 Click Exit to return to the Toshiba Hard Disk Password Utilities dialog box. Click OK. You are prompted to reboot the computer. The hard disk drive password will be registered the next time you restart the computer. Each time you start the - Toshiba 8100 | Tecra 8100 Users Guide (PDF) 20030103 - Page 215
Files Safe Hard disk drive passwords - Windows NT The Toshiba HDD Password Utility dialog box appears. The hard disk drives with a registered password display "Registered" under the User columns. HINT: Clicking Cancel allows you to exit the utility. Toshiba HDD Password Utility dialog box Part II - Toshiba 8100 | Tecra 8100 Users Guide (PDF) 20030103 - Page 216
Keeping Your Files Safe Hard disk drive passwords - Windows NT 6 Click User. The Master Password dialog box appears. Master Password dialog box 7 Click Delete. The dialog box lists all the hard disk drives with registered passwords. 8 Select one or more of the hard disk drives listed by clicking the - Toshiba 8100 | Tecra 8100 Users Guide (PDF) 20030103 - Page 217
processed, the Delete Master Password dialog box appears. HINT: Clicking No cancels the deletion process. 12 Click OK. The Toshiba HDD Password Utility dialog box displays the drives with deleted passwords as "Deleted (Pending)" in the status column. 13 Click Exit. A dialog box appears prompting you - Toshiba 8100 | Tecra 8100 Users Guide (PDF) 20030103 - Page 218
Your Files Safe Hard disk drive passwords - Windows NT NOTE: If you try to change the password before restarting the computer, the password that was in place the last time the computer was started will be the effective password. 14 Click OK to shut down the computer. Part II: Technical Reference - Toshiba 8100 | Tecra 8100 Users Guide (PDF) 20030103 - Page 219
193 Keeping Your Files Safe Hard disk drive passwords - Windows NT Part II: Technical Reference - Toshiba 8100 | Tecra 8100 Users Guide (PDF) 20030103 - Page 220
Chapter 9 Industry standard architecture 195 Operating system compatibility 197 System management 197 Security management 203 - Toshiba 8100 | Tecra 8100 Users Guide (PDF) 20030103 - Page 221
of the latest notebooks, including the Tecra 8100, are outlined briefly in this section. Industry standard architecture Toshiba incorporates advanced Advanced Configuration and Power Interface. Wired for Management Adherence to the Wired for Management (WfM) Baseline allows Toshiba to deliver - Toshiba 8100 | Tecra 8100 Users Guide (PDF) 20030103 - Page 222
or removal. Additionally, using the features of the ACPI specification, the operating system manages the power status of the computer and all motherboard devices. It turns off devices that are not being used. When the operating system determines from applications and user settings that no part of - Toshiba 8100 | Tecra 8100 Users Guide (PDF) 20030103 - Page 223
197 Managing Your Tecra 8100 Computer Operating system compatibility Operating system compatibility Additionally, the Tecra 8100 computer, like all Toshiba computers, bears the Microsoft Hardware Compatibility logo. The logo indicates the unit has passed a series of tests that verify the - Toshiba 8100 | Tecra 8100 Users Guide (PDF) 20030103 - Page 224
Your Tecra 8100 Computer System management The Tecra 8100 offers two features that help the IT administrator handle inventory management. First, it provides automatic recognition and recording of the serial numbers of the computer and key components, including hard disk drives, batteries, and - Toshiba 8100 | Tecra 8100 Users Guide (PDF) 20030103 - Page 225
is anticipated, the ability to forewarn the user in advance of an occurrence. ❖ Notification and Analysis: if a fault does occur, the ability to fix the problem quickly and cleanly and to collect detailed analysis as to the cause of the fault. The Tecra 8100 addresses these areas of fault management - Toshiba 8100 | Tecra 8100 Users Guide (PDF) 20030103 - Page 226
Toshiba incorporates an enhanced BIOS POST (Power On Self Test) into the Tecra 8100 boot process. Once the machine is powered on, the system executes a testing sequence prior to loading the operating system, including analysis of the memory subsystem, display and keyboard controllers, and hard drive - Toshiba 8100 | Tecra 8100 Users Guide (PDF) 20030103 - Page 227
makes this system ideal for use in large corporate environments. SMS connection With Toshiba's SMS Connection, using Microsoft's System Management Server to manage and support the Tecra 8100 can extend the power of this popular package to include hardware and system configurations. By using - Toshiba 8100 | Tecra 8100 Users Guide (PDF) 20030103 - Page 228
202 Managing Your Tecra 8100 Computer System management Wake on LAN Toshiba offers IT managers best-of- reconfigure the hard disk image, perform software upgrades of individual components and perform a BIOS upgrade. Basically, it allows an administrator to restore a crashed disk drive quickly and - Toshiba 8100 | Tecra 8100 Users Guide (PDF) 20030103 - Page 229
203 Managing Your Tecra 8100 Computer Security management Security management System security is of primary concern for many end users, particularly those individuals and IT departments working within the corporate environment. Loss of any kind, whether loss of hardware or loss of sensitive data, - Toshiba 8100 | Tecra 8100 Users Guide (PDF) 20030103 - Page 230
Your Tecra 8100 Computer notebook. Hard disk drive password For added security of data, Toshiba has implemented the hard disk drive password feature across all portable platforms. Should the hard drive be removed, transferred and installed into another system with this password enabled, that user - Toshiba 8100 | Tecra 8100 Users Guide (PDF) 20030103 - Page 231
205 Managing Your Tecra 8100 Computer Security management Eject password A user can enable the notebook's eject password when docked. This function requires that the user input a password prior to the notebook ejecting from the docking station, thus preventing unauthorized users from removing the - Toshiba 8100 | Tecra 8100 Users Guide (PDF) 20030103 - Page 232
are easy to fix 207 Problems when you turn on the computer 208 Resolving a hardware conflict 213 Fixing device-related problems 216 DVD operating problems-Windows 98 Second Edition 233 Developing good computing habits 242 If you need further assistance 243 Toshiba's worldwide offices 247 - Toshiba 8100 | Tecra 8100 Users Guide (PDF) 20030103 - Page 233
Troubleshooting Guide Some problems you may encounter when using your Tecra 8100 computer are relatively easy to identify and solve. Others may require help from your network administrator or the manufacturer of the software program. This chapter aims to help you solve many problems yourself. It - Toshiba 8100 | Tecra 8100 Users Guide (PDF) 20030103 - Page 234
errors. 5 Turn on the peripheral devices. 6 Turn on the computer. 7 If you are running the computer on battery power, check that the battery charge isn't low. If the equipment still isn't working properly, refer to the devicespecific sections of this chapter. Problems when you turn on the computer - Toshiba 8100 | Tecra 8100 Users Guide (PDF) 20030103 - Page 235
209 Troubleshooting Guide Problems when you turn on the computer If the computer will not start after it has been turned off for a while, remove the battery and reinsert it. For instructions on removing the battery, see "Changing batteries" on page 102. The computer starts but, when you press a key - Toshiba 8100 | Tecra 8100 Users Guide (PDF) 20030103 - Page 236
turns off the computer. You press the power button and hear the system start, but you receive a hard disk drive (HDD) error message. There may be a problem starting Windows from your hard disk. Follow these steps: CAUTION: Before using the Toshiba Companion Diskette, make sure that your computer - Toshiba 8100 | Tecra 8100 Users Guide (PDF) 20030103 - Page 237
should start Windows from the hard drive. You press the power button and hear the system start, but Windows NT does not load correctly. There is a problem starting Windows NT from your hard disk. Follow these steps if you have a diskette drive: 1 Insert the Toshiba Companion Diskette for Windows NT - Toshiba 8100 | Tecra 8100 Users Guide (PDF) 20030103 - Page 238
in the diskette drive. If there is one, remove it and press any key to continue. If pressing any key does not work, press Ctrl, Alt, and Del simultaneously or press the reset button to restart the computer. If the problem persists, try restarting the computer with the Toshiba Companion Diskette or - Toshiba 8100 | Tecra 8100 Users Guide (PDF) 20030103 - Page 239
a task. A device, such as a CD-ROM drive or a modem, needs a channel to the computer's Central Processing Unit (CPU). It also needs a direct channel to the computer's memory to store information as it works. These channels of communication are commonly referred to as system resources. Part II - Toshiba 8100 | Tecra 8100 Users Guide (PDF) 20030103 - Page 240
cards to bypass the microprocessor and access memory directly. If two or more devices use the same DMA, the data required by one device overwrites the data required by the other, causing a hardware conflict. Plug and Play TECHNICAL NOTE: Windows NT does not support Plug and Play. With Plug and Play - Toshiba 8100 | Tecra 8100 Users Guide (PDF) 20030103 - Page 241
. Properties include the name of the manufacturer, the type of device, the drivers installed, and the system resources assigned to the device. TECHNICAL NOTE: Windows NT does not support Device Manager. To check a device's properties: 1 Click Start, then point to Settings, and click Control Panel - Toshiba 8100 | Tecra 8100 Users Guide (PDF) 20030103 - Page 242
216 Troubleshooting Guide Fixing device-related problems ❖ The Resources tab, which lists the resources assigned to the device. If you have a device conflict, it is shown in the Conflicting device list. ❖ The Drivers tab, which displays the drivers being used by the device. For further information - Toshiba 8100 | Tecra 8100 Users Guide (PDF) 20030103 - Page 243
217 Troubleshooting Guide Fixing device-related problems 4 Remove the memory card following the instructions in "Removing a memory module" on page 47. 5 Reinstall the memory card following the instructions in "Installing a memory module" on page 43, and make sure it's seated properly. 6 Replace the - Toshiba 8100 | Tecra 8100 Users Guide (PDF) 20030103 - Page 244
218 Troubleshooting Guide Fixing device-related problems The power cable and AC adapter work correctly, but the battery won't charge. The main battery may not be making a good electrical connection. Turn off the computer, remove the battery and confirm that its contacts are clean. If they are dirty, - Toshiba 8100 | Tecra 8100 Users Guide (PDF) 20030103 - Page 245
219 Troubleshooting Guide Fixing device-related problems For more information on maximizing battery power, refer to "Taking care of your battery" on page 104 and "Conserving power" on page 106. Keyboard problems If, when you type, strange things happen or nothing happens, the problem may be related - Toshiba 8100 | Tecra 8100 Users Guide (PDF) 20030103 - Page 246
220 Troubleshooting Guide Fixing device-related problems AccuPoint II problems Some of the keyboard conditions listed in the previous section may also affect the AccuPoint II. Your finger easily slides off the AccuPoint II. The AccuPoint II cap may be greasy. Remove the cap and clean it with a - Toshiba 8100 | Tecra 8100 Users Guide (PDF) 20030103 - Page 247
221 Troubleshooting Guide Fixing device-related problems If you are using the built supported by the computer's internal display. The display is set to a simultaneous display mode (LCD/CRT or LCD/TV) and the external display device doesn't work. Make sure the resolution of the external display device - Toshiba 8100 | Tecra 8100 Users Guide (PDF) 20030103 - Page 248
222 Troubleshooting Guide Fixing device-related problems You are using an external display device and part of the desktop isn't visible. If the desktop area is set to a resolution greater than 640 x 480, the external device goes into "virtual" display mode. This means that part of the desktop will - Toshiba 8100 | Tecra 8100 Users Guide (PDF) 20030103 - Page 249
223 Troubleshooting Guide Fixing device-related problems disk configuration information. This information fix file system errors and Scan for and attempt recovery of bad sectors. Your hard disk seems very slow. If you have been using your computer for some backup files. Part II: Technical Reference - Toshiba 8100 | Tecra 8100 Users Guide (PDF) 20030103 - Page 250
224 Troubleshooting Guide Fixing device-related problems You may also be able to recover lost data by using utility software, which is available from your network administrator. Some programs run correctly but others do not. This is probably a configuration problem. When a program doesn't run - Toshiba 8100 | Tecra 8100 Users Guide (PDF) 20030103 - Page 251
225 Troubleshooting Guide Fixing device-related problems Modem problems The modem dials the line but doesn't connect, or cannot maintain the connection. You may be connected to this. The other system may be busy or off line. Try making a test transmission to someone else. Part II: Technical Reference - Toshiba 8100 | Tecra 8100 Users Guide (PDF) 20030103 - Page 252
The CD-ROM or DVD-ROM drive eject mechanism requires power to operate. If you need to remove a disc and cannot turn on the computer (for example, if the battery is completely discharged), use a narrow object, such as a straightened paper clip, to press the manual eject button. This button is in the - Toshiba 8100 | Tecra 8100 Users Guide (PDF) 20030103 - Page 253
227 Troubleshooting Guide Fixing device-related problems CD-RW (read-only). The CD-ROM drive supports CD-ROM, CD-R, and CD-RW (read-only). HINT: The DVD-ROM drive reads only Region 1 (North America) DVDs. If the problem is with a data CD or DVD, refer to the software's documentation and check that - Toshiba 8100 | Tecra 8100 Users Guide (PDF) 20030103 - Page 254
228 Troubleshooting Guide Fixing device-related problems The computer emits a problems" on page 220. PC Card problems Most PC Card problems occur during installation and setup of new cards. If you're having trouble getting one or more of these devices to work use them. Part II: Technical Reference - Toshiba 8100 | Tecra 8100 Users Guide (PDF) 20030103 - Page 255
Troubleshooting Guide Fixing device-related problems Some card manufacturers use special software called enablers to support their cards. Enablers result in nonstandard configurations that can cause problems when installing another PC Card. If Windows doesn't have built-in drivers removing Services - Toshiba 8100 | Tecra 8100 Users Guide (PDF) 20030103 - Page 256
230 Troubleshooting Guide Fixing device-related problems 1 Click the My Computer icon with the secondary button, then click Properties. Windows displays the System Properties dialog box. 2 Click the Device Manager tab. 3 Double-click the device listed as your PC Card. Windows displays your PC Card's - Toshiba 8100 | Tecra 8100 Users Guide (PDF) 20030103 - Page 257
231 Troubleshooting Guide Fixing device-related problems Hardware Options button and the PC Card tab. You will need to restart the machine in order for changes to take effect. The computer stops working (hangs) when you insert a PC Card. The problem may be caused by an I/O (input/output) conflict - Toshiba 8100 | Tecra 8100 Users Guide (PDF) 20030103 - Page 258
Troubleshooting Guide Fixing device-related problems The PCMCIA.INI file may not be installed on your computer. Install it, referring to the Toshiba Configuration Builder CD Instructions problem with the printer itself. Make sure you installed the proper printer drivers. Part II: Technical Reference - Toshiba 8100 | Tecra 8100 Users Guide (PDF) 20030103 - Page 259
233 Troubleshooting Guide DVD operating problems- problem playing DVDs, you may be able to fix the problem yourself. For general problems playing a DVD title, try the following steps: 1 Check that the disc is in a format that the drive supports (DVD-ROM, DVD-R, or DVD-RW). 2 Ensure that the drive - Toshiba 8100 | Tecra 8100 Users Guide (PDF) 20030103 - Page 260
234 Troubleshooting Guide DVD operating problems-Windows 98 Second Edition 5 Clean the DVD disc and try again. A dirty drive can also cause audio problems; send your drive to an authorized service provider to get it cleaned. 6 Verify that your computer recognizes your DVD-ROM drive. To do this: - Toshiba 8100 | Tecra 8100 Users Guide (PDF) 20030103 - Page 261
Troubleshooting Guide DVD operating problems-Windows 98 Second Edition The Display Properties dialog box appears. 3 Click the Settings tab. 4 Next to the words Desktop Area, move the slider to a lower setting, such as 800 x 600 or 640 x 480. 5 Click OK. DVD 6 Click None. Part II: Technical Reference - Toshiba 8100 | Tecra 8100 Users Guide (PDF) 20030103 - Page 262
Troubleshooting Guide DVD operating problems-Windows 98 Second Edition 7 Click OK. DVDExpress problems commands on the DVD. For example, it is common for DVD movie titles to then select the Device Manager tab. 3 Open the CDROM device folder, select your DVD-ROM device driver, then click Properties. - Toshiba 8100 | Tecra 8100 Users Guide (PDF) 20030103 - Page 263
237 Troubleshooting Guide DVD operating problems-Windows 98 Second Edition The "Root" or "Title" menu does not open. Most DVD titles have one or both of the "Root" and "Title" menus. If one menu button appears to do nothing, try the other menu button. DVDExpress performance decreases after making a - Toshiba 8100 | Tecra 8100 Users Guide (PDF) 20030103 - Page 264
Troubleshooting Guide DVD operating problems-Windows 98 Second Edition Microsoft DirectX®5.2b or higher and DVDExpress. Contact the manufacturer of the component. 4 Make sure that your display driver resolution, color depth, and refresh rate are optimal for DVD playback. (Some systems do not support - Toshiba 8100 | Tecra 8100 Users Guide (PDF) 20030103 - Page 265
239 Troubleshooting Guide DVD operating problems-Windows 98 Second Edition Error messages The following table offers descriptions and resolutions for error messages that may appear when using DVDExpress. Error message and additional information Resolution The disc in the DVD-ROM drive is not a - Toshiba 8100 | Tecra 8100 Users Guide (PDF) 20030103 - Page 266
240 Troubleshooting Guide DVD operating problems-Windows DVD disc. There may be a problem with the DVD-ROM drive. Try to play another disc. Contact your supplier's Technical Support. DVDExpress does not support this version of Check that this is a DVD- the DVD specification. Video 1.0 disc. Part - Toshiba 8100 | Tecra 8100 Users Guide (PDF) 20030103 - Page 267
241 Troubleshooting Guide DVD operating problems-Windows 98 Second Edition Error message and additional information Resolution This DVD disc cannot be played in this region. The selected region cannot be used due to one of the following: The Region Code of DVDExpress and the DVD disc do not match - Toshiba 8100 | Tecra 8100 Users Guide (PDF) 20030103 - Page 268
242 Troubleshooting Guide Developing good computing habits Error message and additional information Resolution This file appears to contain unsupported data. Please refer to the Supported Formats section of the DVDExpress Help file and ensure that this file contains valid data. The drive or - Toshiba 8100 | Tecra 8100 Users Guide (PDF) 20030103 - Page 269
with the computer. Your ability to solve problems will improve as you learn about how the computer and its software work together. Get familiar with all the manuals provided with your computer, as well as the manuals that come with the programs and devices you purchase. Look in your local computer - Toshiba 8100 | Tecra 8100 Users Guide (PDF) 20030103 - Page 270
following before contacting Toshiba: ❖ Review the troubleshooting information in your Windows documentation. ❖ If the problem occurs while you are running a program, consult the program's documentation for troubleshooting suggestions. Contact the software company's technical support group for their - Toshiba 8100 | Tecra 8100 Users Guide (PDF) 20030103 - Page 271
Troubleshooting Guide If you need further assistance keep you up to date with future upgrades. Other Internet Web sites for Toshiba are: www.toshiba.com worldwide Toshiba corporate site www.computers.toshiba.com marketing and product information in the USA www.toshiba.ca Canada www.toshiba - Toshiba 8100 | Tecra 8100 Users Guide (PDF) 20030103 - Page 272
246 Troubleshooting Guide If you need further assistance Use the following telephone number: (949) 837-4408 Toshiba voice contact To aid Toshiba, make sure you have: ❖ The computer and any optional devices related to the problem. ❖ Backup copies of Windows and all other preloaded software on - Toshiba 8100 | Tecra 8100 Users Guide (PDF) 20030103 - Page 273
247 Troubleshooting Guide Toshiba's worldwide offices Toshiba's worldwide offices Argentina Acron, S.A. Solís 1525 (1134) Buenos Aires Argentina Austria Toshiba Europe GmbH Niederlassung Österreich Landstraßer Hauptstraße 2/259 a - c, A-1030 Wien, Austria Brazil Semp Toshiba Informática Silveria - Toshiba 8100 | Tecra 8100 Users Guide (PDF) 20030103 - Page 274
248 Troubleshooting Guide Toshiba's worldwide offices France Toshiba Systèmes (France) S.A. 7, Rue Ampère 92804 Puteaux Cédex France Greece Ideal Electronics S.A. 109 Syngrou Avenue 176 71 Kalithea Athens Greece Ireland Same as United Kingdom Japan Toshiba Corporation, PCO-IO 1-1, Shibaura 1-Chome - Toshiba 8100 | Tecra 8100 Users Guide (PDF) 20030103 - Page 275
249 Troubleshooting Guide Toshiba's worldwide offices Norway Scribona Norge A/S Toshiba PC Service Stalfjaera 80 1230 Domzale Slovenia Spain Toshiba Information Systems (España) S.A. Parque Switzerland United Kingdom Toshiba Information Systems (U.K) Ltd. Toshiba Court Weybridge Business - Toshiba 8100 | Tecra 8100 Users Guide (PDF) 20030103 - Page 276
250 Troubleshooting Guide Toshiba's worldwide offices United States Toshiba America Information Systems, Inc. 9740 Irvine Boulevard Irvine, California 92618 United States Venezuela InterPC de Venezuela Esquina Calle 4 y Calle 8 Edificio Tepal - Piso 3 La Urbina Caracas 1073 - Venezuela Part II: - Toshiba 8100 | Tecra 8100 Users Guide (PDF) 20030103 - Page 277
251 Troubleshooting Guide Toshiba's worldwide offices Part II: Technical Reference - Toshiba 8100 | Tecra 8100 Users Guide (PDF) 20030103 - Page 278
- Toshiba 8100 | Tecra 8100 Users Guide (PDF) 20030103 - Page 279
PART III APPENDIXES What's in Part III This part provides additional technical information about the computer. Review this material if you have additional questions or need additional information. - Toshiba 8100 | Tecra 8100 Users Guide (PDF) 20030103 - Page 280
Appendix A Instant password security 255 Power usage mode 256 Shutdown mode 257 Sound 257 Display modes 258 Keyboard hot keys 258 - Toshiba 8100 | Tecra 8100 Users Guide (PDF) 20030103 - Page 281
indicating the option or feature the key controls. Instant password security Fn + F1 This hot key locks the keyboard and blanks the display. To resume working, you must enter your user password, if registered, or press Enter. For more information about the instant password, see "Using the instant - Toshiba 8100 | Tecra 8100 Users Guide (PDF) 20030103 - Page 282
Edition) The power usage modes in Windows NT are: Full power, High power, Medium power, Low power, and User setting. Power usage modes (Windows NT) The properties of each mode are set in the Toshiba Power Saver utility. For more information, see "Power Saver" on page 154. Part III: Appendixes - Toshiba 8100 | Tecra 8100 Users Guide (PDF) 20030103 - Page 283
are: Standby, Hibernation, and Shutdown. Shutdown modes (Windows 98 Second Edition) The Shutdown modes in Windows NT are: Boot, and Suspend/Resume (memory). Sound Fn + F4 Shutdown modes (Windows NT) This hot key cycles through the different alarm volume levels. The alarm volume options are: off - Toshiba 8100 | Tecra 8100 Users Guide (PDF) 20030103 - Page 284
power-on display options. The display modes are: built-in display panel only, built-in display panel and external monitor simultaneously, external monitor only, built in display panel and TV (or other external video device ) simultaneously, and TV (or other external video device display device. - Toshiba 8100 | Tecra 8100 Users Guide (PDF) 20030103 - Page 285
259 Hot Keys Part III: Appendixes - Toshiba 8100 | Tecra 8100 Users Guide (PDF) 20030103 - Page 286
Appendix B Built-in features 261 Optional accessories and devices 268 Specifications 270 - Toshiba 8100 | Tecra 8100 Users Guide (PDF) 20030103 - Page 287
Specifications This appendix lists the features of the Tecra 8100 computer and summarizes its specifications. Built-in and complementary metal-oxide semiconductor technology, providing minimum size and weight, low power usage and high reliability 32 KB write-back (16 KB for code and 16 - Toshiba 8100 | Tecra 8100 Users Guide (PDF) 20030103 - Page 288
controller with 64-bit AGP bus with side band, 8 MB external memory with digital video accelerator supports external monitors and high-resolution, high-color video and DVD video modes Power Computer Main Battery 60 watt universal AC power adapter, 100-240V input voltage, 50/60 Hz frequency, 15V - Toshiba 8100 | Tecra 8100 Users Guide (PDF) 20030103 - Page 289
for the internal real-time clock and calendar Intelligent power supply Detects low battery charge and displays the battery charge remaining Storage capacity Hard disk 3.5-inch diskette drive module Ports 2.5-inch removable drive and controller provides non-volatile storage for 6.0 billion bytes - Toshiba 8100 | Tecra 8100 Users Guide (PDF) 20030103 - Page 290
-pin port lets you connect an optional expansion device Lets you connect the external 3.5-inch diskette drive, if you've removed the diskette drive from the SelectBay to install the DVD-ROM/CD-ROM drive module, HDD module, or secondary battery module Infrared Data Association (IrDA)-compliant serial - Toshiba 8100 | Tecra 8100 Users Guide (PDF) 20030103 - Page 291
support PC Card 16 and CardBus cards. Maximum slot thickness: 10.5 mm Standard hardware Memory options The Tecra 8100 comes with 64 MB RAM standard (expandable to 256 MB). The amount of RAM 800 x 600, 640 x 480 External video support: 16 million colors at 1280 x 1024, supports external monitors and - Toshiba 8100 | Tecra 8100 Users Guide (PDF) 20030103 - Page 292
Wavetable, Full duplex support, MIDI, 3D sound, DirectSound, Direct3DSound, DirectMusic Provide the complete function of a mouse or other pointing device from within the keyboard Special features Resume Mode Hibernation mode Electronic bookmark that saves what you're doing to memory when you turn - Toshiba 8100 | Tecra 8100 Users Guide (PDF) 20030103 - Page 293
Explains how to set up the computer, gives instructions for basic computing tasks, and documents all system components and features Electronic Guide Provides the user's guide in electronic form Install this guide onto your hard drive from your Configuration Builder CD and refer to it when you - Toshiba 8100 | Tecra 8100 Users Guide (PDF) 20030103 - Page 294
when no other module is in it. This is especially useful if you want to travel light A Weight Saver Insert module ships with the computer Power devices Battery charger Charges a main battery and a secondary battery simultaneously Part III: Appendixes - Toshiba 8100 | Tecra 8100 Users Guide (PDF) 20030103 - Page 295
to a LAN jack, and separate PS/2 mouse and PS/2 keyboard ports, a line-out jack, and two USB ports Connects to the NetDock providing two PCI card slots, a 5.25-inch drive bay and a 3.5-inch drive bay. The 5.25-inch drive bay accommodates conventional devices or Selectable Bay IDE modules with an - Toshiba 8100 | Tecra 8100 Users Guide (PDF) 20030103 - Page 296
cable to deter computer theft Power-on and HDD passwords provide access security Hardware screws for memory, built-in modem, main HDD drive module Actual weight will vary slightly depending on configuration and installed modules. width x depth x height 12.28 inches x 10.0 inches x 1.46 inches Part - Toshiba 8100 | Tecra 8100 Users Guide (PDF) 20030103 - Page 297
drive installed Vibration 0.5G; 0.25G with CD-ROM/DVD-ROM drive installed Non-operating -20° to 65° C (-4° to 149° F) 10% to 90% non-condensing -60 to 10,000 m (-197 ft. to 32,808 ft.) 60G; 50G with CD-ROM/DVD-ROM drive installed 1G; 1G with CD-ROM/DVD-ROM drive installed Part III: Appendixes - Toshiba 8100 | Tecra 8100 Users Guide (PDF) 20030103 - Page 298
Appendix C - Toshiba 8100 | Tecra 8100 Users Guide (PDF) 20030103 - Page 299
Cable Connectors The computer features a universal power supply you can use worldwide. This appendix shows the shapes of the typical AC power cable connectors for various parts of the world. USA and Canada United Kingdom UL approved CSA approved Australia AS approved BS approved Europe VDA - Toshiba 8100 | Tecra 8100 Users Guide (PDF) 20030103 - Page 300
Appendix D IRQ level assignments 275 DMA channel assignments 277 Input/output port address assignments 278 - Toshiba 8100 | Tecra 8100 Users Guide (PDF) 20030103 - Page 301
System Resources This appendix lists the IRQ levels, DMA channels, and I/O port addresses. IRQ level assignments The direct line to the CPU is called an Interrupt ReQuest (IRQ) level or channel. You'll hear both terms used by technical experts. They mean the same thing. The following table lists - Toshiba 8100 | Tecra 8100 Users Guide (PDF) 20030103 - Page 302
3.5-inch diskette drive 7 LPT1 COM port, modem, ECP, sound system 8 Real-time clock 9 Not Available Reserved for system 10 Available COM port, sound system, modem 11 PCI bus Modem, sound system, FIR 12 PS/2 mouse 13 Math coprocessor 14 Hard disk CD-ROM, secondary hard disk 15 - Toshiba 8100 | Tecra 8100 Users Guide (PDF) 20030103 - Page 303
assignments Direct Memory Access (DMA) allows some devices to transfer data to and from memory at high speeds, without using the CPU. Such devices are each for sound system 1 Sound system Choice for ECP 2 3.5-inch diskette drive 3 ECP Choice for sound system, ECP 4 Cascade from DMA channel - Toshiba 8100 | Tecra 8100 Users Guide (PDF) 20030103 - Page 304
write must specify the address (in memory) for the port. Each device that communicates with the CPU must have a unique I/O port address. The following table lists the device names and their assigned I/O port addresses 2 0E0-0E1 PCI bus 0F0-0F7 Math coprocessor 100-1EF VGA Part III: Appendixes - Toshiba 8100 | Tecra 8100 Users Guide (PDF) 20030103 - Page 305
279 System Resources Port address (h) Device/function Notes 170-177 CD-ROM (secondary IDE controller) 1F0-1FF Hard disk controller (primary IDE controller) 200 Not used Available for joy 360-37F Not used 370 Controller I/O address 376-377 Secondary IDE controller Part III: Appendixes - Toshiba 8100 | Tecra 8100 Users Guide (PDF) 20030103 - Page 306
280 System Resources Port address (h) Device/function Notes 378-37F Parallel PRT 1 380 , infrared port, or builtin modem (COM3) 3F0-3F7 3.5-inch diskette drive controller I/O ports 3F6 and 3F7 are used for the hard disk controller 3F8-3FF Serial port, infrared port, or builtin modem (COM1 - Toshiba 8100 | Tecra 8100 Users Guide (PDF) 20030103 - Page 307
Port address (h) Device/function E80-E87 Not used F44-F47 Not used 281 System Resources Notes Available for Windows sound system Available for Windows Sound System Part III: Appendixes - Toshiba 8100 | Tecra 8100 Users Guide (PDF) 20030103 - Page 308
Appendix E - Toshiba 8100 | Tecra 8100 Users Guide (PDF) 20030103 - Page 309
the mode number in hexadecimal; it is generally used by programmers to specify video modes in programs. Type identifies the display adapter that first supported the mode, and specifies whether the mode is text or graphics. Resolution is the measure of the screen's dimensions in terms of horizontal - Toshiba 8100 | Tecra 8100 Users Guide (PDF) 20030103 - Page 310
284 Video Modes This table lists the video modes for the Tecra 8100 computer: Internal LCD External Monitor Scan Freq. Mode (hex) Type Grid Grid Resolution (pelxpel) Colors (pelxpel) Colors hor. vert 8x16 64K/64K 8x16 64K/64K 31.5kHz 60Hz Grph 37.6kHz 75Hz 43.2kHz 85Hz Part III: Appendixes - Toshiba 8100 | Tecra 8100 Users Guide (PDF) 20030103 - Page 311
.7kHz 85Hz 16M/16M 35.5kHz 87Hz* 48.5kHz 60Hz 60.0kHz 75Hz 68.8kHz 85Hz *These modes are interlaced. All others are non-interlaced. Part III: Appendixes - Toshiba 8100 | Tecra 8100 Users Guide (PDF) 20030103 - Page 312
- Toshiba 8100 | Tecra 8100 Users Guide (PDF) 20030103 - Page 313
AC: Alternating Current ANSI: American National Standards Institute APM: Advanced Power Management ASCII: American Standard Code for Information Interchange AVI: Audio Video Interleaved BBS: Bulletin Board Service BIOS: Basic Input/Output System BPS: Bits Per Second CAD: Computer - Toshiba 8100 | Tecra 8100 Users Guide (PDF) 20030103 - Page 314
: CPU: CRT: DC: DMA: DIMM: DOS: DPI: DSTN: DSVD: DVD: ECC: ECP: EDO: EGA: EMS: ESD: FCC: FIR: FPS: Unit Cathode Ray Tube Direct Current Direct Memory Access Dual Inline Memory Module Disk Operating System Dots Per Enhanced Graphics Adapter Expanded Memory Specification Electrostatic Discharge Federal - Toshiba 8100 | Tecra 8100 Users Guide (PDF) 20030103 - Page 315
289 Glossary HDD: Hard Disk Drive HMA: High Memory Area HTML: HyperText Markup Language IEEE: Institute of Electrical and Electronic Engineers I/O: Input/ System OCR: Optical Character Recognition (reader) PC: Personal Computer PCI: Peripheral Component Interconnect Part III: Appendixes - Toshiba 8100 | Tecra 8100 Users Guide (PDF) 20030103 - Page 316
Receiver/Transmitter UMA: Upper Memory Area UMB: Upper Memory Block URL: Universal Resource Locator USB: Universal Serial Bus VCR: VideoCassette Recorder VESA: Video Electronics Standards Association VGA: Video Graphics Adapter VRAM: Video Random Access Memory Part III: Appendixes - Toshiba 8100 | Tecra 8100 Users Guide (PDF) 20030103 - Page 317
are often used in notebook computers because of their device, such as a PC Card, may use a specific memory address to transfer information to and from the computer. See also hexadecimal. Advanced Power power is usually supplied to residential and commercial electrical outlets. Part III: Appendixes - Toshiba 8100 | Tecra 8100 Users Guide (PDF) 20030103 - Page 318
removable disk or tape, kept in case the original file is lost or damaged. It's a good idea to keep backup copies of all your important files. base memory: See conventional memory. basic input/output system (BIOS): A set of basic computer instructions. The BIOS you have a series of MS-DOS - Toshiba 8100 | Tecra 8100 Users Guide (PDF) 20030103 - Page 319
since it can be implemented as a series of electronic signals that are either programs can do the work for you. See is passed between two devices. This is the BIOS and memory power with Resume Mode off is called a cold boot. Restarting the computer by pressing Ctrl + Alt + Del or the restart button - Toshiba 8100 | Tecra 8100 Users Guide (PDF) 20030103 - Page 320
see what to do next. bus: An electrical circuit that connects the microprocessor with other parts of the computer, such as the video adapter, disk drives and ports. It is the highway along which data flows from one device to another. See also local bus. bus speed: The speed at which the central - Toshiba 8100 | Tecra 8100 Users Guide (PDF) 20030103 - Page 321
can be stored in a computer's memory or on a storage device such as a hard disk, diskettes, or CD-ROM. Capacity memory, input/output and/or control functions. Chips are mounted on printed circuit boards. choose: To use the pointing device or keyboard to select a menu item, a button or an icon. Part - Toshiba 8100 | Tecra 8100 Users Guide (PDF) 20030103 - Page 322
such as the operating system and device drivers. CONFIG.SYS: An MS-DOS file containing commands that change the default configuration of the computer system. configuration: 1) The set of components in a computer system (such as memory, printers and disk drives). 2) How parts of the system are set up - Toshiba 8100 | Tecra 8100 Users Guide (PDF) 20030103 - Page 323
device that automatically operates a unit or regulates a process. For example, the computer's built-in disk drive controller takes information from the computer and translates it into a form usable by the hard drive processing speed saves power when you are using the battery. cursor: A symbol - Toshiba 8100 | Tecra 8100 Users Guide (PDF) 20030103 - Page 324
of RAM used for memory expansion. direct current (DC): Electric current that flows in one direction. This type of power is usually supplied by batteries. Direct Memory Access (DMA): A dedicated channel which bypasses the Central Processing Unit (CPU) and enables a device to access memory directly - Toshiba 8100 | Tecra 8100 Users Guide (PDF) 20030103 - Page 325
. document: 1) A file containing a report, letter, user guide, etc. 2) In Windows 95, Windows 98 and Windows NT, any file that contains the information you are working on. See also file. documentation: The set of manuals and/or other instructions written for the users of a computer system or program - Toshiba 8100 | Tecra 8100 Users Guide (PDF) 20030103 - Page 326
or left mouse button, unless otherwise stated. driver: See device driver. Dual SuperTwist Nematic: A type of LCD display. duplex: The method used to transmit data in both directions between two devices. Synonymous with full duplex. See also half duplex, full duplex. DVD-ROM: A very high-capacity - Toshiba 8100 | Tecra 8100 Users Guide (PDF) 20030103 - Page 327
out an instruction in a computer program. executable file: A computer program that is ready to run. Application programs and batch files are examples of executable files. Names of executable files usually end with a .BAT, .COM or .EXE extension. expanded memory: Memory that occupies part of the - Toshiba 8100 | Tecra 8100 Users Guide (PDF) 20030103 - Page 328
firmware: A set of instructions built into a chip to control its activities. folder (also called directory): Part of the organizational structure that smaller while preserving its shape. handshake: The series of signals between a computer and a peripheral device (such as a modem) that sets the parameters - Toshiba 8100 | Tecra 8100 Users Guide (PDF) 20030103 - Page 329
hard disk that are removable. By default, the hard disk is referred to as drive C. hardware: The physical, electronic and mechanical components of a computer system, including devices such as a screen, disk drive, printer, pointing device feature of many Toshiba notebook computers which preserves - Toshiba 8100 | Tecra 8100 Users Guide (PDF) 20030103 - Page 330
the results of processing to users. I/O devices include keyboards (input) and printers (output). A disk drive is both an input and an output device, since it can both provide information to the computer and receive information from the computer. instruction: A statement in a computer program that - Toshiba 8100 | Tecra 8100 Users Guide (PDF) 20030103 - Page 331
as a CD-ROM) into memory for processing. local bus: A type of bus that connects devices directly to the microprocessor. Because there are no wires between the CPU and the device, information is passed at a much greater speed than through a traditional bus. See also bus. logical drive: A section of - Toshiba 8100 | Tecra 8100 Users Guide (PDF) 20030103 - Page 332
can greatly improve system speed if you work with large spreadsheets or some graphics programs. memory. 2) A synonym for Random Access Memory (RAM). See Random Access Memory and Read-Only Memory. menu: A list of options on the screen, from which you can make a selection. microphone: An input device - Toshiba 8100 | Tecra 8100 Users Guide (PDF) 20030103 - Page 333
network allows you to share data and peripheral devices, such as printers, with other users and to exchange electronic mail. non-interlaced: computer. See system disk. non-volatile memory: Memory that retains data in the absence of an external power source. numeric keypad overlay: A feature that - Toshiba 8100 | Tecra 8100 Users Guide (PDF) 20030103 - Page 334
works. Operating system functions include creating programs and data files, and controlling the flow of information between the processor, memory and devices a specific user or group of users. A drive, the top-level directory or folder and any lower-level directories or folders. Part III: Appendixes - Toshiba 8100 | Tecra 8100 Users Guide (PDF) 20030103 - Page 335
of notebook computers. PC Cards provide functions such as modem, fax/modem, hard disk drive, network adapter, sound card, or SCSI adapter. pel: The smallest display element that the computer can control. It consists of a single pixel (dot), or a set of contiguous pixels. peripheral device: A unit - Toshiba 8100 | Tecra 8100 Users Guide (PDF) 20030103 - Page 336
power button to turn the computer on. processor: See central processing unit. program: A set of instructions that tells the computer what to do. A program requires data (input), which is entered at the keyboard or by means of a pointing device icons, applications, disk drives, documents, folders, - Toshiba 8100 | Tecra 8100 Users Guide (PDF) 20030103 - Page 337
to hold backup copies. Diskettes are an obvious example, but removable hard disks are available. In addition, there are high capacity removable disks. In addition, there are high capacity removable disks which only work in proprietary drives. resolution: A measure of the sharpness of the images that - Toshiba 8100 | Tecra 8100 Users Guide (PDF) 20030103 - Page 338
computers with printers and other peripheral devices. S select: To highlight text ) to which you can connect a serial device, such as a modem, a mouse or a serial printer. serial input/output shortcut. SIMM: Single Inline Memory Module. A unit of RAM used for memory expansion. soft keys: Key - Toshiba 8100 | Tecra 8100 Users Guide (PDF) 20030103 - Page 339
Glossary software: The computer programs or instructions that tell the hardware what tasks to perform. The general classes of software are operating systems, applications and utilities. Standby: A feature in Windows 98 that, like Windows 95's Suspend command or Toshiba's Resume Mode, allows you to - Toshiba 8100 | Tecra 8100 Users Guide (PDF) 20030103 - Page 340
work-they just make your life easier. Different utilities manage your fonts, compress files and check for viruses. MaxTime and Hardware Setup are examples of utilities. V volatile memory: Random Access Memory (RAM) that stores information while it is connected to a power source. If the battery - Toshiba 8100 | Tecra 8100 Users Guide (PDF) 20030103 - Page 341
, allowing large amounts of multimedia data to bypass the CPU or system bus. The Zoomed Video standard makes full-screen, full-motion video available on a notebook computer. Part III: Appendixes - Toshiba 8100 | Tecra 8100 Users Guide (PDF) 20030103 - Page 342
316 Glossary Part III: Appendixes - Toshiba 8100 | Tecra 8100 Users Guide (PDF) 20030103 - Page 343
105 light 23 SelectBay battery 23 lights 10 main 10 module 7 monitoring power 89 placing into adapter 52 power usage hot key 107, 108 power usage mode 256 real-time clock (RTC) 88 remaining charge 91 removing 103 from adapter 52 status 10 storing spare packs 105 troubleshooting 217 unlocking 102 - Toshiba 8100 | Tecra 8100 Users Guide (PDF) 20030103 - Page 344
a device 33 computer display latch 8 precautions 18 shut down 27 starting where you left off 93 configuration management tool 146 configuring hard drive passwords 175, 182 password 161 PC Cards 55 power-saving options 106 connecting computer to a television set 6 headphones 40 memory module - Toshiba 8100 | Tecra 8100 Users Guide (PDF) 20030103 - Page 345
143 changing or removing key assignments 146 keyboard 142 program 141 starting 142 viewing key assignments 145 function keys 65 assignments 145 H hard disk drive in-use light 23 light 10 Master password 175 password 162, 175 passwords 175 troubleshooting 222 User password 175 Hardware Configuration - Toshiba 8100 | Tecra 8100 Users Guide (PDF) 20030103 - Page 346
function keys 65 hot keys 258 Part III: Appendixes indicator panel 9, 10 overlays 65 troubleshooting 219 Windows special keys 65 L LCD display 9 lighting 16 lights AC power 9 hard disk drive 10 main battery 10 numlock 11 on/off 10, 23 SelectBay battery 10, 23 SelectBay drive 10, 23 line-in jack 118 - Toshiba 8100 | Tecra 8100 Users Guide (PDF) 20030103 - Page 347
configurations 229 removing 55 security lock 4 slots 3 troubleshooting checklist 229 Windows driver 229 PC Card lock 7 Plug and Play 214 pointing device 9 port composite video 6 expansion 5 external diskette drive 11 infrared 5 monitor 5 parallel 5 PS/2 mouse/keyboard 5 serial 5 Part III: Appendixes - Toshiba 8100 | Tecra 8100 Users Guide (PDF) 20030103 - Page 348
troubleshooting 232 problems diagnosing 207 forgetting your password 164 solving 207 Part III: Appendixes sound system 227 processor, specifications 261 PS/2-compatible keyboard 5, 36 mouse 5 R real-time clock (RTC) battery 88 recording .wav files 118 sounds 118 removing PC Cards 3, 55 reset button - Toshiba 8100 | Tecra 8100 Users Guide (PDF) 20030103 - Page 349
247 Toshiba's Bulletin Board Service (BBS) 245 protocol 245 Toshiba's online resources 138 travel, conserving power 106 troubleshooting AC power light not on 217 AccuPoint II 209, 220 battery 218 CD-ROM drive 226 charging the battery 218 checking device properties 215 common device problems and - Toshiba 8100 | Tecra 8100 Users Guide (PDF) 20030103 - Page 350
performance 237 DVD-ROM drive 226 external display device 221, 222 external keyboard 219 hard disk drive 210, 212, 222 hardware 213 keyboard 209, 219 keypad overlay 219 memory card 216 modem 225 PC Cards 229 power 217 printer 232 Resume Failure 209 run ScanDisk 222 Toshiba's online services 244
-
 1
1 -
 2
2 -
 3
3 -
 4
4 -
 5
5 -
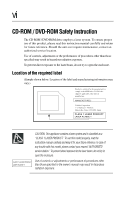 6
6 -
 7
7 -
8
-
9
-
10
-
11
-
12
-
13
-
14
-
15
-
16
-
17
-
18
-
19
-
20
-
21
-
22
-
23
-
24
-
25
-
26
-
27
-
28
-
29
-
30
-
31
-
32
-
33
-
34
-
35
-
36
-
37
-
38
-
39
-
40
-
41
-
42
-
43
-
44
-
45
-
46
-
47
-
48
-
49
-
50
-
51
-
52
-
53
-
54
-
55
-
56
-
57
-
58
-
59
-
60
-
61
-
62
-
63
-
64
-
65
-
66
-
67
-
68
-
69
-
70
-
71
-
72
-
73
-
74
-
75
-
76
-
77
-
78
-
79
-
80
-
81
-
82
-
83
-
84
-
85
-
86
-
87
-
88
-
89
-
90
-
91
-
92
-
93
-
94
-
95
-
96
-
97
-
98
-
99
-
100
-
101
-
102
-
103
-
104
-
105
-
106
-
107
-
108
-
109
-
110
-
111
-
112
-
113
-
114
-
115
-
116
-
117
-
118
-
119
-
120
-
121
-
122
-
123
-
124
-
125
-
126
-
127
-
128
-
129
-
130
-
131
-
132
-
133
-
134
-
135
-
136
-
137
-
138
-
139
-
140
-
141
-
142
-
143
-
144
-
145
-
146
-
147
-
148
-
149
-
150
-
151
-
152
-
153
-
154
-
155
-
156
-
157
-
158
-
159
-
160
-
161
-
162
-
163
-
164
-
165
-
166
-
167
-
168
-
169
-
170
-
171
-
172
-
173
-
174
-
175
-
176
-
177
-
178
-
179
-
180
-
181
-
182
-
183
-
184
-
185
-
186
-
187
-
188
-
189
-
190
-
191
-
192
-
193
-
194
-
195
-
196
-
197
-
198
-
199
-
200
-
201
-
202
-
203
-
204
-
205
-
206
-
207
-
208
-
209
-
210
-
211
-
212
-
213
-
214
-
215
-
216
-
217
-
218
-
219
-
220
-
221
-
222
-
223
-
224
-
225
-
226
-
227
-
228
-
229
-
230
-
231
-
232
-
233
-
234
-
235
-
236
-
237
-
238
-
239
-
240
-
241
-
242
-
243
-
244
-
245
-
246
-
247
-
248
-
249
-
250
-
251
-
252
-
253
-
254
-
255
-
256
-
257
-
258
-
259
-
260
-
261
-
262
-
263
-
264
-
265
-
266
-
267
-
268
-
269
-
270
-
271
-
272
-
273
-
274
-
275
-
276
-
277
-
278
-
279
-
280
-
281
-
282
-
283
-
284
-
285
-
286
-
287
-
288
-
289
-
290
-
291
-
292
-
293
-
294
-
295
-
296
-
297
-
298
-
299
-
300
-
301
-
302
-
303
-
304
-
305
-
306
-
307
-
308
-
309
-
310
-
311
-
312
-
313
-
314
-
315
-
316
-
317
-
318
-
319
-
320
-
321
-
322
-
323
-
324
-
325
-
326
-
327
-
328
-
329
-
330
-
331
-
332
-
333
-
334
-
335
-
336
-
337
-
338
-
339
-
340
-
341
-
342
-
343
-
344
-
345
-
346
-
347
-
348
-
349
-
350
 |
 |

Tecra
8100 Series
User’s Guide
If you need assistance:
❖
www.pcsupport.toshiba.com
❖
InTouch
sm
Center
Calling within the United States (800) 457-7777
Calling from outside the United States (949) 859-4273
For more information, see Chapter 10 on page 206 in this guide.
®