| Section |
Page |
| Tecra 8100 Series User’s Guide |
1 |
| Model: Tecra 8100 Series |
2 |
| FCC Notice “Declaration of Conformity Information” |
2 |
| Industry Canada Requirement |
3 |
| FCC Requirements |
3 |
| Installation |
3 |
| Type of Service |
3 |
| Telephone Company Procedures |
4 |
| If Problems Arise |
4 |
| Disconnection |
4 |
| Fax Branding |
4 |
| Notes for users in Australia and New Zealand |
4 |
| Instructions for IC CS-03 certified equipment |
5 |
| 1 NOTICE: The Industry Canada label identifies certified equipment. This certification means that... |
5 |
| 2 The user manual of analog equipment must contain the equipment’s Ringer Equivalence Number (REN... |
5 |
| 3 The standard connecting arrangement (telephone jack type) for this equipment is jack type(s): U... |
5 |
| CD-ROM / DVD-ROM Safety Instruction |
6 |
| Location of the required label |
6 |
| Copyright |
7 |
| Export Administration Regulation |
7 |
| Notice |
7 |
| Trademarks |
8 |
| Energy Star Compliance |
8 |
| Contents |
9 |
| Part I: Getting to Know Your Computer |
9 |
| Chapter 1: Finding Your Way Around 1 |
9 |
| Chapter 2: Getting Started 13 |
9 |
| Chapter 3: Connecting Other External Devices 31 |
10 |
| Chapter 4: Learning the Basics 59 |
11 |
| Chapter 5: Power Management 87 |
12 |
| Part II: Technical Reference |
13 |
| Chapter 6: Exploring Your Options 113 |
13 |
| Chapter 7: Toshiba Utilities 141 |
13 |
| Chapter 8: Keeping Your Files Safe 161 |
14 |
| Chapter 9: Managing Your Tecra 8100 Computer 195 |
14 |
| Chapter 10: Troubleshooting Guide 207 |
15 |
| Part III: Appendixes |
16 |
| Appendix A: Hot Keys 255 |
16 |
| Appendix B: Features and Specifications 261 |
16 |
| Appendix C: Power Cable Connectors 273 |
16 |
| Appendix D: System Resources 275 |
16 |
| Appendix E: Video Modes 283 |
16 |
| Glossary 287 |
16 |
| Index 317 |
16 |
| Introduction |
19 |
| About this guide |
20 |
| Safety icons |
20 |
| Other icons used |
21 |
| Other documentation |
22 |
| Operating system differences |
22 |
| Service options |
23 |
| Part I |
25 |
| Getting to Know Your Computer |
25 |
| What’s in Part I |
25 |
| Chapter 1 |
26 |
| Finding Your Way Around |
27 |
| This chapter presents a “grand tour” of your Tecra 8100 computer with illustrations to guide you ... |
27 |
| It serves as a reference when you need to locate specific parts of the computer. |
27 |
| Making sure you have everything |
27 |
| Before you do anything else, consult the Quick Start card shipped with your unit to make sure you... |
27 |
| If any items are missing or damaged, notify your network administrator. |
27 |
| Finding where everything’s located |
27 |
| The next few pages take you on a guided tour of the computer and its components. |
27 |
| Front with the display panel closed |
28 |
| The system indicator panel is made up of several status lights that provide information about var... |
28 |
| Sliding the display latch opens the computer display panel. For more information, see “Keyboard a... |
28 |
| The battery powers the computer when it is not connected to an AC outlet. |
28 |
| The volume control dial lets you adjust the loudness of the �system speakers. |
28 |
| Pressing the reset button restarts the computer. This button overrides the Suspend/Standby comman... |
28 |
| Left side |
29 |
| The PC Card ejection tabs allow easy removal of PC Cards. |
29 |
| The PC Card slots allow you to use Type I, Type II, or Type III PC Cards. |
29 |
| The left side speaker lets you hear stereo sound from a CD or DVD in addition to system alarms an... |
29 |
| The 3.5 mm headphone jack lets you connect stereo headphones or other audio output devices. Conne... |
29 |
| The 3.5 mm microphone jack lets you connect an external �monaural microphone or other audio input... |
29 |
| The cooling vent provides ventilation to keep the computer’s Pentium® processor from overheating.... |
29 |
| The PC Card lock, when used with the security lock, prevents unauthorized removal of the PC Cards. |
30 |
| The external diskette drive cover protects the external drive port. To connect the external diske... |
30 |
| For more information about the external diskette drive, see “External diskette drive” on page�11. |
30 |
| The power button cover protects the power button. Slide this cover toward the rear of the compute... |
30 |
| Back |
30 |
| The USB (Universal Serial Bus) port provides a connection for USB peripherals. USB is a single-ca... |
30 |
| The PS/2™ port lets you connect an optional PS/2-compatible mouse or keyboard. You can use an opt... |
31 |
| The fast infrared port allows cable-free communication with another device, such as a computer or... |
31 |
| The monitor port allows you to connect an external monitor. For more information, see “Using exte... |
31 |
| The expansion port allows you to connect one of several available expansion stations. These devic... |
31 |
| The serial port lets you connect a serial mouse, serial printer, or other serial device. |
31 |
| The parallel port lets you connect a parallel printer or other parallel device. For more informat... |
31 |
| The DC IN socket is where you plug in the AC adapter. |
31 |
| Right side |
32 |
| The right side speaker lets you hear stereo sound from a CD or DVD in addition to system alarms a... |
32 |
| The SelectBay® allows you to use one of several possible SelectBay modules. The DVD-ROM drive is ... |
32 |
| The modem port lets you connect the computer’s internal modem directly to a conventional telephon... |
32 |
| The composite video port lets you connect your computer to an external video device such as a sta... |
32 |
| Attaching an optional PORT-Noteworthy Computer Lock Cable to the security lock slot lets you anch... |
32 |
| Underside |
33 |
| The battery module enables you to use the Tecra when a standard electrical outlet is not availabl... |
33 |
| The SelectBay lock ejects the SelectBay module from the computer. |
33 |
| The SelectBay of the Tecra can contain one of several interchangeable devices, offering exception... |
33 |
| The memory module lets you add more memory to your Tecra computer. For more information, see “Add... |
33 |
| The PC Card lock keeps the PC Cards secure in their slots. |
33 |
| The PC Card lock retaining screw prevents the PC Card lock from accidentally releasing the PC Car... |
33 |
| Keyboard and display features |
34 |
| To view the front of the computer with the display panel open: |
34 |
| 1 Locate the display latch on the front of the computer. |
34 |
| 2 Slide the display latch to the right and lift the display panel. |
34 |
| 3 Adjust the display panel to a comfortable viewing angle. |
34 |
| Front with the display panel open |
34 |
| The computer’s screen is a liquid crystal display (LCD) that �provides clear, sharp images. |
35 |
| The 85-key keyboard provides all the functionality of a full-size keyboard. For more information,... |
35 |
| The lights on the keyboard indicator panel provide information about various keyboard functions. ... |
35 |
| The AccuPoint® II pointing device combines the function of a mouse with the convenience of never ... |
35 |
| The built-in microphone lets you record sounds. |
35 |
| The system indicator panel is made up of several status lights that provide information about var... |
35 |
| Indicator panel lights |
35 |
| Two sets of indicator lights, the system indicator panel and the keyboard indicator panel, displa... |
35 |
| System indicator lights |
35 |
| This panel is located on the front of the computer. |
35 |
| The AC power light glows green when the computer is connected to an external power source. |
35 |
| The on/off light glows green when the computer is on. It flashes amber when you turn off the comp... |
36 |
| The main battery light indicates the state of the main battery. The light glows amber when the ba... |
36 |
| The SelectBay battery light indicates the state of a secondary battery in the SelectBay, if insta... |
36 |
| The hard disk drive light indicates that the hard disk is currently in use. |
36 |
| The SelectBay drive light indicates that the module installed in the SelectBay or the external di... |
36 |
| Keyboard indicator lights |
36 |
| The lights on the keyboard indicator panel provide information about keyboard functions. |
36 |
| The caps lock light glows when you press the caps lock key. When this light is on, pressing a let... |
36 |
| The cursor control mode light glows when the cursor control overlay is on. When this light is on,... |
36 |
| The numlock light glows when the numeric overlay is on. When this light is on, pressing an overla... |
37 |
| External diskette drive |
37 |
| Your computer comes with an external diskette drive designed for use with 3.5-inch diskettes. |
37 |
| You may connect the external diskette drive using the external diskette drive port on the left si... |
37 |
| Chapter 2 |
38 |
| Getting Started |
39 |
| This chapter provides tips for working comfortably, describes how to connect components, and expl... |
39 |
| Selecting a place to work |
39 |
| Your computer is designed to be used in a variety of locations and situations. This section provi... |
39 |
| Creating a computer-friendly environment |
39 |
| Place the computer on a flat surface that is large enough for the computer and any other items yo... |
39 |
| To keep your computer in prime operating condition, protect your work area from: |
39 |
| Keeping yourself comfortable |
40 |
| Strain and stress injuries are becoming more common as people spend more time using their compute... |
40 |
| This section provides hints on avoiding strain and stress injuries. For more information, consult... |
40 |
| Placement of the computer |
41 |
| Proper placement of the computer and external devices is important to avoid stress-related injuri... |
41 |
| Seating and posture |
41 |
| When using your computer, maintain good posture with your body relaxed and your weight distribute... |
41 |
| If you are using a conventional chair: |
42 |
| Lighting |
42 |
| Proper lighting can improve the readability of the display and reduce eyestrain. |
42 |
| Arms and wrists |
42 |
| Work habits |
43 |
| The key to avoiding discomfort or injury from strain is to vary your activities. If possible, sch... |
43 |
| Other precautions |
43 |
| Your Tecra computer is designed to optimize safety, minimize strain, and withstand the rigors of ... |
43 |
| Setting up your computer |
45 |
| If you are using the computer for the first time, you need to connect the AC adapter to power the... |
45 |
| Connecting the AC adapter |
45 |
| The AC adapter enables you to power the computer from an electrical outlet and to charge the comp... |
45 |
| To connect AC power to the computer: |
45 |
| 1 Connect the power cable to the AC adapter. |
45 |
| 2 Plug the AC adapter into the DC IN socket on the rear of the computer. |
46 |
| 3 Connect the power cable to a live electrical outlet. |
46 |
| Charging the battery |
47 |
| Before you can use the battery to power the computer, you must charge it. Connect the computer to... |
47 |
| Charging time for the battery varies depending upon the demand placed on the AC adapter. If the c... |
47 |
| For more information on battery use, see “Running the computer on battery power” on page�88. |
47 |
| Connecting other external components |
47 |
| You should attach any other external components and devices to your Tecra computer before you tur... |
47 |
| Turning on the computer |
48 |
| The computer is now ready for you to turn it on and begin using it. |
48 |
| Opening the display panel |
48 |
| 1 Release the display latch. |
48 |
| 2 Lift the display panel. |
48 |
| Turning on the power |
48 |
| To turn on the computer: |
48 |
| 1 Make sure any external devices (such as the AC adapter) are properly connected and ready. |
48 |
| 2 If the diskette drive is connected, check that it is empty. |
48 |
| 3 Slide the power button cover on the left side of the computer toward the rear, revealing the po... |
48 |
| 4 Press and hold the power button in until the on/off light on the system indicator panel turns o... |
49 |
| 5 The preinstalled operating system will load automatically. |
50 |
| Operating system |
50 |
| Your computer comes with one of the following operating systems preinstalled: |
50 |
| The appropriate Microsoft operating system documentation comes with your Toshiba computer. |
50 |
| Using the computer for the first time |
50 |
| When you start your computer for the first time, it prompts you to: |
50 |
| Windows automatically detects and installs the devices it finds on your computer. Follow the inst... |
50 |
| Registering your computer |
51 |
| The last step in setting up your computer is to register your computer. |
51 |
| Sending in your product registration card lets Toshiba keep you up to date with information about... |
51 |
| Registering your computer also extends your Toshiba warranty worldwide at no charge to you. See t... |
51 |
| Windows NT does not support online registration. To register your computer, complete and mail the... |
51 |
| When and how to turn off the computer |
52 |
| It’s a good idea to turn off your computer when you’re not using it for a while. |
52 |
| Turning off the computer for a short period of time |
52 |
| If you have work in progress and expect to resume shortly, use the Windows Suspend/Standby comman... |
52 |
| The computer saves the state of all open programs, turns off the display, and goes into a low-pow... |
52 |
| The on/off light pulsates amber indicating the machine is in Standby mode. |
52 |
| You may configure your Tecra 8100 for additional Suspend/ Standby options. For more information, ... |
52 |
| Turning off the computer for a long period of time |
53 |
| To leave the computer turned off for a longer period, use the Windows Shut Down command. |
53 |
| To shut down Windows 98 Second Edition and turn off your computer: |
53 |
| 1 Click the Start menu, then Hibernate, or select Start, then Shut Down. |
53 |
| 2 Select Shut down and click OK. |
53 |
| To shut down Windows NT and turn off your computer: |
54 |
| 1 Click the Start menu, then click Shut Down. |
54 |
| 2 Select Shut down the computer, then click Yes. |
54 |
| Windows NT shuts down. A message tells you to wait while data is saved to disk. Then the computer... |
54 |
| There are a few additional things to keep in mind when you turn off the power. |
54 |
| Chapter 3 |
56 |
| Connecting Other External Devices |
57 |
| Using external display devices |
57 |
| Connecting the display device |
58 |
| Selecting video cables |
58 |
| Connecting to the composite video port |
59 |
| 1 Connect one end of the video cable to the external video device. |
59 |
| 2 Connect the other end of the video cable to the plug on the video port adapter (included with y... |
59 |
| 3 Connect the other end of the video port adapter cable to the composite video port on the left s... |
59 |
| 4 Turn on the external video device. |
59 |
| 5 Set the display mode by pressing Fn + F5, or by setting the Display Properties settings. For mo... |
59 |
| Connecting an external monitor |
59 |
| 1 Connect the monitor’s video cable to the monitor port on the back of the computer. |
59 |
| 2 Connect the monitor’s power cable to a live electrical outlet. |
59 |
| 3 Turn on the external monitor. |
59 |
| 4 Set the display mode by pressing Fn + F5, or by setting the Display Properties settings. For mo... |
59 |
| Directing the display output when you turn on the �computer |
60 |
| 1 Press Fn and F5 simultaneously. |
60 |
| 2 While holding down Fn, press F5 repeatedly until the setting you want takes effect. |
60 |
| 3 Release the Fn key. |
60 |
| Adjusting the quality of the external display |
61 |
| Video limitations |
61 |
| Using an external keyboard |
62 |
| Making your external keyboard emulate the Fn key |
62 |
| Using a mouse |
62 |
| Setting up a PS/2 mouse with the AccuPoint II |
63 |
| PS/2 mouse with Windows�98�Second�Edition |
63 |
| 1 Click Start, Settings, then point to Control Panel. |
63 |
| 2 Double click the Toshiba Hardware Setup icon. |
63 |
| 3 Select the Pointing Devices tab and click Simultaneous. |
63 |
| PS/2 mouse with Windows NT |
63 |
| 1 Click Start, select Programs, then select Toshiba Utilities. |
63 |
| 2 Click Hardware Setup, click the Hardware Options button, and then select the Pointing Devices tab. |
63 |
| 3 Select the Simultaneous radio button and click OK. |
63 |
| Connecting a local printer |
64 |
| 1 If the computer is on, turn it off. |
64 |
| 2 Connect the printer cable to the printer and to the computer’s parallel port. Use the printer c... |
64 |
| 3 Plug the printer’s power cable into a live electrical outlet. |
65 |
| 4 See your printer documentation for additional configuration steps. |
65 |
| Connecting the external diskette drive |
65 |
| Connecting external speakers or headphones |
66 |
| 1 Locate the headphone jack on the left side of the computer. It’s beside the external microphone... |
66 |
| 2 Using any necessary adapters, plug the cable from the external audio device into the headphone ... |
66 |
| Connecting an external microphone |
66 |
| 1 Locate the microphone jack on the left side of the �computer. |
66 |
| 2 Plug the microphone cord into the microphone jack. |
66 |
| 3 Turn on the microphone. |
66 |
| Using an expansion device |
66 |
| Adding memory |
67 |
| Memory module sizes |
68 |
| Installing a memory module |
69 |
| Preparing to install memory with Windows�98�Second�Edition |
69 |
| 1 Press Fn and F3 simultaneously to display the Shutdown mode pop-up window. |
69 |
| 2 While continuing to press Fn, press F3 until you select Shut�down. |
69 |
| 3 Release Fn. |
69 |
| 4 Click Start, then click Shut Down. |
69 |
| 5 Select Shut down the computer, then click Yes or OK, as appropriate. |
69 |
| Preparing to install memory with Windows NT |
69 |
| 1 Click Start then click Shut Down. |
70 |
| 2 Select Shut down the computer, then click Yes. |
70 |
| Inserting a memory module |
70 |
| 1 Unplug the computer. |
70 |
| 2 Close the display panel and remove any cables you may have �connected. |
70 |
| 3 Turn the computer upside down. |
70 |
| 4 Locate and remove the screws that hold the cover plate in place. |
71 |
| 5 Lift off the cover. |
71 |
| 6 Remove the memory module from its anti-static packaging. |
72 |
| 7 Insert the memory module in the slot and gently press it down into place. |
72 |
| 8 Replace the cover plate and the screws. |
73 |
| 9 Turn the computer over and restart it. |
73 |
| Removing a memory module |
73 |
| 1 Complete steps 1 through 5 in “Installing a memory module” to turn off the computer and open th... |
73 |
| 2 Pull the clips away from the memory module. |
73 |
| 3 Carefully remove the module from the slot. |
73 |
| 4 Replace the cover plate and screws. |
73 |
| 5 Turn the computer over and restart it. |
73 |
| Swapping SelectBay modules |
73 |
| Removing a module from the SelectBay |
74 |
| 1 Turn off the power. |
74 |
| 2 Turn the computer upside down and locate the SelectBay cover. |
74 |
| 3 Slide the SelectBay ejection bar towards the back of the computer. Twist a coin in the ejection... |
74 |
| 4 Slide the module out of the computer. |
75 |
| Inserting a module into the SelectBay |
76 |
| 1 Snap the module into the cover, if necessary. |
76 |
| 2 Slide the module all the way into the SelectBay. |
76 |
| Inserting the diskette drive module |
76 |
| 1 Simultaneously pinch the two eject buttons. |
76 |
| 2 Carefully pull the diskette drive by the front edges to completely remove it from the case. |
77 |
| Using the secondary battery in the SelectBay |
77 |
| Placing the battery into the adapter |
77 |
| 1 Align the contacts on the battery with the contacts on the adapter. |
78 |
| 2 Push down to snap the battery into the adapter. |
78 |
| Removing the battery from the adapter |
78 |
| 1 Holding the front of the battery adapter toward you, slide the battery release latch to your ri... |
78 |
| 2 Holding the latch to the right, push up on the front of the battery until it pops out of the ad... |
78 |
| Inserting and removing PC Cards |
79 |
| Inserting a PC Card |
79 |
| 1 Locate the PC Card slot on the left side of the �computer. |
79 |
| 2 If the PC Card slots are locked, unlock them by turning the computer over, locating the PC Card... |
79 |
| 3 Insert the PC Card. |
80 |
| 4 When the card is almost all the way into the slot, push firmly, but gently, to ensure a firm co... |
80 |
| 5 Fold the PC Card eject lever into the case. |
80 |
| 6 To lock the PC Cards in their slots, turn the computer over and locate the PC Card lock, remove... |
80 |
| Removing a PC Card |
81 |
| 1 If the PC Card slots are locked, unlock them by turning the computer over, locating the PC Card... |
81 |
| 2 Locate the PC Card ejection tab that corresponds to the slot in which your PC Card is installed. |
81 |
| 3 Fold out the PC Card eject lever and push it in to remove the PC Card. |
81 |
| 4 Grasp the edges of the PC Card and slide it out of the slot. |
81 |
| Setting up your PC Card for your computer |
81 |
| Connecting a modem |
81 |
| Connecting to a phone line |
82 |
| 1 Plug one end of the telephone cable into the modem jack on the right side of the computer. |
82 |
| 2 Connect the other end to the wall jack. |
82 |
| Chapter 4 |
84 |
| Learning the Basics |
85 |
| This chapter covers precautions and computing tips as well as providing important information abo... |
85 |
| Precautions |
85 |
| Computing tips |
86 |
| Windows basics |
87 |
| Windows 98 Second Edition or Windows NT Workstation 4.0 is the computer’s operating system. If yo... |
87 |
| For answers to common questions, click Start, click Help to open the online help, then double-cli... |
87 |
| Logging on to Windows NT |
87 |
| A major difference between Windows NT and other versions of Windows is that you have to log on, e... |
87 |
| To turn on your computer and log on to Windows NT: |
87 |
| 1 If the external diskette drive is connected to the computer, check that it is empty. |
87 |
| 2 If a printer or other external device is connected to the computer, turn on the device. |
87 |
| 3 If the battery is not charged or you are running the computer on AC power, connect the AC adapt... |
88 |
| 4 With the power button lock in the unlocked position, press and hold the power button until the ... |
88 |
| 5 Use the arrow keys to select one of the following operating system options: |
88 |
| 6 Press Enter. |
88 |
| 7 Press the Ctrl, Alt and Del keys simultaneously to begin the Windows NT logon process. |
88 |
| 8 Enter your user name and password, then click OK. |
88 |
| Using the keyboard |
89 |
| The Tecra keyboard contains character keys, control keys, function keys, and special Windows keys... |
89 |
| Keyboard |
89 |
| Character keys |
89 |
| Typing with the character keys is very much like typing on a typewriter, except that: |
89 |
| Making your keyboard emulate a full-size keyboard |
90 |
| Although the Tecra computer’s keyboard layout is compatible with a standard full-size keyboard, i... |
90 |
| A standard full-size keyboard has two Enter, Ctrl, and Alt keys, editing keys, cursor positioning... |
90 |
| The computer’s built-in keyboard has only one Enter and one Ctrl key. Most of the time this doesn... |
90 |
| Ctrl, Fn, and Alt keys |
90 |
| The Ctrl, Fn and Alt keys |
90 |
| The Ctrl, Fn, and Alt keys do different things depending on the program you are using. For more i... |
90 |
| Function keys |
91 |
| The function keys (not to be confused with the Fn key) are the 12 keys at the top of the keyboard. |
91 |
| The function keys |
91 |
| F1 through F12 are called function keys because they execute programmed functions when pressed. U... |
91 |
| Windows special keys |
91 |
| The Windows special keys |
91 |
| The keyboard provides two keys that have special functions in Windows: The Start key activates th... |
91 |
| Overlay keys |
91 |
| The keys with white numbers and symbols on the front of them form the numeric and cursor overlay.... |
91 |
| Keyboard overlay keys |
92 |
| Using the overlay to type numeric data |
92 |
| The keys with the numbers on the right front of the keycaps are the cursor control overlay. |
92 |
| To turn the numeric overlay on, press Fn and F11 simultaneously. The numeric mode light on the ke... |
92 |
| You can still use the overlay keys to type alphabetic characters while the numeric overlay is on.... |
92 |
| To use the cursor control keys when the numeric overlay is on. |
92 |
| To disable the numeric keypad overlay, hold down the Fn key and press F11 again. The numeric mode... |
93 |
| Using the overlay for cursor control |
93 |
| The keys with the white arrows and white symbols on the left front are the cursor control overlay. |
93 |
| To turn the cursor control overlay on, press Fn and F10 simultaneously. The cursor control light ... |
93 |
| To type alphabetic characters while the overlay is on: |
93 |
| To use the numeric overlay keys while the cursor control overlay is on: |
93 |
| To disable the cursor control overlay, hold down the Fn key and press F10 again. The cursor contr... |
93 |
| Using the AccuPoint II |
94 |
| The AccuPoint II keys |
94 |
| The round button in the middle of the keyboard is the AccuPoint II pointing device. It enables yo... |
94 |
| To move the cursor, gently push the pointing device in the direction you want the cursor to move.... |
94 |
| The primary button acts as the left button on a mouse. The secondary button acts as the right mou... |
94 |
| The small left button performs the same function as the Page�Up key. |
94 |
| The small right button performs the same function as the Page�Down key. |
94 |
| When a step instructs you to click or choose an item, move the cursor to the item, then press and... |
94 |
| Starting a program |
95 |
| In Windows there are three ways to start a program—from the Start menu, from Windows Explorer, or... |
95 |
| Starting a program from the Start menu |
95 |
| To start a program that has an icon in the Programs menu, follow these steps, which use the Windo... |
95 |
| 1 Click Start, then point to Programs. |
95 |
| 2 Point to the program group, in this example, Accessories. |
95 |
| 3 Click the program, in this example, Wordpad. |
95 |
| That’s all there is to it. To close the program, click the Close button at the upper-right corner... |
95 |
| Starting a program from Explorer |
95 |
| If a program is not in the Programs menu, you can start it in Windows Explorer. To use this metho... |
95 |
| The following method also opens Wordpad, using its file name of Wordpad.exe. |
95 |
| To start a program from Windows Explorer: |
95 |
| 1 Click Start, then point to Programs. |
95 |
| 2 Click Windows Explorer. |
96 |
| 3 In the left part of the screen, under the C: icon, double-click the folder containing the progr... |
96 |
| 4 Click Accessories. |
96 |
| 5 Double-click Wordpad. |
96 |
| Starting a program from Run menu on the taskbar |
96 |
| You can start a program from the taskbar if you know its name and location. |
96 |
| To start a program using the taskbar: |
96 |
| 1 Click Start on the taskbar. |
96 |
| 2 Point to Run. |
96 |
| 3 In the dialog box, type the command line. For example, to access Paintbrush, type C:\\Windows\\pb... |
96 |
| 4 Click OK. |
96 |
| Saving your work |
97 |
| Before you turn off the computer, save your work to the hard disk drive or a diskette. This is on... |
97 |
| Many programs offer a feature that saves documents at regular intervals, such as every 15 minutes... |
97 |
| To save: |
97 |
| File names |
97 |
| Windows 95 and newer operating systems support file names of up to 255 characters. You may use al... |
97 |
| Most programs assign an extension of a period and up to three characters that identifies the file... |
97 |
| If you plan to share your files with a computer using MS-DOS® or a pre-Windows 95 version of Wind... |
98 |
| Windows NT supports the following file systems: |
98 |
| With Windows NT, long and short filenames can be used on both NTFS or FAT volumes. |
98 |
| Printing your work |
98 |
| Make sure that Windows 98 Second Edition is set up for your printer as described in “Setting up W... |
98 |
| To print a file: |
98 |
| 1 If your printer is not on, turn it on now. |
98 |
| 2 In the File menu of your Windows program, click Print. |
98 |
| A sample Print dialog box |
99 |
| 3 Click OK to print. |
99 |
| Using diskettes |
99 |
| The diskette drive |
99 |
| The diskette in-use indicator light glows when the diskette drive is being accessed. |
99 |
| Push the eject button to remove a diskette from the drive. When a diskette is fully seated in the... |
99 |
| Inserting and removing diskettes |
100 |
| To insert a diskette in the computer’s diskette drive: |
100 |
| 1 Hold the diskette so that the arrow on its upper surface points toward the drive. |
100 |
| 2 Push the diskette gently into the drive slot. |
100 |
| To remove a diskette from the drive, push the eject button. |
100 |
| Diskette care |
100 |
| Backing up your files |
101 |
| Backing up your files means copying individual files to a diskette or copying entire sections of ... |
101 |
| Copying to a diskette |
101 |
| To back up your files to a diskette: |
101 |
| 1 Insert a formatted diskette into the diskette drive. |
101 |
| 2 Double-click the My Computer icon on the Windows desktop. |
101 |
| 3 Double-click the drive that contains the file you want to copy. |
101 |
| 4 Double-click the folder that contains the file, then click the file you want to copy. |
101 |
| 5 Click File, then click Send To. |
101 |
| 6 Click the icon for the diskette drive (drive A:). |
101 |
| Using the optional DVD-ROM drive |
101 |
| DVD (Digital Versatile Disc) is primarily a video medium. Because it provides a significant incre... |
101 |
| Your Tecra computer may have a Toshiba DVD-ROM drive that can read both DVD-ROM and CD-ROM discs. |
102 |
| If the DVD-ROM drive is not currently installed in the SelectBay, follow the instructions in “Swa... |
102 |
| The DVD-ROM drive |
102 |
| The DVD in-use indicator light indicates when the DVD�ROM drive is in use. |
102 |
| Use the eject button to release the tray. |
102 |
| The manual eject hole can be used to release the DVD-ROM tray when the power is off. |
103 |
| Inserting compact discs |
103 |
| To insert a disc into the DVD-ROM or CD-ROM drive: |
103 |
| 1 Make sure the in-use indicator light is off. |
103 |
| 2 With the computer’s power on, locate and press the DVD’s eject button. |
103 |
| 3 Grasp the tray and pull it fully open. |
103 |
| The drive tray fully extended |
103 |
| 4 Hold the disc by its edges and check that it is free of dust. |
104 |
| 5 Place the disc carefully in the tray, label side up. |
104 |
| Positioning the disc in the drive |
104 |
| 6 Gently press the disc onto the center spindle until you feel it click into place. |
104 |
| 7 Make sure the disc is completely on the spindle and is lying flat. |
104 |
| 8 Push the tray in by pressing gently on the center of the tray until it clicks into place. |
105 |
| Playing a CD or DVD |
105 |
| For information on playing a disc, see “Using Microsoft CD Player” on page�121, or “Using the DVD... |
105 |
| Removing compact discs |
105 |
| To remove a compact disc with the computer turned on: |
105 |
| 1 Press the eject button on the drive. |
105 |
| 2 Pull the tray until it is fully open, remove the disc, and place it in its protective cover. |
105 |
| 3 Push the tray in to close the drive. |
105 |
| To remove a compact disc with the computer turned off: |
105 |
| 1 Insert a slender object, such as a straightened paper clip, into the manual eject hole. |
105 |
| 2 Pull the tray until it is fully open, remove the disc and place it in its protective cover. |
105 |
| 3 Push the tray in to close the drive. |
105 |
| Caring for CDs and DVDs |
106 |
| Using PC Cards |
106 |
| When you buy a PC Card, check the package for the type of card you are �buying. |
106 |
| For information on inserting or removing a PC Card, see “Inserting and removing PC Cards” on page... |
106 |
| Using Cardbus-compliant PC Cards |
107 |
| If you are using Cardbus-compliant PC Cards, but don’t have CardWizard installed on your computer: |
107 |
| 1 Start TSETUP. For instructions, see “TSETUP” on page�151. |
107 |
| 2 Set the PC Card controller to Cardbus/16. |
107 |
| Hot swapping |
107 |
| With PC Cards, you can replace one PC Card with another while the computer is on. This is called ... |
107 |
| Hot swapping precautions |
107 |
| Although you can insert a PC Card at any time, remember not to remove a card while it is in use. ... |
107 |
| Before removing a PC Card, stop it by clicking the PC Card (PCMCIA) icon on the taskbar. After th... |
108 |
| Using your computer at the office |
108 |
| By connecting an external monitor, external full-size keyboard, and a mouse, you can work with yo... |
108 |
| An external monitor connects to the monitor port. |
108 |
| An external PS/2-compatible keyboard or a PS/2 mouse connects to the PS/2 port. An optional Y-cab... |
108 |
| A serial mouse connects to the serial port. |
108 |
| For more information on connecting these and other components, see “Connecting Other External Dev... |
108 |
| Using a computer lock |
108 |
| For your own peace of mind, you may want to secure your computer to a heavy object such as your d... |
108 |
| PORT-Noteworthy Computer Lock Cable |
109 |
| To secure the computer: |
109 |
| 1 Loop the cable through or around some part of a heavy object. |
109 |
| 2 Pass the locking end through the loop. |
109 |
| 3 Slide the PC Card lock (located underneath the PC Card slots) to secure your PC Cards in place. |
109 |
| 4 Insert the cable’s locking end into the security lock slot on the computer then give the key a ... |
109 |
| Locking the computer |
109 |
| Caring for your computer |
110 |
| This section gives tips on cleaning and moving your computer. For information about taking care o... |
110 |
| Cleaning the computer |
110 |
| To keep your computer clean, gently wipe the display panel and exterior case with a lightly dampe... |
110 |
| Moving the computer |
110 |
| Before moving your computer, even across the room, make sure all disk activity has ended (the dri... |
110 |
| Although your notebook computer is built to withstand reasonable shock and vibration, transport i... |
110 |
| Chapter 5 |
112 |
| Power Management |
113 |
| Toshiba’s energy-saver design |
113 |
| Running the computer on battery power |
114 |
| Charging the batteries |
114 |
| Monitoring battery power |
115 |
| Displaying remaining battery power |
116 |
| 1 Click Start, point to Settings, then click Control Panel. |
116 |
| 2 In the Control Panel window, double-click Power Saver. |
116 |
| 1 Click Start, point to Settings, then click Control Panel. |
117 |
| 2 In the Control Panel window, double-click Power Saver. |
117 |
| What to do when the battery alarm sounds |
118 |
| 1 Click Start, Settings, then Control Panel. |
118 |
| 2 Double-click the Power Management icon, select the Alarms tab, then adjust the settings to suit... |
118 |
| Starting where you left off |
119 |
| Using Standby command |
120 |
| Using Suspend/Resume (memory) mode |
121 |
| Using Hibernation mode |
123 |
| 1 Open the Start menu, point to Settings, and click Control Panel. |
123 |
| 2 Double-click the Power Management icon. |
123 |
| 3 Click OK to clear the dialog box. |
123 |
| 4 Click the Hibernate tab. |
124 |
| 5 Click the Enable hibernate support check box, then click OK. |
124 |
| Activating Hibernation mode |
124 |
| 1 Open the Start menu. |
124 |
| 2 Click Hibernate. |
125 |
| Other Hibernation mode settings |
125 |
| 1 Open the Start menu, point to Settings, then click Control Panel. |
125 |
| 2 In the Control Panel window, double-click the Power Saver icon. |
125 |
| 3 In the Power Save Mode tab, click the Details button, then select the System Power Mode tab. |
125 |
| 4 Select Hibernate for any or all of the applicable modes. |
125 |
| 5 Once you have made your selections, click OK to return to the Power Save Mode tab, and click OK... |
126 |
| Shutdown mode hot key |
127 |
| 1 Press Fn and F3 simultaneously to display the power usage pop-up window. |
127 |
| 2 While continuing to press Fn, press F3 until you select the desired power usage mode. |
127 |
| 3 Release the Fn key. |
127 |
| 1 Press Fn and F3 simultaneously to display the power usage pop-up window. |
127 |
| 2 While continuing to press Fn, press F3 until you select the desired power usage mode. |
127 |
| 3 Release the Fn key. |
128 |
| Restarting a computer in Standby, Suspend or Hibernate�mode |
128 |
| Changing batteries |
128 |
| 1 Save your work. |
128 |
| 2 Shut down and turn off the computer. |
128 |
| 3 Remove all cables connected to the computer. |
128 |
| 4 Turn the computer over. |
128 |
| 5 Slide the computer latch to release the battery. |
128 |
| 6 Pull the discharged battery module out of the computer. |
129 |
| 7 Wipe the terminals of the charged battery with a clean cloth to ensure a good connection. |
129 |
| 8 Insert the charged battery into the slot until the latch clicks. |
129 |
| 9 Turn the computer right side up. |
130 |
| 10 Reconnect any cables. |
130 |
| 11 Restart the computer. |
130 |
| Taking care of your battery |
130 |
| Safety precautions |
130 |
| Maximizing battery life |
131 |
| Disposing of used batteries safely |
131 |
| Conserving power |
132 |
| Power usage modes in Windows 98 Second Edition |
132 |
| 1 Click Start, point to Settings, Control Panel, and click on the Power Saver icon. |
133 |
| 2 Open the Power Save Modes tab and set your options. |
133 |
| 3 For more information, see “Power Saver” on page�154. |
133 |
| Using a hot key to set the power usage mode |
133 |
| 1 Press Fn and F2 simultaneously to display the power usage pop-up window. |
133 |
| 2 While continuing to press Fn, press F2 until you select the desired power usage mode. |
133 |
| 3 Release the Fn key. |
133 |
| 1 Press Fn and F2 simultaneously to display the power usage pop-up window. |
134 |
| 2 While continuing to press Fn, press F2 until you select the desired power usage mode. |
134 |
| 3 Release the Fn key. |
134 |
| Additional options for power |
134 |
| Part II |
137 |
| Technical Reference |
137 |
| What’s in Part II |
137 |
| Chapter 6 |
138 |
| Exploring Your Options |
139 |
| Setting up Windows to work with your�printer |
139 |
| Setting up Windows 98 Second Edition to work with�your�printer |
140 |
| 1 Click the Start button, then point to Settings, and click Printers. |
140 |
| 2 Double-click Add Printer. |
140 |
| 3 Click Next. |
141 |
| 4 If the printer you are setting up: |
141 |
| 5 Click Next. |
141 |
| 6 From the list of manufacturers and printers, select your printer, then click Next. |
141 |
| 7 Select the port settings according to the instructions in your printer’s documentation and the ... |
141 |
| 8 Enter a name for your printer, then click Next. |
141 |
| 9 If you want this printer to be: |
141 |
| 10 Click Next. |
142 |
| 11 If your printer is connected and turned on, click Finish to print a test page. |
142 |
| 12 Click OK to print. |
142 |
| Setting up Windows NT to work with your printer |
142 |
| 1 Open the Printers window. |
142 |
| 2 Double-click Add Printer. |
142 |
| 3 Select one of the following printer management options: |
143 |
| 4 Click Next to continue. |
143 |
| 5 Follow the on-screen instructions to complete the printer setup process. |
144 |
| Exploring audio features |
144 |
| Using external speakers or headphones |
144 |
| 1 Locate the headphone jack on the computer. |
144 |
| 2 Using any necessary adapters, plug the cable from the headphones or external speakers into the ... |
144 |
| For external speakers, use the volume controls on each speaker. |
144 |
| For headphones, use the computer’s volume control dial. |
144 |
| Recording sounds |
145 |
| 1 If you want to use an external microphone, connect it to the external microphone jack. |
145 |
| 2 Click Start, point to Programs, Accessories, and then click Entertainment. |
145 |
| 3 Click Sound Recorder. |
145 |
| 1 If you want to use an external microphone, connect it to the external microphone jack. |
145 |
| 2 Click Start, point to Programs, Accessories, and then click Multimedia. |
145 |
| 3 Click Sound Recorder. |
145 |
| 4 Click the Record button. |
146 |
| 5 Speak normally into the microphone. |
146 |
| 6 When you have finished recording, click the Stop button. |
146 |
| 7 To hear what you just recorded, click the Play button. |
146 |
| 8 To save the file, select Save from the File menu. |
146 |
| Adjusting recording quality |
146 |
| 1 Open Sound Recorder, if necessary. |
146 |
| 2 Click Start, point to Programs, Accessories, Entertainment, and then click Sound Recorder. |
146 |
| 3 In the Sound Recorder window, click Edit, then click Audio Properties. |
146 |
| 4 In the Audio Properties dialog box, adjust the Recording Volume, Preferred device, and �Preferr... |
147 |
| 5 Click OK. |
147 |
| Using Microsoft CD Player |
147 |
| 1 Click Start, point to Programs, Accessories, and then click Entertainment. |
147 |
| 2 Click CD Player. |
147 |
| 1 Click Start, point to Programs, Accessories, and then click Multimedia. |
147 |
| 2 Click CD Player. |
147 |
| Using the DVDExpress DVD Player |
148 |
| Starting DVDExpress |
149 |
| 1 Open the Start menu, point to Programs, Mediamatics DVDExpress, then click Mediamatics DVD Player. |
149 |
| Status display window |
149 |
| DVD Player controls |
150 |
| Using the DVDExpress shortcut keys |
154 |
| Accessing the shortcut menu |
154 |
| Using DVDExpress options |
155 |
| 1 Launch DVDExpress, if it is not already running. |
155 |
| 2 On the DVDExpress control panel, click the Options button. |
155 |
| About — This tab displays copyright, trademark, version number, region code, and other relevant i... |
155 |
| Audio — Use this tab to enable or disable Digital Audio Output (SPDIF output). The Audio tab appe... |
155 |
| Display — Use this tab to select or modify various video and display settings. This tab is availa... |
155 |
| DVD Region — Use this tab to change the current region code for �DVDExpress. |
155 |
| Region codes |
156 |
| Playing CDs and files |
156 |
| Playing a VideoCD |
157 |
| 1 Place the VideoCD in the DVD-ROM drive. |
157 |
| 2 Launch DVDExpress and press the Play button. |
157 |
| Playback controls — Play, Pause, and Stop within DVDExpress work the same way as in DVD playback. |
157 |
| Menu — Use the keyboard Enter key to access the �VideoCD’s main menu. |
157 |
| Track selection — To select a specific track on the VideoCD, use the numeric keyboard keys. Enter... |
157 |
| Shortcut menu —A pop-up menu for track selection appears when you click the right mouse button. |
158 |
| Playing an audio CD |
158 |
| 1 Place the audio CD in the DVD-ROM drive. |
158 |
| 2 Launch DVDExpress and press the Play button. |
158 |
| Playing a file |
158 |
| 1 On the DVDExpress control panel, click the Open File button. |
158 |
| 2 Locate, then double-click the file you want to play. |
158 |
| Exchanging data with another computer |
158 |
| The serial port, you need a null modem serial cable. |
158 |
| The parallel port, you need a LapLink®-type parallel cable. |
159 |
| 1 Connect the appropriate serial or parallel cable. |
159 |
| 2 Load the transfer program on both computers. |
159 |
| 3 Set any specific options. |
159 |
| 4 Start the transfer. |
159 |
| 5 When you have finished transferring files, close the programs on both computers. |
159 |
| 1 Click Start, then Help. |
159 |
| 2 Choose the Index tab. |
159 |
| 3 In the dialog box, type communicating. |
159 |
| 4 Follow the online instructions. |
159 |
| Using the computer’s telephony feature |
159 |
| Setting up for communications |
160 |
| A modem (one comes with your Tecra 8100 computer) |
160 |
| A telephone line |
160 |
| A browser or communications program |
160 |
| An Internet Service Provider (ISP) or online service if you plan to use the Internet |
160 |
| Determining the COM port |
161 |
| 1 Click Start, point to Settings, and click Control Panel. |
161 |
| 2 Double-click Modems. |
161 |
| 3 Click the Diagnostics tab. |
161 |
| 4 Make a note of the COM port number. |
161 |
| 5 To verify that the modem is set up properly, click the port to which your modem is connected an... |
162 |
| 6 Click OK to close the Modem Properties dialog box. |
162 |
| 7 Close the Control Panel. |
162 |
| 1 Click Start, point to Settings, and click Control Panel. |
162 |
| 2 Double-click Modems. |
162 |
| 3 Make a note of the COM port to which the modem is connected. |
162 |
| 4 Click OK to close the Modem Properties dialog box. |
162 |
| 5 Close Control Panel. |
162 |
| Connecting the modem to a telephone line |
163 |
| Sending a fax |
163 |
| 1 On the desktop, double-click the RingCentral icon. |
163 |
| 2 Select Next and follow the instructions on the screen. |
163 |
| Connecting directly to a remote computer |
163 |
| Connecting your computer to a network |
163 |
| At the office, you need to install a network card in one of the PC Card slots. For specific infor... |
163 |
| While you are at home or traveling, you need a dial-up connection. Ask your network administrator... |
163 |
| 1 Click Start and point to Programs. |
164 |
| 2 Point to Accessories, then to Communications, and click Dial-Up Networking. |
164 |
| Toshiba’s online resources |
164 |
| Using MS-DOS programs |
164 |
| 1 Click Start, then click Shut Down. |
164 |
| 2 Click Restart in MS-DOS mode, then click OK. |
164 |
| 3 Refer to the program’s documentation for the command that starts the program. |
164 |
| 4 At the system prompt, type the command and press Enter. |
164 |
| Chapter 7 |
166 |
| Toshiba Utilities |
167 |
| Fn�esse |
167 |
| Starting Fn�esse |
168 |
| Assigning a key to a program or document |
169 |
| Using drag-and-drop |
169 |
| 1 Open both Fn�esse and Windows Explorer. |
169 |
| 2 Resize the Explorer window so you can see both the Fn�esse keyboard and Explorer at the same time. |
169 |
| 3 In the Explorer window, highlight the program or document file you wish to assign to a key. |
169 |
| 4 Click and hold the primary button as you drag the highlighted item from Explorer to the key on ... |
169 |
| 5 Release the primary button. |
169 |
| 6 Click OK to close the Add/Edit Command dialog box with your key assignment in place. |
169 |
| Using the keyboard or pointing device |
170 |
| 1 Start Fn-esse. |
170 |
| 2 Perform one of the following: |
170 |
| 3 To make a direct key assignment, select Direct. |
171 |
| 4 To make a pop-up assignment, select Popup. |
171 |
| Viewing existing key assignments |
171 |
| Changing or removing existing key assignments |
172 |
| 1 In the Fn�esse keyboard, click the key you wish to change with the secondary button. |
172 |
| 2 To change the key assignment, click Direct or Popup and continue as if you were creating a new ... |
172 |
| 3 To remove the key assignment, click Clear. |
172 |
| Hardware Setup |
172 |
| Hardware Setup in Windows 98 Second Edition |
172 |
| Hardware Setup in Windows NT |
174 |
| Hardware Configuration online help |
175 |
| 1 Click the Start menu button, then click Run. |
175 |
| 2 In the Run dialog box enter Explorer, then click OK. |
175 |
| Hardware Configuration Options window |
175 |
| TSETUP |
177 |
| Using Power Management |
178 |
| 1 Open the Start menu, point to Settings, then click Control Panel. |
179 |
| 2 In the Control Panel window, double-click the Power Management icon. |
179 |
| 3 Click OK to close the dialog box. |
179 |
| Power Saver |
180 |
| Power Saver in Windows 98 Second Edition |
180 |
| 1 Open the Start menu, point to Settings, then click Control Panel. |
180 |
| 2 In the Control Panel window, double-click the Power Saver icon. |
180 |
| Power Saver in Windows NT |
182 |
| 1 Open the Start menu, point to Settings, then click Control Panel. |
182 |
| 2 Click Power Saver. |
182 |
| Power Save Modes tab |
182 |
| 1 Select Battery Power (or External Power). |
183 |
| 2 Select a Power Save mode. |
183 |
| 3 Click the Details... button. |
183 |
| 4 Select a tab, make any changes you require, and click OK. |
183 |
| Auto Power On tab |
184 |
| Expansion device properties |
184 |
| 1 Open the Start menu, point to Settings, then click Control Panel. |
184 |
| 2 In the Control Panel window, double-click the Toshiba Services Configuration icon. |
184 |
| Chapter 8 |
186 |
| Using passwords in Windows 161 |
186 |
| User-level passwords 162 |
186 |
| Supervisor-level passwords 170 |
186 |
| Hard disk drive passwords - Windows�98�Second�Edition 175 |
186 |
| Hard disk drive passwords - Windows�NT 182 |
186 |
| Keeping Your Files Safe |
187 |
| Using passwords in Windows |
187 |
| User-level passwords |
188 |
| Protecting against forgetfulness |
188 |
| Setting a user-level password |
189 |
| Setting a user-level password in Toshiba�Hardware�Setup |
189 |
| 1 Click Start, point to Settings, Control Panel, and click Toshiba Hardware Setup. |
189 |
| 2 Open the Password tab. |
189 |
| 3 Click Registered. |
189 |
| 4 Type in the password and click OK. |
189 |
| 5 Reenter the password and click OK. |
189 |
| 6 Click OK at the bottom of the Hardware Setup window. |
189 |
| 1 Click Start, point to Programs, and then point to Toshiba Utilities. |
189 |
| 2 Click Hardware Setup, click the Hardware Options button, and then select the Password tab. |
189 |
| 3 Click the Registered radio button in the User Password section and then follow the prompts to r... |
189 |
| 4 You must restart your computer in order for changes to take effect. |
189 |
| Setting a user-level password in TSETUP |
190 |
| 1 Click Start, then Shut Down. Select Shut down and click OK. |
190 |
| 2 If your diskette drive is not installed in the SelectBay, connect the external diskette drive o... |
190 |
| 3 Insert a write-enabled diskette into the diskette drive. |
190 |
| 4 Slide the power button cover on the left side of the computer toward the rear, revealing the po... |
190 |
| 5 Hold down the Esc key and press and hold the power button in until the on/off light on the syst... |
190 |
| A sample TSETUP screen |
191 |
| 6 Press P to move to the PASSWORD section of the screen. |
191 |
| 7 Press the spacebar. |
191 |
| 8 Type a password of 1 to 16 characters and press Enter. |
191 |
| 9 When TSETUP prompts you to do so, verify the password by typing it again and pressing Enter. |
191 |
| 10 Press End to save your change. |
191 |
| 11 Press Y to confirm you want to quit. |
191 |
| 12 Press 1 if you’re using a 1.44 MB diskette or press 2 if you’re using a 720 KB diskette. |
192 |
| 13 Remove the diskette and press any key to continue. |
192 |
| 14 Store your password service diskette in a safe place, away from the computer. |
192 |
| Disabling the user-level password |
192 |
| Disabling a user-level password in Toshiba�Hardware�Setup |
192 |
| 1 Click Start, point to Settings, Control Panel, and click Toshiba Hardware Setup. |
193 |
| 2 Open the Password tab. |
193 |
| 3 Click Not Registered. |
193 |
| 4 Type in the password and click OK. |
193 |
| 5 Click OK at the bottom of the Hardware Setup window. |
193 |
| 1 Click Start, point to Programs, and then point to Toshiba Utilities. |
193 |
| 2 Click Hardware Setup, click the Hardware Options button, and then select the Password tab. |
193 |
| 3 Click Not Registered. |
193 |
| 4 Type in the password and click OK. |
193 |
| 5 Click OK at the bottom of the Hardware Setup window. |
193 |
| Disabling a user-level password in TSETUP |
193 |
| 1 Click Start, then Shut Down. Select Shut down and click OK. |
193 |
| 2 Slide the power button cover on the left side of the computer toward the rear, revealing the po... |
194 |
| 3 Hold down the Esc key and press and hold the power button in until the on/off light on the syst... |
194 |
| 4 Press P to move to the PASSWORD section of the screen. |
194 |
| 5 Press the spacebar. |
194 |
| 6 Press Enter. |
194 |
| 7 When TSETUP prompts you to do so, verify the password by pressing Enter. |
194 |
| 8 Press End to save your change. |
194 |
| 9 Press Y to confirm you want to quit. |
194 |
| Using the power-on (user-level) password |
194 |
| 1 If your diskette drive is not installed in the SelectBay, �connect the external diskette drive ... |
195 |
| 2 Turn on the computer with Resume Mode turned off. |
195 |
| 3 Insert the password service diskette into the diskette drive and press Enter. |
195 |
| 4 To enter TSETUP and reset your password, press Y. Follow the instructions in “Setting a user-le... |
195 |
| Using the instant (user-level) password |
196 |
| Supervisor-level passwords |
196 |
| Setting a supervisor-level password |
196 |
| 1 Click Start, then click Shut Down. |
196 |
| 2 Select Restart the computer in MS�DOS mode and click Yes, or OK, as appropriate. |
197 |
| 3 Type c:\ oshiba\\svpw and press Enter. |
197 |
| 4 Press Y. |
197 |
| 5 Type in a password and press Enter. |
197 |
| 6 Restart your computer to return to Windows. |
197 |
| 1 If Suspend/Resume (memory) Mode is enabled, turn it off. |
197 |
| 2 Click Start, then click Shut Down. |
197 |
| 3 Select Shut down the computer, then click Yes. |
197 |
| 4 Connect the external diskette drive to the computer. |
197 |
| 5 Insert the Toshiba Companion Diskette into the diskette drive and turn on the computer. |
197 |
| 6 Press Enter. |
198 |
| 7 Use the arrow keys to select Exit to DOS. |
198 |
| 8 At the A:\\ prompt, type c:\ oshiba\\svpw and press Enter. |
198 |
| 9 Type Y to set a supervisor password. |
198 |
| 10 Type in a password of up to 10 characters and press Enter. |
198 |
| 11 Reenter the password and press Enter. |
198 |
| 12 Type Y and reenter the password. |
198 |
| 13 Press Ctrl, Alt, and Del simultaneously to return to Windows. |
198 |
| Deleting a supervisor-level password |
199 |
| 1 Click Start, then click Shut Down. |
199 |
| 2 Select Restart the computer in MS�DOS mode and click Yes, or OK, as appropriate. |
199 |
| 3 Type c:\ oshiba\\svpw and press Enter. |
199 |
| 4 Press Y. |
199 |
| 5 Type your password and press Enter. |
199 |
| 6 Restart your computer to return to Windows. |
199 |
| 1 If Suspend/Resume (Memory) mode is enabled, turn it off. |
199 |
| 2 Click Start, then click Shut Down. |
199 |
| 3 Select Shut down the computer, then click Yes. |
199 |
| 4 Connect the external diskette drive to the computer. |
199 |
| 5 Insert the Toshiba Companion Diskette into the diskette drive and turn on the computer. |
200 |
| 6 Press Enter. |
200 |
| 7 Use the arrow keys to select Exit to DOS. |
200 |
| 8 At the A:\\ prompt, type c:\ oshiba\\svpw and press Enter. |
200 |
| 9 Type Y. |
200 |
| 10 Enter the password and press Enter. |
200 |
| 11 At the system prompt, type c:\ oshiba\\svpw and press�Enter. |
200 |
| 12 Type Y and reenter the password. |
200 |
| 13 Enter the password and press Enter. |
200 |
| 14 Press Ctrl, Alt, and Del simultaneously to return to Windows. |
200 |
| Hard disk drive passwords - Windows�98�Second�Edition��� |
201 |
| Setting a hard disk drive User password |
201 |
| 1 If your diskette drive is not installed in the SelectBay, �connect the external diskette drive ... |
201 |
| 2 Click Start, then click Shut Down. |
201 |
| 3 Click Restart the computer in MS�DOS mode and click Yes, or OK, as appropriate. |
202 |
| 4 At the system prompt, type c:\ oshiba\\hddpwd32 and press�Enter. |
202 |
| 5 To set a hard disk drive User password, type�1 and press�Enter. |
202 |
| 6 To set a hard disk drive User password, type�Y. |
202 |
| 7 To set a hard disk drive User password, type�Y. |
202 |
| 8 Type a password of up to 10 characters and press�Enter. |
203 |
| 9 Type the password again and press�Enter. |
203 |
| 10 To create a password diskette, type�Y. |
203 |
| 11 If you are creating a password diskette, insert a blank formatted write-enabled diskette in th... |
203 |
| 12 To finish setting the hard disk drive User password, type�Y. |
203 |
| Deleting the hard disk drive User password |
204 |
| 1 Click Start, then click Shut Down. |
204 |
| 2 Click Restart the computer in MS�DOS mode and click Yes or OK, as appropriate. |
204 |
| 3 At the system prompt, type c:\ oshiba\\hddpwd32 and press�Enter. |
204 |
| 4 To delete the hard disk drive User password, type�1 and press�Enter. |
204 |
| 5 To delete the hard disk drive User password, type�Y. |
204 |
| 6 Type your password and press�Enter. |
204 |
| 7 Shut down and restart the computer for your changes to take effect. |
204 |
| Setting a hard disk drive Master password |
205 |
| 1 If your diskette drive is not installed in the SelectBay, �connect the external diskette drive ... |
205 |
| 2 Click Start, then click Shut Down. |
205 |
| 3 Click Restart the computer in MS�DOS mode and click Yes or OK, as appropriate. |
205 |
| 4 At the system prompt, type c:\ oshiba\\hddpwd32 and press�Enter. |
205 |
| 5 To set a hard disk drive Master password, type�2 and press�Enter. |
205 |
| 6 To set a hard disk drive Master password, type�Y. |
205 |
| 7 Type a password of up to 10 characters and press�Enter. |
206 |
| 8 Type the password again and press�Enter. |
206 |
| 9 To create a password diskette, type�Y. |
206 |
| 10 If you are creating a password diskette, when prompted insert a blank formatted write-enabled ... |
206 |
| 11 To finish setting the hard disk drive Master password, type�Y. |
206 |
| Deleting a hard disk drive Master password |
207 |
| 1 Click Start, then click Shut Down. |
207 |
| 2 Click Restart the computer in MS�DOS mode and click�Yes. |
207 |
| 3 At the system prompt, type c:\ oshiba\\hddpwd32 and press�Enter. |
207 |
| 4 To delete the hard disk drive Master password, type�2 and press�Enter. |
207 |
| 5 To delete the hard disk drive Master password, type�Y. |
207 |
| 6 Type your password and press�Enter. |
208 |
| 7 Shut down and restart the computer for your changes to take effect. |
208 |
| Hard disk drive passwords - Windows�NT������������ |
208 |
| Setting a hard disk drive password |
208 |
| 1 Click Start and point to Programs. |
208 |
| 2 Click Windows NT Explorer. |
208 |
| 3 Choose the C:\\ drive and click the Toshiba folder to open it. |
208 |
| 4 Select and double-click the hddpwdnt.exe file. |
208 |
| Hard disk drive password warning dialog box |
209 |
| 5 Click OK to continue. |
209 |
| 6 The Toshiba Hard Drive Password Utility dialog box appears. Click on the box next to the readme... |
209 |
| 7 When you are done reading the readme file, click OK to return to the dialog box. |
210 |
| 8 Click the User button. |
210 |
| 9 Click Register. |
210 |
| Register Password dialog box |
211 |
| 10 Select one or more of the hard disk drives listed by clicking in the box next to the drive. To... |
211 |
| 11 Click OK to continue setting the password. |
211 |
| Register User Password dialog box |
211 |
| 12 Click Yes to continue registering the user password. |
212 |
| Register Password dialog box |
212 |
| 13 Type the password in the New Password field. |
212 |
| 14 Confirm the password by typing the password again in the Confirm new password field. |
212 |
| 15 Click OK. |
212 |
| Register User Password dialog box |
212 |
| 16 Specify if you want to register the password. |
213 |
| 17 Repeat steps 11 through 14 for each drive that requires a new password. |
213 |
| Creating a password backup diskette |
213 |
| Create HDD Key-file dialog box |
213 |
| 1 Click Yes to create a password diskette. |
213 |
| 2 Insert a blank formatted diskette into the diskette drive, press any key to continue, then clic... |
213 |
| 3 Click Exit to return to the Toshiba Hard Disk Password Utilities dialog box. Click OK. |
214 |
| Deleting the hard disk drive password |
214 |
| 1 Click Start and point to Programs. |
214 |
| 2 Click Windows NT Explorer. |
214 |
| 3 Choose the C:\\ drive and click the Toshiba folder to open it. |
214 |
| 4 Select and double-click the hddpwdnt.exe file. |
214 |
| 5 Click Delete, then click OK to continue deleting a registered password. |
214 |
| Toshiba HDD Password Utility dialog box |
215 |
| 6 Click User. |
216 |
| Master Password dialog box |
216 |
| 7 Click Delete. |
216 |
| 8 Select one or more of the hard disk drives listed by clicking the box next to the drive. |
216 |
| 9 Click OK. |
216 |
| Delete Password dialog box |
216 |
| 10 Type the password for the drive shown in the dialog box, then click OK. |
217 |
| 11 Click Yes. |
217 |
| 12 Click OK. |
217 |
| 13 Click Exit. |
217 |
| System shutdown dialog box |
217 |
| 14 Click OK to shut down the computer. |
218 |
| Chapter 9 |
220 |
| Managing Your Tecra 8100 Computer |
221 |
| Industry standard architecture |
221 |
| Wired for Management |
221 |
| Desktop Management Interface |
222 |
| Advanced Configuration and Power Interface |
222 |
| Operating system compatibility |
223 |
| System management |
223 |
| Asset management |
223 |
| Inventory management |
223 |
| Configuration management |
224 |
| Fault management |
225 |
| Enhanced BIOS POST |
226 |
| Enterprise management software compatibility |
226 |
| SNMP mapping agent |
226 |
| SMS connection |
227 |
| Advanced features via the NetDock |
227 |
| Wake on LAN |
228 |
| Service Boot |
228 |
| Alert on LAN |
228 |
| Security management |
229 |
| System password in Flash, Not CMOS |
229 |
| Supervisor password |
229 |
| Boot String |
230 |
| Hard disk drive password |
230 |
| HDD supervisor level password |
230 |
| Eject password |
231 |
| Dock prevention lock |
231 |
| Cable connection |
231 |
| Chapter 10 |
232 |
| Problems that are easy to fix 207 |
232 |
| Problems when you turn on the computer 208 |
232 |
| Resolving a hardware conflict 213 |
232 |
| Fixing device-related problems 216 |
232 |
| DVD operating problems–Windows�98�Second�Edition 233 |
232 |
| Developing good computing habits 242 |
232 |
| If you need further assistance 243 |
232 |
| Toshiba's worldwide offices 247 |
232 |
| Troubleshooting Guide |
233 |
| Problems that are easy to fix |
233 |
| 1 Turn off the computer and any peripheral devices connected to it. This includes a local printer... |
234 |
| 2 Check that the electrical outlet is working by plugging in another appliance such as a lamp. |
234 |
| 3 Check that the power cables are firmly plugged in. |
234 |
| 4 Check that all cables connecting peripheral devices to the computer are correctly and firmly at... |
234 |
| 5 Turn on the peripheral devices. |
234 |
| 6 Turn on the computer. |
234 |
| 7 If you are running the computer on battery power, check that the battery charge isn’t low. |
234 |
| Problems when you turn on the computer |
234 |
| The computer won’t start. |
234 |
| The computer starts, but then shuts down and the on/off light glows amber and blinks. |
234 |
| The computer starts but, when you press a key on the keyboard or touch the AccuPoint�II, nothing ... |
235 |
| The message “WARNING: RESUME FAILURE. PRESS ANY KEY TO CONTINUE” appears. |
235 |
| The message “Boot system has changed” appears. |
236 |
| The message “Bad XXXX�XXXX” appears after the Toshiba logo is displayed. |
236 |
| The message “Warning: XXXX” appears after the Toshiba logo is displayed. |
236 |
| The message “Password=” appears after the Toshiba logo is displayed. |
236 |
| You press the power button and hear the system start, but you receive a hard disk drive (HDD) err... |
236 |
| 1 Insert the Toshiba Companion Diskette into the diskette drive. |
236 |
| 2 Restart your computer and press F when the system starts. |
237 |
| 3 Press Enter. |
237 |
| 4 Choose Exit to DOS, and press Enter. |
237 |
| 5 Type sys c:, then press Enter. |
237 |
| 6 Remove the diskette from the diskette drive. |
237 |
| 7 Restart your computer. |
237 |
| You press the power button and hear the system start, but Windows NT does not load correctly. |
237 |
| 1 Insert the Toshiba Companion Diskette for Windows NT in the diskette drive. |
237 |
| 2 Boot from the hard drive and select Windows NT Workstation 4.0, then press Enter. |
237 |
| 3 When prompted to press the spacebar, press the spacebar to invoke the Hardware Profile/Last Kno... |
237 |
| 4 Press L to switch to the last known good configuration, then press Enter. |
238 |
| The computer is not accessing the hard disk or the diskette drive. |
238 |
| The computer displays the Non-system disk or disk error �message. |
238 |
| Resolving a hardware conflict |
239 |
| Using the Windows 98 Second Edition troubleshooting�feature |
239 |
| 1 From the Windows Help menu, click the Contents tab and select Troubleshooting. |
239 |
| 2 Click If you have a hardware conflict and follow the steps. |
239 |
| A plan of action |
239 |
| Resolving hardware conflicts on your own |
239 |
| Interrupt Request channel |
240 |
| Direct Memory Access |
240 |
| Plug and Play |
240 |
| Checking device properties |
241 |
| 1 Click Start, then point to Settings, and click Control Panel. |
241 |
| 2 Double-click the System icon. |
241 |
| 3 Click the Device Manager tab. |
241 |
| 4 Double-click the device type. |
241 |
| 5 To view the properties, double-click the device. |
241 |
| Fixing device-related problems |
242 |
| Memory card problems |
242 |
| 1 Make sure the computer isn’t in Resume Mode. |
242 |
| 2 Click Start, then click Shut Down. |
242 |
| 3 Click the button next to Shut down the computer, then click Yes or OK, as appropriate. |
242 |
| 4 Remove the memory card following the instructions in “Removing a memory module” on page�47. |
243 |
| 5 Reinstall the memory card following the instructions in “Installing a memory module” on page�43... |
243 |
| 6 Replace the memory expansion slot cover. |
243 |
| 7 Check for the error again. |
243 |
| 8 If the error recurs, remove the memory card entirely and check for the error again. |
243 |
| Power and the batteries |
243 |
| The AC power light doesn’t come on when you plug in the AC adapter. |
243 |
| The power cable and AC adapter work correctly, but the battery won’t charge. |
244 |
| The battery appears not to power the computer for as long as it usually does. |
244 |
| Keyboard problems |
245 |
| The keyboard produces unexpected characters. |
245 |
| You’ve connected an external keyboard and Windows displays one or more keyboard error messages. |
245 |
| Nothing happens when you press the keys on the external �keyboard. |
245 |
| The keyboard locks and the computer will not restart. |
245 |
| AccuPoint�II problems |
246 |
| Your finger easily slides off the AccuPoint�II. |
246 |
| 1 Firmly grasp the cap and pull it straight up. |
246 |
| 2 After cleaning the cap, position it on the peg and press it into place. |
246 |
| Display problems |
246 |
| The screen is blank. |
246 |
| The built-in screen flickers. |
247 |
| Windows displays a message that there is a problem with your display settings and that the adapte... |
247 |
| The display is set to a simultaneous display mode (LCD/CRT or LCD/TV) and the external display de... |
247 |
| You are using an external display device and part of the desktop isn’t visible. |
248 |
| Disk drive problems |
248 |
| You are having trouble accessing a disk, or some of the data appears to be missing. |
248 |
| 1 Click Start, then point to Programs. |
248 |
| 2 Point to Accessories, then point to System Tools. |
248 |
| 3 Click ScanDisk. |
248 |
| 1 Click Start, then point to Programs. |
249 |
| 2 Point to Administrative Tools, then click Disk Administrator. |
249 |
| 3 Click the partition you want to check for errors. |
249 |
| 4 Click Properties or select Properties from the Tools menu. |
249 |
| 5 Click Tools in the Disk properties sheet. |
249 |
| 6 Click Check Now in the Error Checking box. |
249 |
| 7 Check Automatically fix file system errors and Scan for and attempt recovery of bad sectors. |
249 |
| Your hard disk seems very slow. |
249 |
| 1 Click Start, then point to Programs. |
249 |
| 2 Point to Accessories, then point to System Tools. |
249 |
| 3 Click Disk Defragmenter. |
249 |
| Your data files are damaged or corrupted. |
249 |
| Some programs run correctly but others do not. |
250 |
| A diskette won’t go into the diskette drive. |
250 |
| The computer displays the Non-system disk or disk error �message. |
250 |
| The drive can’t read a diskette. |
250 |
| Modem problems |
251 |
| The modem dials the line but doesn’t connect, or cannot maintain the connection. |
251 |
| The modem won’t receive or transmit properly. |
251 |
| The modem is on, configured properly, and still won’t transmit or receive data. |
251 |
| Problems with the CD�ROM or DVD-ROM drive |
252 |
| You cannot access a disc in the drive. |
252 |
| You press the CD-ROM or DVD�ROM eject button, but the CD-ROM or DVD�ROM tray doesn’t slide out. |
252 |
| Some discs run correctly but others do not. |
252 |
| The disc will not come out of the drive when you click the eject �button on the screen. |
253 |
| Sound system problems |
253 |
| You don’t hear any sound from the computer. |
253 |
| The computer emits a loud, high-pitched noise. |
254 |
| Optional devices |
254 |
| PC Card problems |
254 |
| Card information structure (CIS) |
254 |
| PC Card checklist |
255 |
| Resolving PC Card problems |
255 |
| The slots appear to be dead. PC Cards that used to work no longer work. |
255 |
| 1 Click the My Computer icon with the secondary button, then click Properties. |
256 |
| 2 Click the Device Manager tab. |
256 |
| 3 Double-click the device listed as your PC Card. |
256 |
| 1 Click Start, then point to Settings. |
256 |
| 2 Click Control Panel. |
256 |
| 3 Double-click PC Cards (PCMCIA). |
256 |
| The system doesn’t seem to recognize my CardBus PC Card. |
256 |
| The computer stops working (hangs) when you insert a PC Card. |
257 |
| Hot swapping (removing one PC Card and inserting another without turning the computer off) fails. |
257 |
| 1 Click the PC Card icon on the �taskbar. |
257 |
| 2 Click Stop xxxx, where xxxx is the identifier for your PC Card. |
257 |
| 3 Remove the card from the slot. |
257 |
| There is still a yellow exclamation point () over the PCMCIA controller icon in Device Manager (W... |
257 |
| A PC Card error occurs. |
258 |
| Printer problems |
258 |
| The printer doesn’t print. |
258 |
| The printer doesn’t print what I see on the screen. |
259 |
| DVD operating problems– Windows�98�Second�Edition |
259 |
| 1 Check that the disc is in a format that the drive supports (DVD-ROM, DVD-R, or DVD-RW). |
259 |
| 2 Ensure that the drive is properly installed in the SelectBay. It must be inserted completely. |
259 |
| 3 Ensure that the DVD-ROM disk is properly inserted in the drive tray. |
259 |
| 4 Ensure that the Display properties are not True Color (24-bit). If it is set to 24-bit color, t... |
259 |
| 5 Clean the DVD disc and try again. |
260 |
| 6 Verify that your computer recognizes your DVD-ROM drive. To do this: |
260 |
| 7 See “Checking device properties” on page�215 for instructions on using Device Manager to view t... |
260 |
| 8 Check the Toshiba Web site for new information on DVD- ROM drives and their operation. |
260 |
| A blank screen appears while watching a DVD-ROM movie or title. |
260 |
| 1 Click the secondary mouse button on a blank area of the desktop. |
260 |
| 2 Click Properties. |
260 |
| 3 Click the Screen Saver tab. |
260 |
| 4 Deselect Shut off Monitor. |
260 |
| Jumping video lines appear around the DVD-ROM video window. |
260 |
| 1 Click Start, point to Settings, then click Control Panel. |
260 |
| 2 Double-click the Display icon. |
260 |
| 3 Click the Settings tab. |
261 |
| 4 Next to the words Desktop Area, move the slider to a lower setting, such as 800�x�600 or 640�x�... |
261 |
| 5 Click OK. |
261 |
| DVD titles, games, or applications appear distorted. |
261 |
| The screen saver runs while you are watching a movie or title. |
261 |
| 1 Click Start, point to Settings, then click Control Panel. |
261 |
| 2 Double-click the Display icon. |
261 |
| 3 Click the Screen Saver tab. |
261 |
| 4 Click the down arrow at the right of the current screen saver name. |
261 |
| 5 Click and hold the up arrow by the list or move the slide to the top. |
261 |
| 6 Click None. |
261 |
| 7 Click OK. |
262 |
| DVDExpress problems |
262 |
| General issues |
262 |
| DVDExpress controls are disabled. |
262 |
| Playback performance is poor. |
262 |
| 1 Open the Start menu, point to Settings, then click Control Panel. |
262 |
| 2 Double-click the System icon, then select the Device Manager tab. |
262 |
| 3 Open the CDROM device folder, select your DVD-ROM device driver, then click Properties. |
262 |
| 4 Select the Settings tab, click the DMA check box, then click OK. |
262 |
| The “Root” or “Title” menu does not open. |
263 |
| DVDExpress performance decreases after making a system change. |
263 |
| Slow playback performance. |
263 |
| 1 Close any other open applications to improve the performance of the DVD playback. |
263 |
| 2 Ensure DMA is turned on. For more information, see “Direct Memory Access” on page�214. |
263 |
| 3 If you have installed new hardware (such as a new graphics card or audio card), ensure the comp... |
263 |
| 4 Make sure that your display driver resolution, color depth, and refresh rate are optimal for DV... |
264 |
| Content issues |
264 |
| Movies exhibit poor performance of “Director's Commentary” or other similar optional content vers... |
264 |
| DVDExpress will not function properly with “debug” software installed. |
264 |
| Minimum system requirements |
264 |
| Error messages |
265 |
| Developing good computing habits |
268 |
| Save your work frequently. |
268 |
| On a regular basis, back up the information stored on your hard disk. |
268 |
| Read the manuals. |
269 |
| If you need further assistance |
269 |
| Contacting Toshiba |
270 |
| Accessing Toshiba online |
270 |
| Toshiba’s Bulletin Board Service |
271 |
| Toshiba voice contact |
272 |
| Toshiba's worldwide offices |
273 |
| Part III |
279 |
| Appendixes |
279 |
| What’s in Part III |
279 |
| Appendix A |
280 |
| Hot Keys |
281 |
| Instant password security |
281 |
| Power usage mode |
282 |
| Shutdown mode |
283 |
| Sound |
283 |
| Display modes |
284 |
| Keyboard hot keys |
284 |
| Appendix B |
286 |
| Features and Specifications |
287 |
| Built-in features |
287 |
| Technology and processor |
287 |
| Power |
288 |
| Storage capacity |
289 |
| Ports |
289 |
| Standard hardware |
291 |
| Special features |
292 |
| Documentation |
293 |
| Optional accessories and devices |
294 |
| SelectBay modules |
294 |
| Power devices |
294 |
| Memory modules |
295 |
| Expansion capability |
295 |
| Other |
296 |
| Security |
296 |
| Specifications |
296 |
| Physical dimensions |
296 |
| Environmental conditions |
297 |
| Appendix C |
298 |
| Power Cable Connectors |
299 |
| USA and Canada |
299 |
| United Kingdom |
299 |
| Australia |
299 |
| Europe |
299 |
| Appendix D |
300 |
| System Resources |
301 |
| IRQ level assignments |
301 |
| DMA channel assignments |
303 |
| Input/output port address assignments |
304 |
| Appendix E |
308 |
| Video Modes |
309 |
| This appendix lists the video modes supported by the display adapter, and identifies the characte... |
309 |
| The tables have these columns: |
309 |
| This table lists the video modes for the Tecra 8100 computer: |
310 |
| Glossary |
313 |
| Acronyms |
313 |
| A |
317 |
| B |
318 |
| C |
320 |
| D |
323 |
| E |
326 |
| F |
327 |
| G |
328 |
| H |
328 |
| I |
329 |
| K |
330 |
| L |
331 |
| M |
331 |
| N |
333 |
| O |
333 |
| P |
334 |
| R |
336 |
| S |
338 |
| T |
339 |
| U |
340 |
| V |
340 |
| W |
340 |
| Z |
340 |
| Index |
343 |
| Numerics |
343 |
| A |
343 |
| B |
343 |
| C |
344 |
| D |
344 |
| E |
345 |
| F |
345 |
| H |
345 |
| I |
346 |
| J |
346 |
| K |
346 |
| L |
346 |
| M |
346 |
| N |
347 |
| O |
347 |
| P |
347 |
| R |
348 |
| S |
348 |
| T |
349 |
| U |
350 |
| V |
350 |
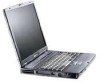
 1
1 142
142 143
143 144
144 145
145 146
146 147
147 148
148 149
149 150
150 151
151 152
152

