Toshiba TDP-P75 User Manual - Page 27
Adjusting the image, Fine-tuning the image size and clarity
 |
View all Toshiba TDP-P75 manuals
Add to My Manuals
Save this manual to your list of manuals |
Page 27 highlights
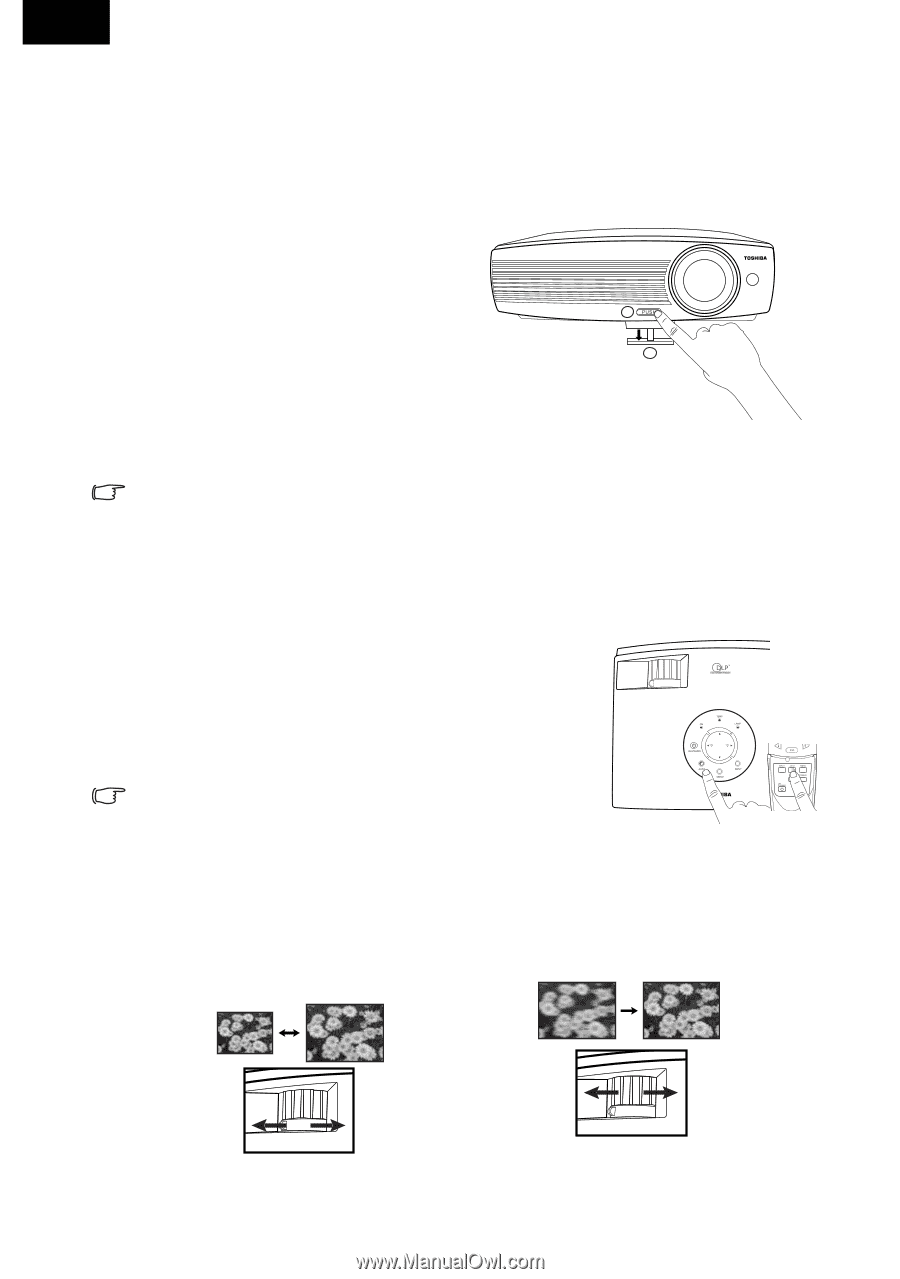
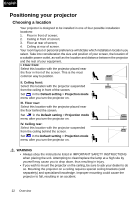
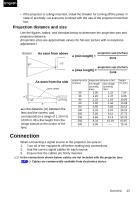
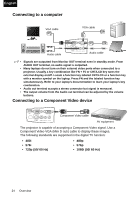
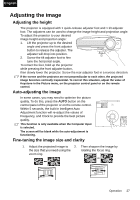
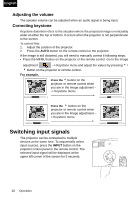
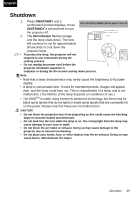
English Adjusting the image Adjusting the height The projector is equipped with 1 quick-release adjuster foot and 1 tilt adjuster foot. The adjusters can be used to change the image height and projection angle. To adjust the projector to your desired image height and projection angle: 1. Lift the projector up to the desired angle and press the front adjuster button to release the adjuster. The 1 adjuster will drop into position. 2 2. Screw the tilt adjuster foot to fine tune the horizontal angle. To retract the feet, hold up the projector while pressing the front adjuster button, then slowly lower the projector. Screw the rear adjuster foot in a reverse direction. If the screen and the projector are not perpendicular to each other, the projected image becomes vertically trapezoidal. To correct this situation, adjust the value of Keystone in the Picture menu, on the projector control panel or on the remote control. Auto-adjusting the image In some cases, you may need to optimize the picture quality. To do this, press the AUTO button on the control panel of the projector or on the remote control. Within 5 seconds, the built-in Intelligent Auto Adjustment function will re-adjust the values of Frequency, and Clock to provide the best picture quality. This function is only available when the Computer input is selected. The screen will be blank while the auto-adjustment is functioning. Fine-tuning the image size and clarity 1. Adjust the projected image to 2. Then sharpen the image by the size that you need using the rotating the focus ring. zoom ring. Operation 27
-
 1
1 -
2
-
3
-
4
-
5
-
6
-
7
-
8
-
9
-
10
-
11
-
12
-
13
-
14
-
15
-
16
-
17
-
18
-
19
-
20
-
21
-
 22
22 -
 23
23 -
 24
24 -
 25
25 -
 26
26 -
 27
27 -
 28
28 -
 29
29 -
 30
30 -
 31
31 -
 32
32 -
33
-
34
-
35
-
36
-
37
-
38
-
39
-
40
-
41
-
42
-
43
-
44
-
45
 |
 |