Troy-Bilt Pro-Line CRT Service Manual - Page 21
Shim Removal Tools, Bronze Bushing Cut A Ways
 |
View all Troy-Bilt Pro-Line CRT manuals
Add to My Manuals
Save this manual to your list of manuals |
Page 21 highlights
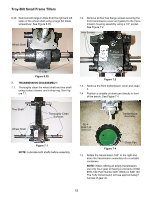
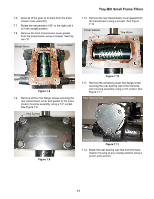
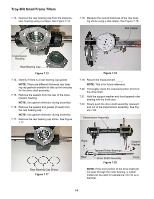
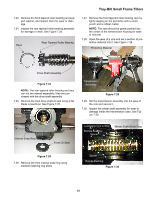
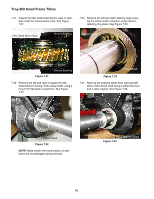
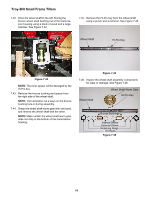
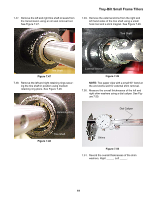
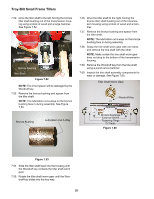
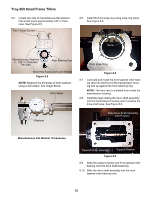
NOTE: Two paper clips with small 90° bends at the end work well for external shim removal. See Image Below Troy-Bilt Small Frame Tillers 7.38. Drive the wheel shaft to the right, forcing the bronze wheel shaft bushing out of the transmission housing using a block of wood and a large hammer. See Figure 7.38. 90° 2" x 4" Hammer Inner Spacer Paper Clips Shim Removal Tools 7.35. Measure the overall thicknesses of the shims on each side using a dial caliper. See Figure 7.35. Dial Caliper Hi-Pro Key Bronze Bushing Wheel Shaft Figure 7.38 NOTE: The inner spacer will be damaged by the Hi-Pro key. 7.39. Remove the bronze bushing and spacer from the right side of the wheel shaft. NOTE: The lubrication cut a ways on the bronze bushing face in during assembly. See Image Below. Shims Bronze Bushing Cut A Way Figure 7.35 7.36. Record the thicknesses of the shims, Right _____, Left _____. 7.37. Make certain the vice is secure. Bronze Bushing Cut A Ways 7.40. Slide the wheel shaft back into the housing until the Hi-Pro key contacts the wheel shaft worm gear. 7.41. Rotate the wheel shaft worm gear until the HiPro key slides into the key way. 17
-
 1
1 -
2
-
3
-
4
-
5
-
6
-
7
-
8
-
9
-
10
-
11
-
12
-
13
-
14
-
15
-
 16
16 -
 17
17 -
 18
18 -
 19
19 -
 20
20 -
 21
21 -
 22
22 -
 23
23 -
 24
24 -
 25
25 -
 26
26 -
27
-
28
-
29
-
30
-
31
-
32
-
33
-
34
-
35
-
36
-
37
-
38
-
39
-
40
-
41
-
42
 |
 |
